
Search
The Search task turns your AI assistant into a search interface: the user asks a question, and the assistant answers it from the documents it has indexed, showing both a written answer and the passages it used.
Turn an assistant into a search assistant
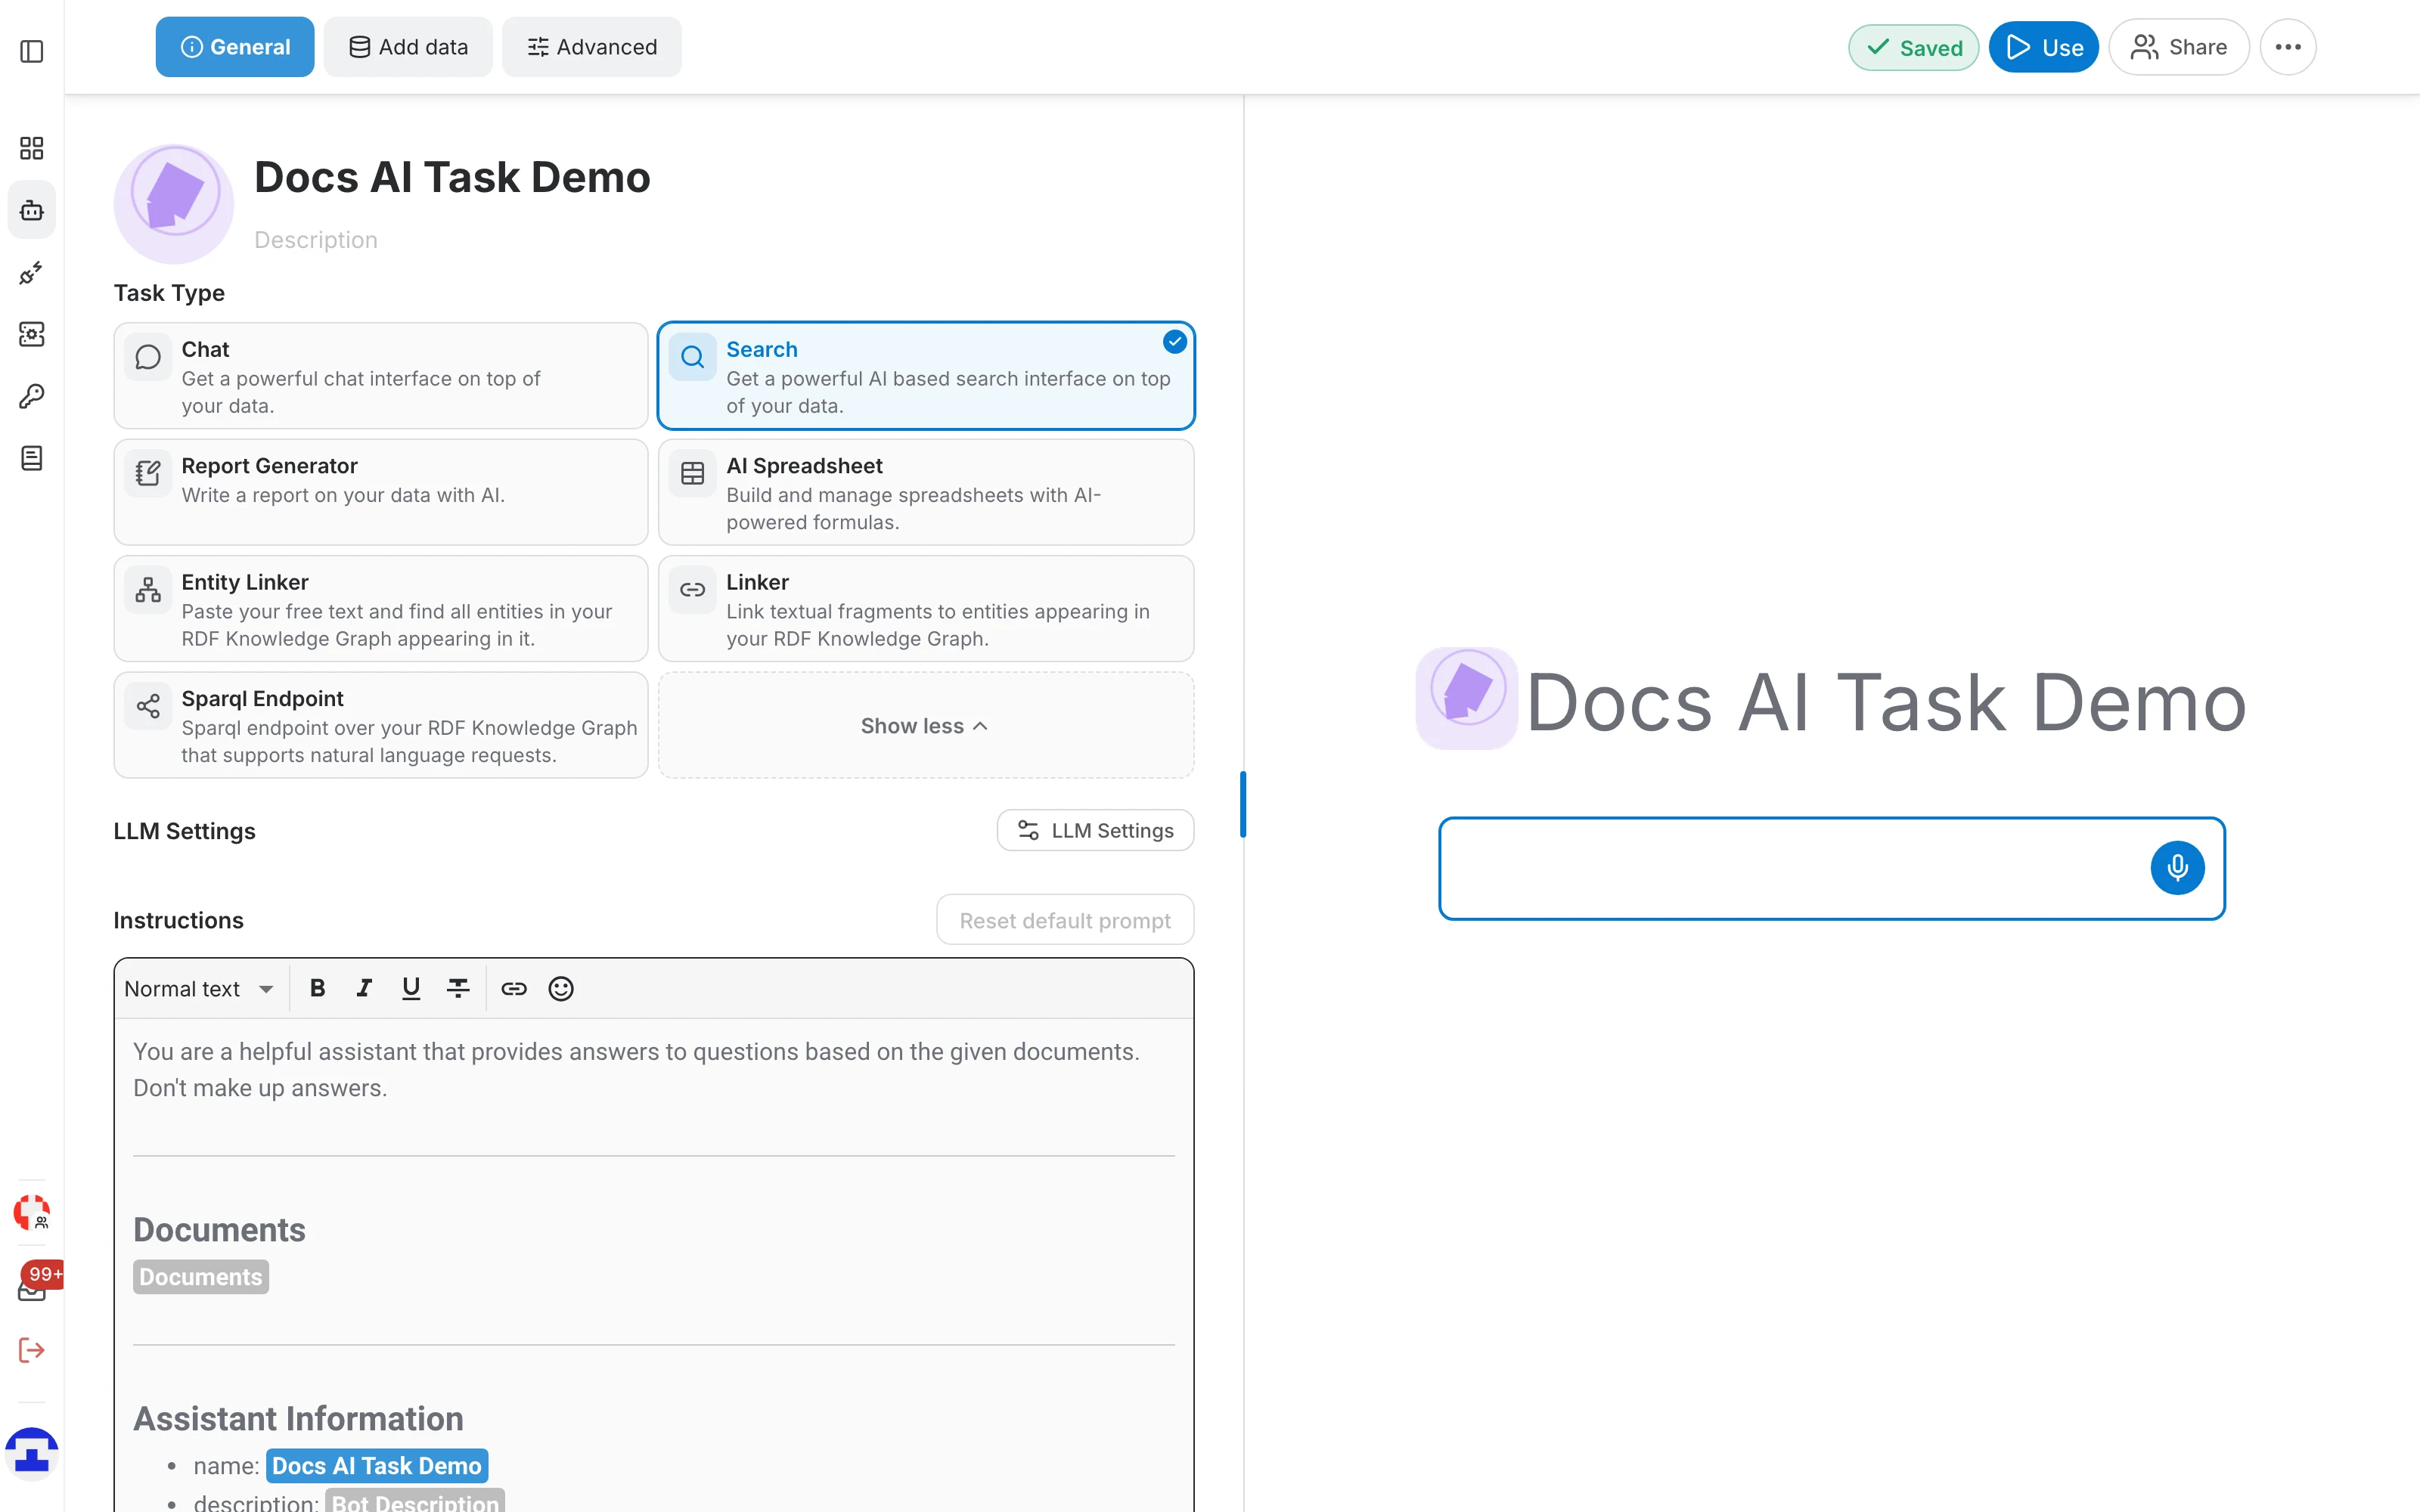
- Open the assistant editor from the gear icon on its row, or with the Edit button on its page.
- On the General tab, click Advanced to reveal every task type, then select the Search tile.
- Add your documents on the Add data tab and wait for indexing to finish.
- Click Use to open the assistant's page — its first tab is now the search interface.
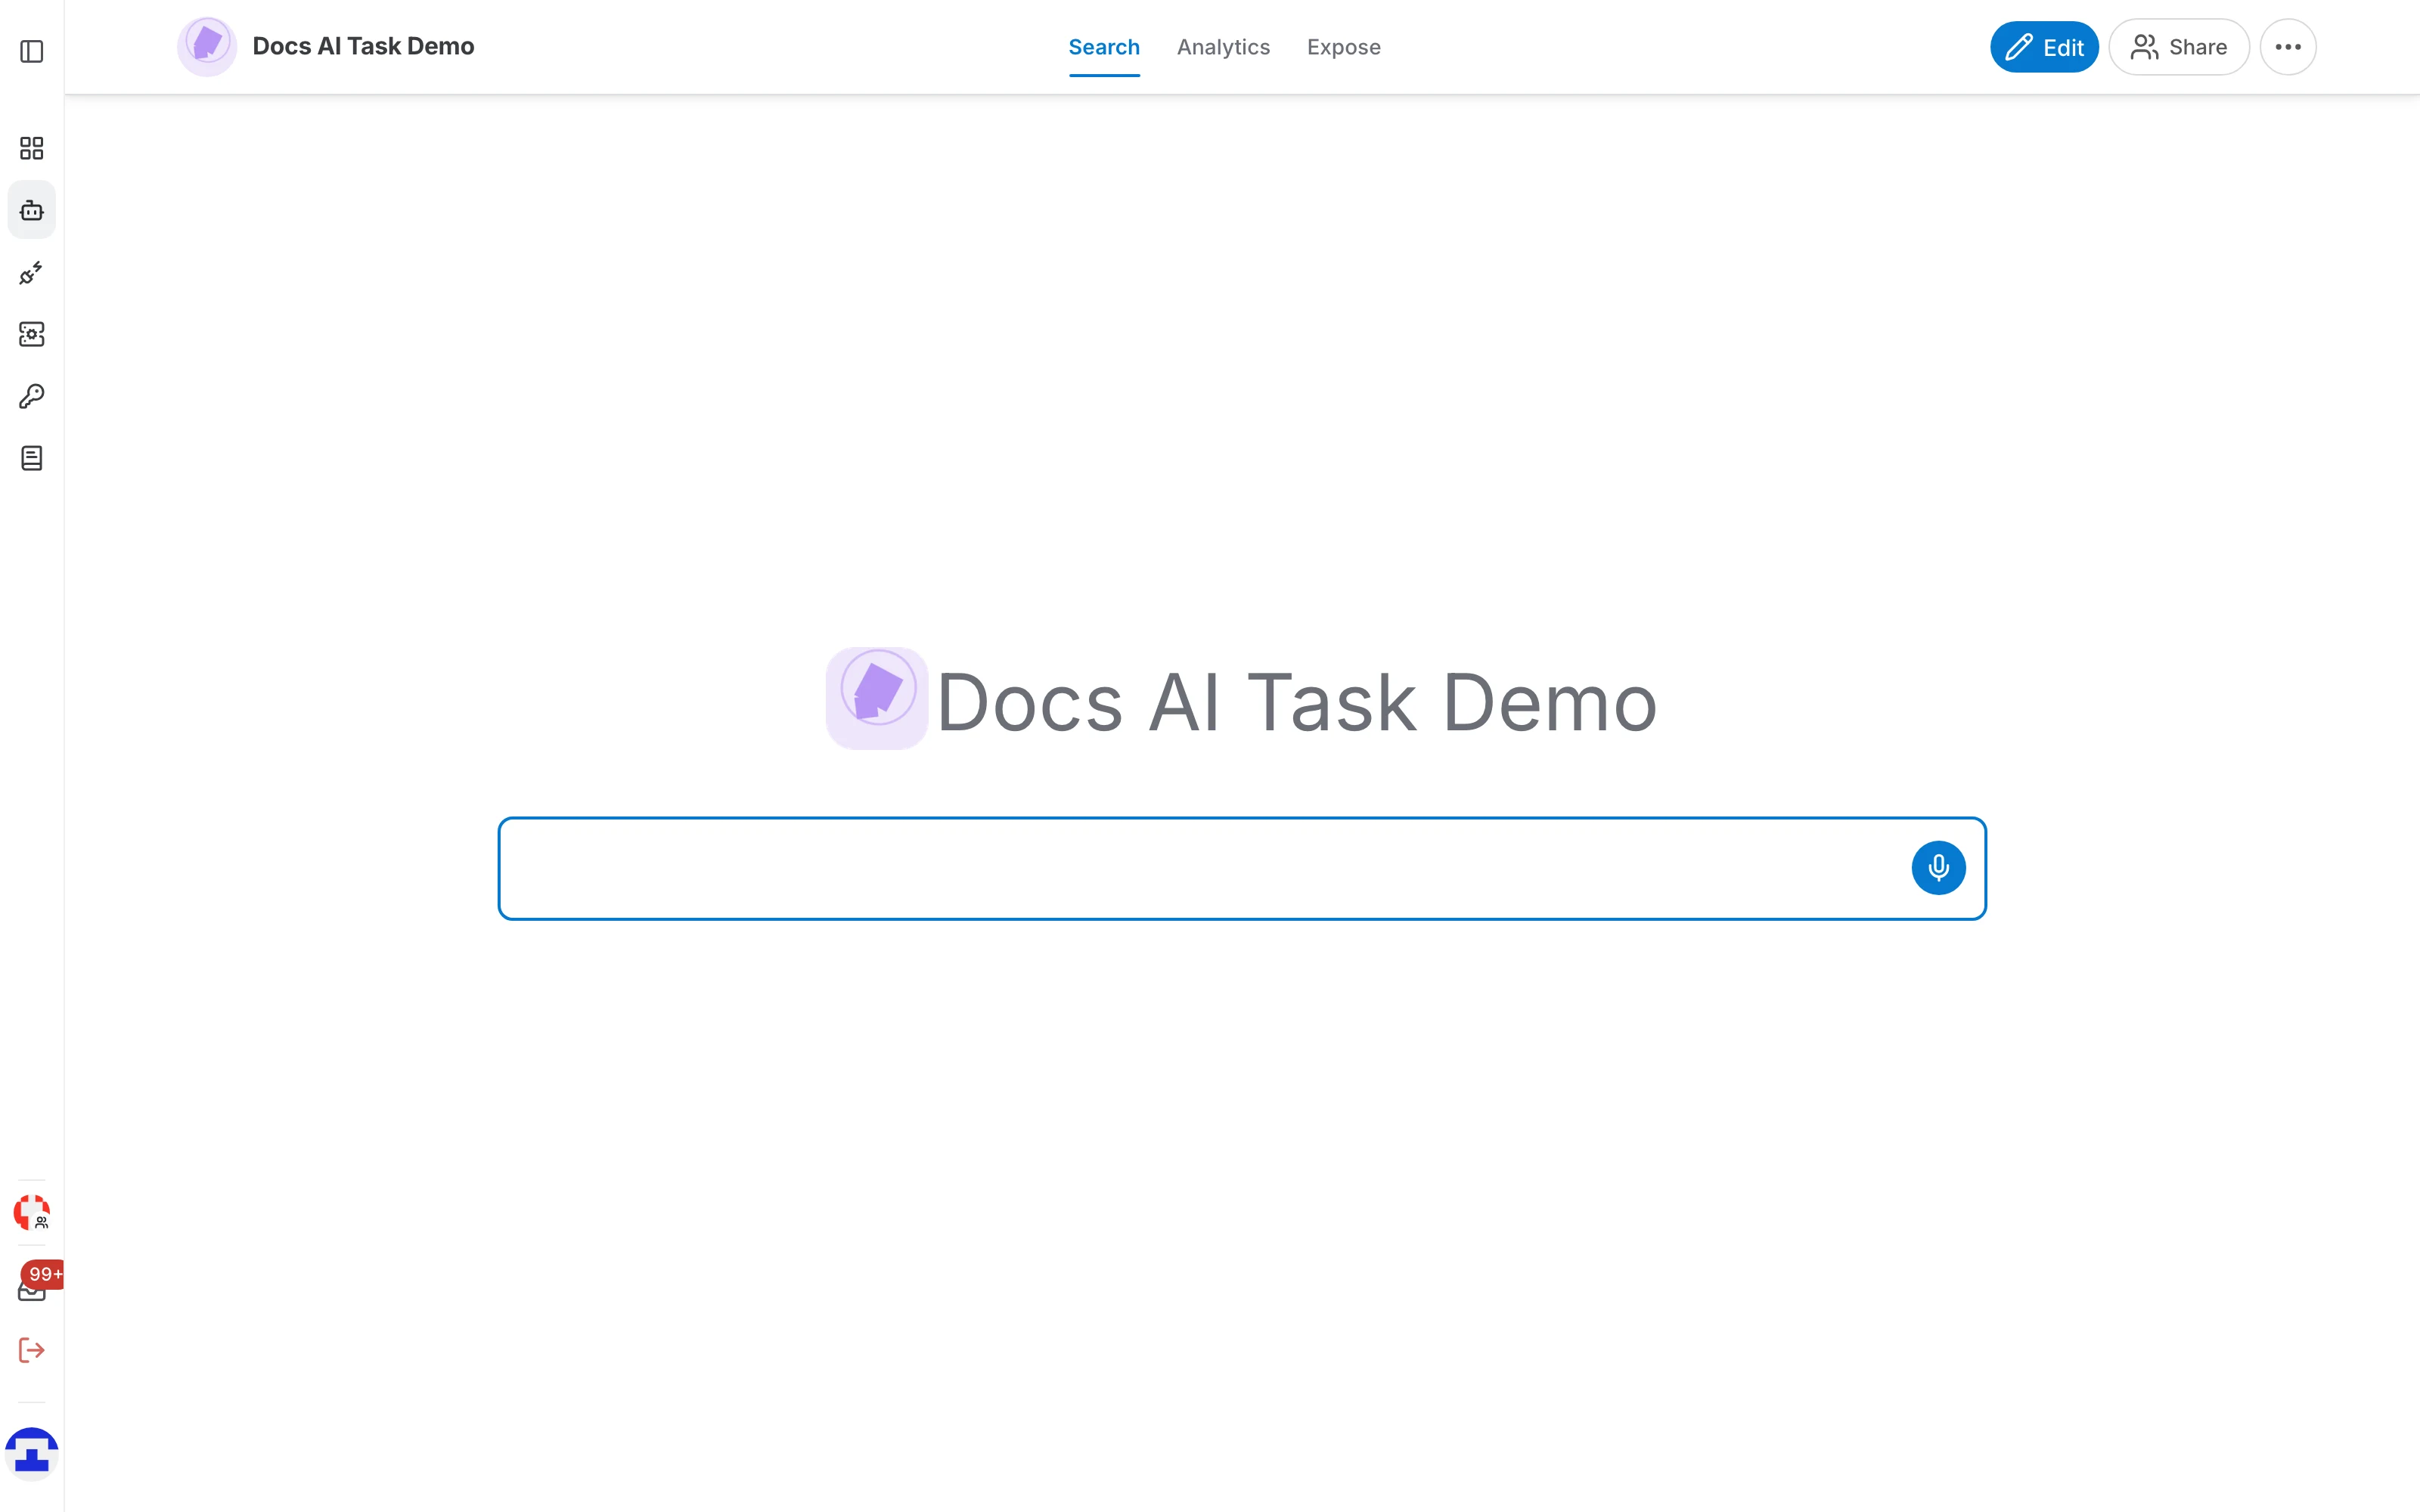
The search interface
Before the first question the interface shows the assistant's name and a single search box. Type a question and press Enter: the answer appears above a Top extracts panel listing the passages it came from.
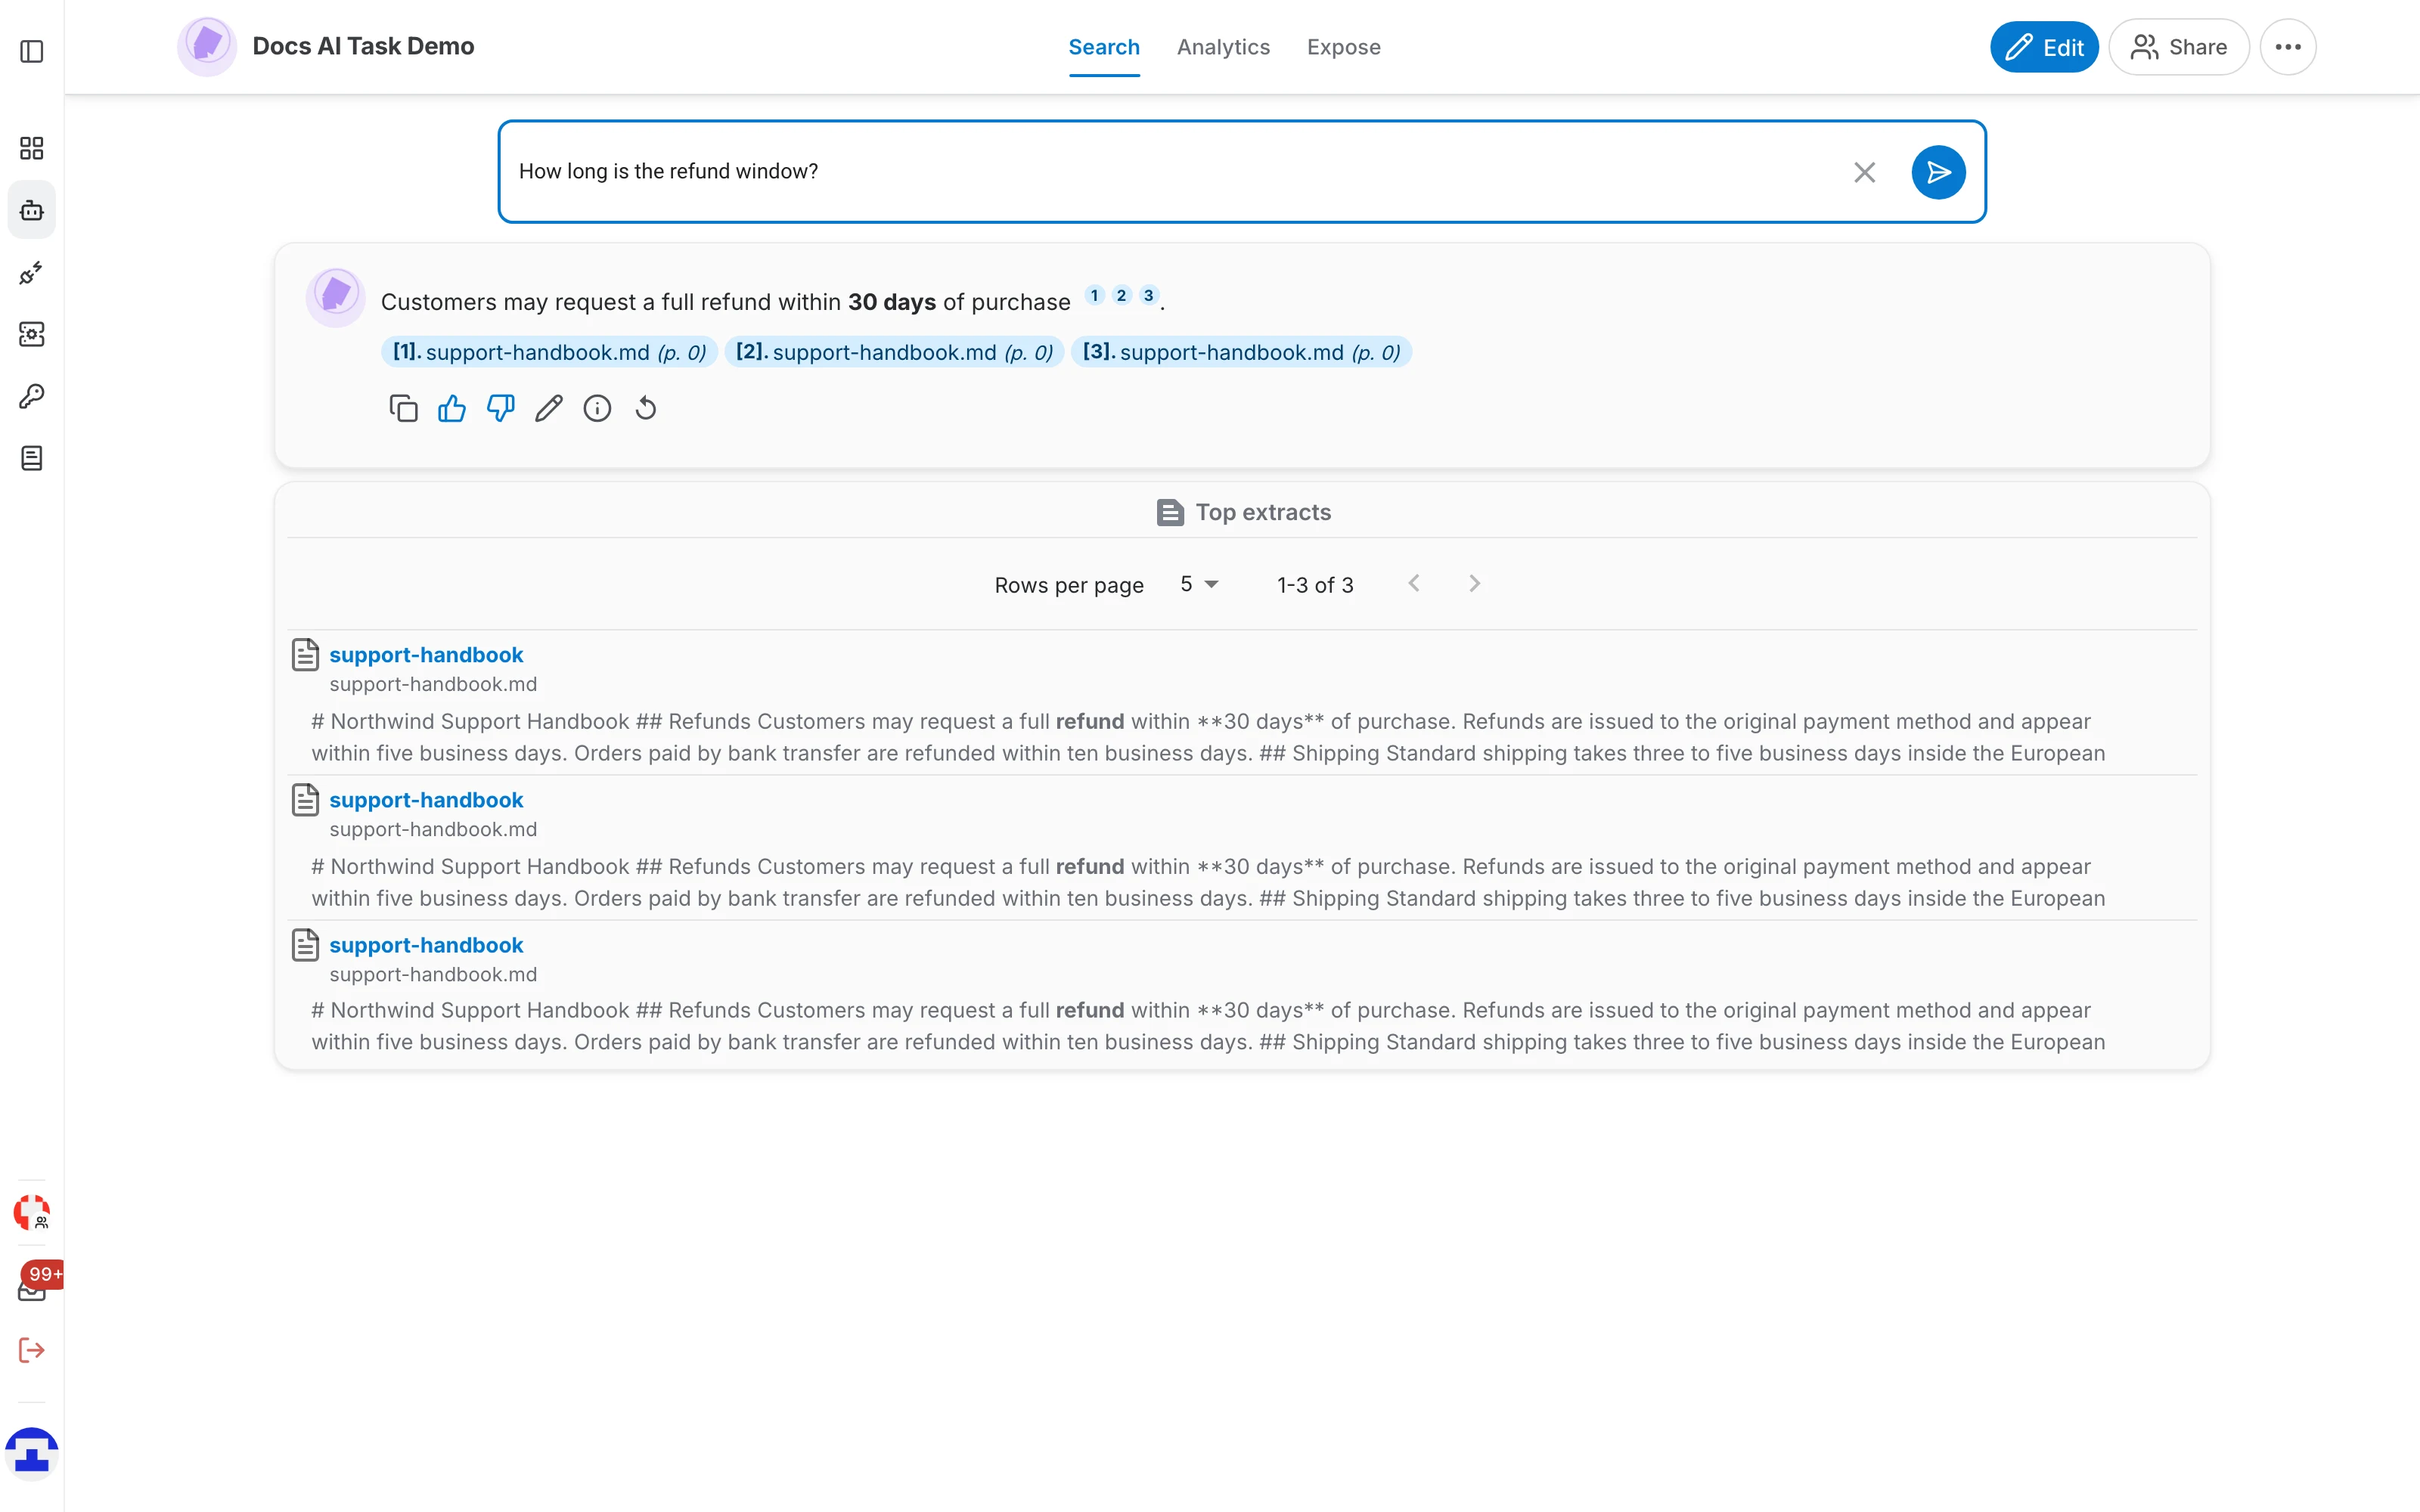
The answer
The answer card holds a synthesized answer built from all the documents the assistant found for the question. Small numbered chips inside the text, and the chips below it, are citations: each one names the file and page the sentence came from. Answers are generative, so the wording can vary between runs while the information stays the same.

The row of icons under the answer offers:
- Copy — put the answer text on the clipboard.
- Thumbs up / thumbs down — rate the answer. The rating is stored and shown in the assistant's feedback view, which is how you spot weak answers over time.
- Edit — correct the generated answer by hand.
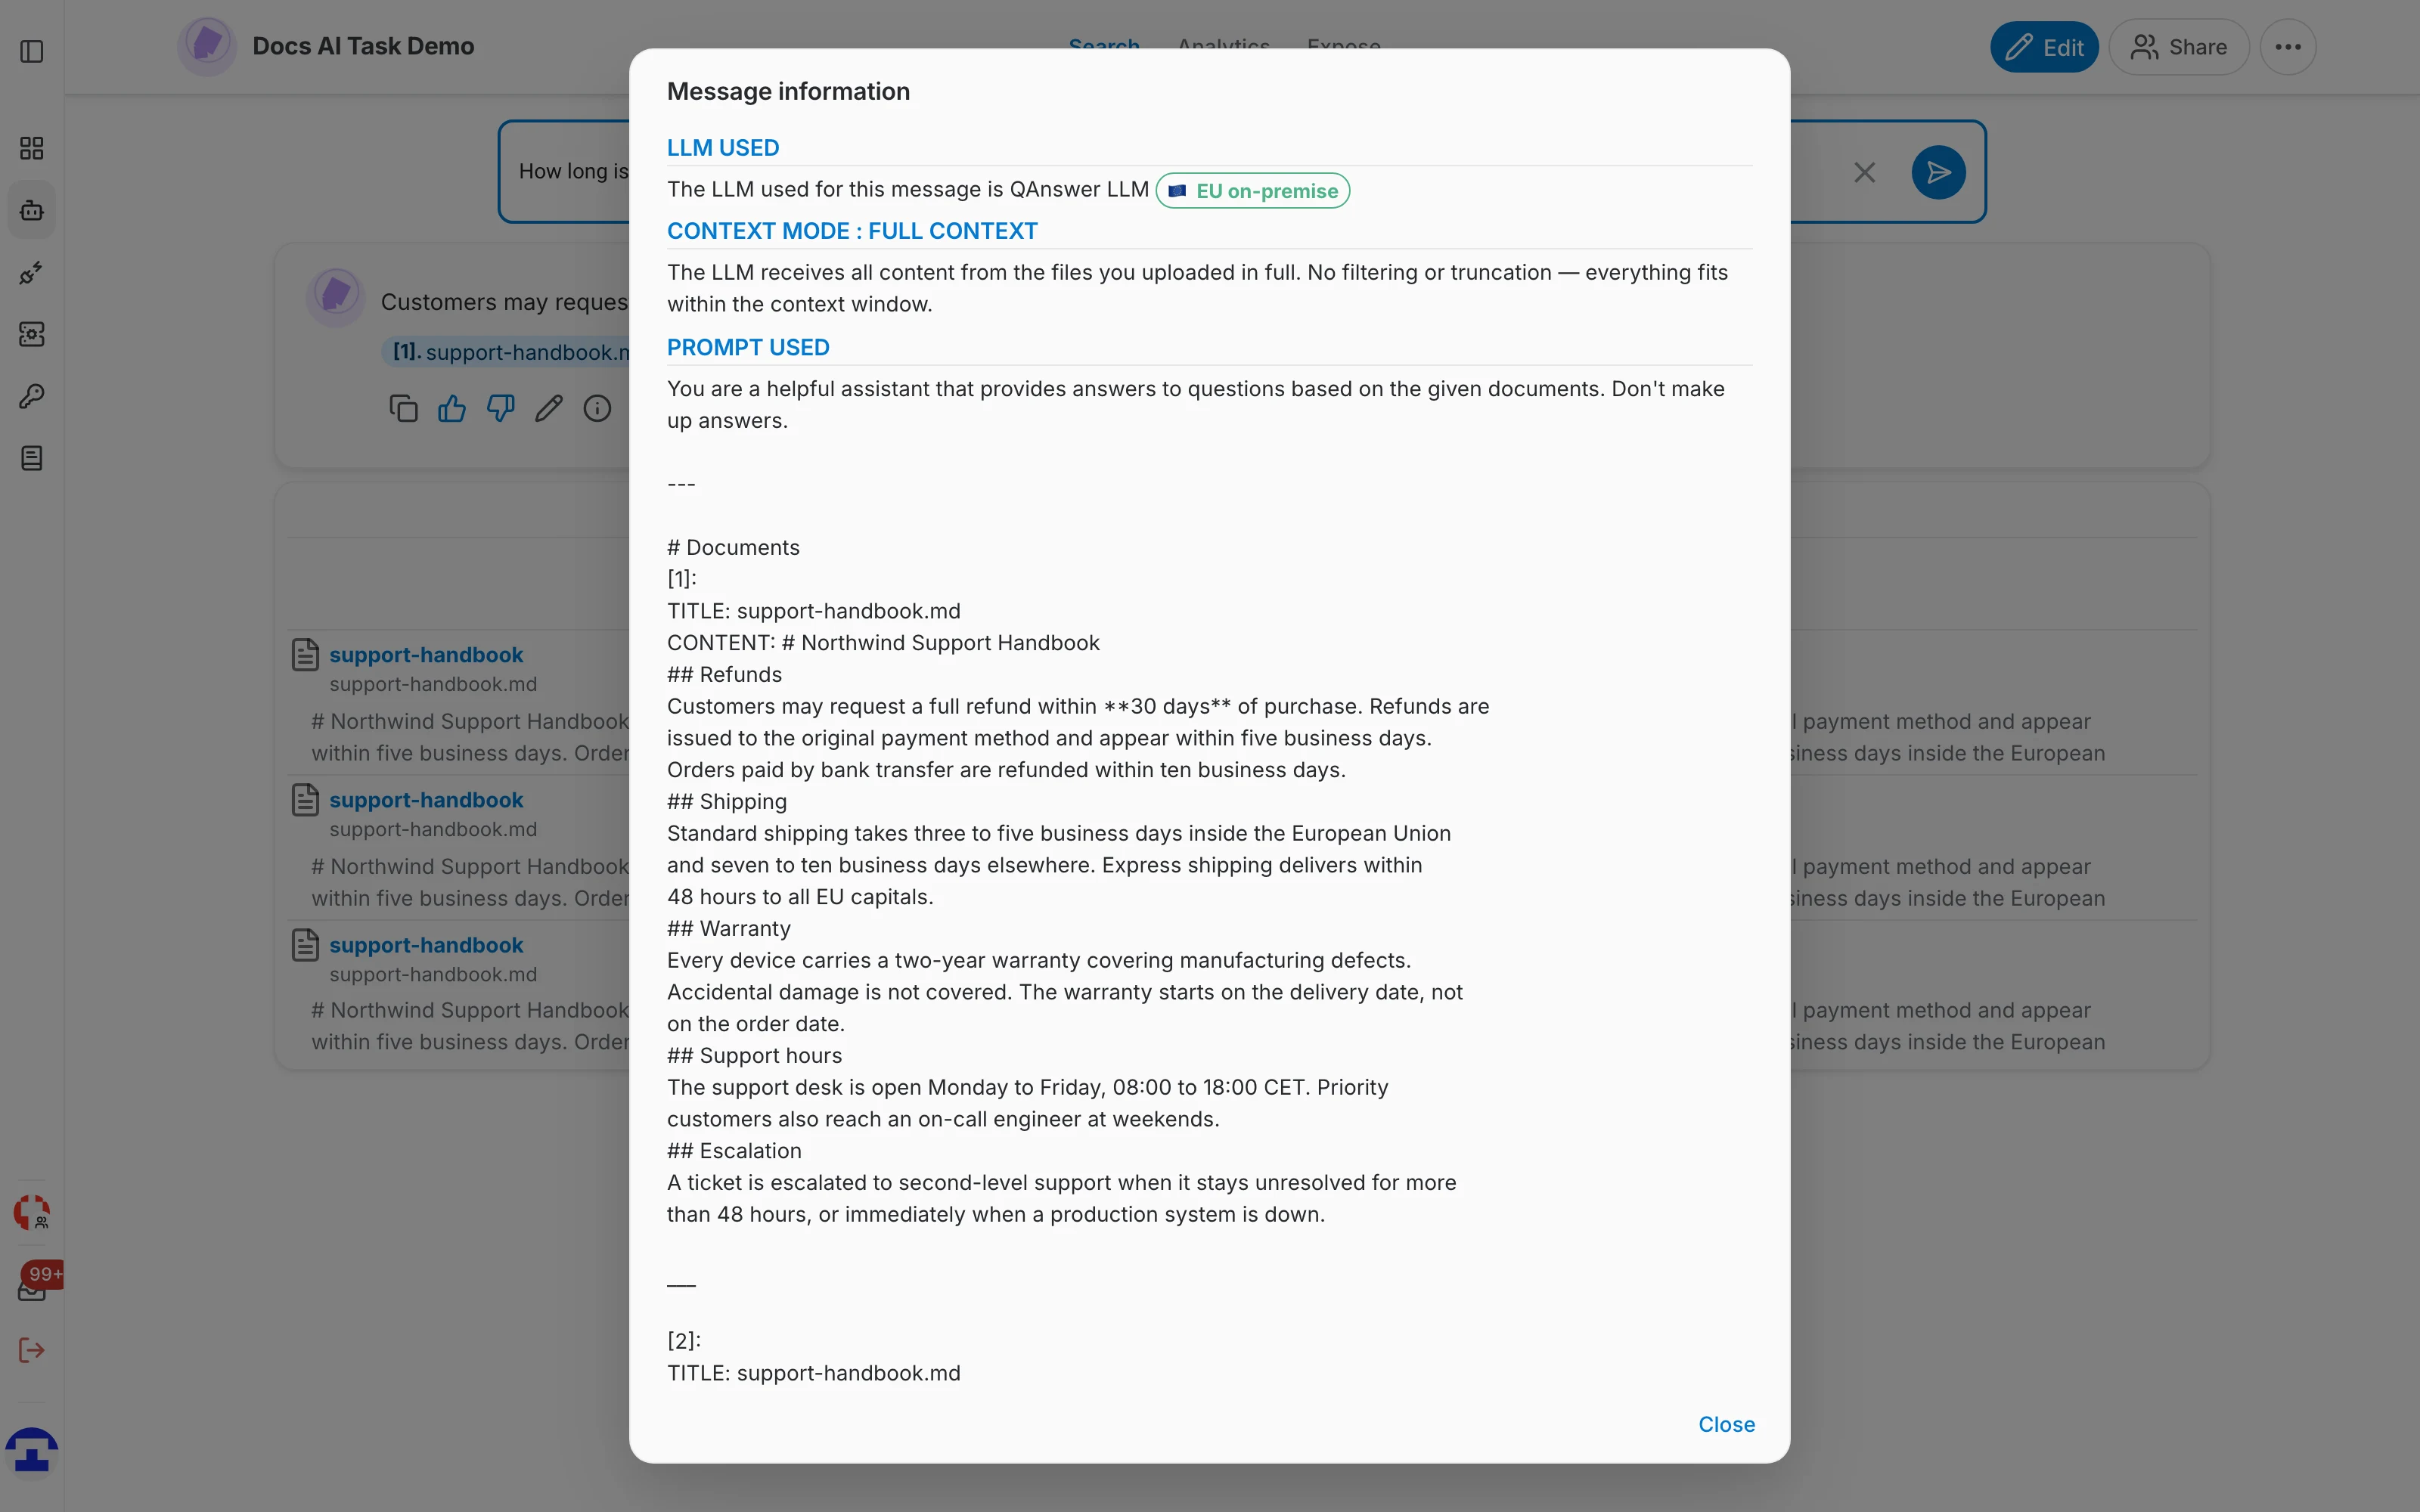
- Information — open a Message information dialog listing the LLM that produced the answer, the context mode used and the complete prompt that was sent, documents included.
- Regenerate — ask the same question again and get a fresh answer.
Top extracts
The Top extracts panel lists the most relevant document sections the assistant retrieved for the question — these are exactly the passages used to write the answer. Use the pager and the rows-per-page selector to walk through them.
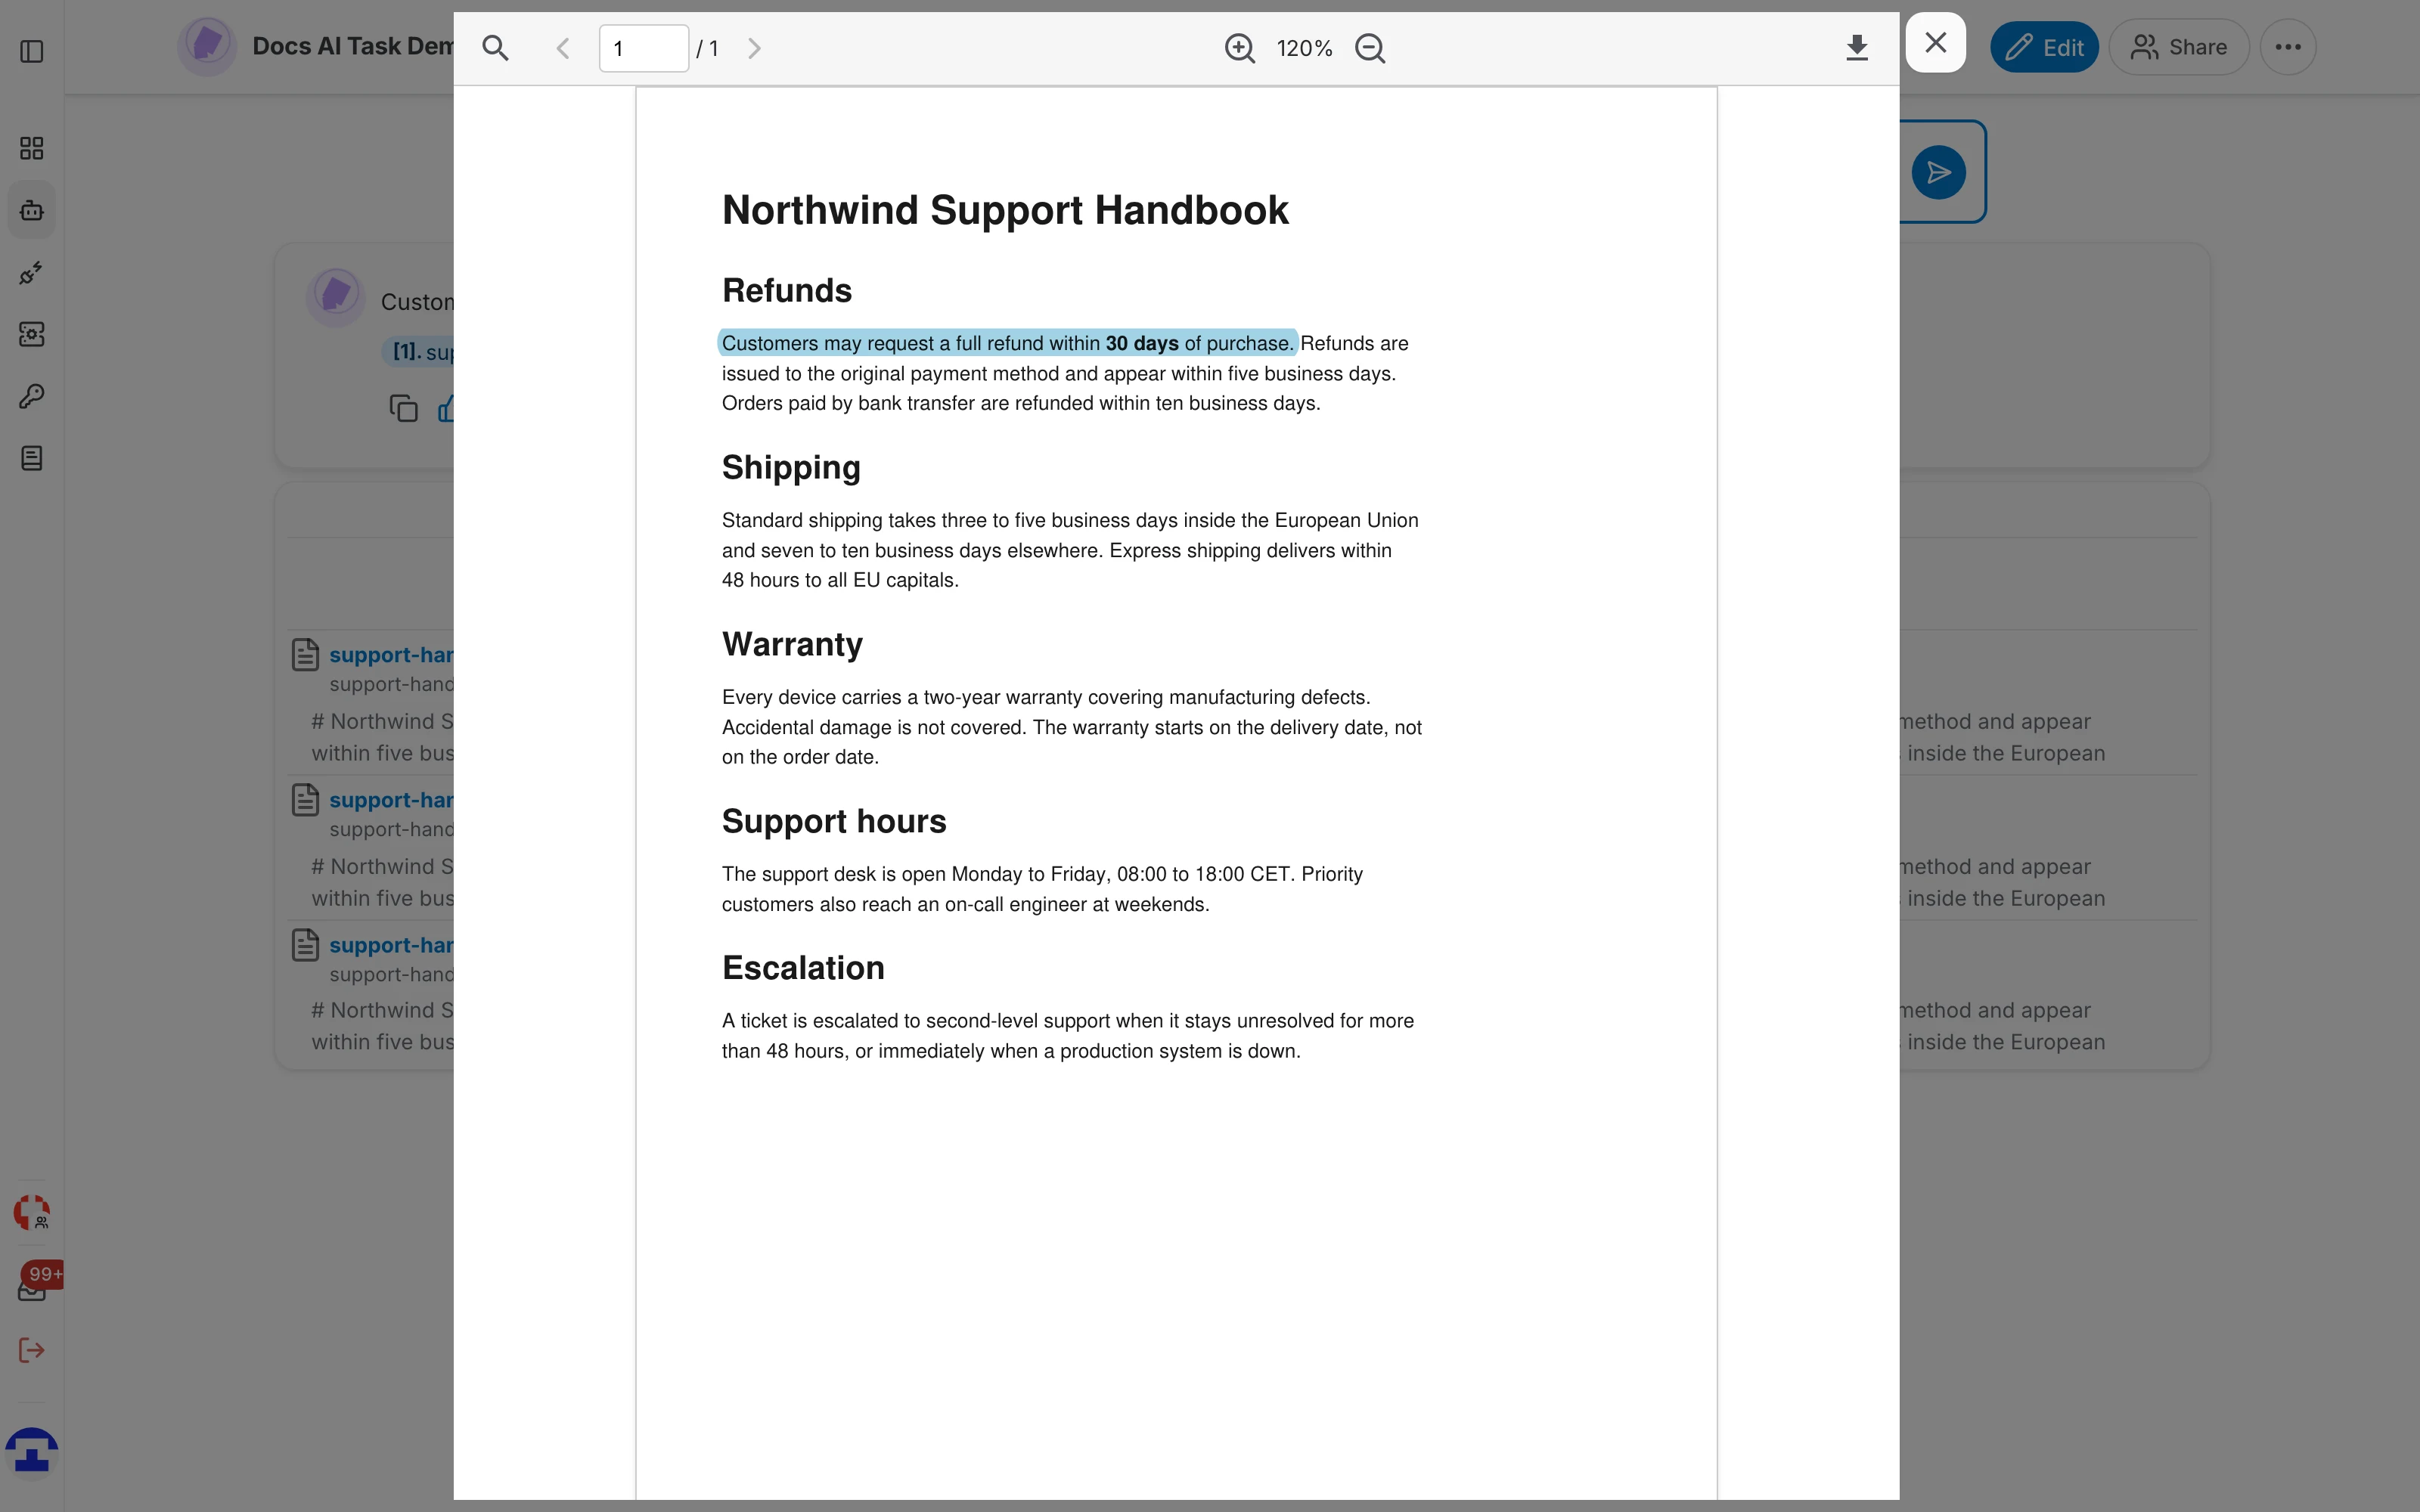
Click a citation chip or a document title to open the source itself. The passage that was used is highlighted, and the viewer lets you search inside the file, page through it, zoom and download it.
Configure the Search task
The Search task has no settings panel of its own. Everything is configured from the assistant editor: the prompt and the model on the General tab, retrieving and chunking on the Add data tab, and the user-facing filters on the Advanced tab.
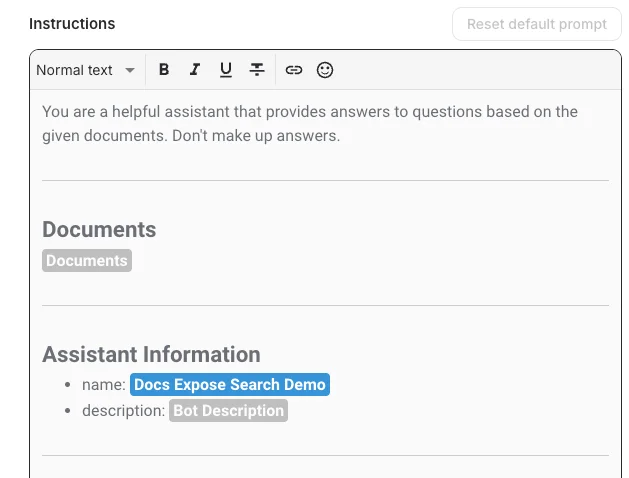
Instructions (the prompt)
The Instructions editor on the General tab defines the assistant's personality and the rules it follows when answering. A badge tells you whether the prompt is still the default one ("Not customized yet").
- Use placeholders such as
{{bot_name}}or{{bot_answer_length}}to have the assistant's own values inserted at runtime. - Type / in the editor to browse the available placeholders and pick one.
- Reset default prompt restores the shipped prompt if an experiment goes wrong.
LLM settings
The LLM Settings button on the General tab opens the model configuration:
- the language model that answers, with its hosting label (for example EU on-premise)
- the context window in tokens
- the maximum response length in tokens
- the response temperature, from very conservative to very creative
- the answer speed
- whether sources show their last update date
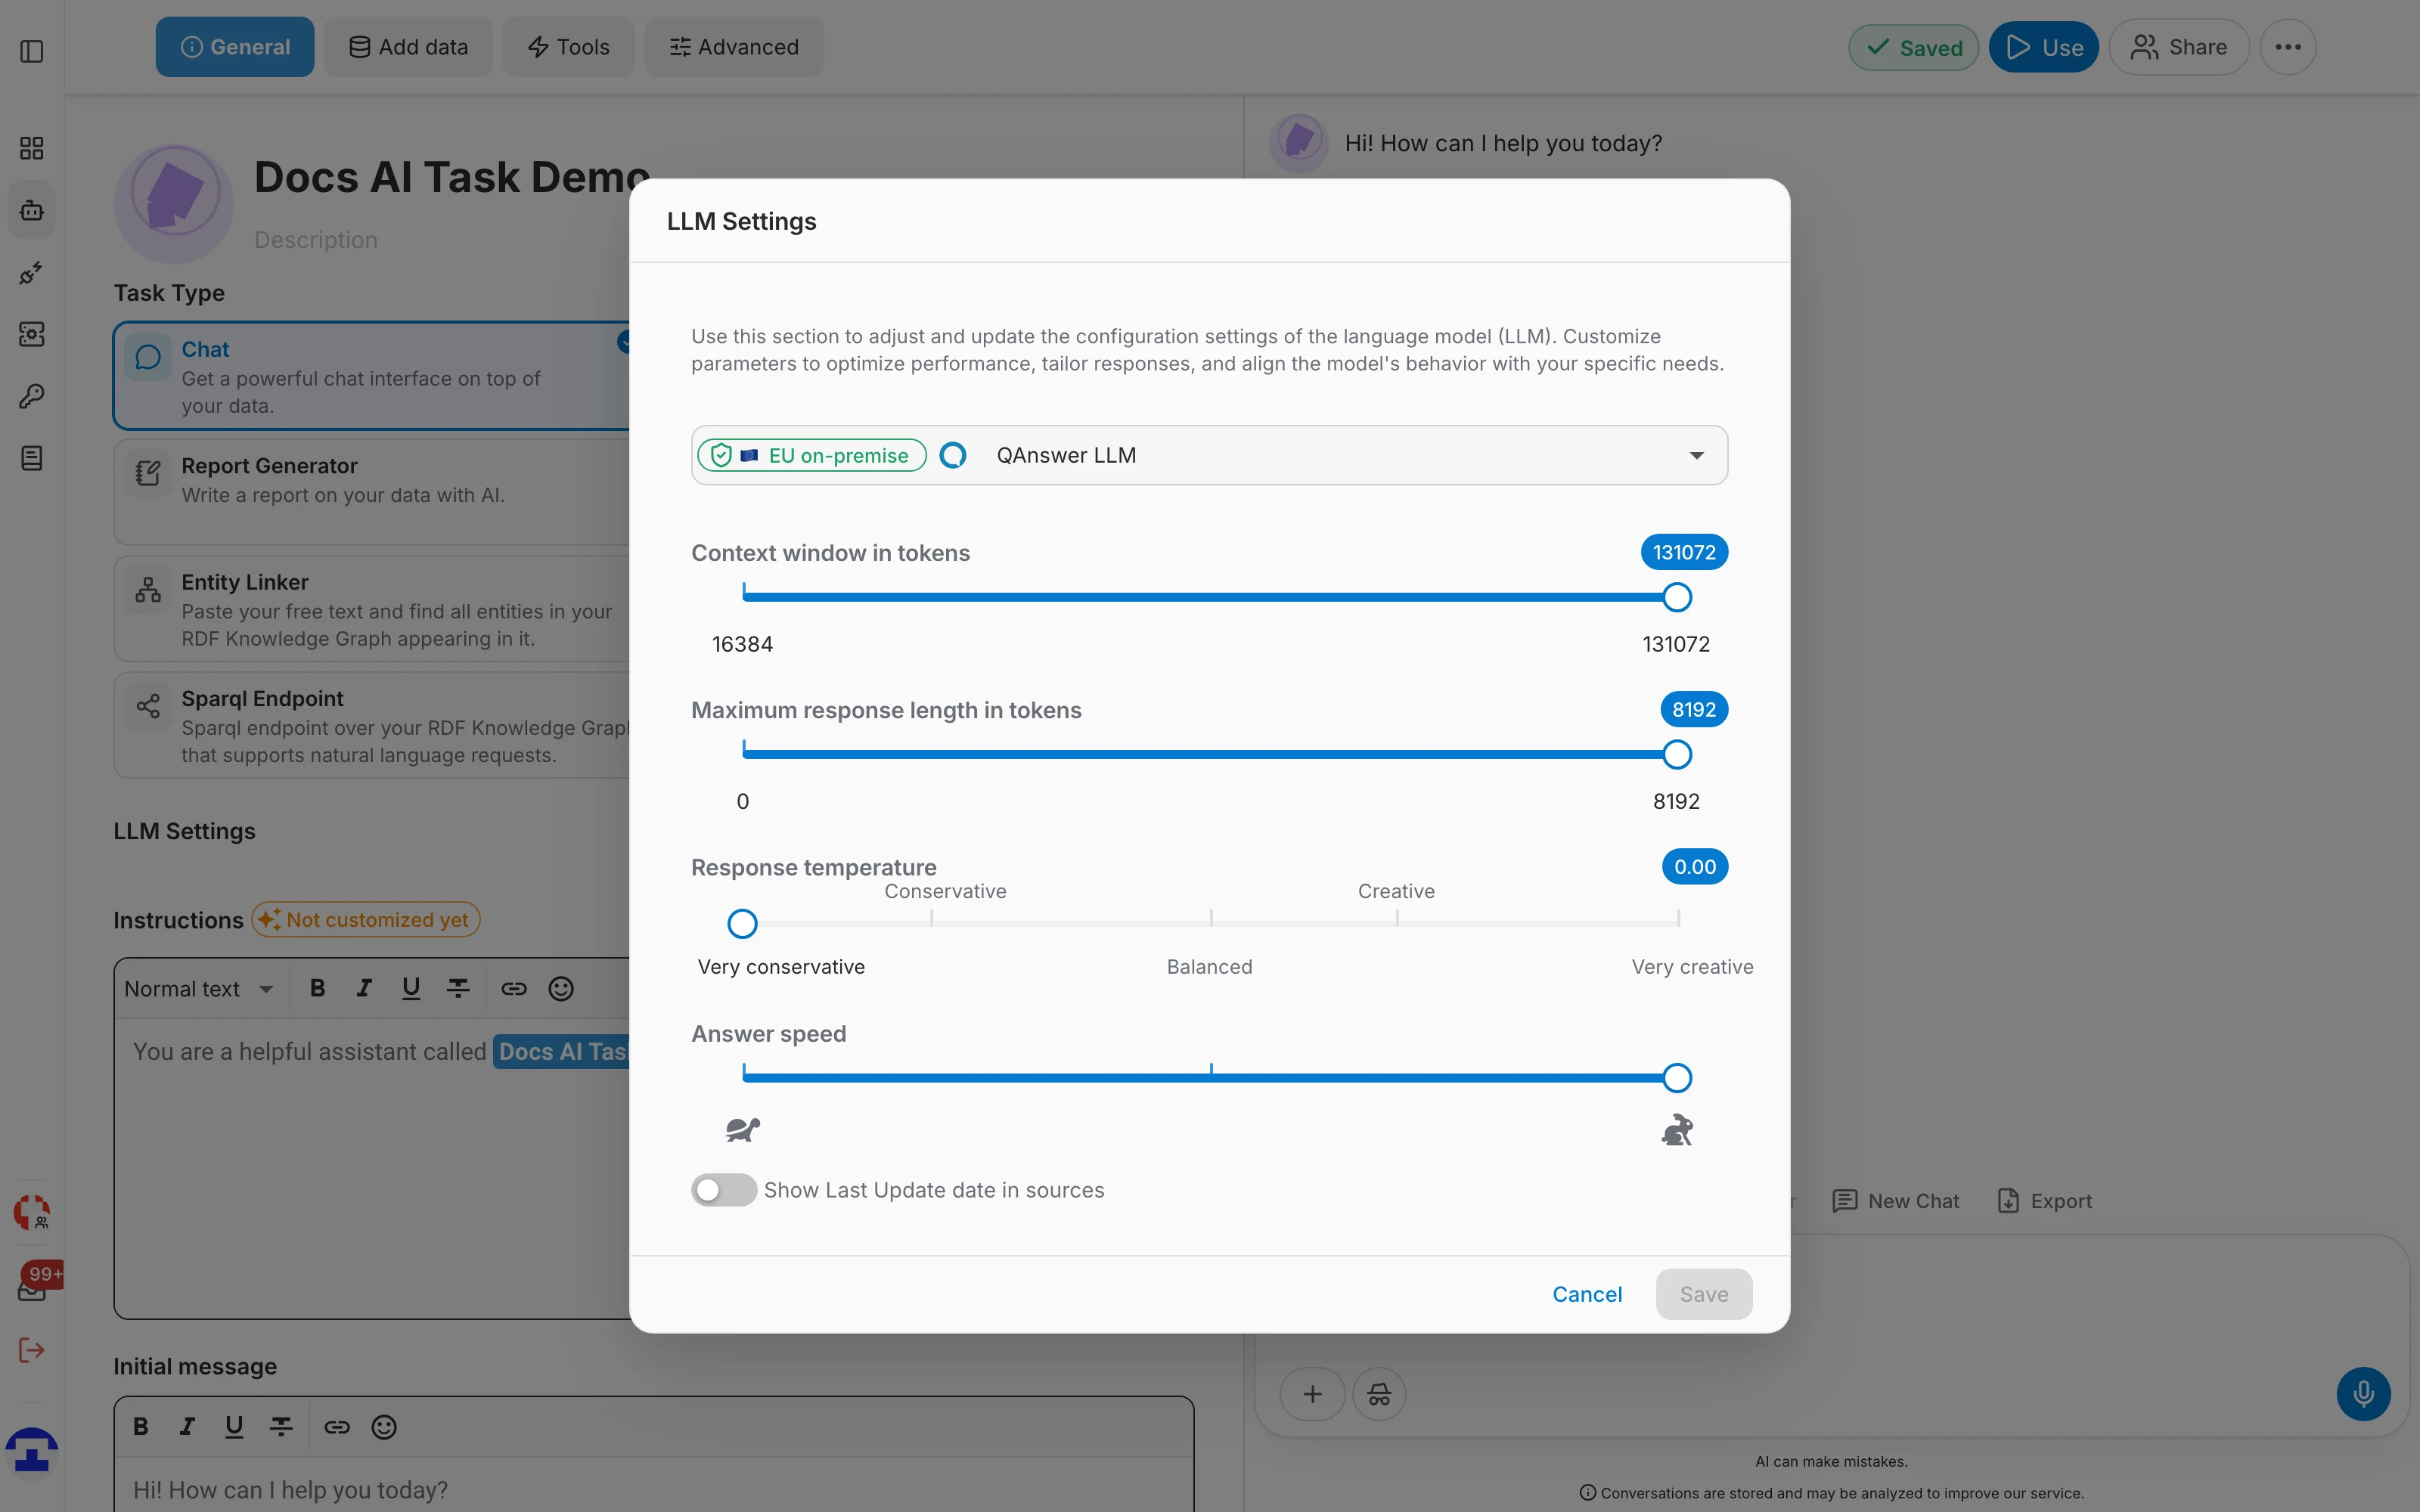
- Context window (tokens): how much text — question plus retrieved documents — the model can consider at once. If the input exceeds it, earlier content is dropped.
- Maximum response length: a cap on the tokens the model returns, which keeps answers from running long.
Practical tip: keep the temperature low for factual search, raise the context window when your documents are long, and cap the response length to control both answer size and cost.
Retrieving: references, synonyms and query expansion
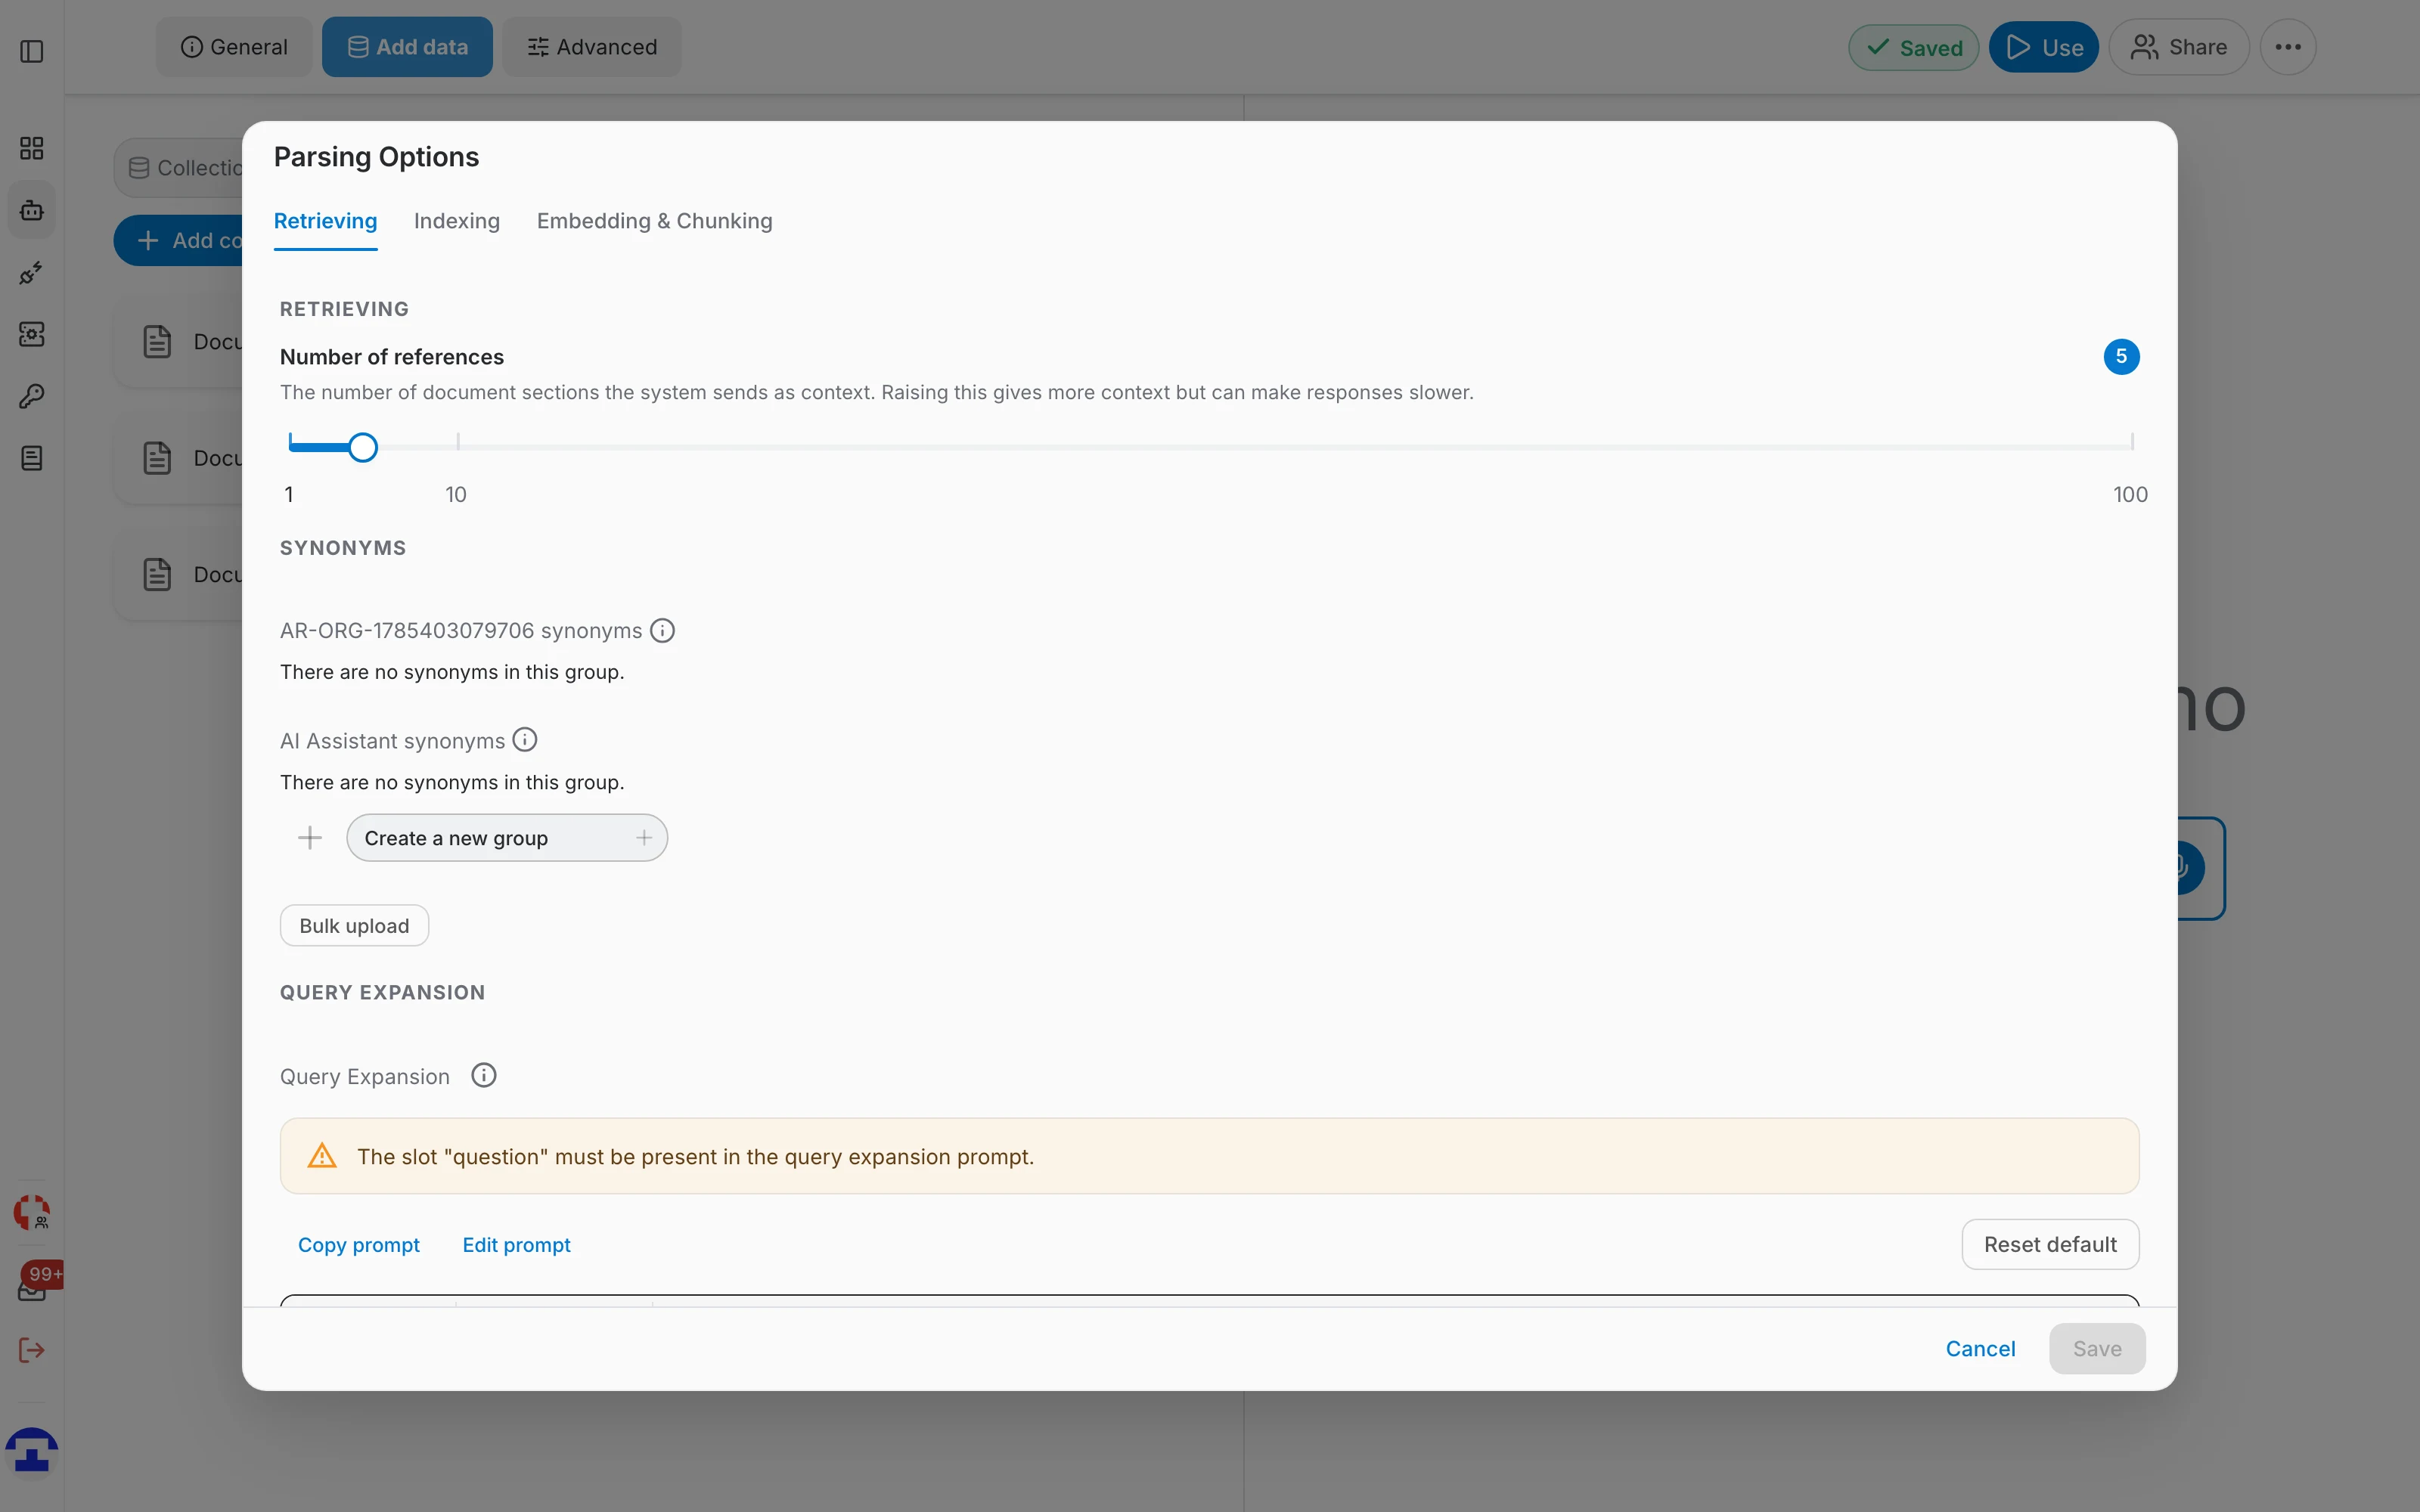
Retrieving is configured per data source. Open the Add data tab, then the connector's Parsing Options button, and stay on the Retrieving tab:
- Number of references — how many document sections are sent to the model as context. More context can mean better answers but slower responses.
- Synonyms — groups of words treated as equivalent when retrieving documents.
- Query expansion — a prompt that rewrites the user's question before retrieval, so that follow-up questions and time references carry the context needed to find the right documents.
Synonyms
Synonym groups make the retriever treat different wordings as the same term — useful for product codes, abbreviations and internal jargon. Groups exist at two levels: one shared across the organization, and one belonging to this assistant.
- Click Create a new group to start a group.
- Type a word and press Enter to add it to the group; the trash icon removes a group.
- The organization-level group applies to every assistant in the organization, so shared vocabulary only has to be entered once.
- Use Bulk upload to import many groups at once from a CSV file.
Query expansion
Query expansion reformulates the user's query so that it contains the context needed to retrieve the right documents. It matters most for follow-up questions ("and in 2024?") and for questions with relative dates. You can copy the prompt, edit it, or reset it to the default.
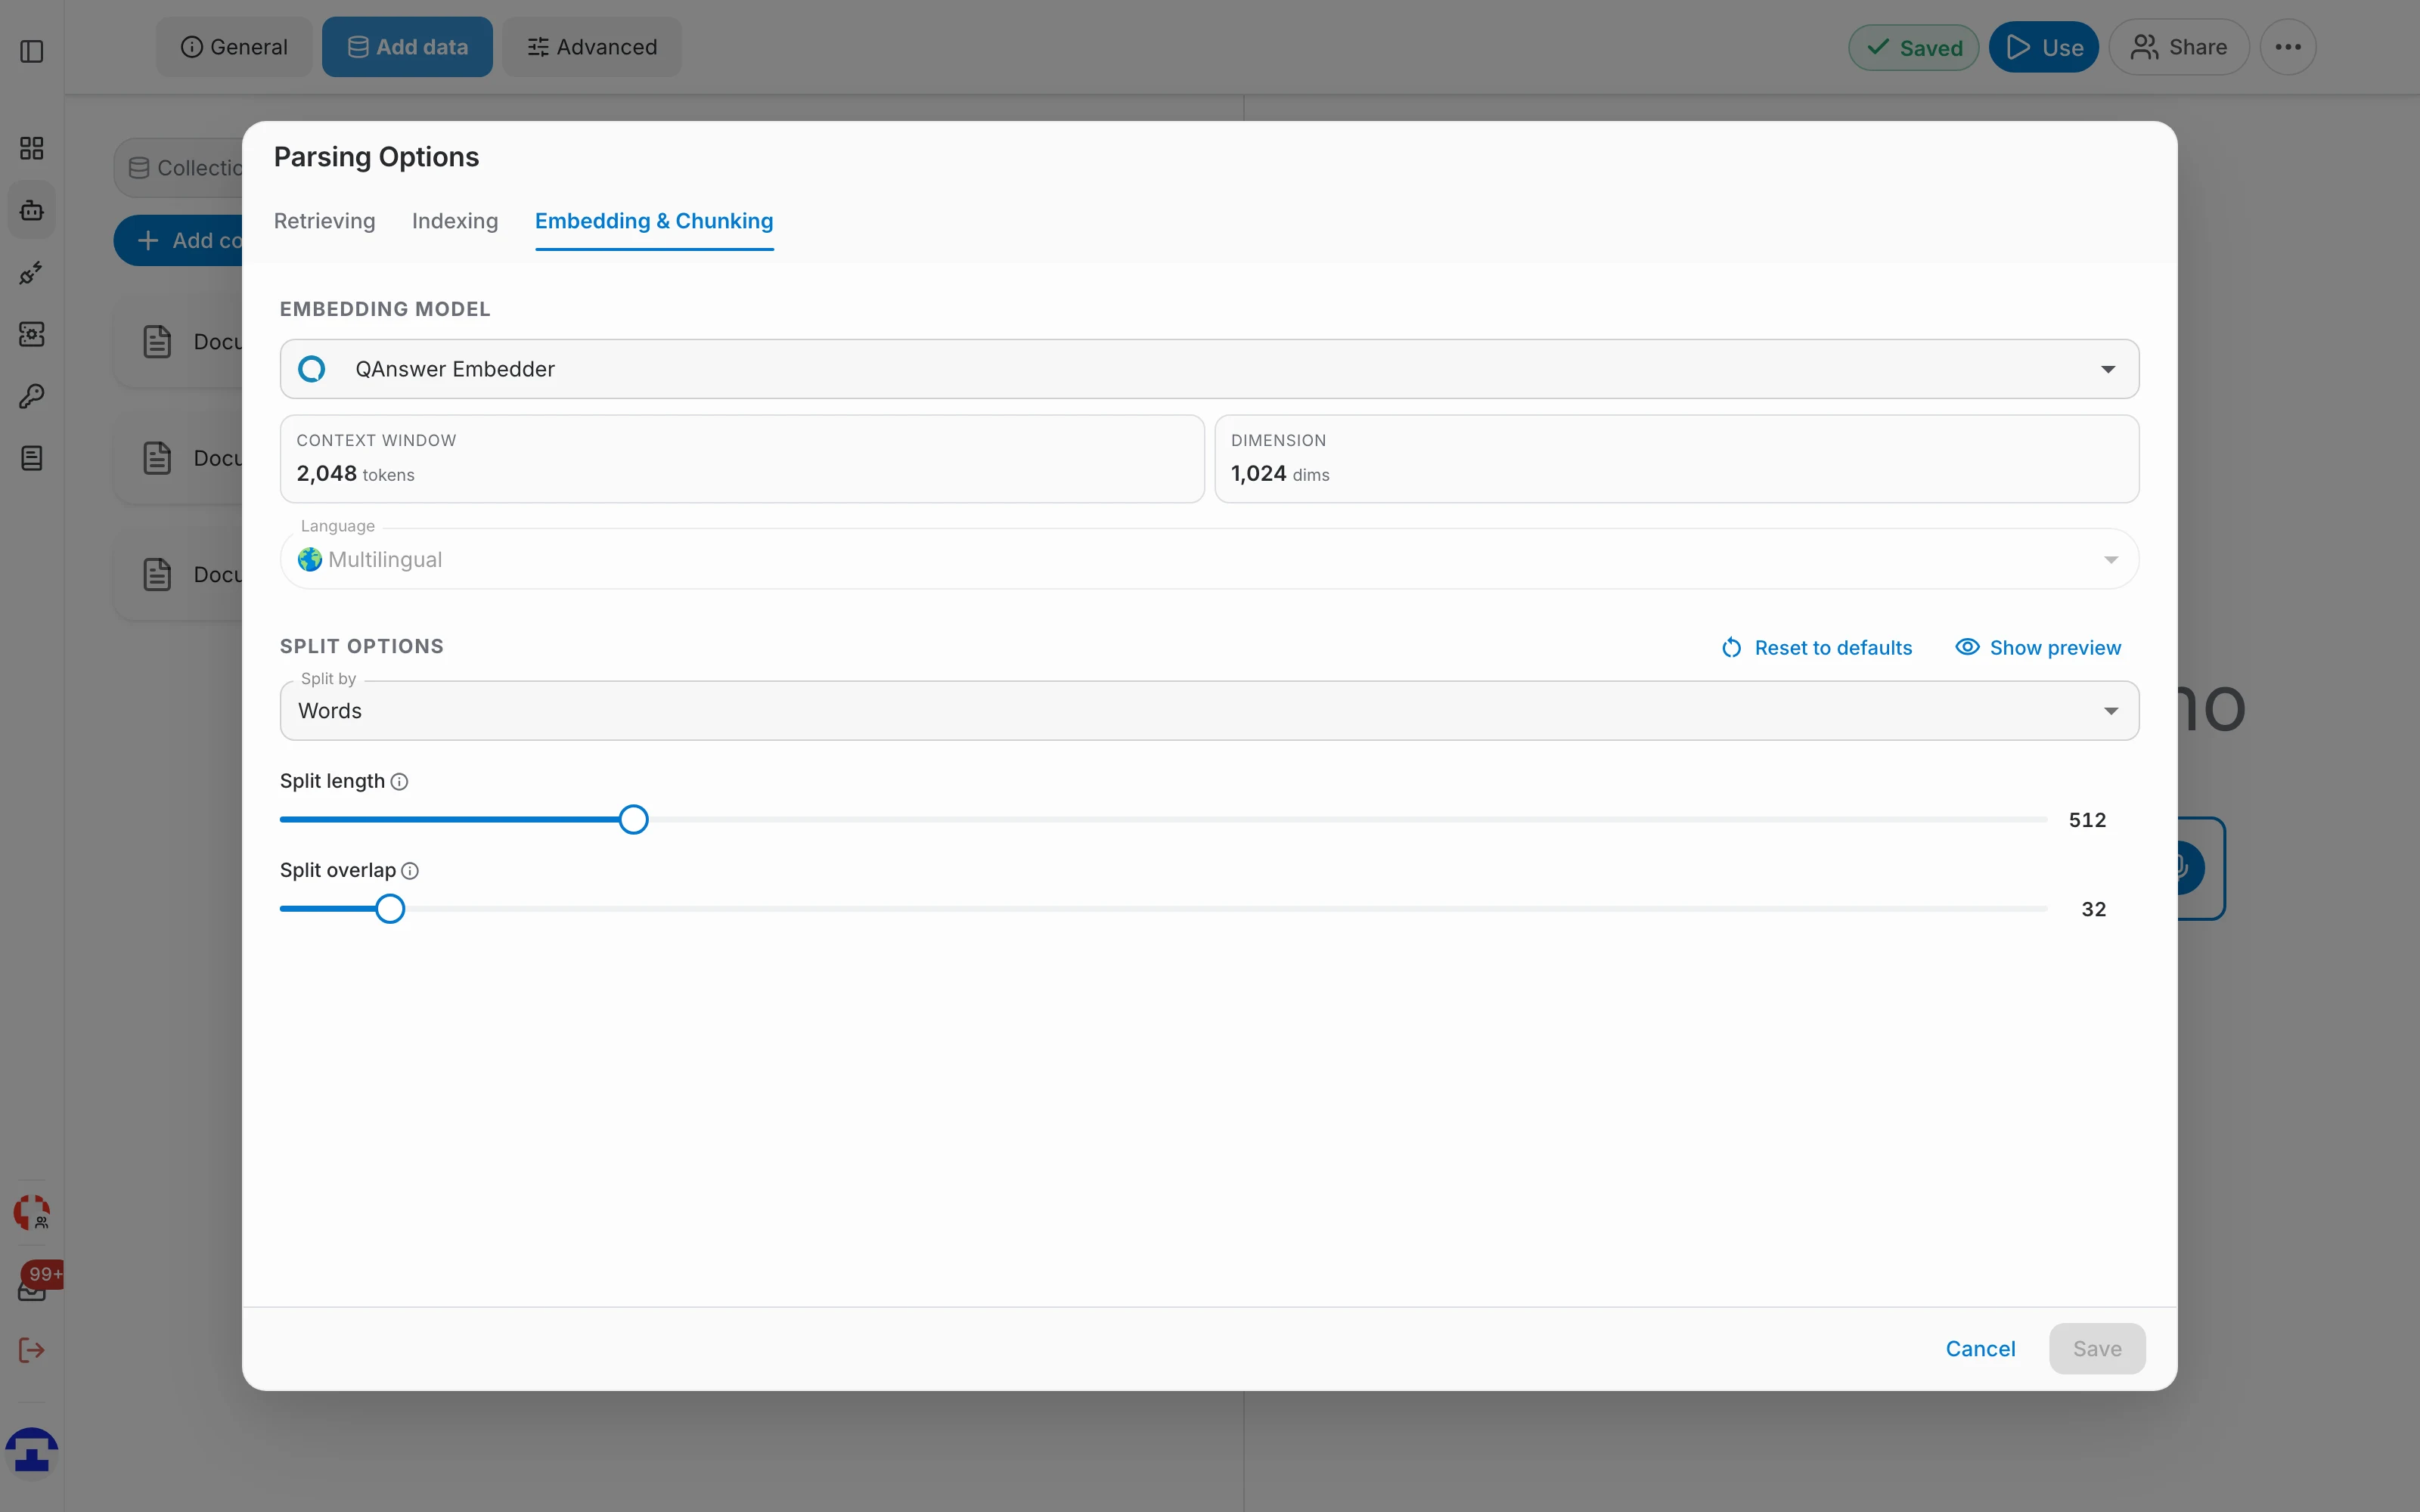
Embedding & chunking
The Embedding & Chunking tab of the same Parsing Options dialog controls how a document is cut up and turned into vectors before it can be searched:
- Embedding model — the model that turns text into vectors, with its context window, dimension and language.
- Split by — the unit used to cut the document: words, sentences or pages.
- Split length — how large each chunk is, in the chosen unit.
- Split overlap — how much of the previous chunk is repeated in the next one, so that context is not lost at the boundary. Example: split length 512 words with an overlap of 32 repeats the last 32 words of each chunk in the following one.
Advanced settings
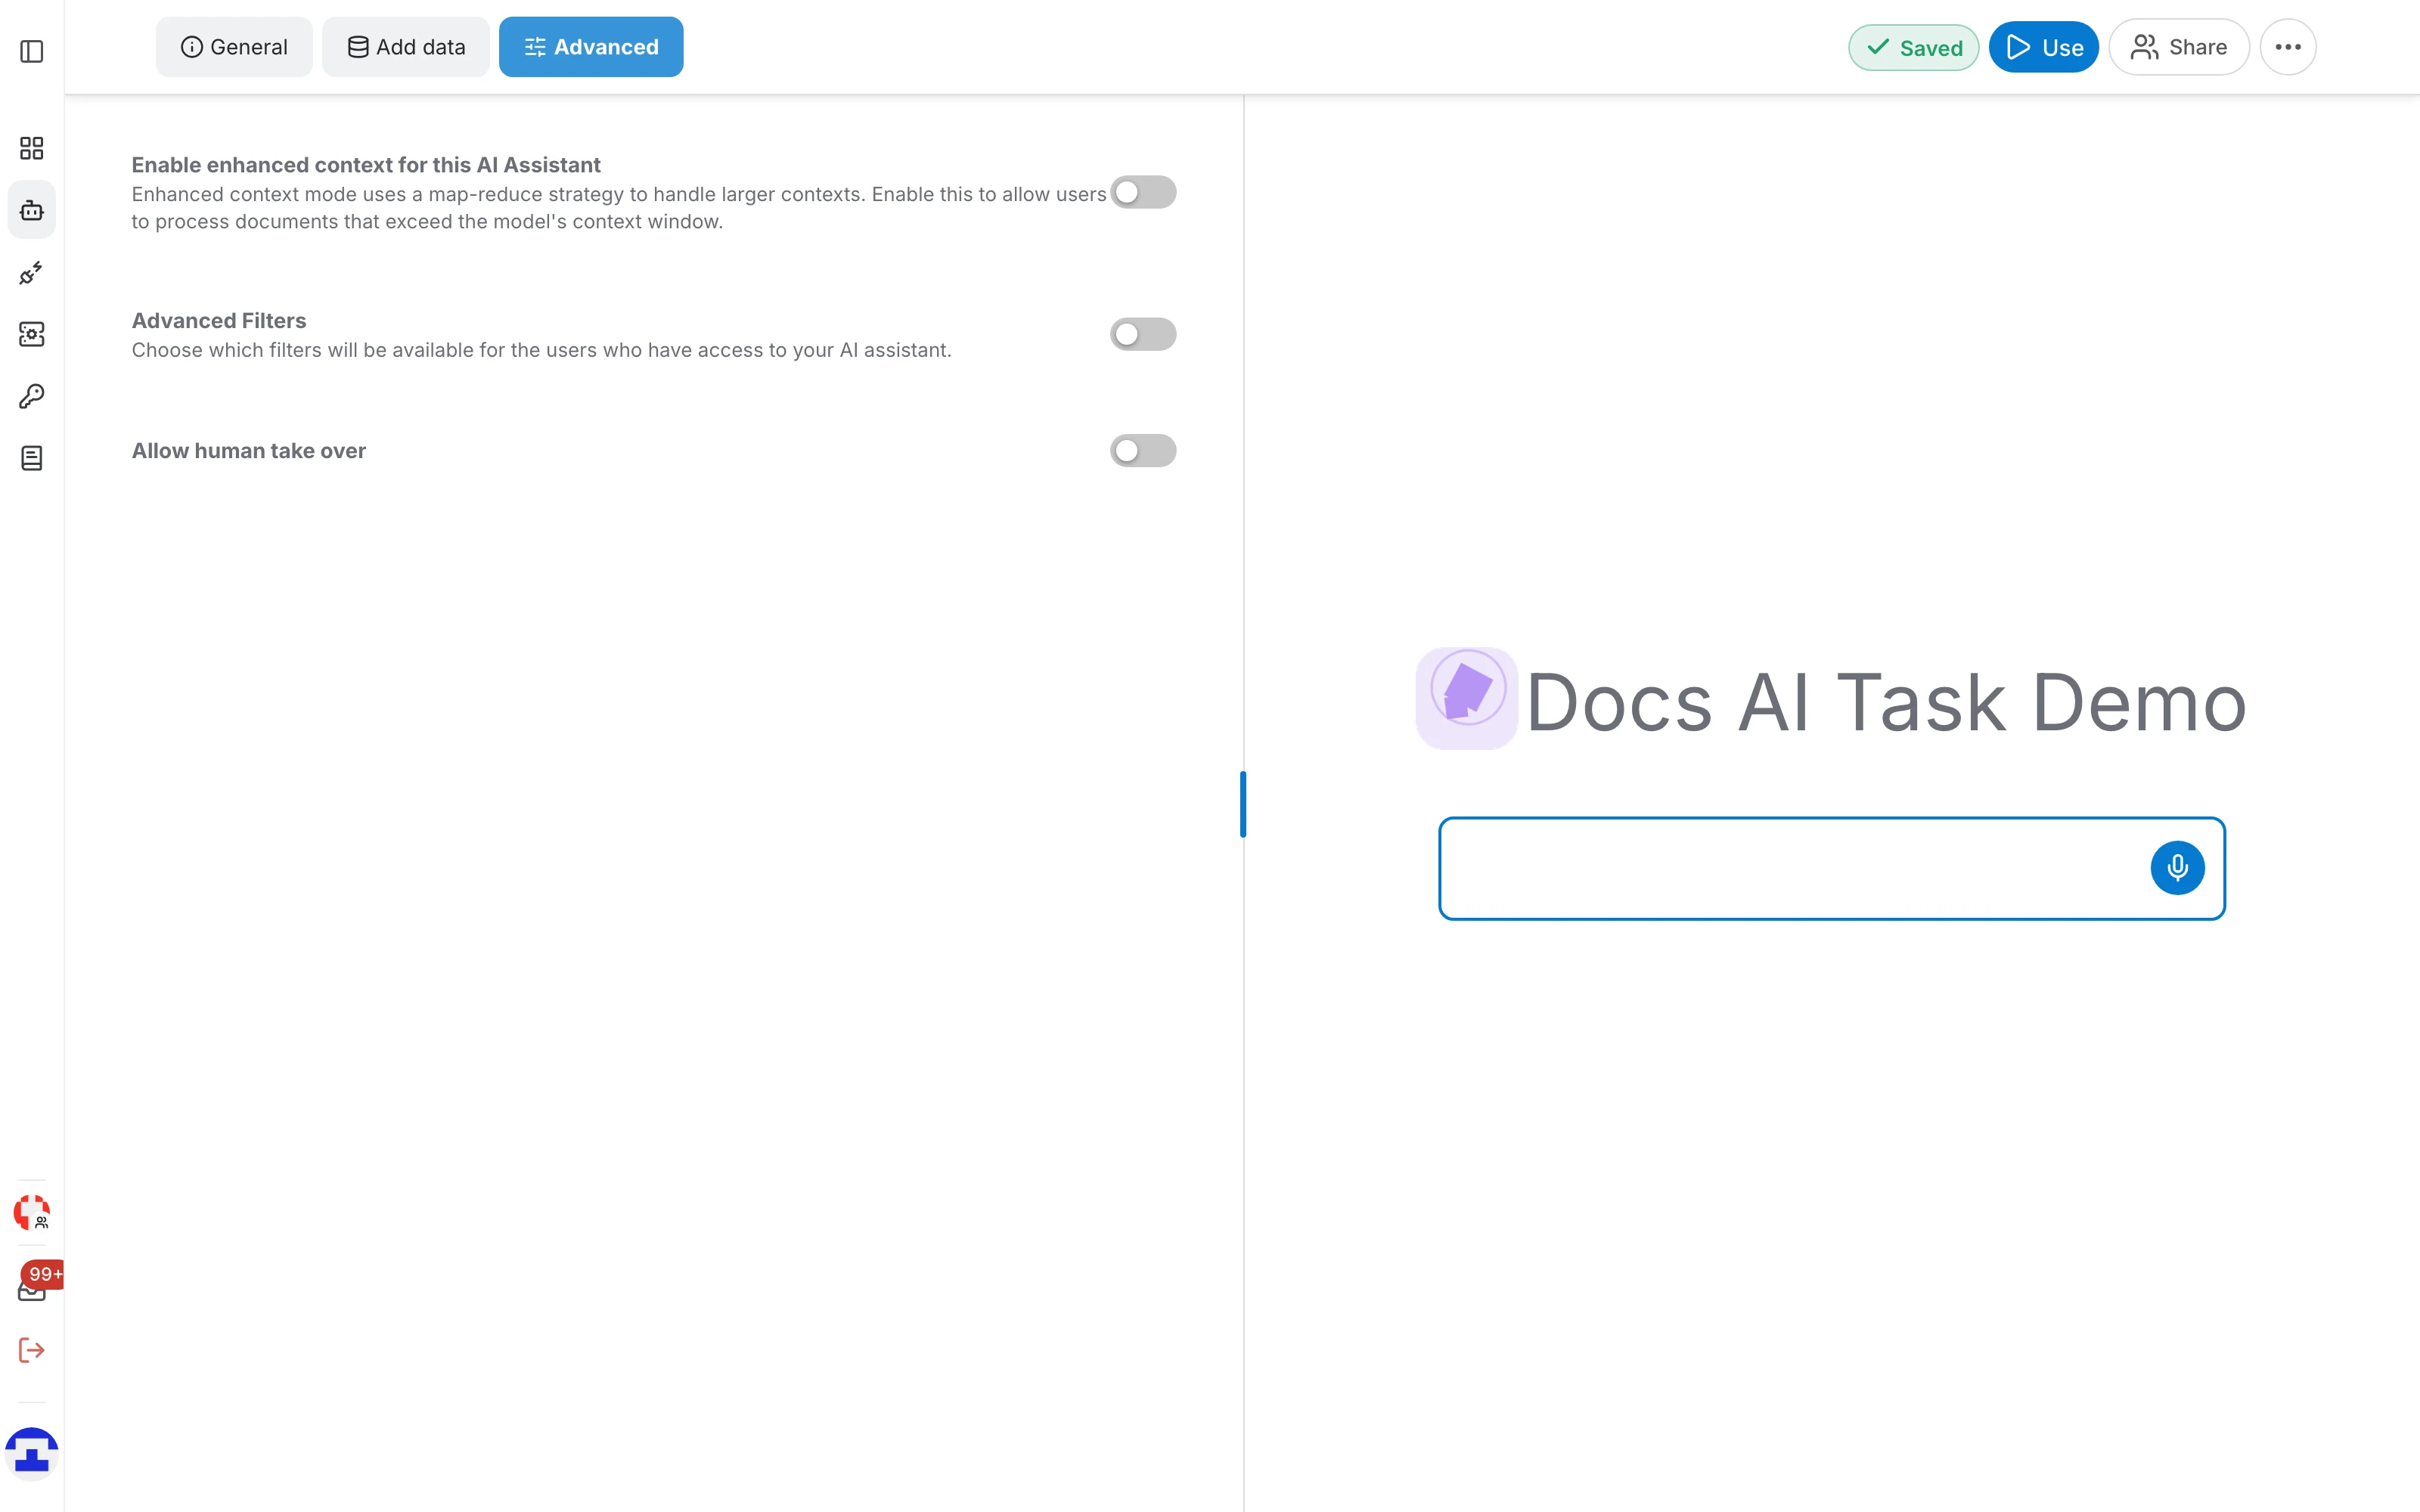
The Advanced tab of the editor controls what your users get on top of the plain answer:
- Enhanced context — a map-reduce strategy that splits documents larger than the model's context window into parts, processes each part and combines the results, so the whole document is considered. It is off by default.
- Advanced Filters — choose which filters the users of this assistant may apply to narrow the documents an answer is built from.
- Allow human take over — let an operator step into a conversation instead of the assistant.
Faceted search
Once Advanced Filters is on, the search interface gains a filter panel. Some filters are always available, such as the data-source type and the file format; the rest come from the metadata you attached to your files, so they are specific to your own data.
Filters detected in the question
Filters can also be applied automatically from what the question itself says — a date range, for instance. Open the search with autoApplyFilters=true in the URL and the filters the assistant detects in the question are applied to the search without the user touching the filter panel.
Keeping answers up to date
Answers are only as fresh as the indexed data. Website data sources can refresh themselves on a schedule — see the Website data source — and the Show Last Update date in sources switch in LLM Settings puts each source's date next to the answer, so readers can judge how current it is.