Audio
Video Tutorial
Audio
Watch on Tutorials page →
The Audio connector turns audio into searchable text. QAnswer transcribes what was said, you can correct the transcript and name the speakers, and the assistant then answers from it like from any document.
Add an Audio connector
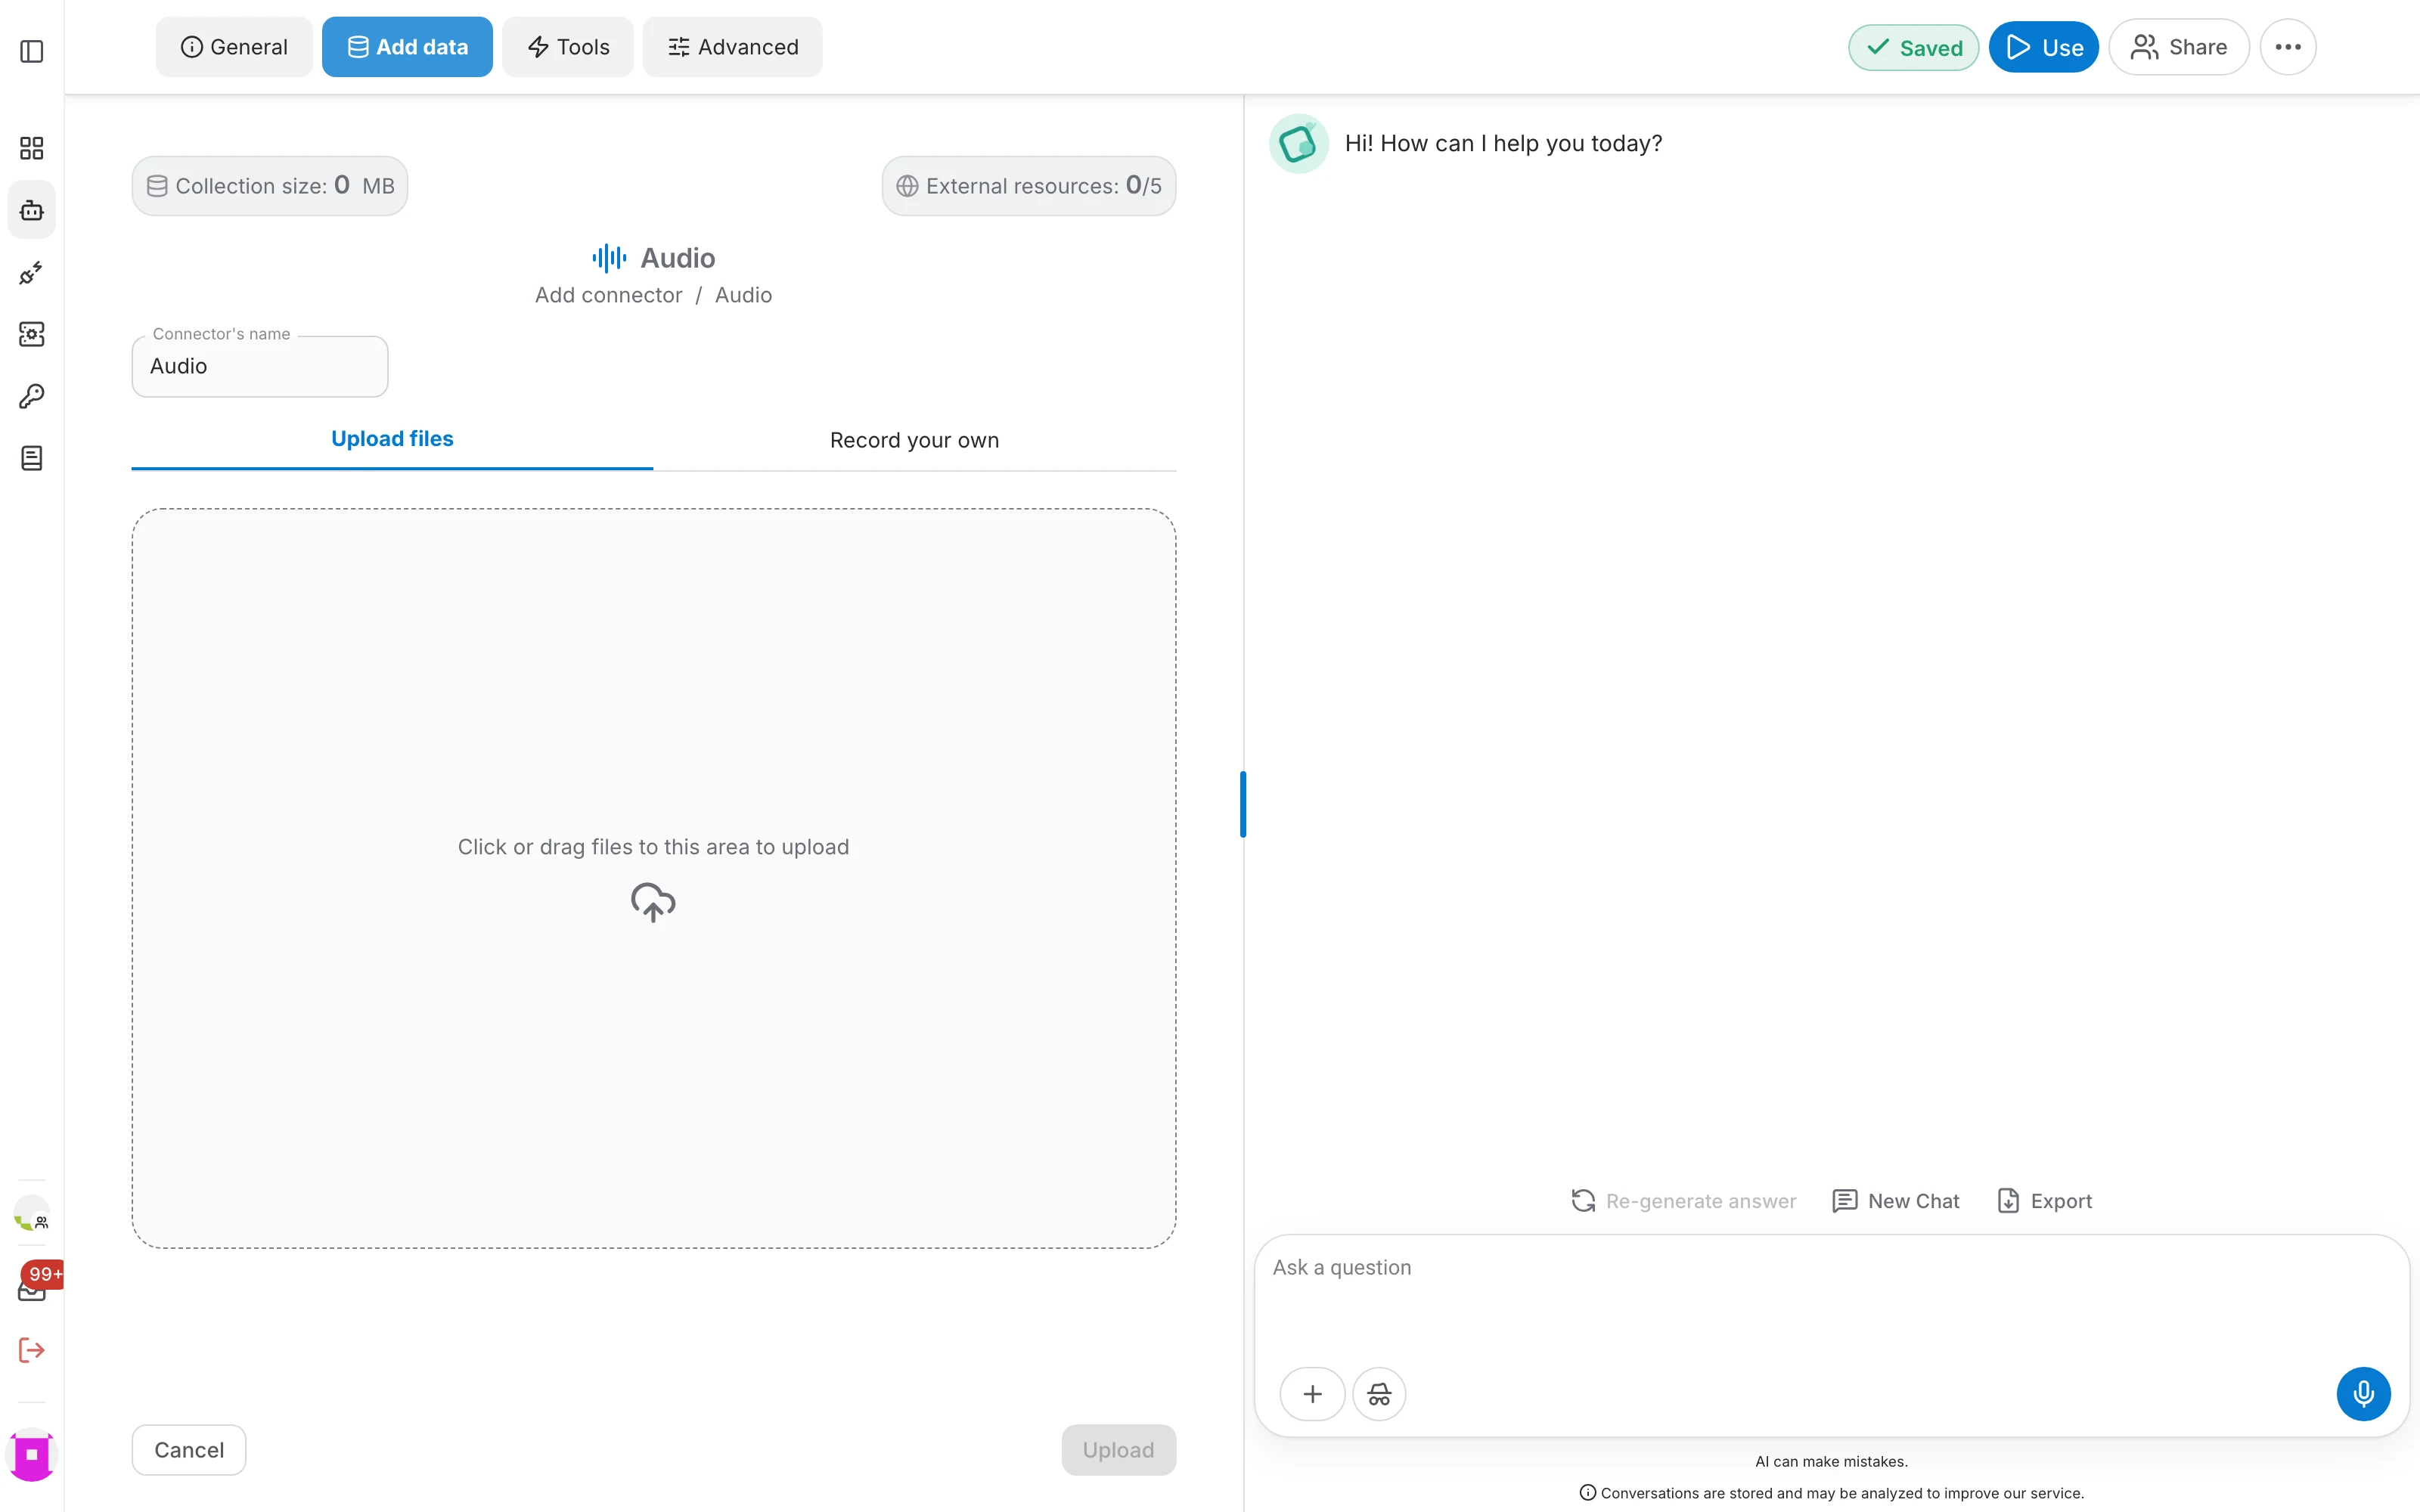
In the assistant editor, open the Add data tab, click Add connector and choose Audio. Name the connector after what it will hold, then bring audio in by uploading files or by recording directly in the browser.
Upload files
Drop your audio files onto the upload area, or click it to pick them. You can add several at once, and the counter under the area shows how many files and how much of the size limit you have used.
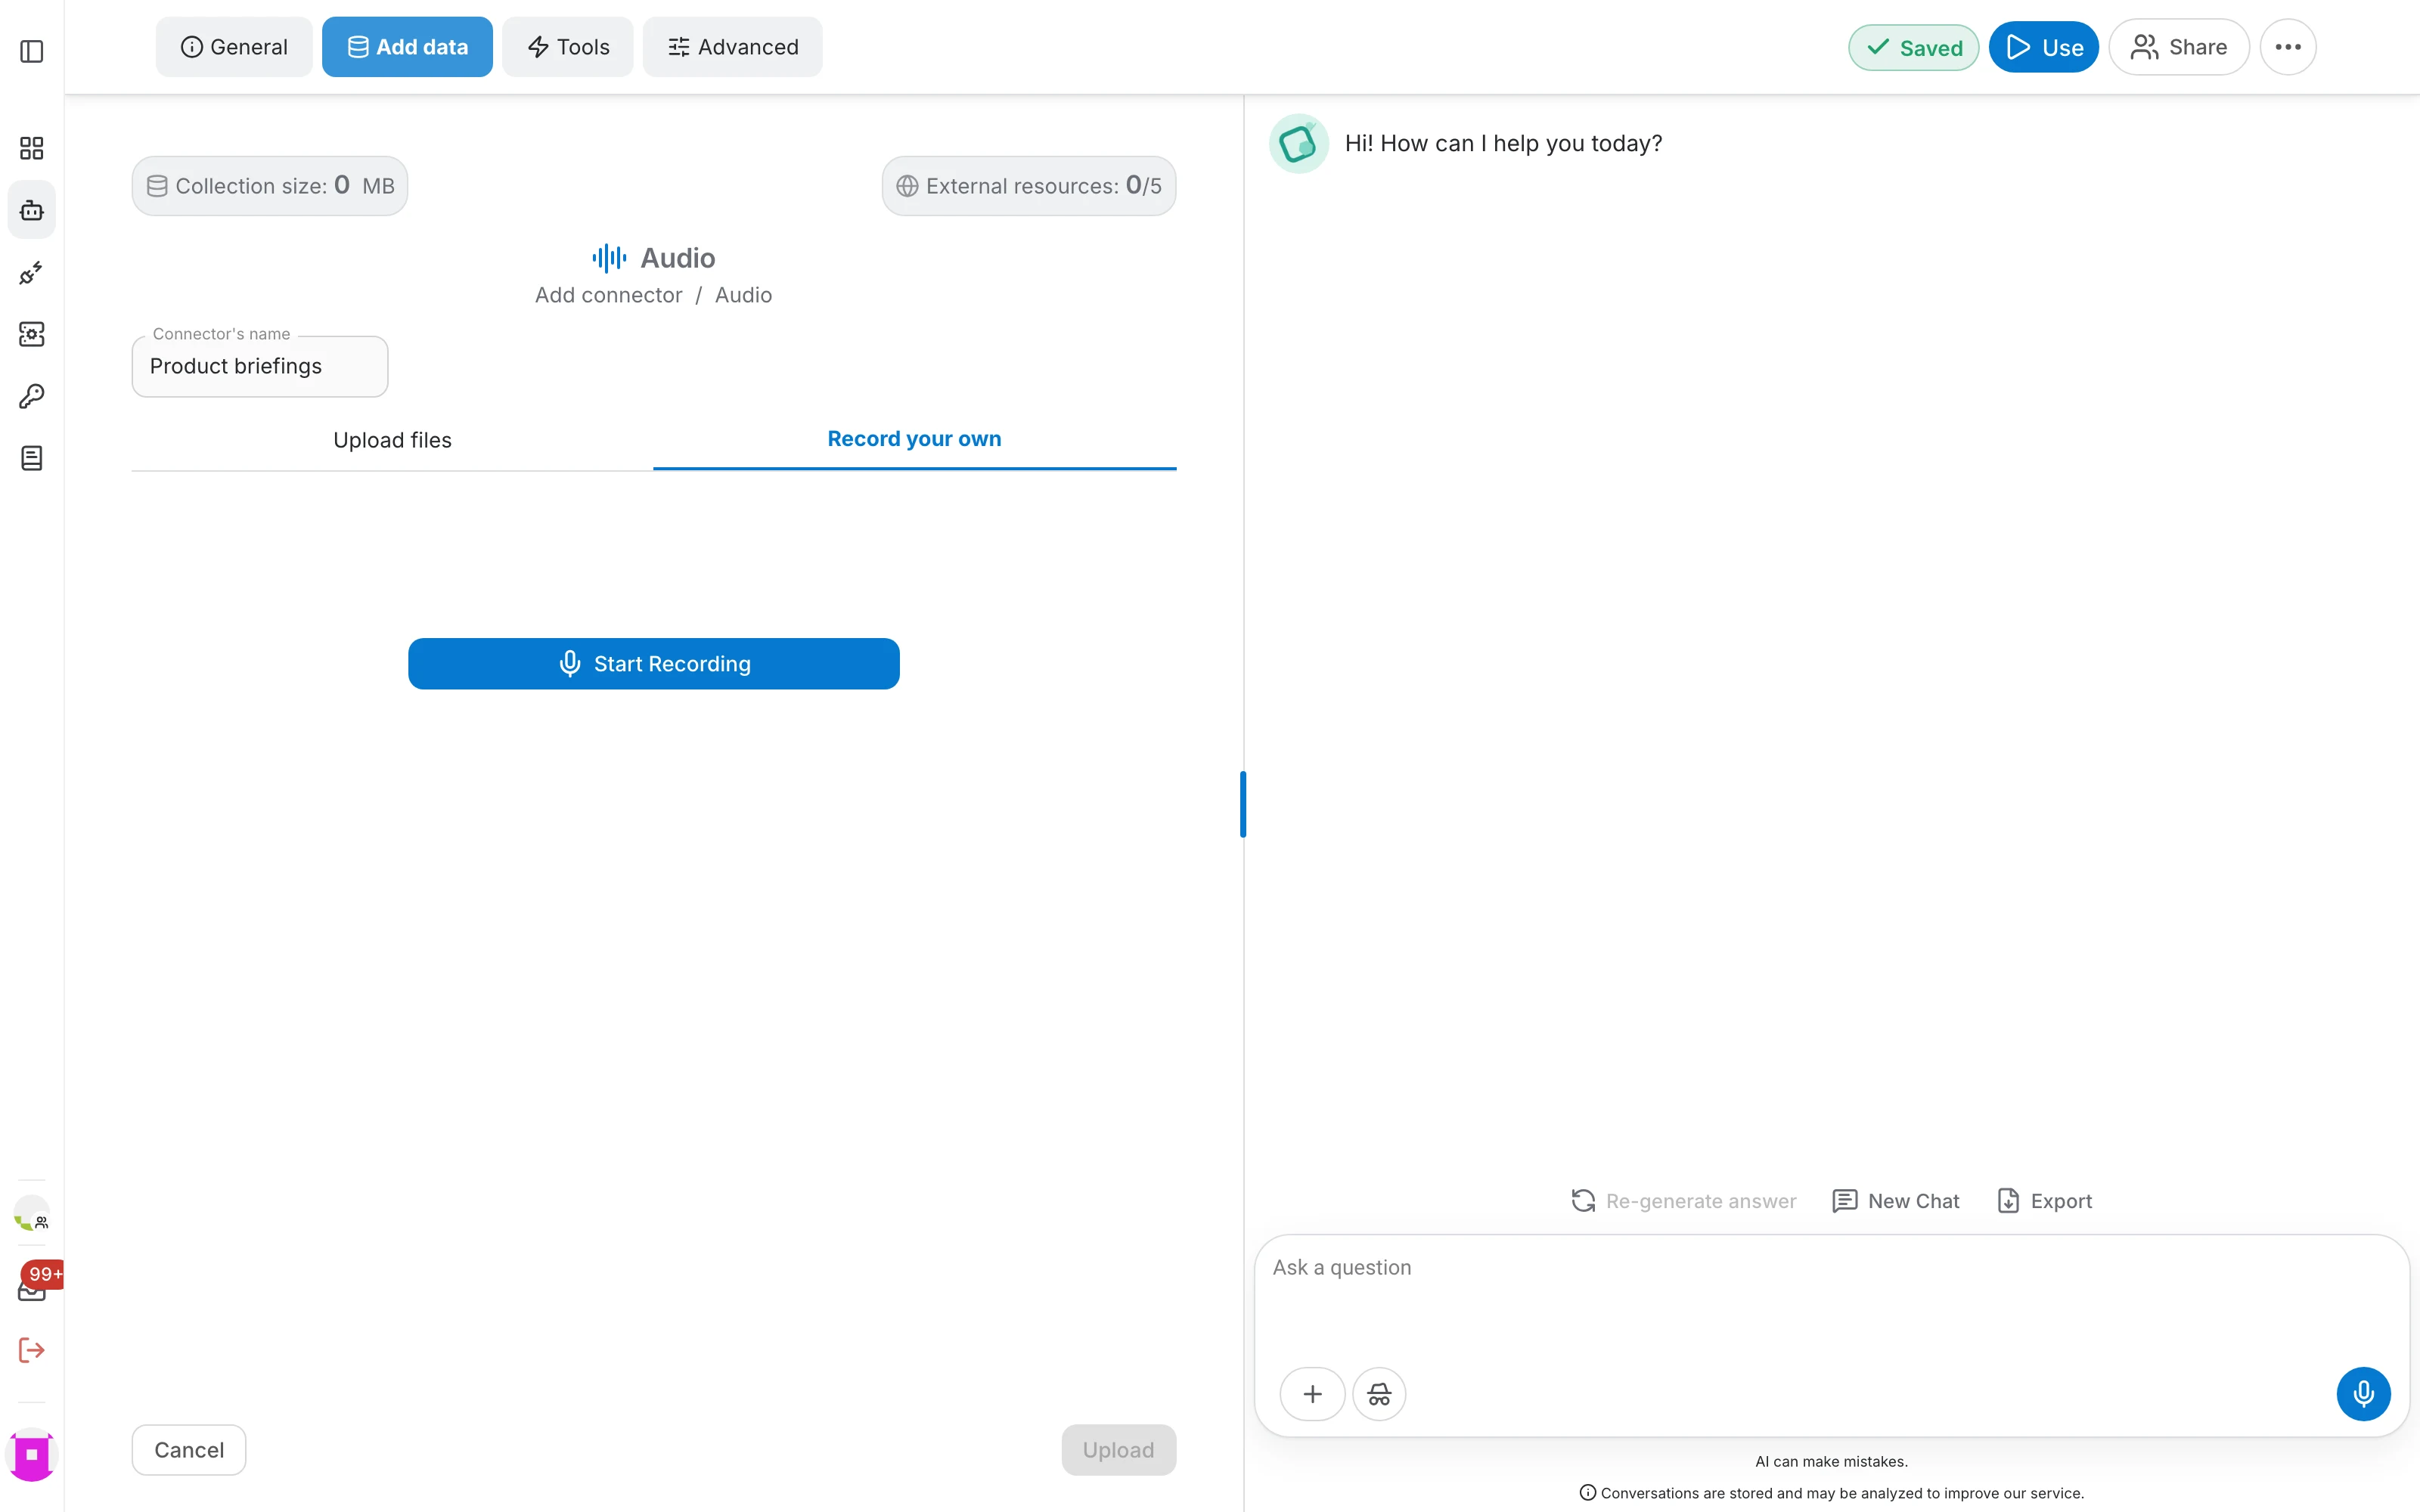
Record your own
The second tab records straight from your microphone, which is handy for a quick note, a meeting summary or a spoken briefing you do not want to write down.
- Click Start Recording to begin. The button turns into Stop Recording while the microphone is live.
- Click Stop Recording to end it. The audio is added to the list of files waiting to be uploaded, so you can record several in a row.
- Recordings are named after the moment they were made, for example Recordings_2026-08-05_at_10-29-49. Rename them later from the file table if you want something more readable.
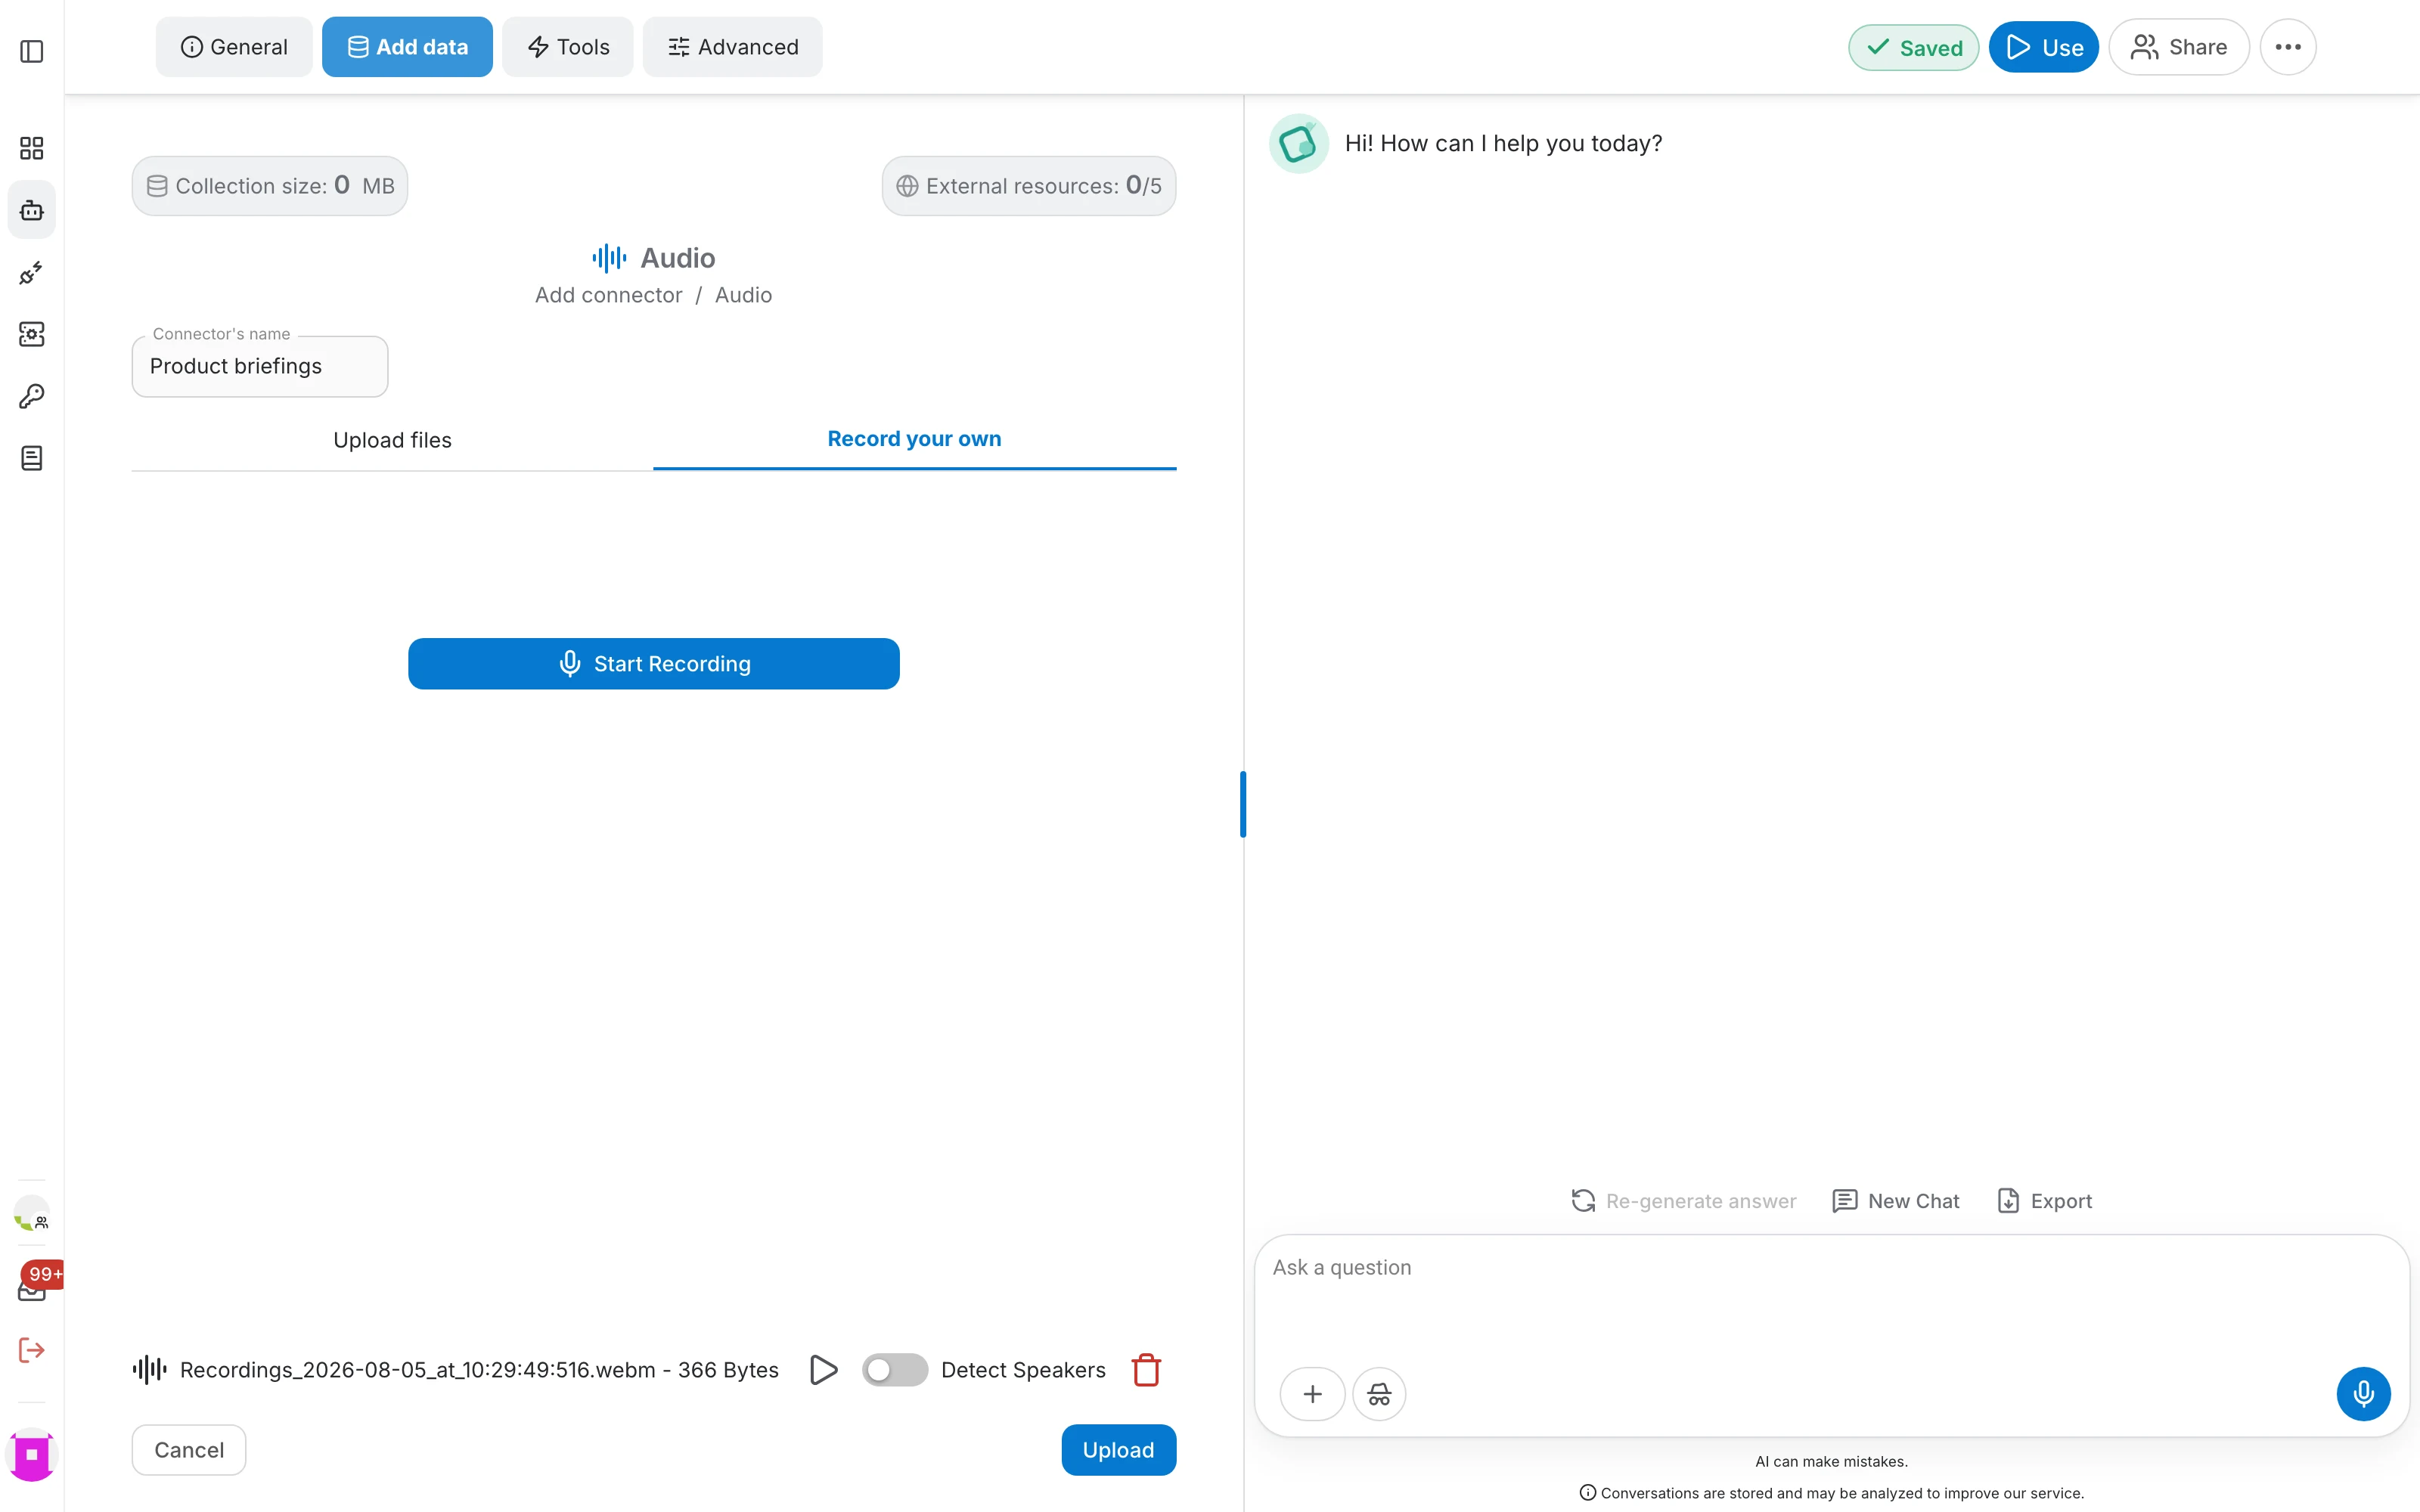
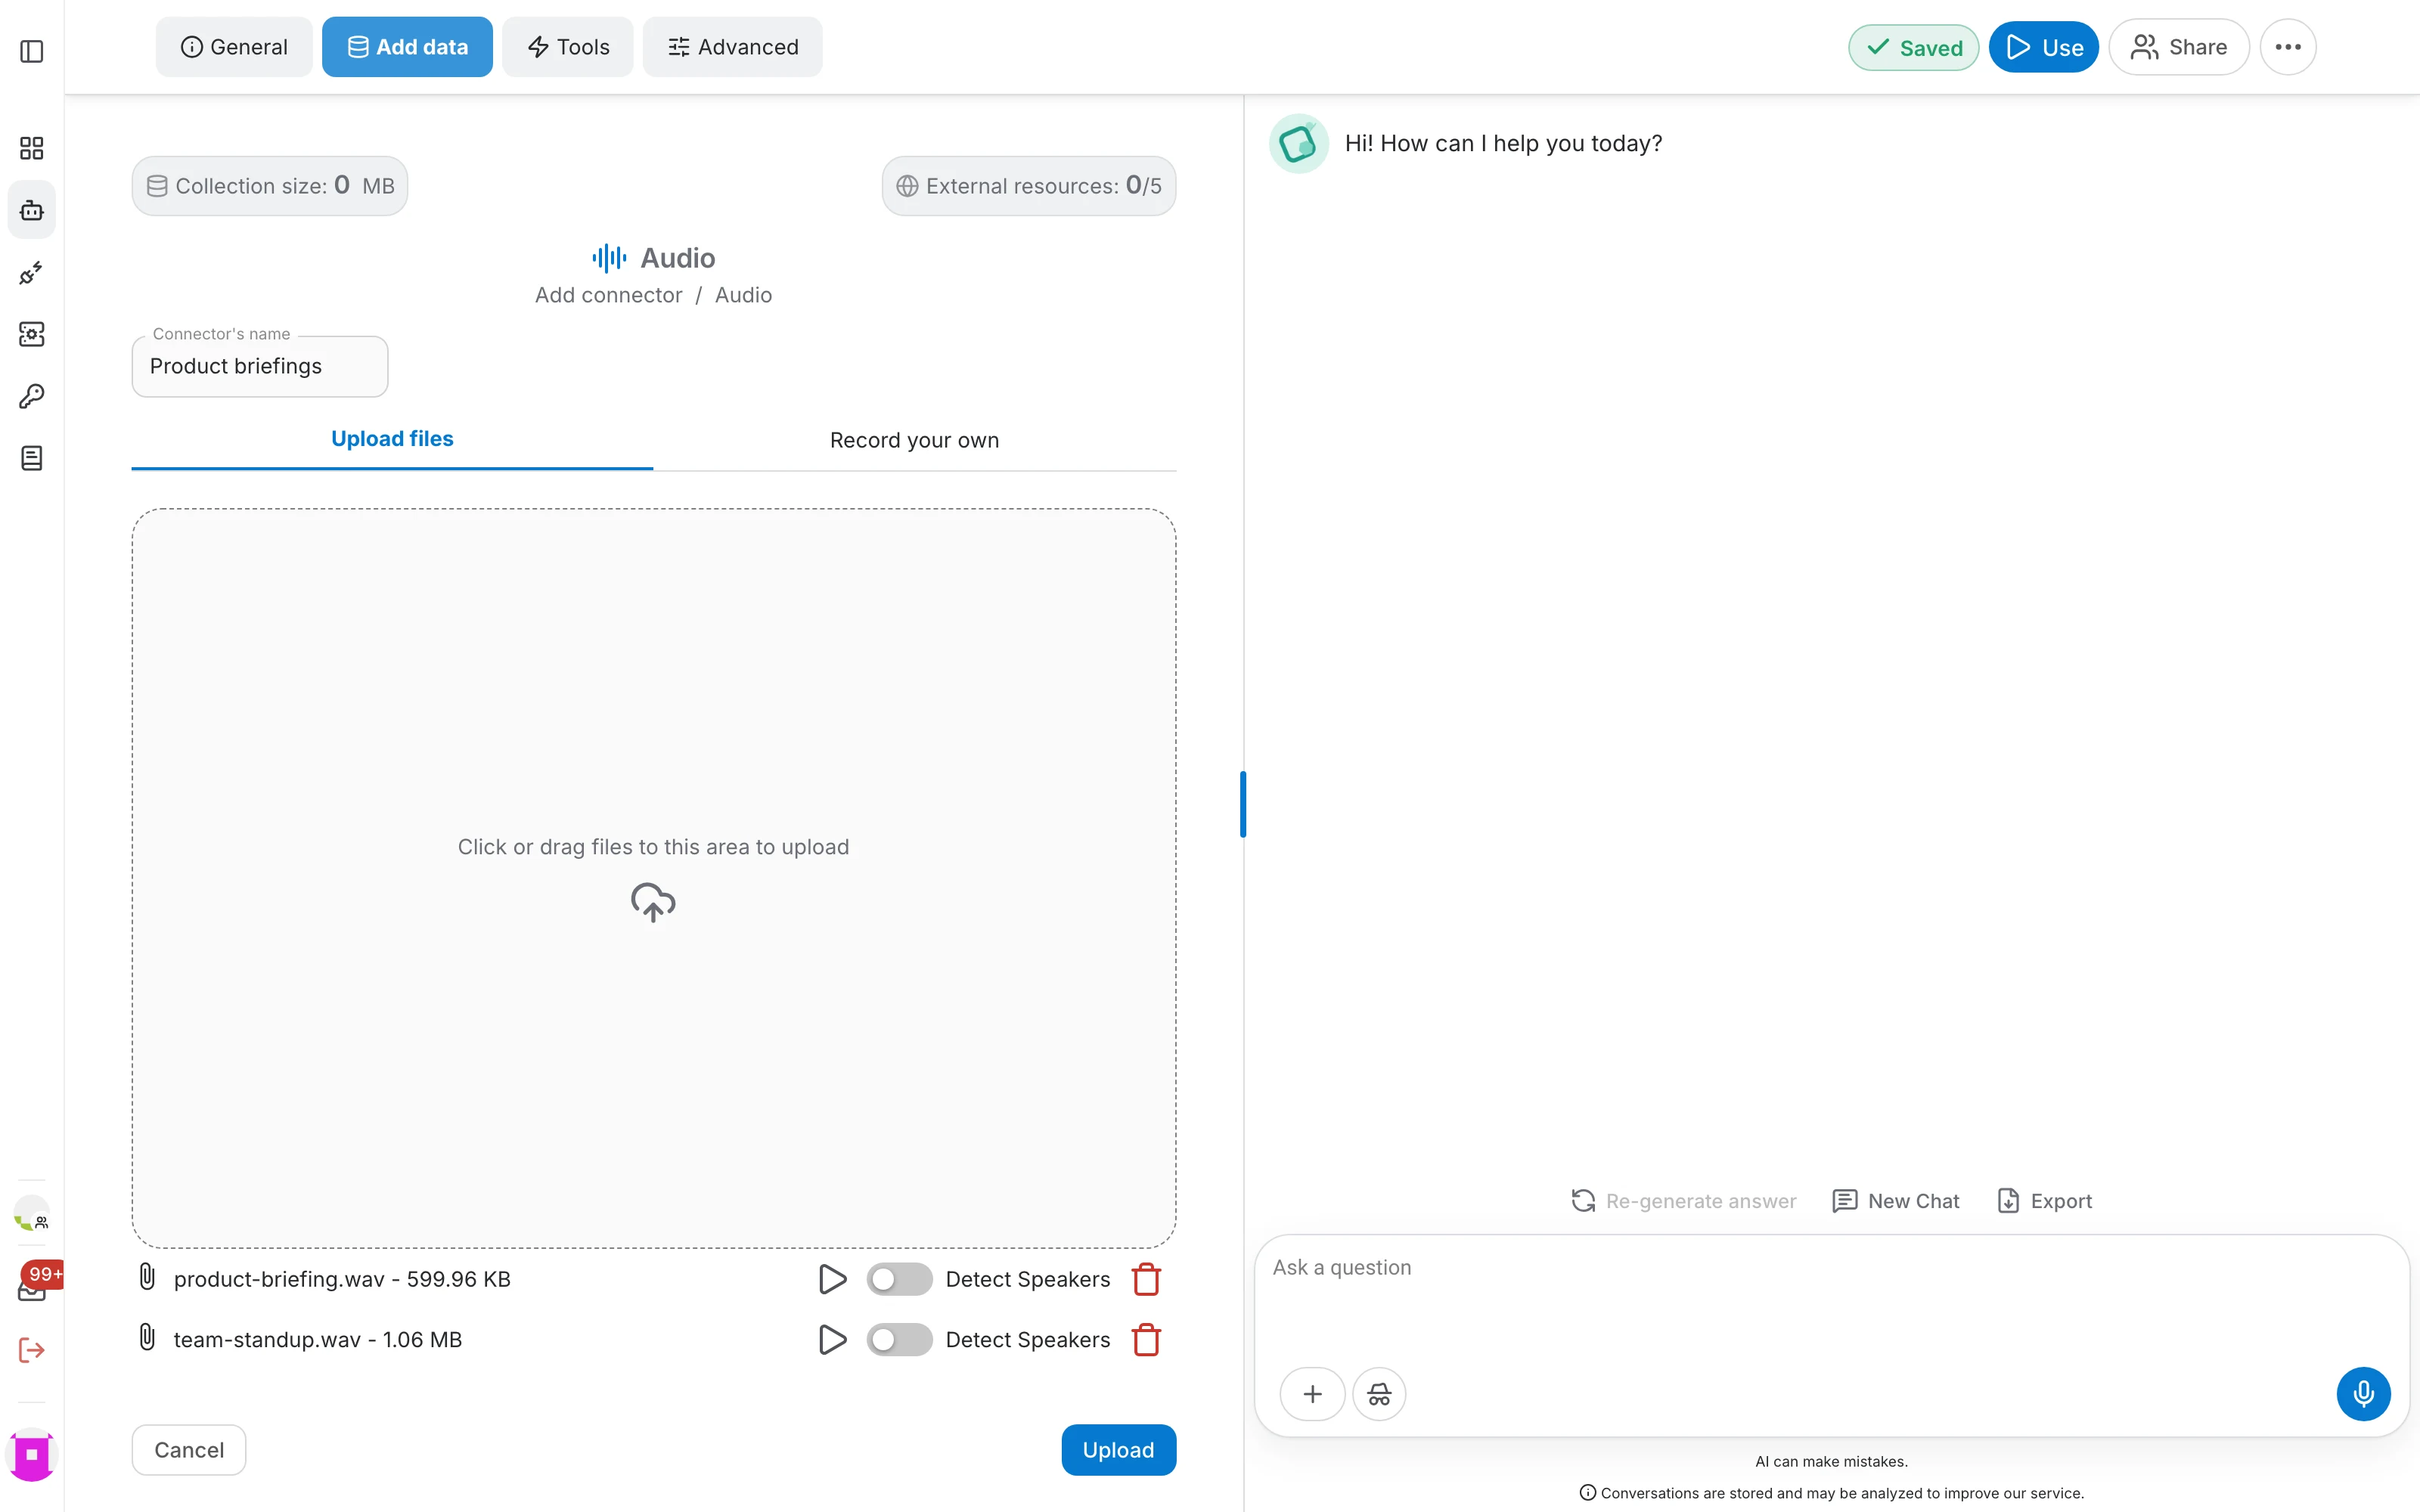
Every file in the list — uploaded or recorded — carries a Detect Speakers switch:
- Transcription (switch off, the default) — the whole audio becomes plain text, without separating speakers.
- Diarization (switch on) — the audio is split per speaker, and each segment is labelled SPEAKER_00, SPEAKER_01 and so on, which you can rename.
When everything you want is in the list, click Upload to save the connector. Uploading and transcription then run in the background — you can leave the page.
Transcription and status
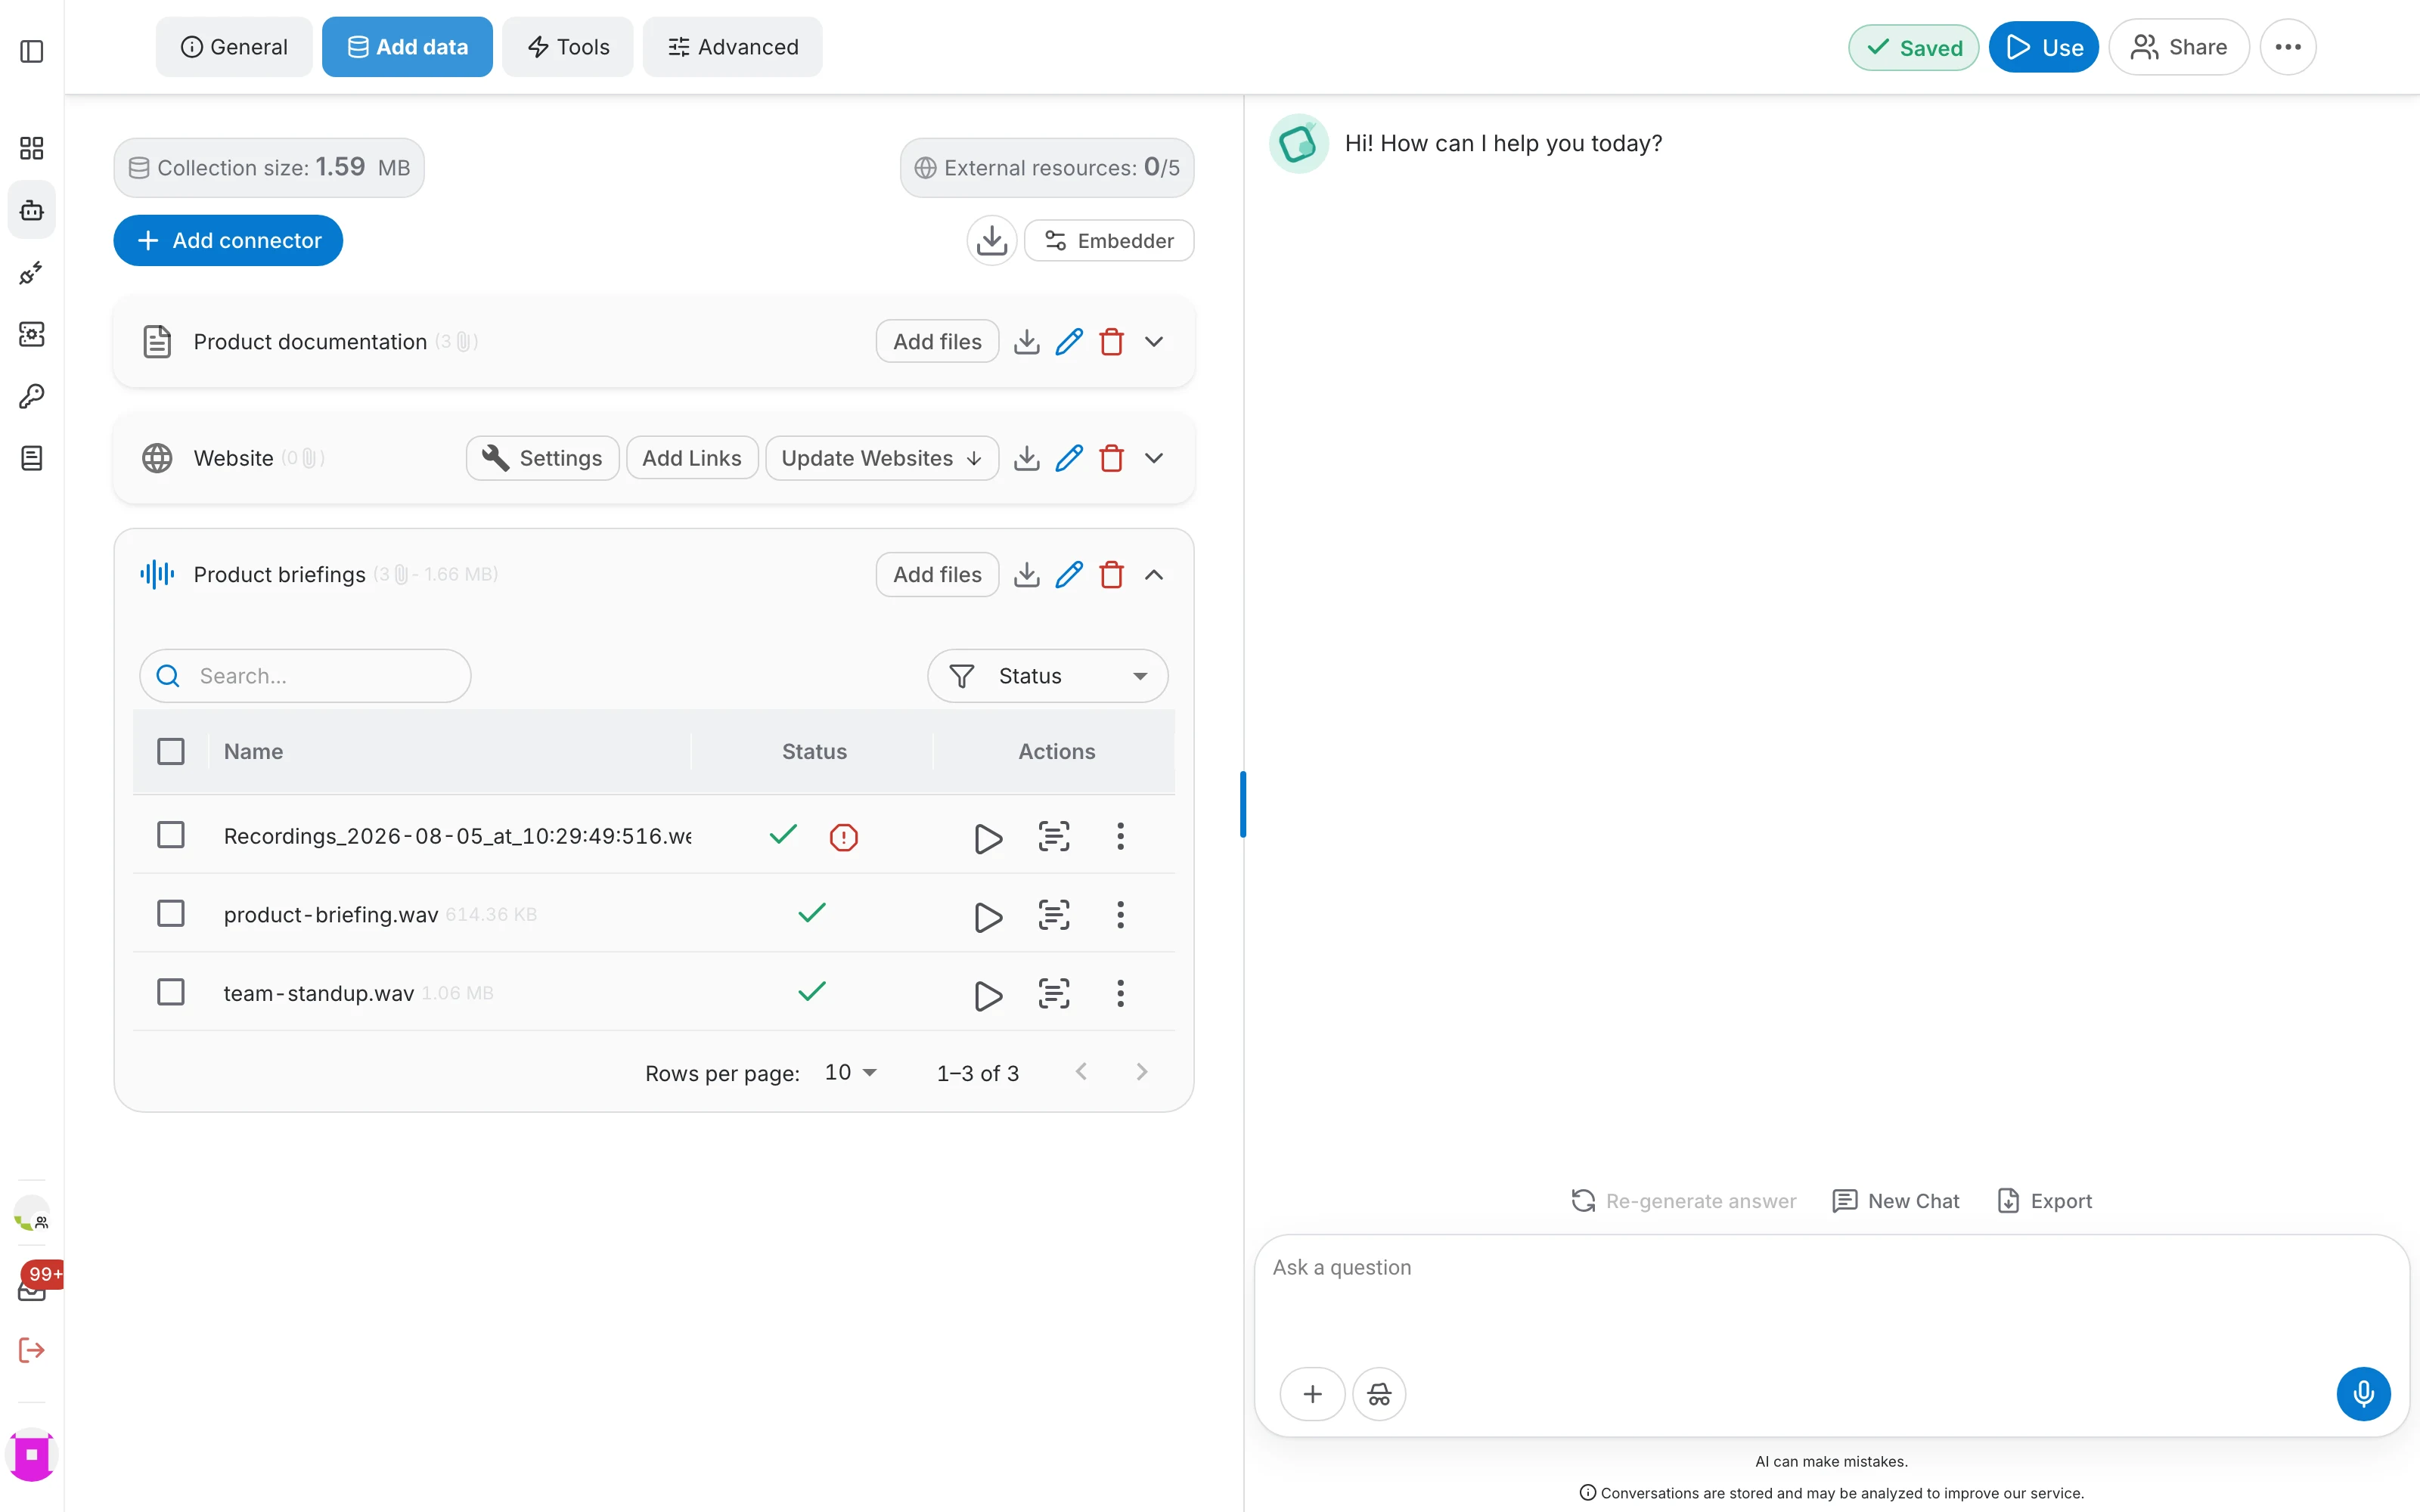
Expand the connector in the connector list to see every audio file it holds and where it is:
- The status column shows a green check when the audio has been transcribed and indexed, and a warning icon when something went wrong — a silent or unintelligible audio file, for instance.
- The play icon plays the audio without leaving the page.
- The transcript icon opens the transcript of that audio file.
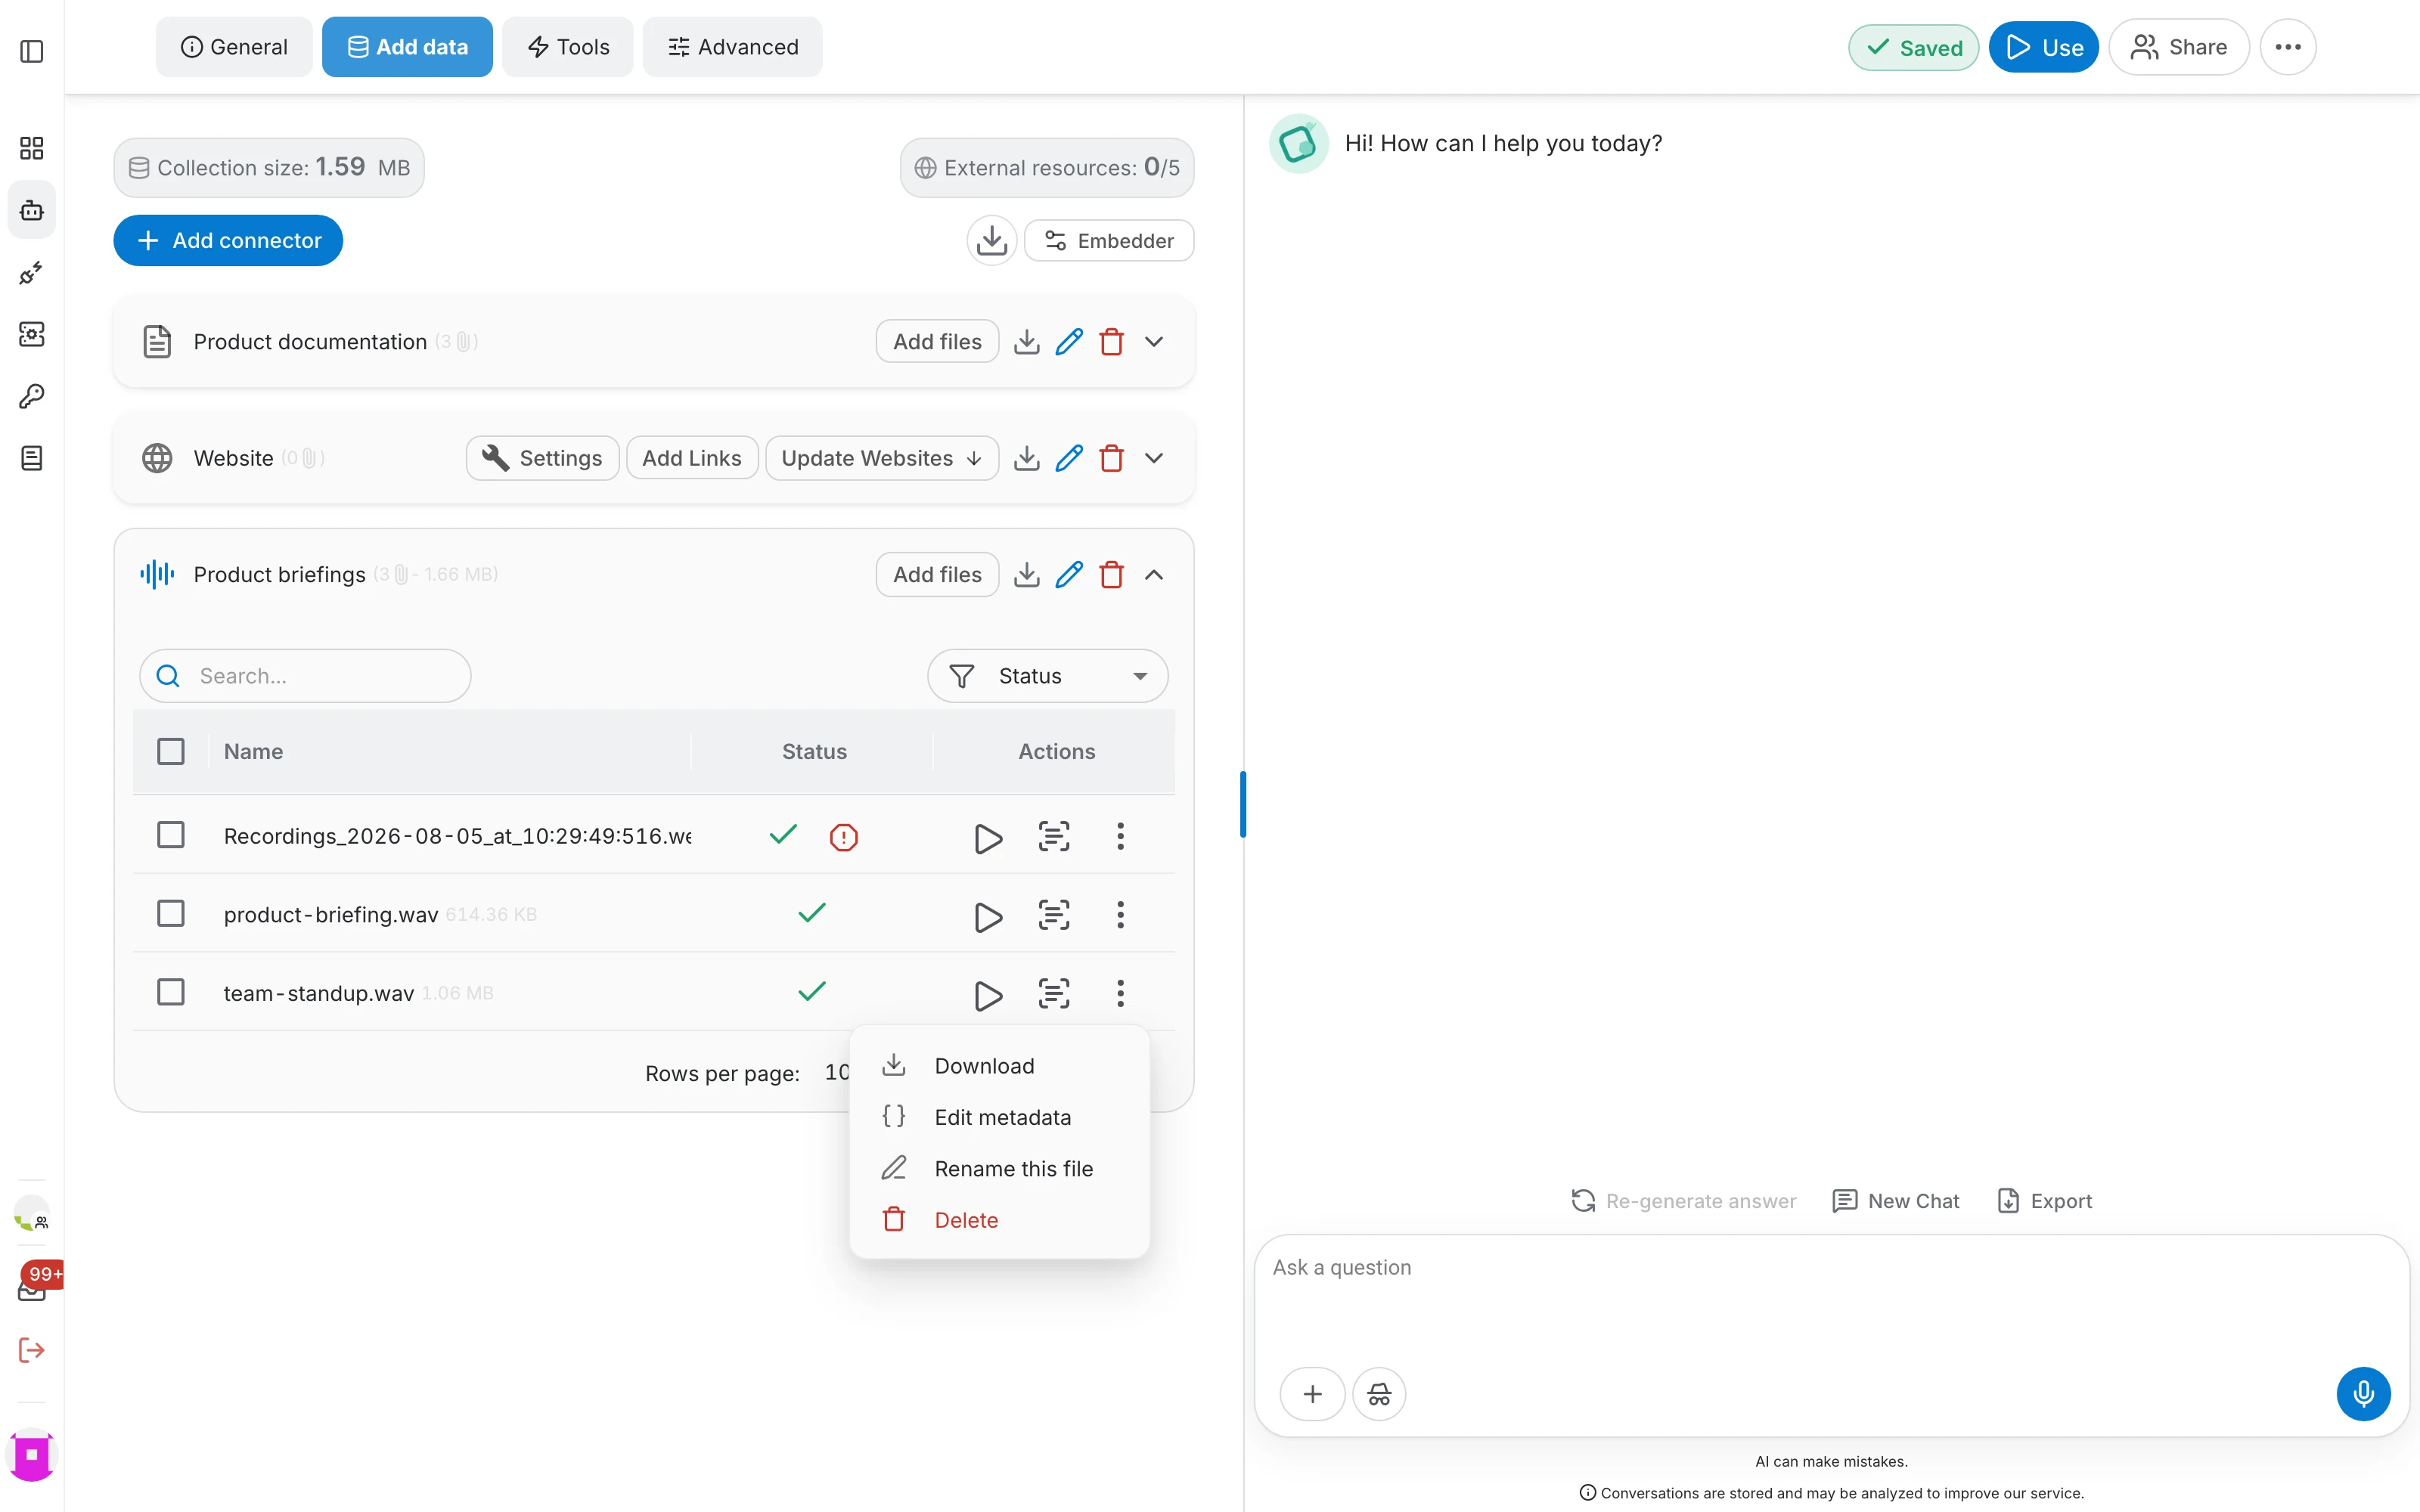
- The ⋮ menu holds Download, Edit metadata, Rename this file and Delete.
Read the transcript
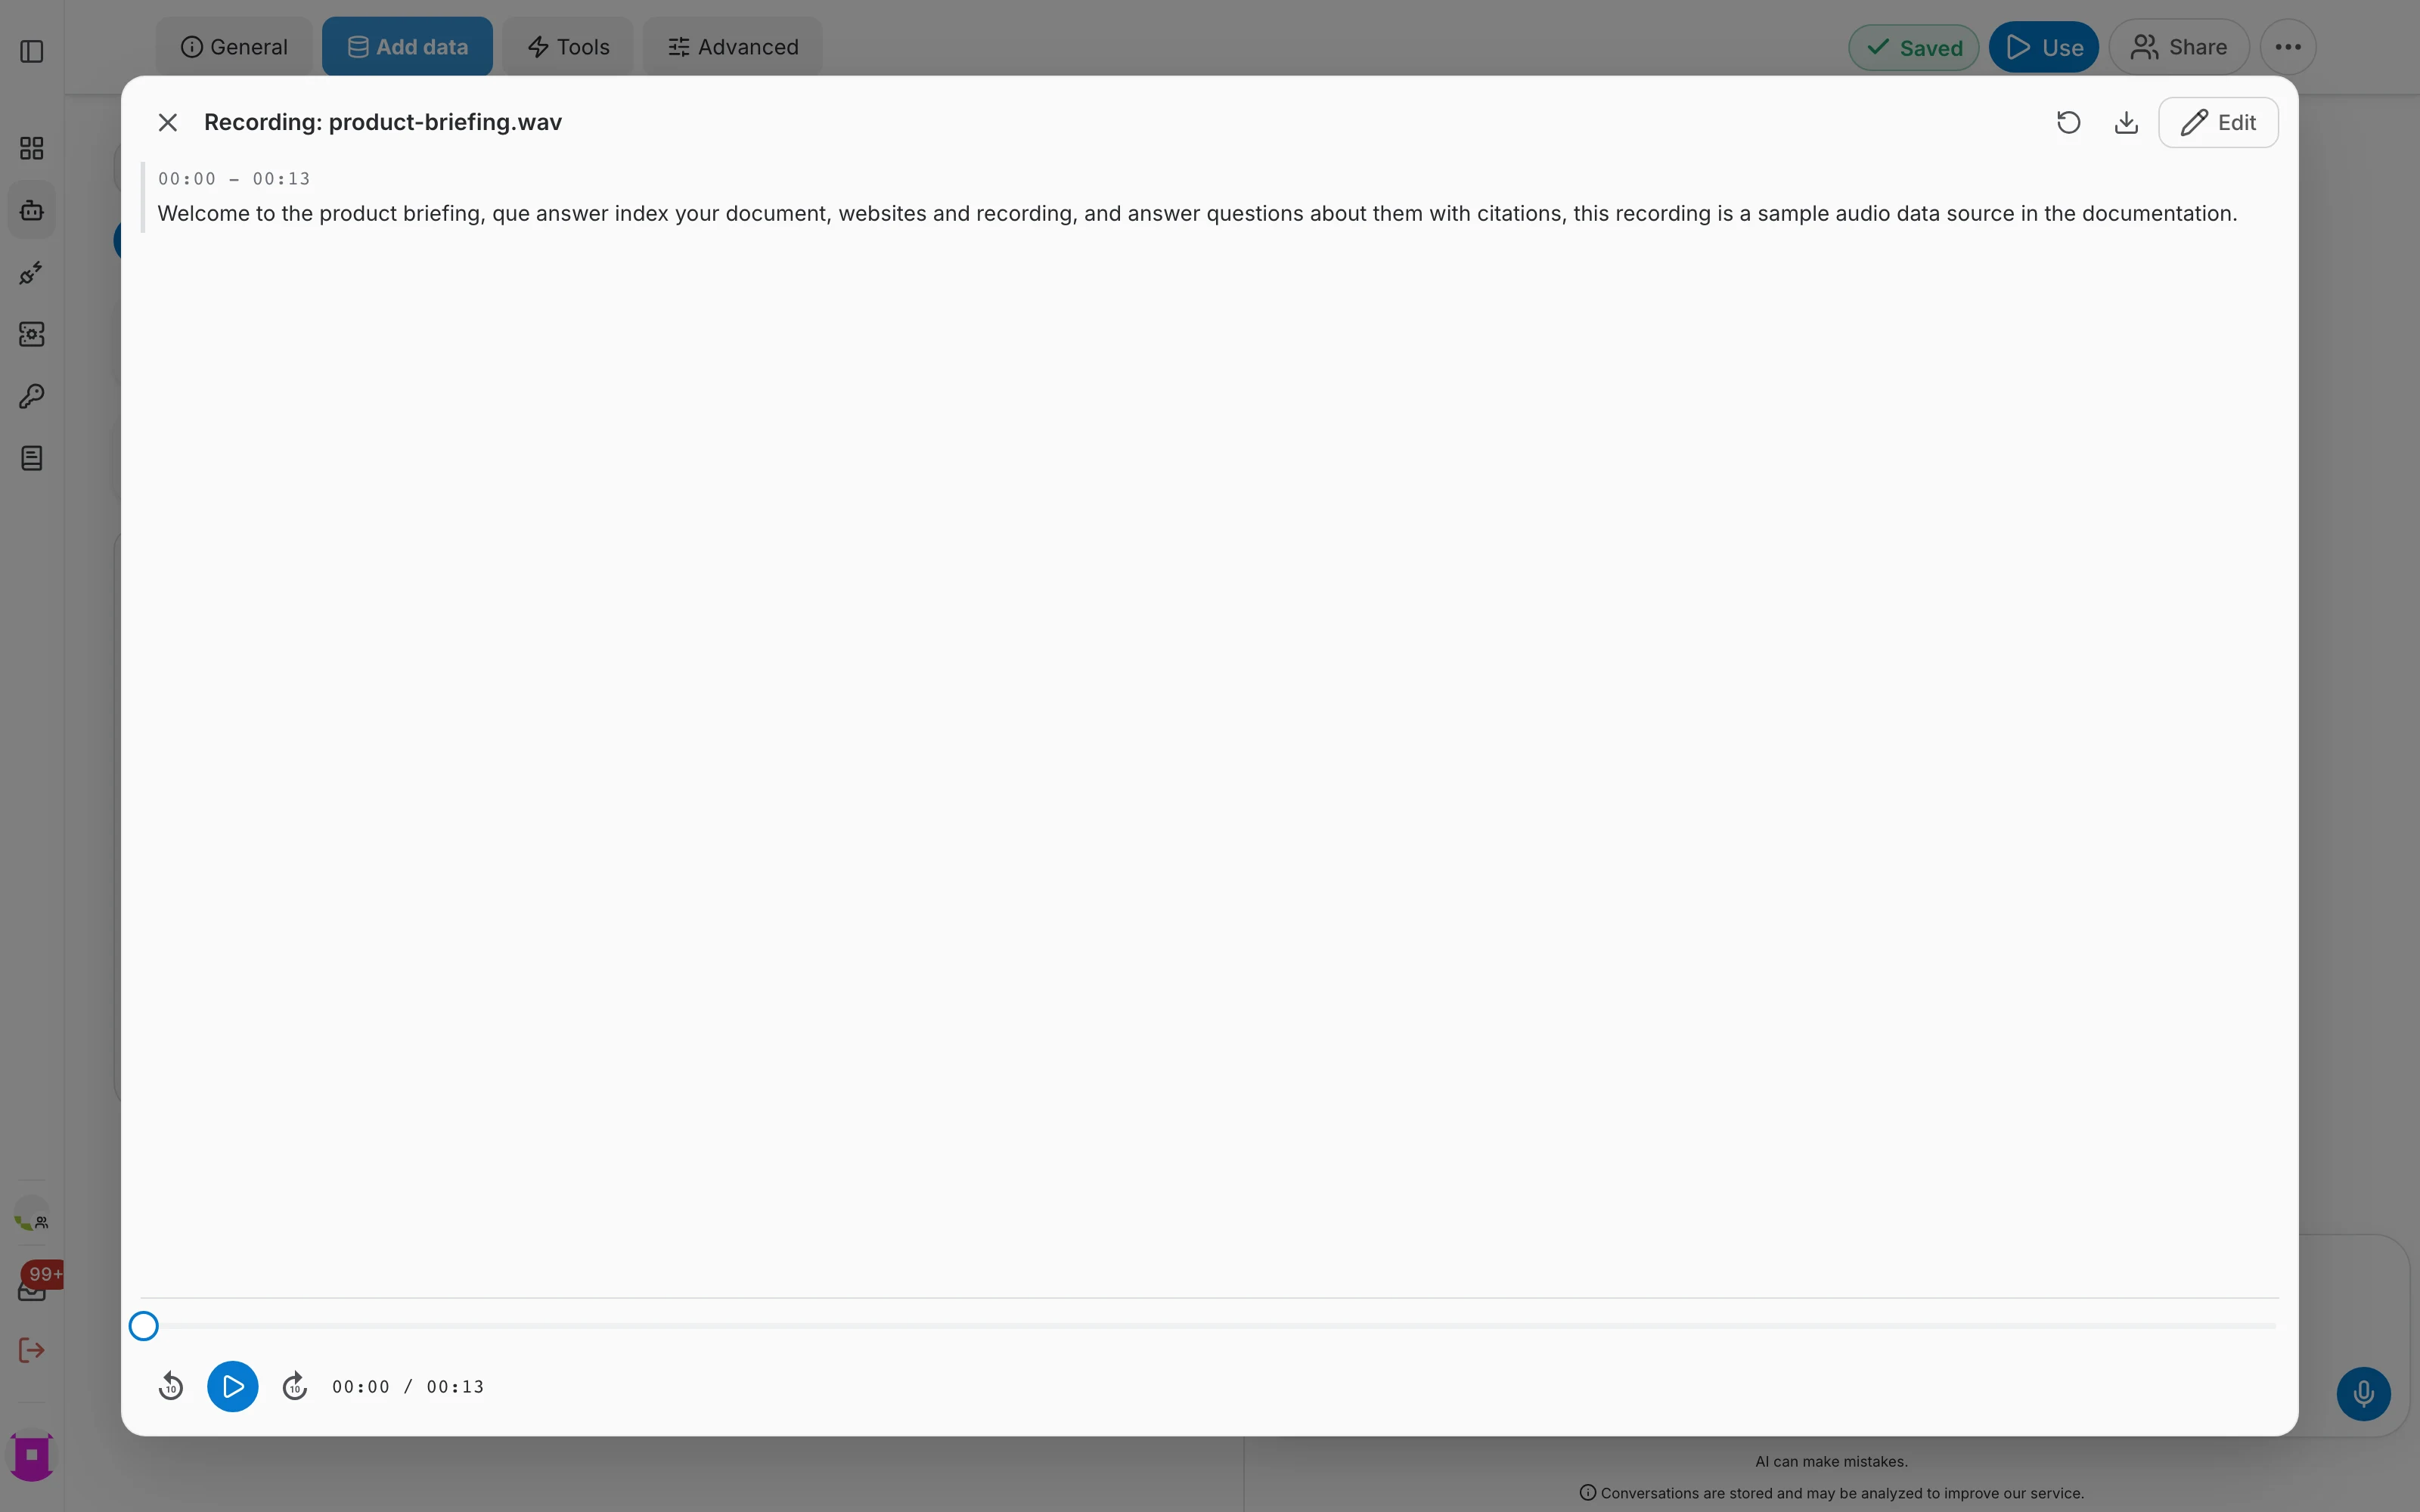
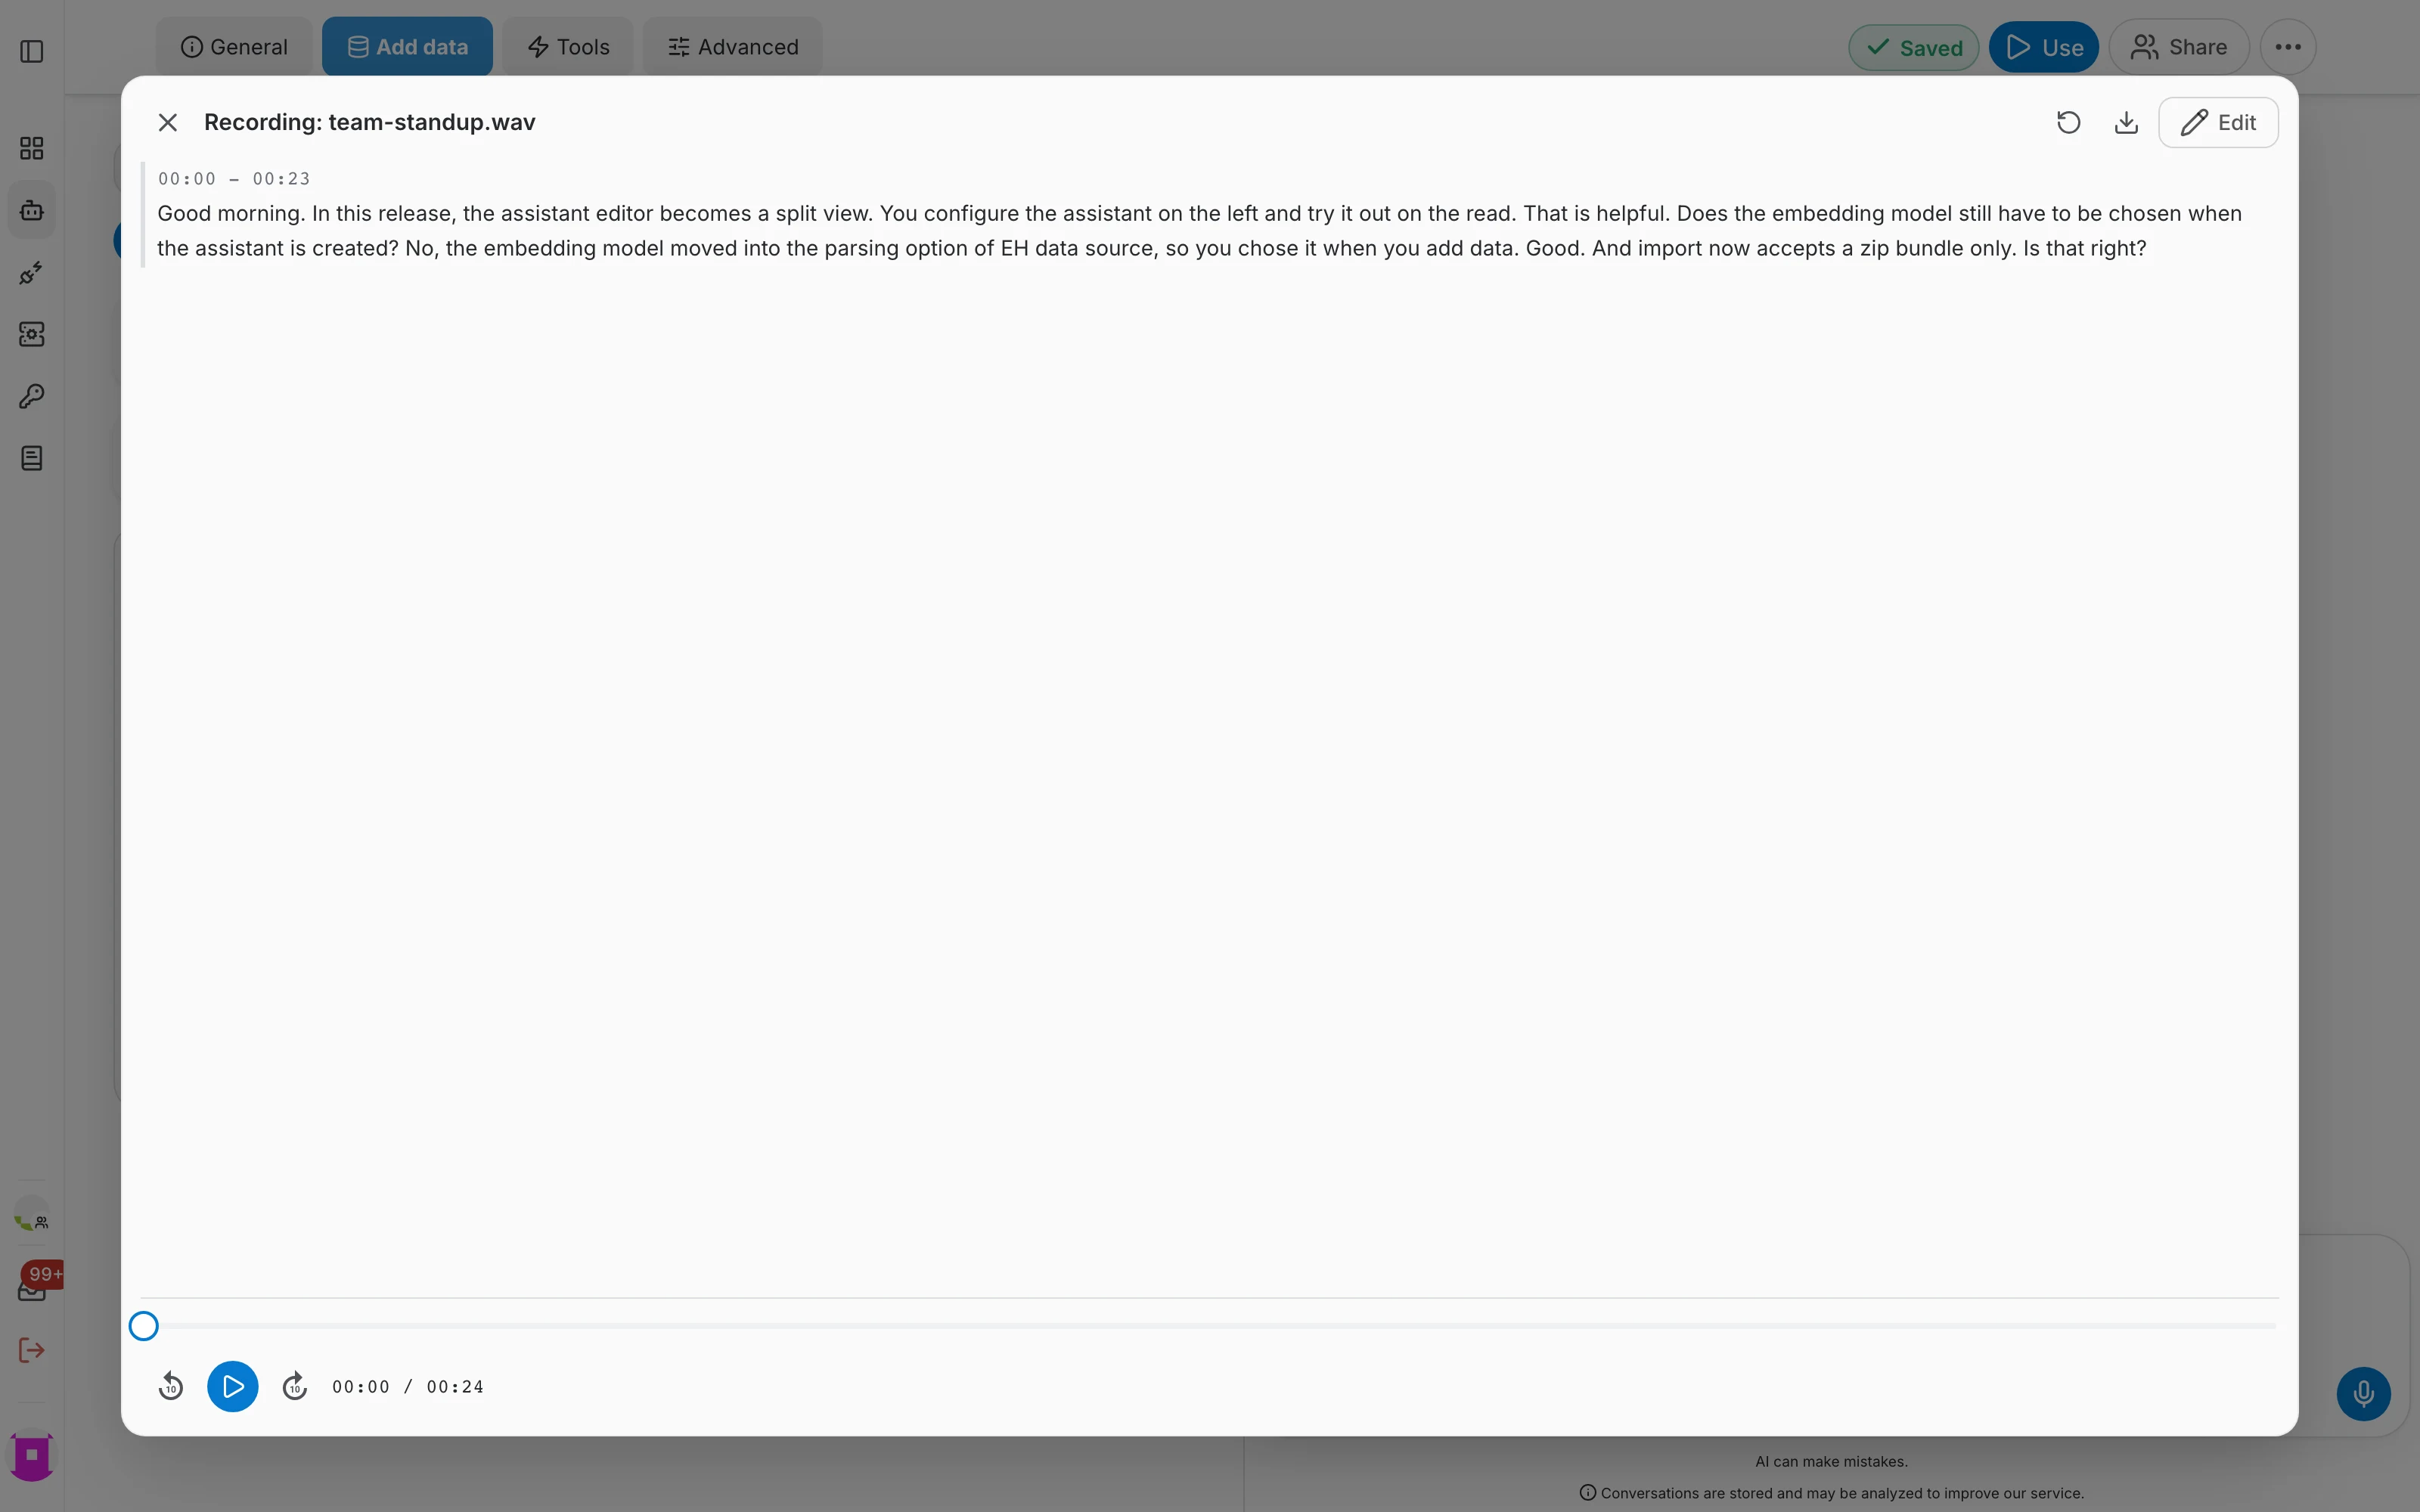
The transcript opens in a full-width view over the editor:
- The text is split into segments, each with the time interval it covers.
- A player at the bottom lets you listen to the audio while you read.
- The download icon in the header saves the transcript as a file.
- Edit switches from reading to editing, which is where speakers and segments can be changed.
Reprocess Audio
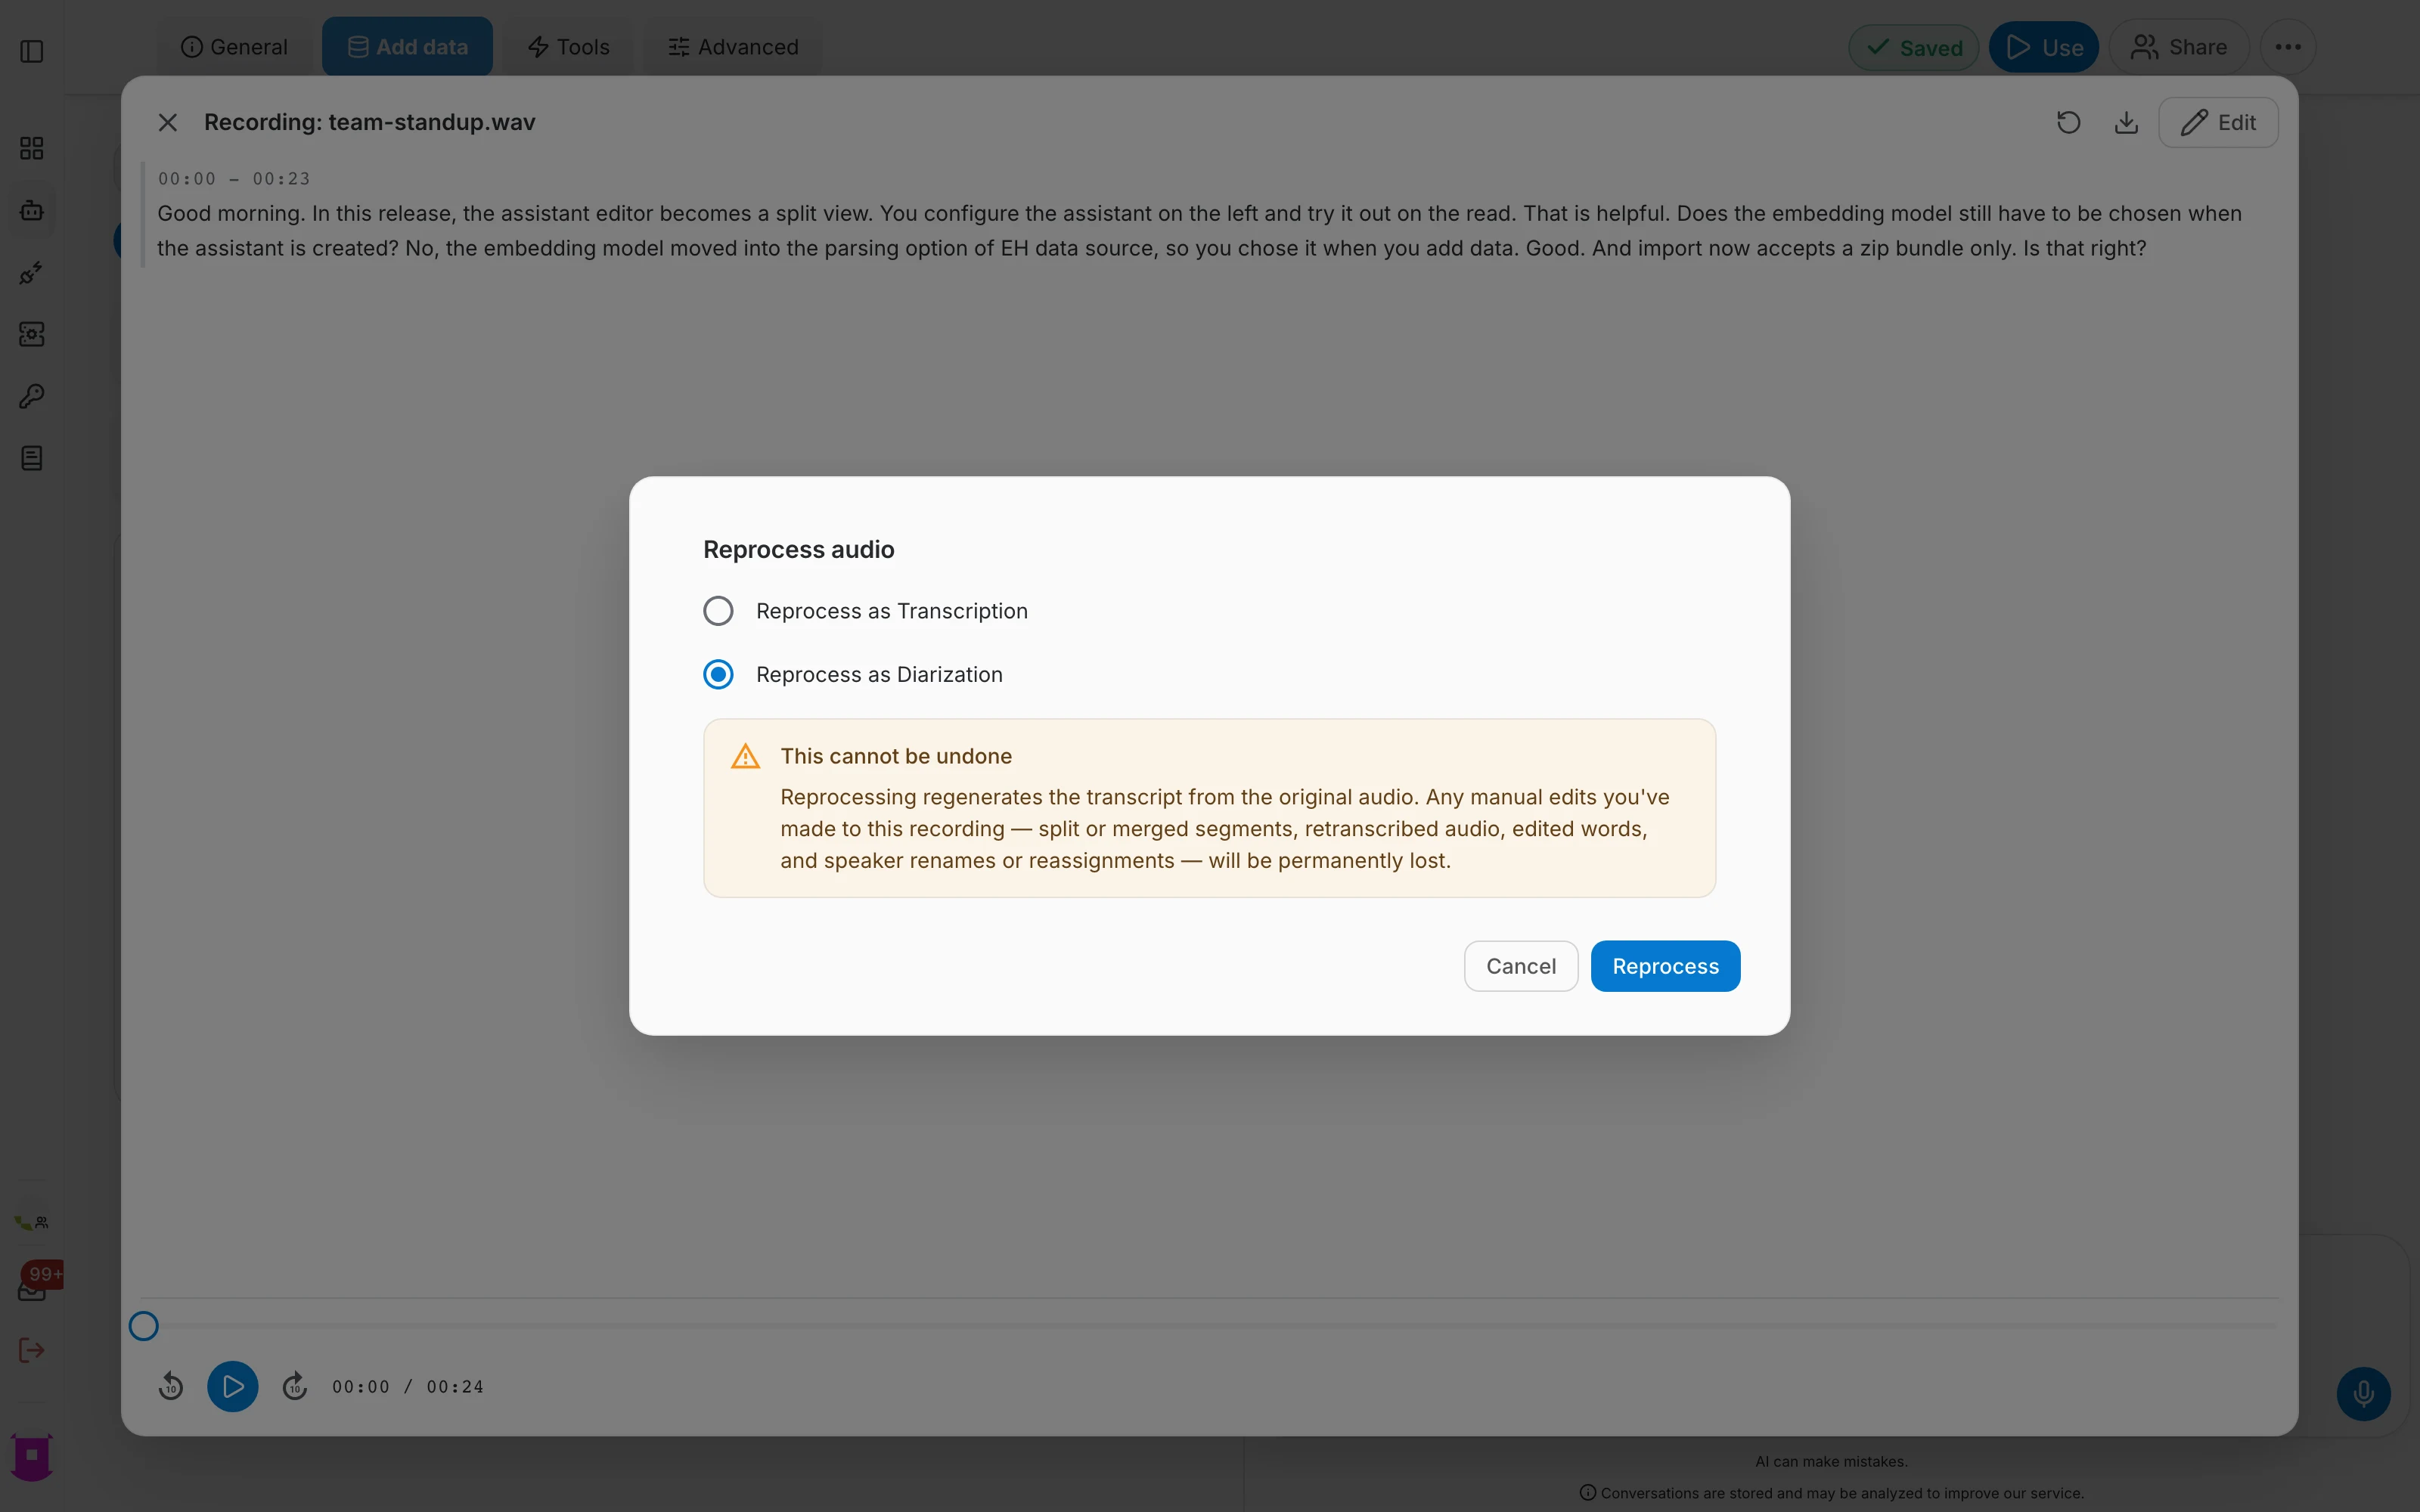
Once an audio file has been processed, you can reprocess it at any time to switch it to the other mode.
To switch between the two, open the transcript and click the ↻ reprocess icon in its header. Pick Reprocess as Transcription or Reprocess as Diarization, then confirm with Reprocess.
Correcting a transcript
Open a transcript and click Edit to switch to editing. What you can change there depends on how the audio was processed:
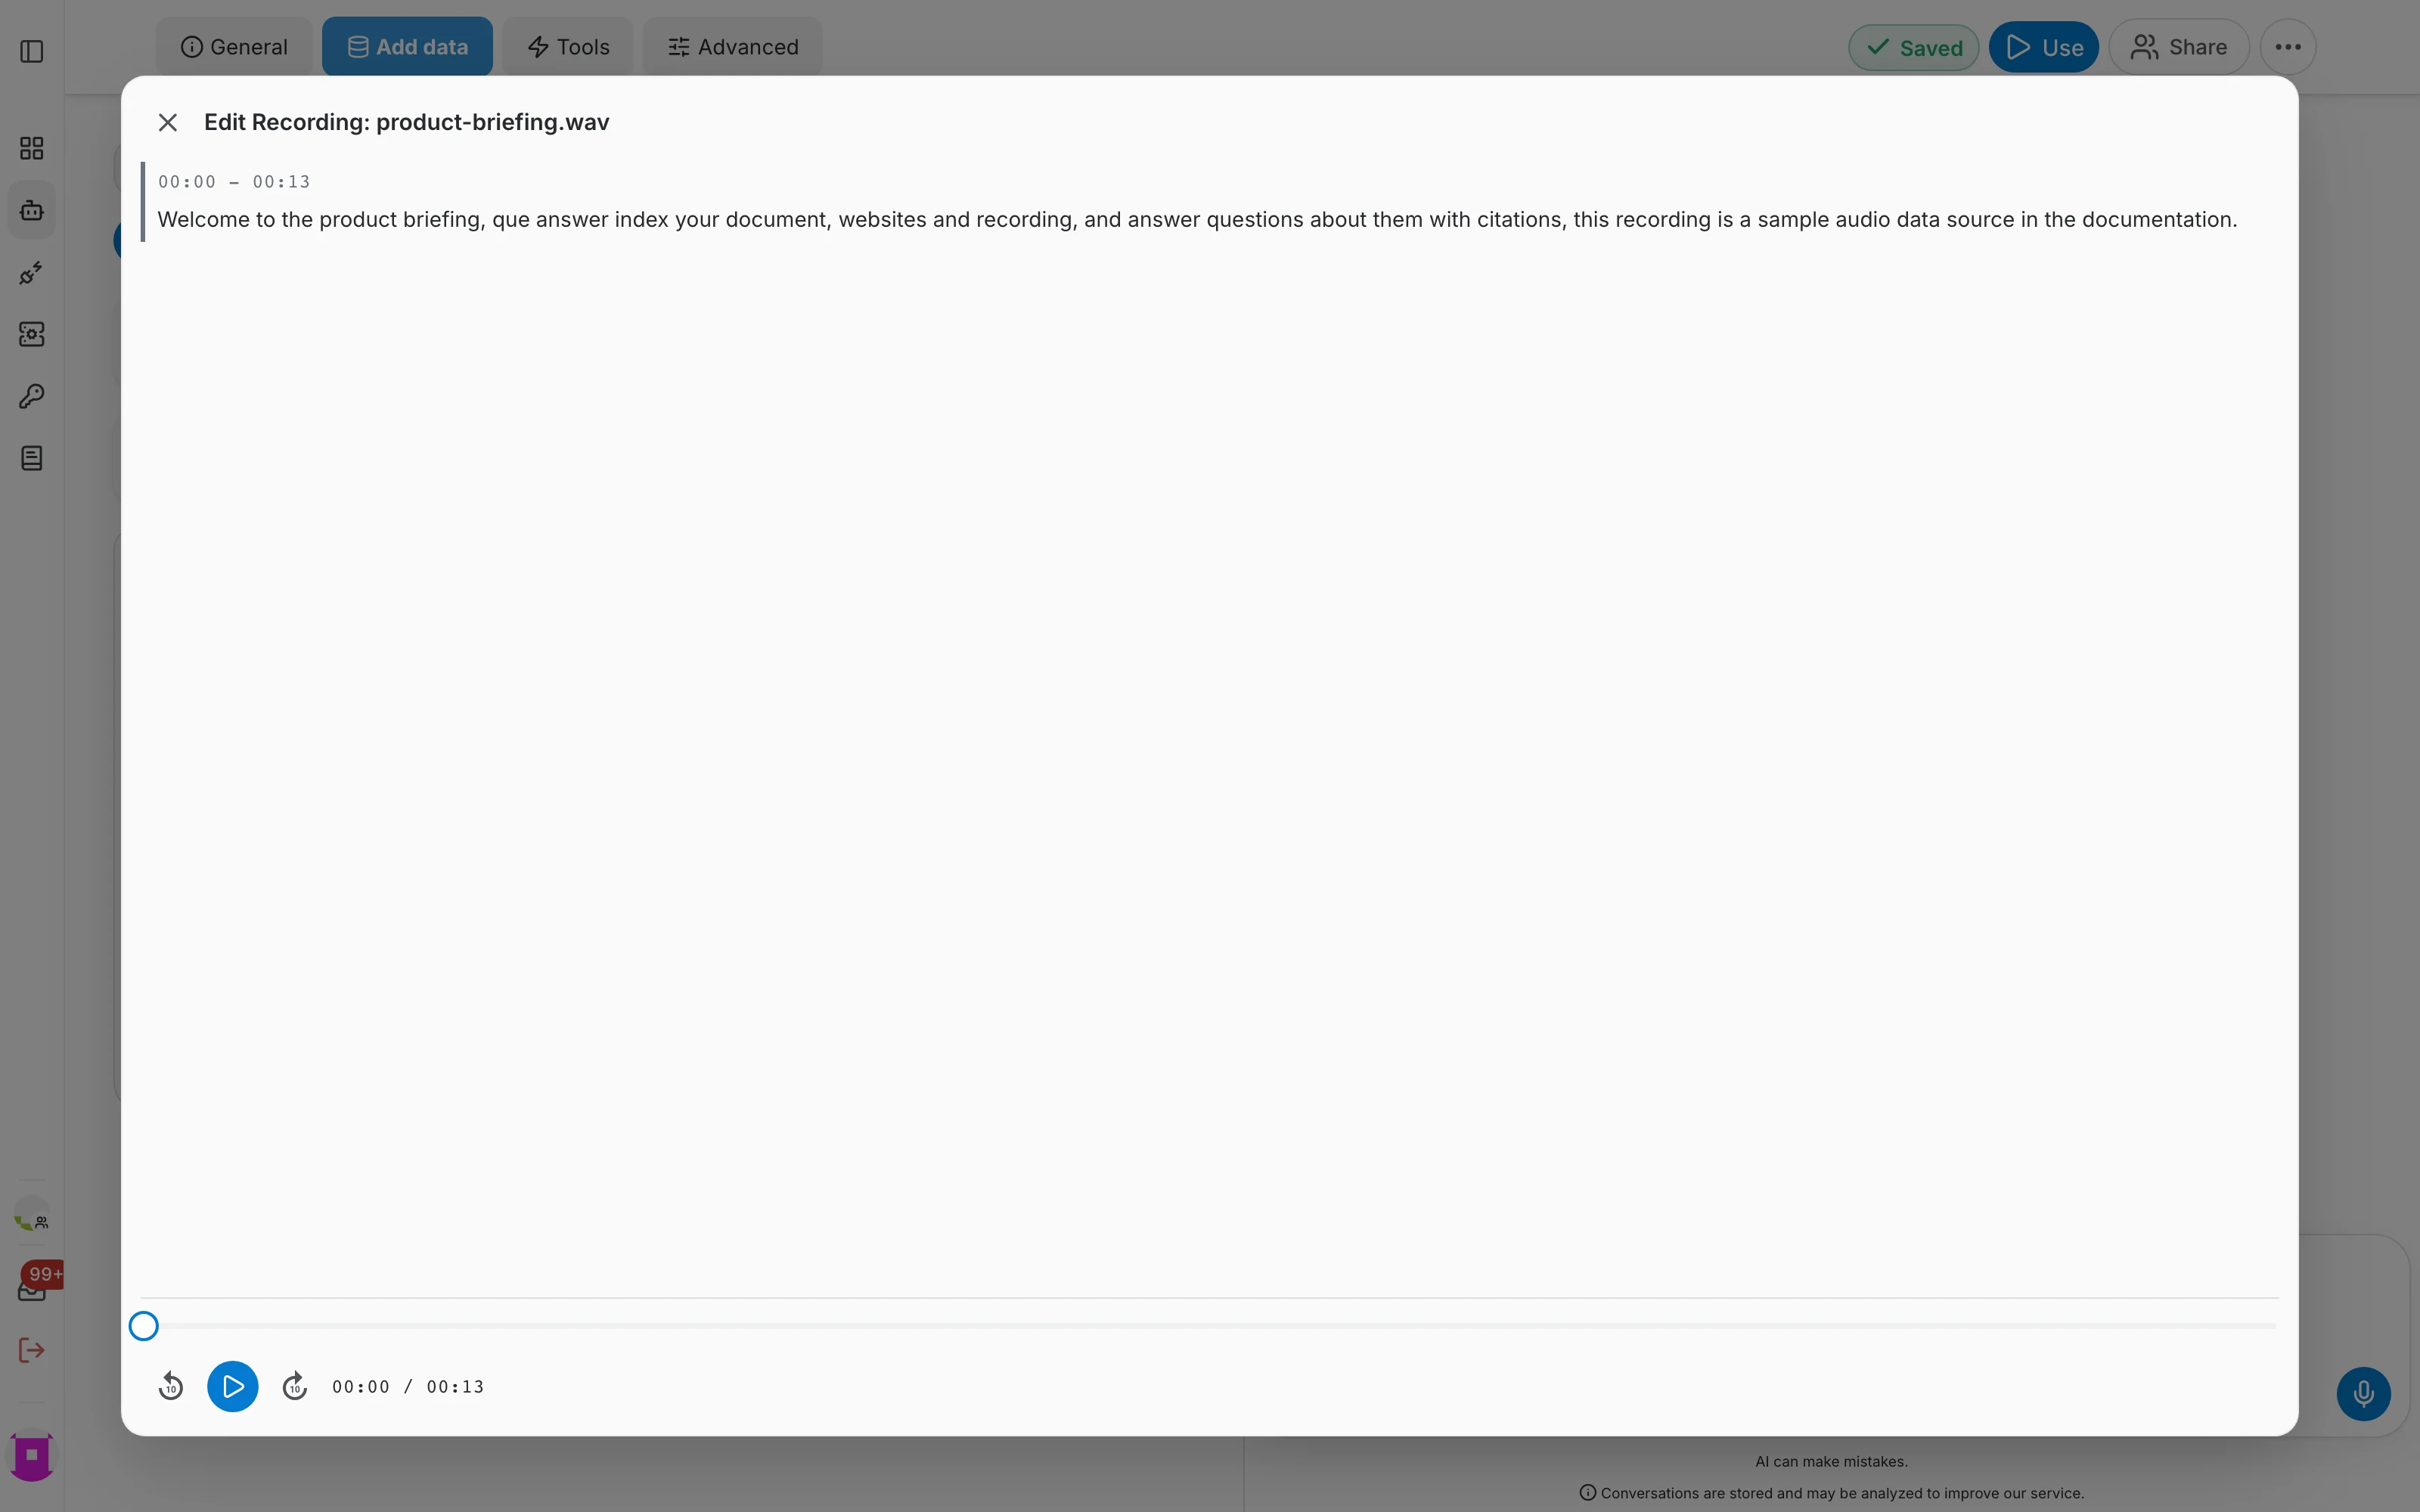
- Plain transcript — the transcript is plain text with its time interval, and the text is the only thing you can change. There are no speakers to name, and no split, merge or retranscribe tools.
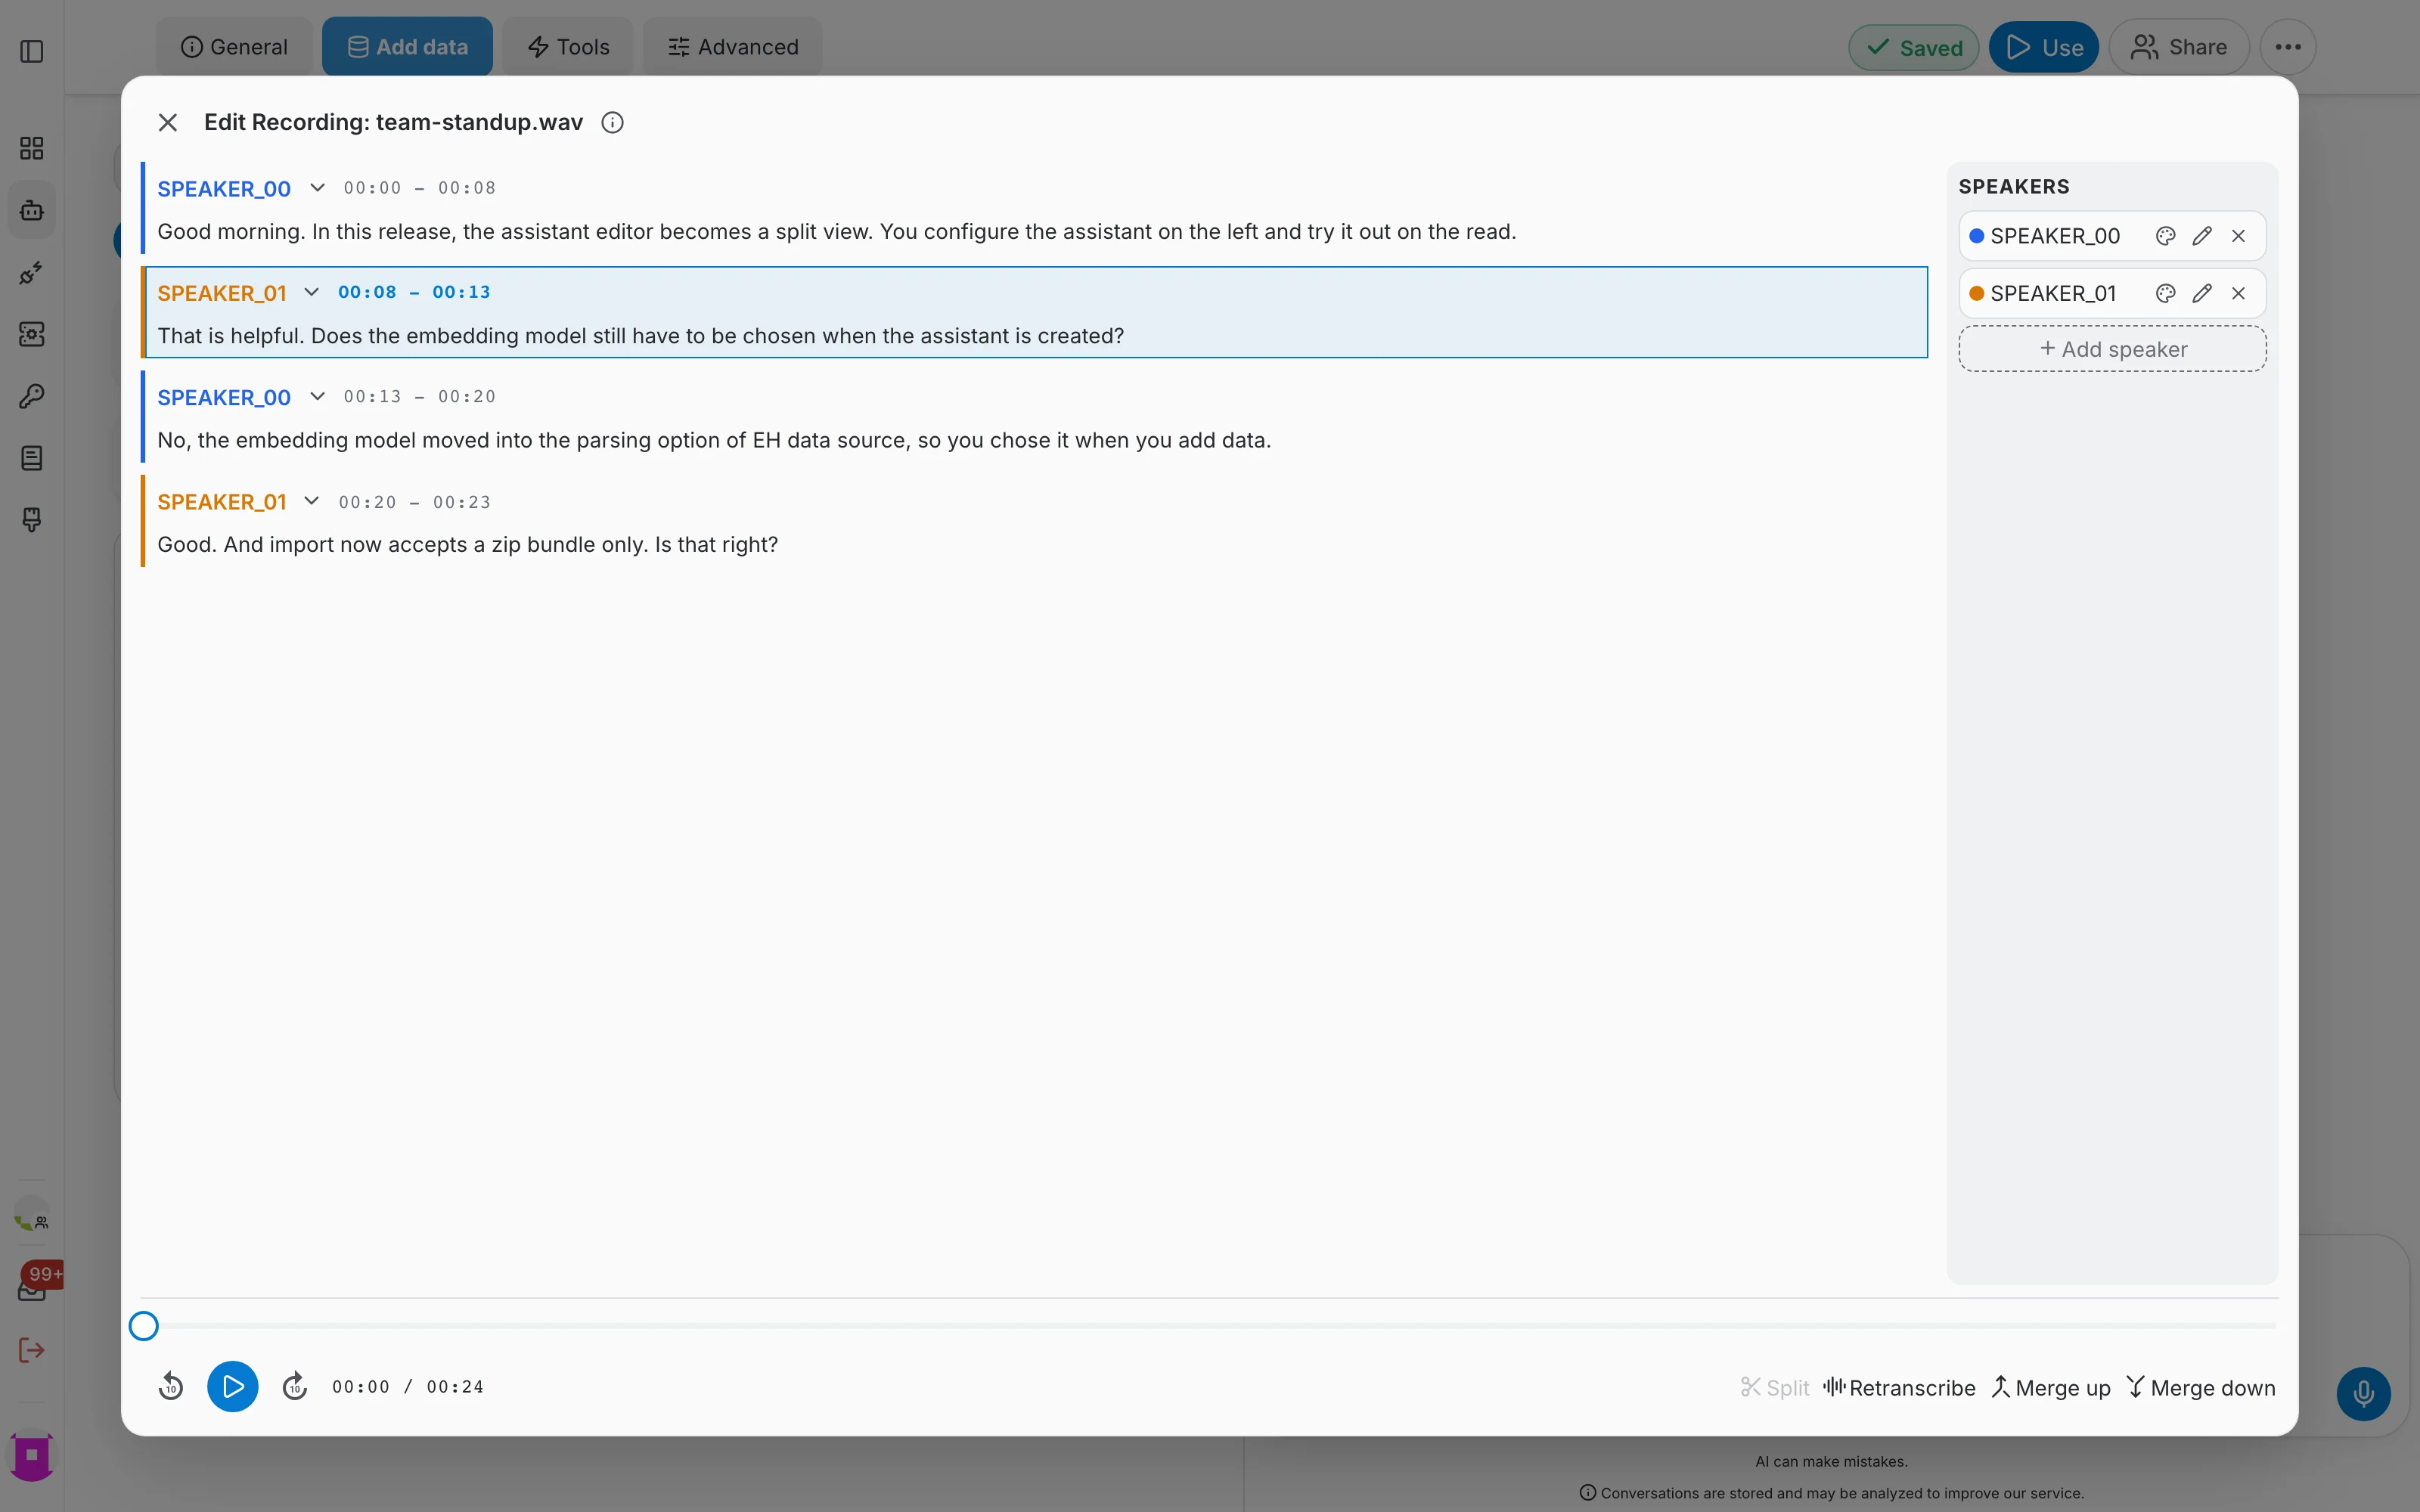
- Diarized transcript — on top of correcting the text, a SPEAKERS panel appears on the right — rename, recolour, remove or add a speaker, and reassign a segment to another one — and segment tools appear along the bottom: Split, Merge up, Merge down and Retranscribe.
Speakers
The SPEAKERS panel lists everyone the diarization found. Each entry carries the colour used for its segments in the transcript:
- Rename (pencil) — replaces SPEAKER_00 with a real name, everywhere that speaker appears.
- Colour (palette) — changes the colour that marks that speaker's segments.
- Remove (×) — deletes a speaker the diarization invented, for example when background noise was mistaken for a voice.
- Add speaker — creates a speaker by hand, for someone the diarization merged into another voice.
- Reassign a segment — use the dropdown next to a segment's speaker name to move that segment to a different speaker.
Segments
Segments are the blocks the transcript is made of. Select one by clicking its timestamp, then use the tools at the bottom of the view:
- Correct the text — click into a segment and type. This is the fix for misheard names and terms.
- Split — drag between two words to select where the break goes, then split the segment there — useful when two speakers ended up in one block.
- Merge up / Merge down — joins the selected segment with the one above or below it, for when a single sentence was cut in two.
- Retranscribe — asks QAnswer to listen again, either to a stretch you select by dragging between words, or to the whole segment by clicking its timestamp.
Listen while you correct
The player at the bottom of the view stays available while you edit:
- Play and pause the audio.
- Skip back or forward ten seconds to hear a passage again.
- Drag the scrubber to jump anywhere in the audio.
- Each segment shows its time interval, so you can find the moment a line was said.
Saving your changes
Save your edits when you are done, or discard them to fall back to the transcript as QAnswer produced it. Saved changes are re-indexed, so the assistant answers from the corrected text from then on.
Using the transcripts
Once transcribed, audio files behave like any other data source:
- Answers cite the audio they came from, and the citation opens the transcript.
- Metadata can be attached to each audio file, so people can filter by meeting, project or date while chatting.
- Add files on the connector row adds more audio files later, without creating a second connector.
- Transcripts can be downloaded, so the text is usable outside QAnswer too.