SharePoint - Data Source
Click on SharePoint to add SharePoint as a data source:
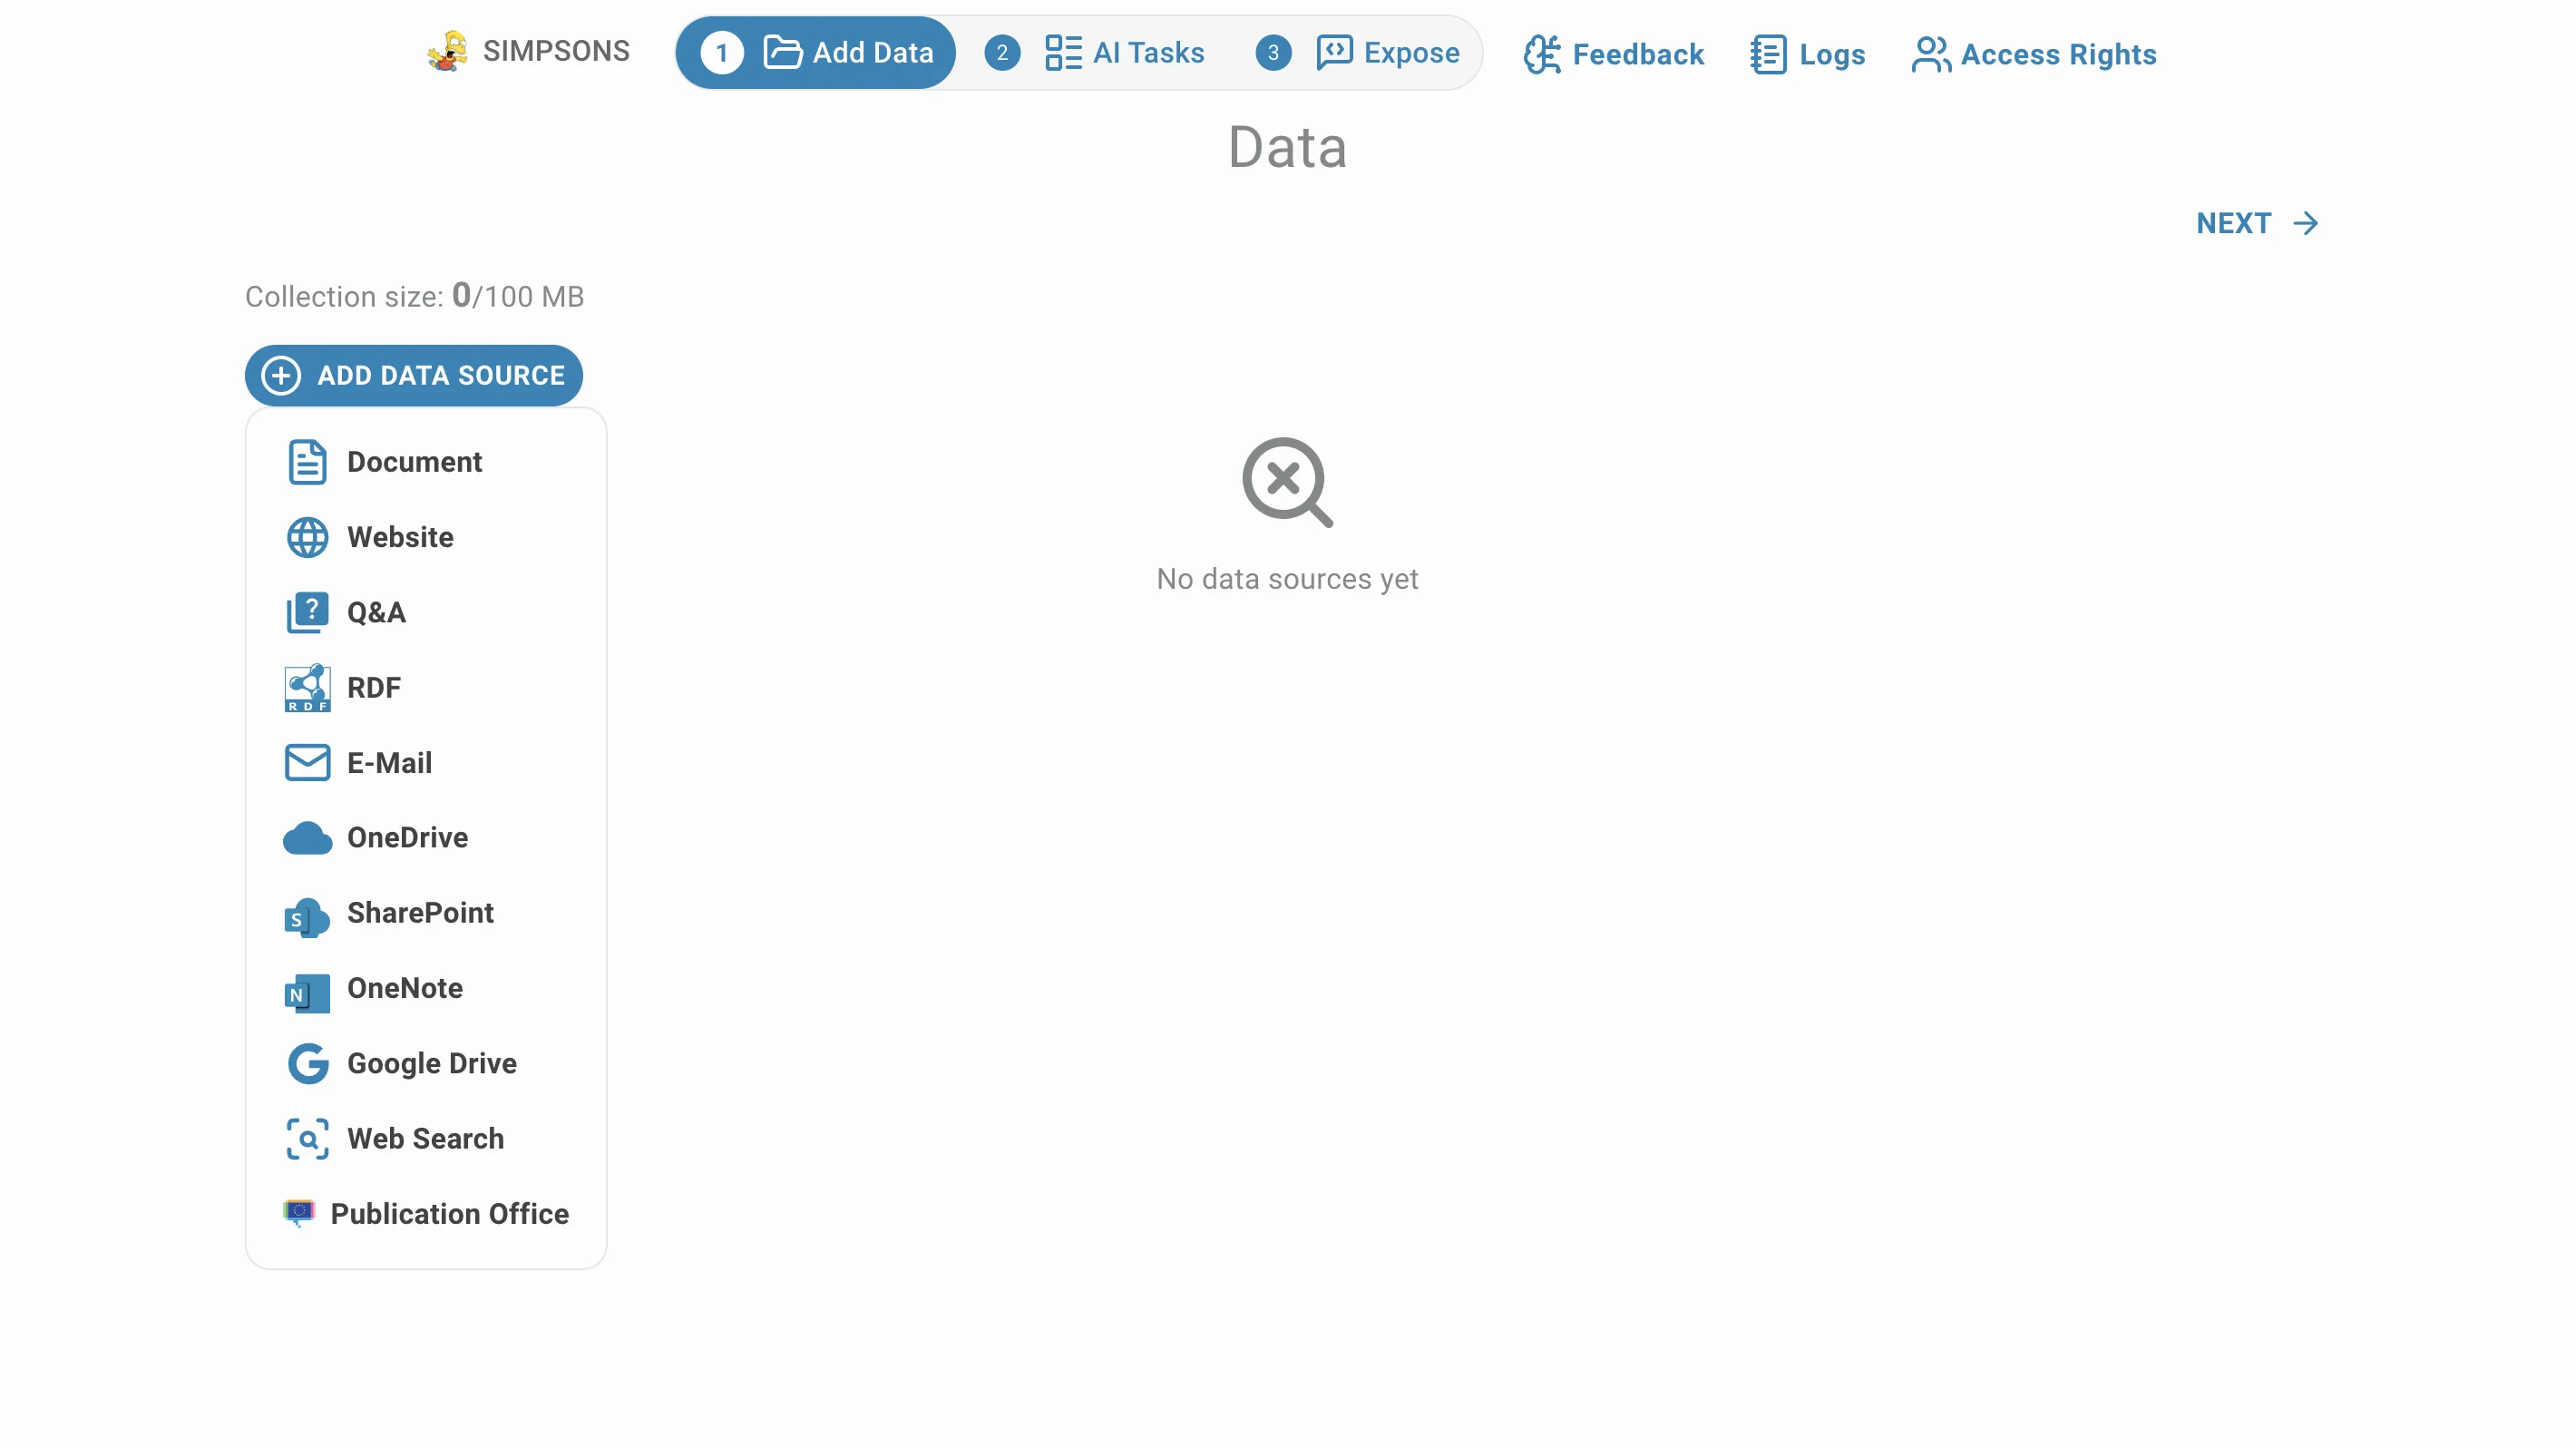
Use one or more SharePoint documents as a data source. This section covers how to link your SharePoint account.
Prerequisites
SharePoint requires an organization account. Obtain your account information from your administrator before proceeding.
Connection
Click Authentication Link or Use credential to start.
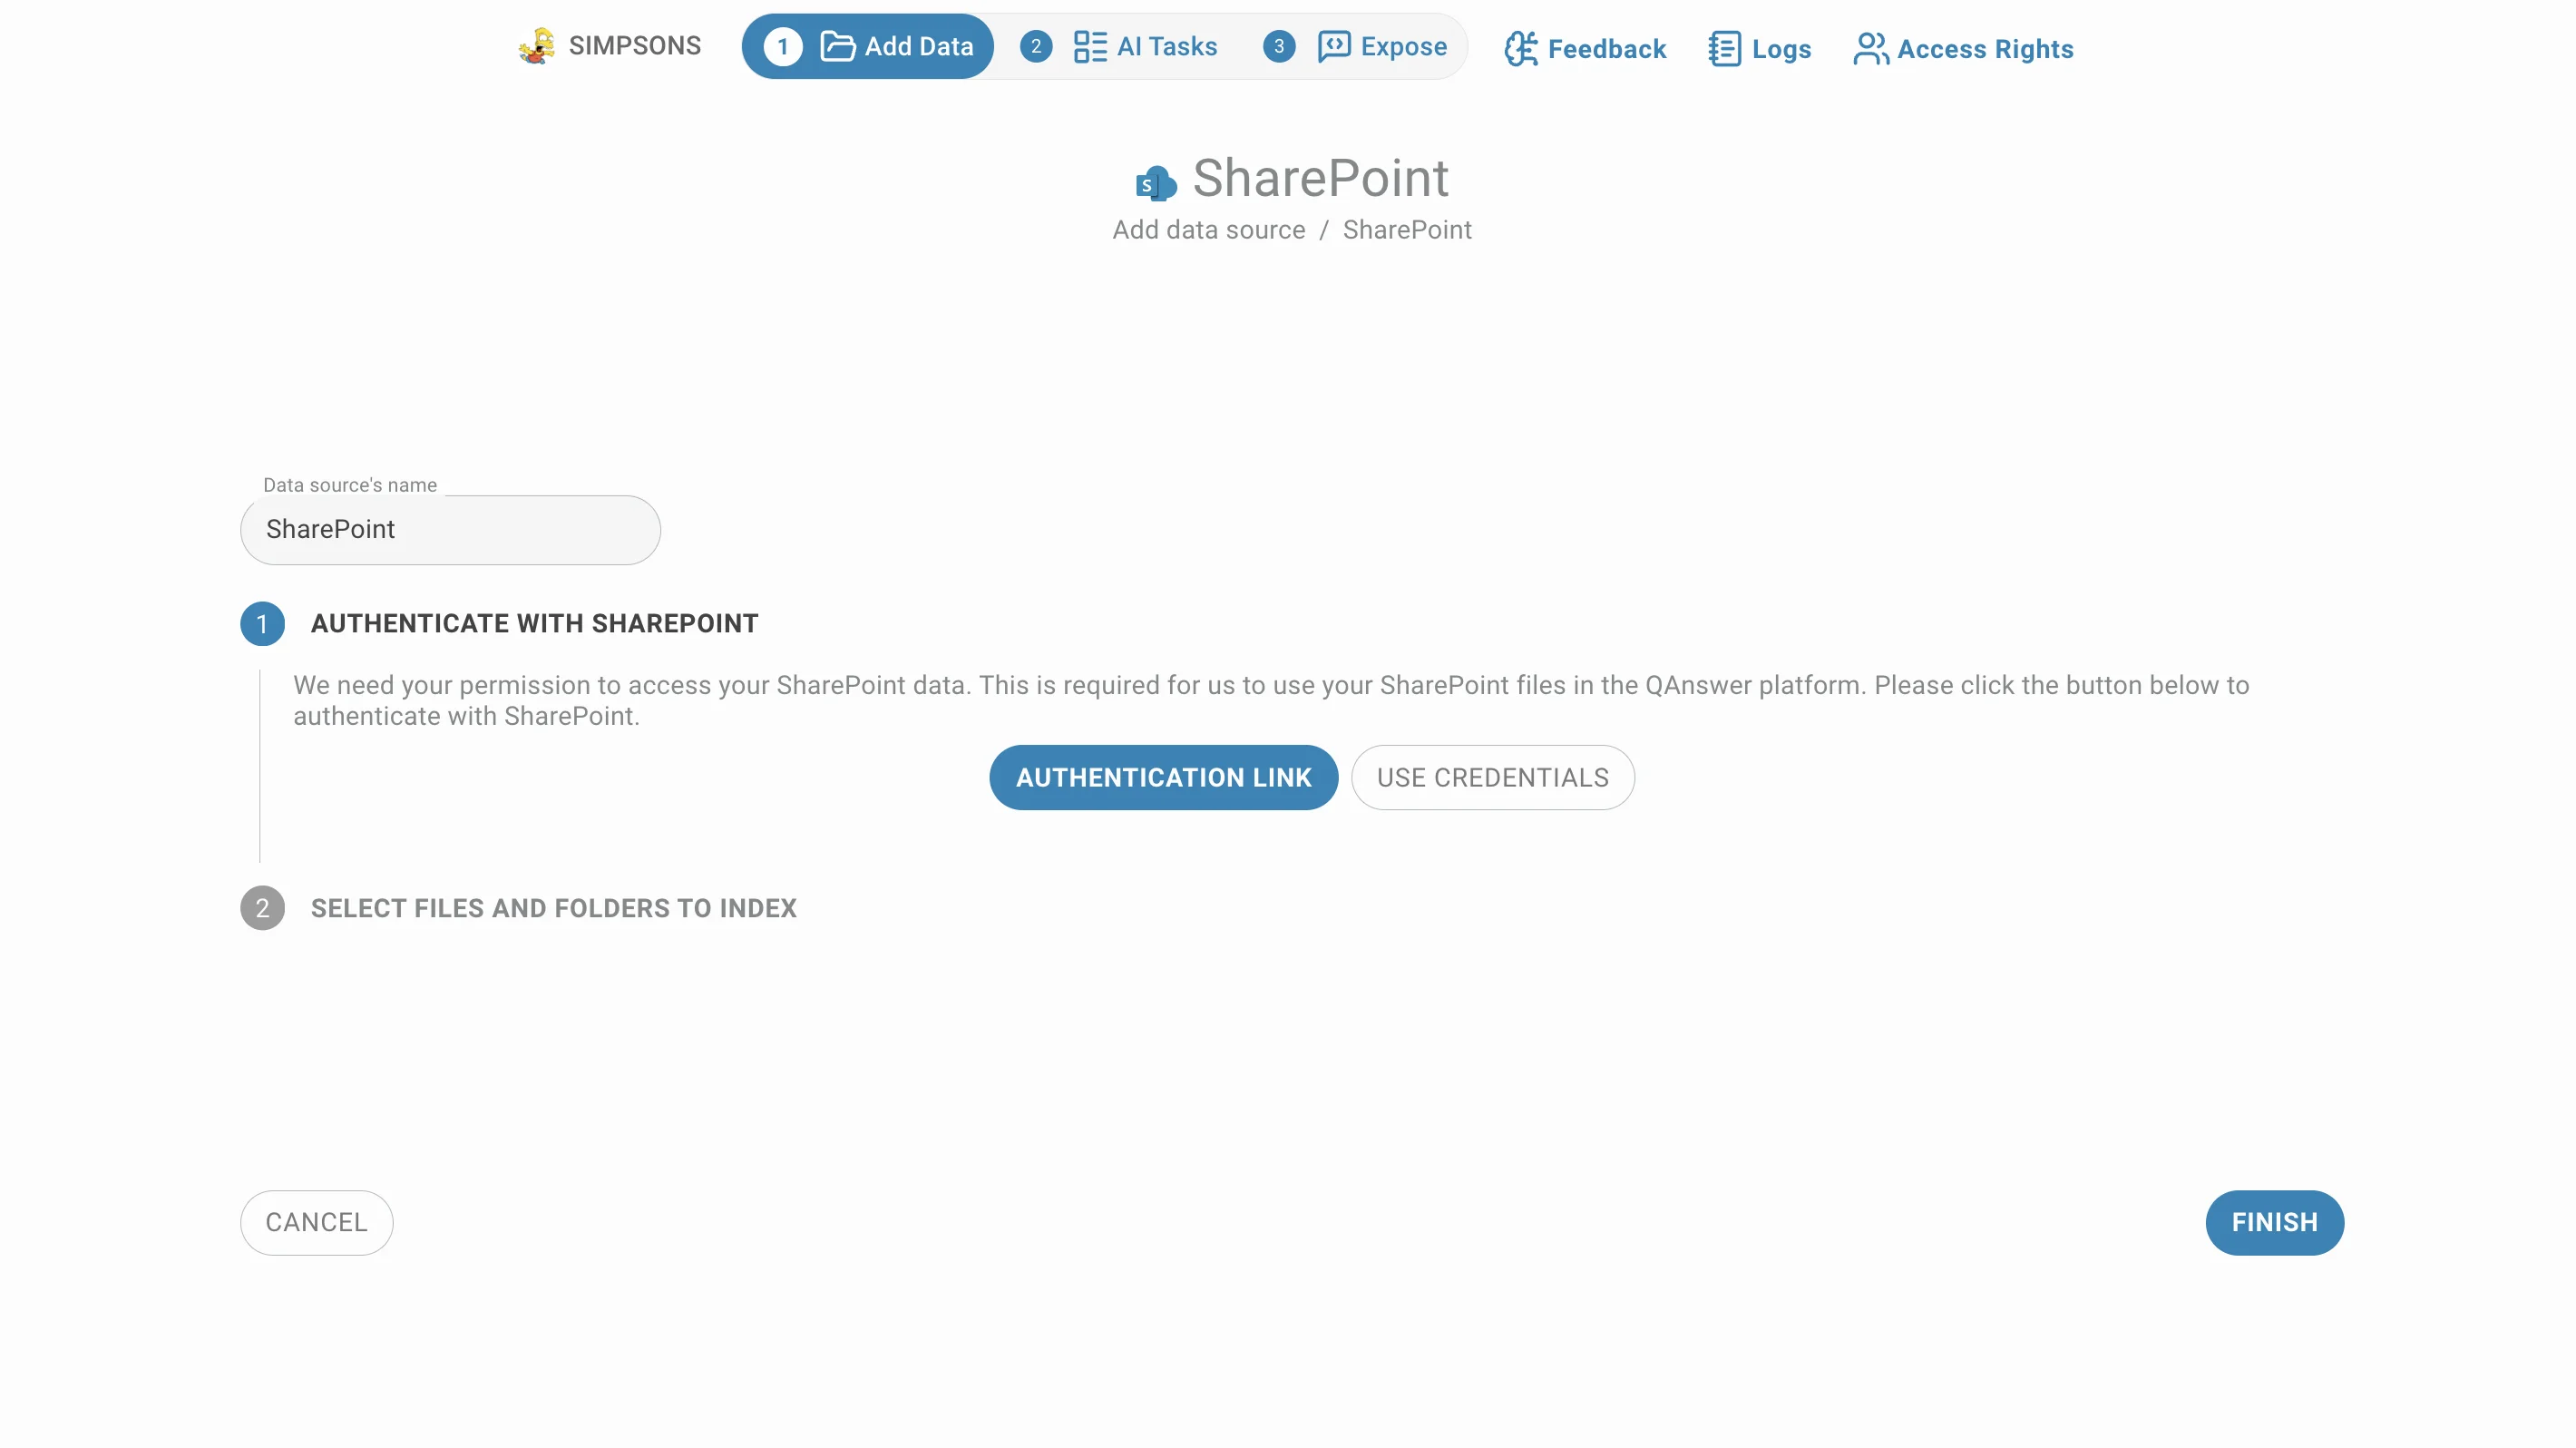
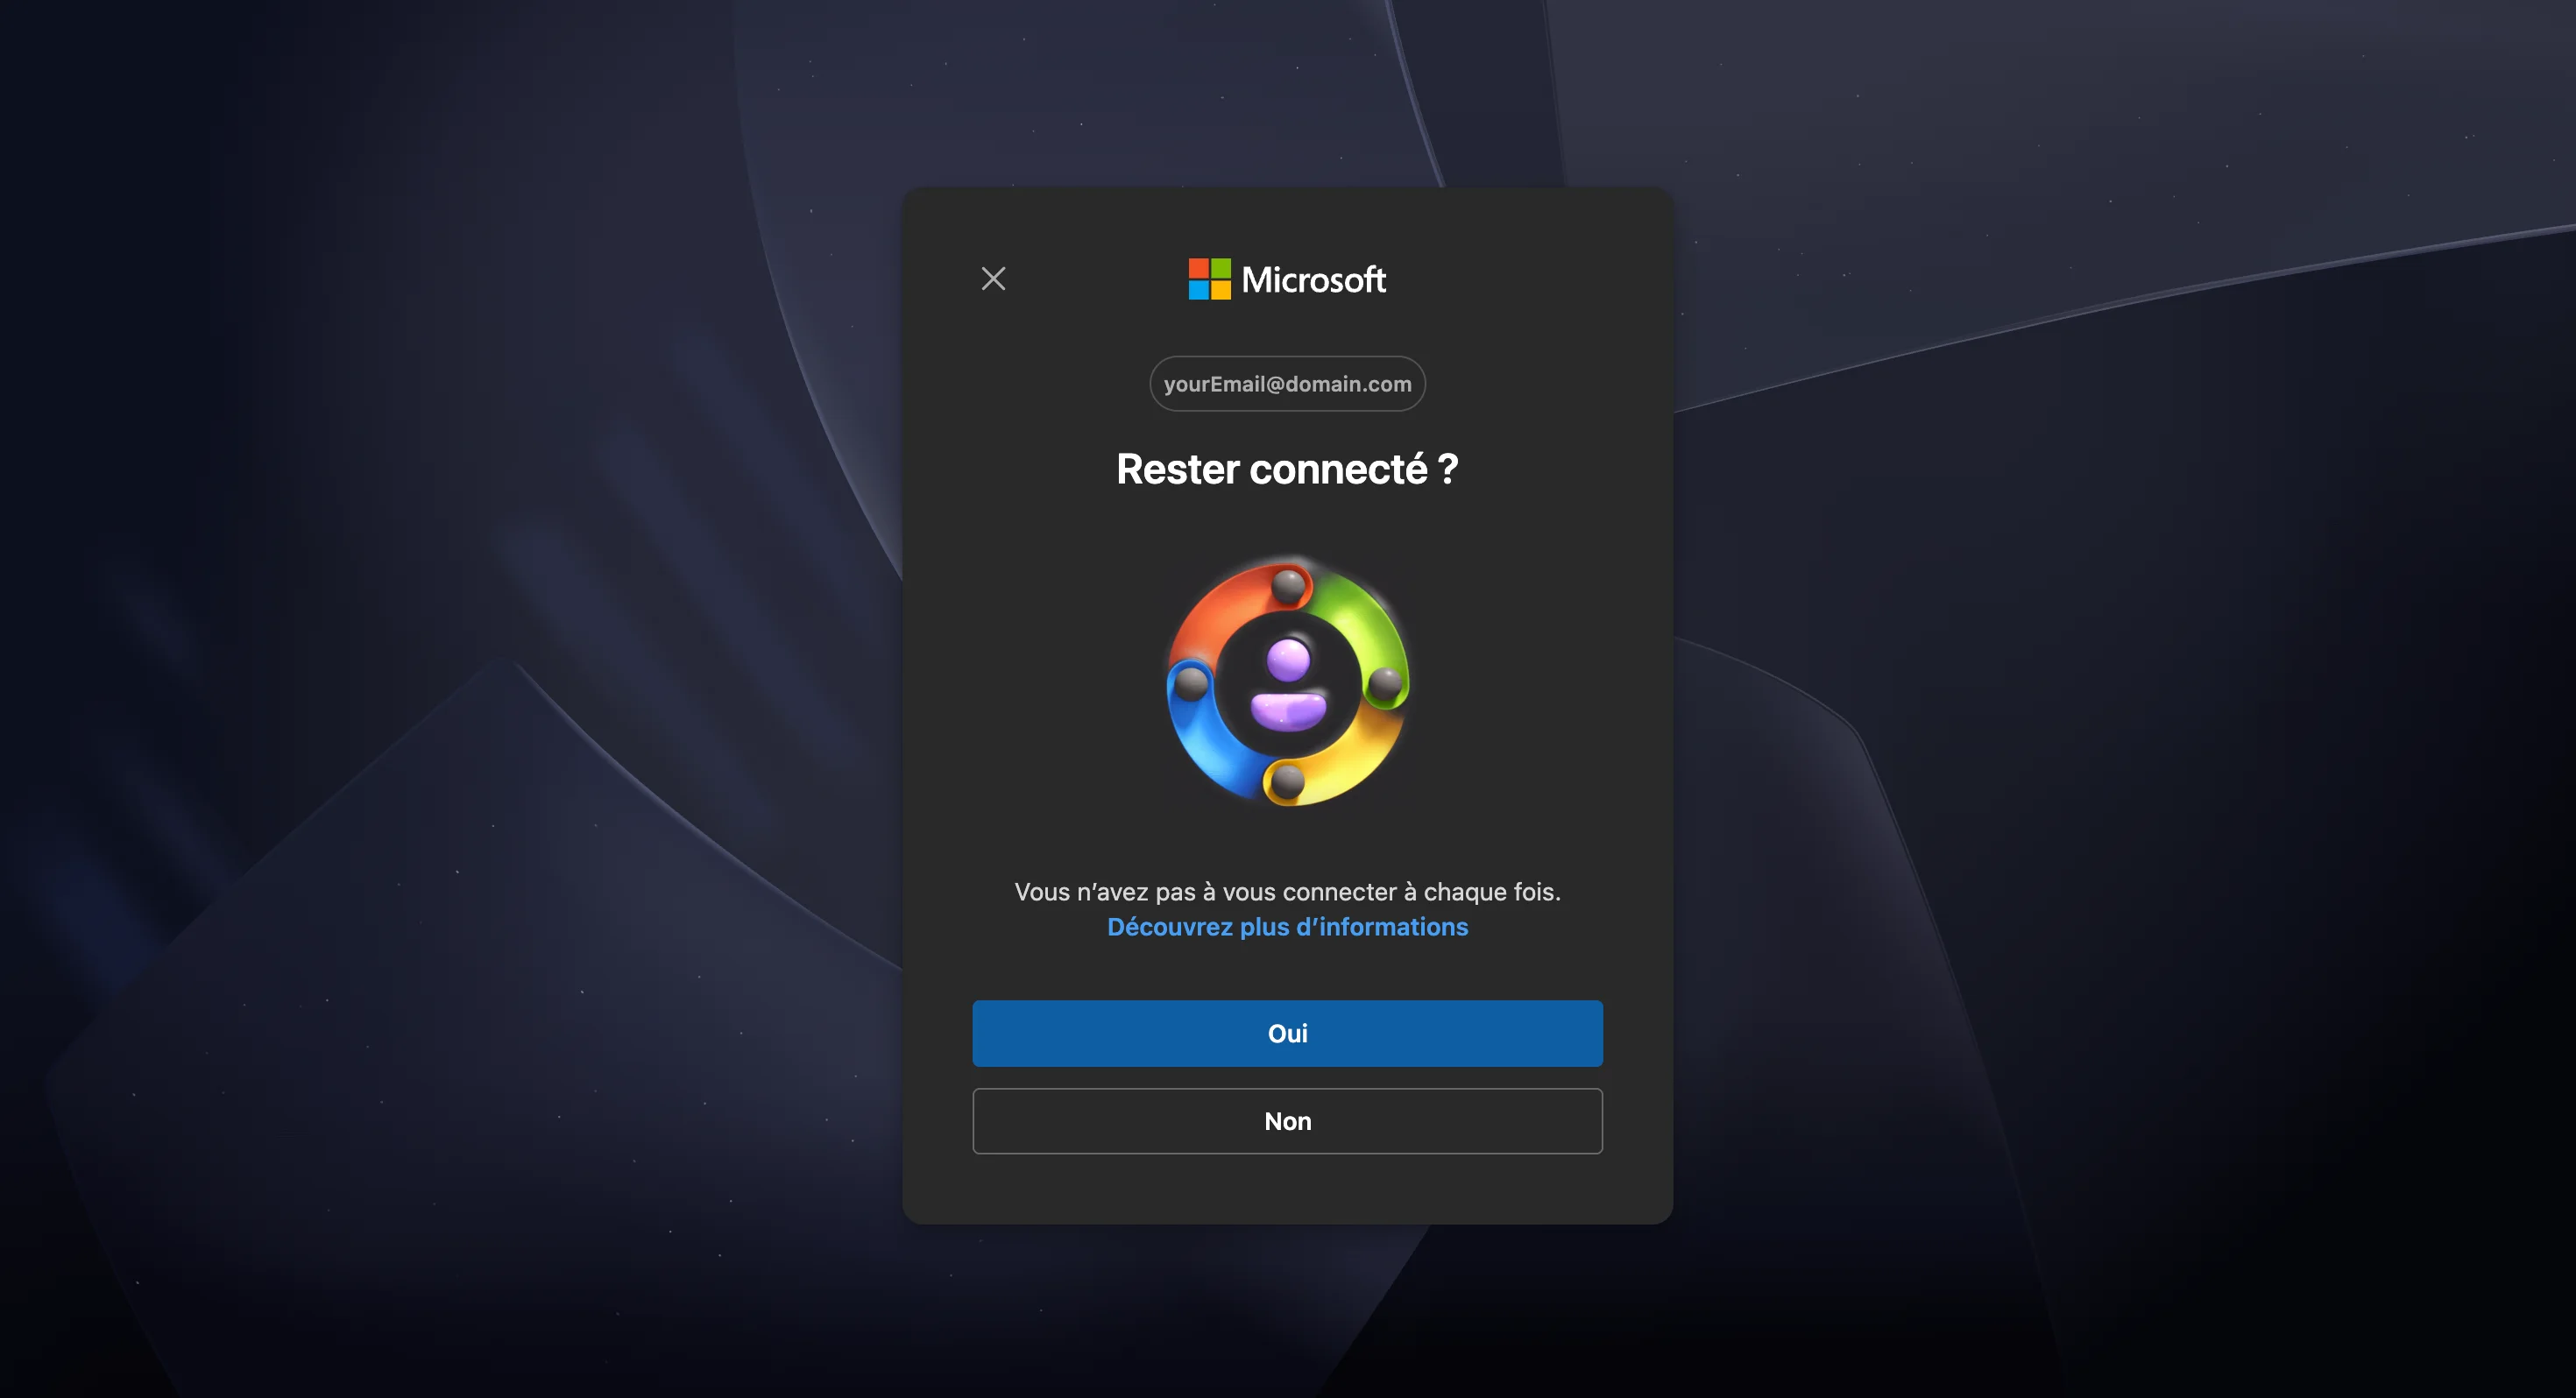
Connection by Authentication Link
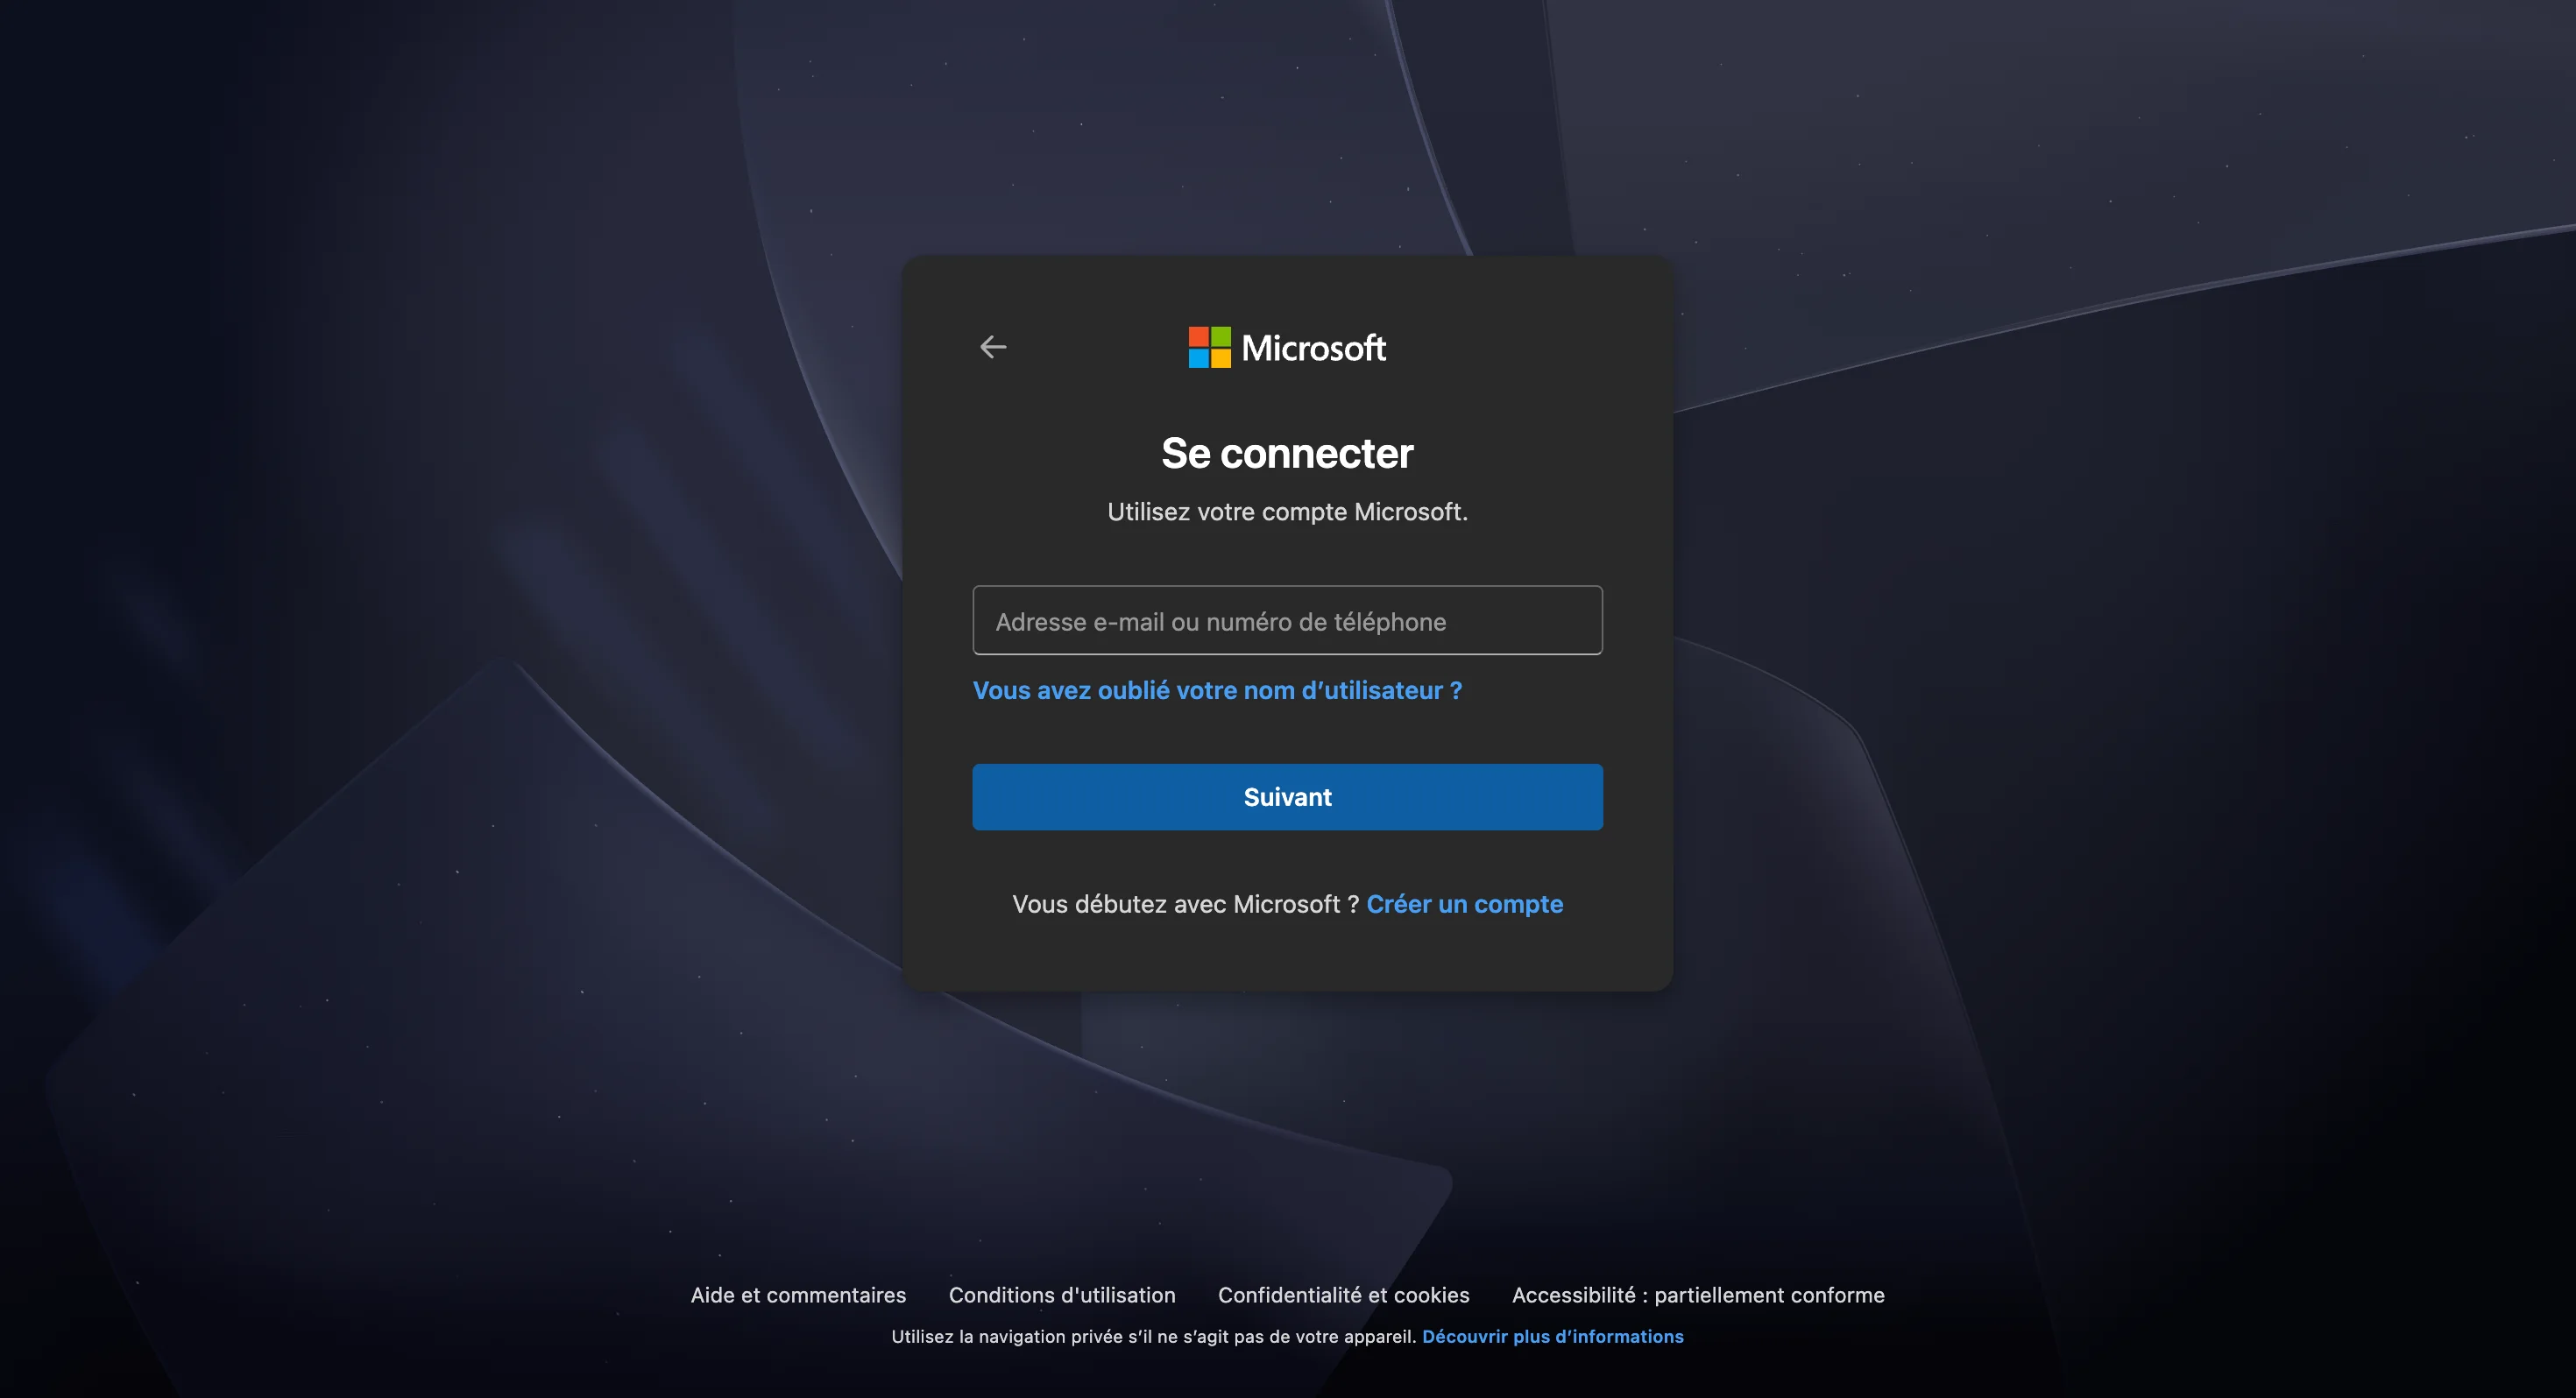
Clicking Authentication Link redirects to the Microsoft login page.
Enter your Microsoft account email address and click Next.
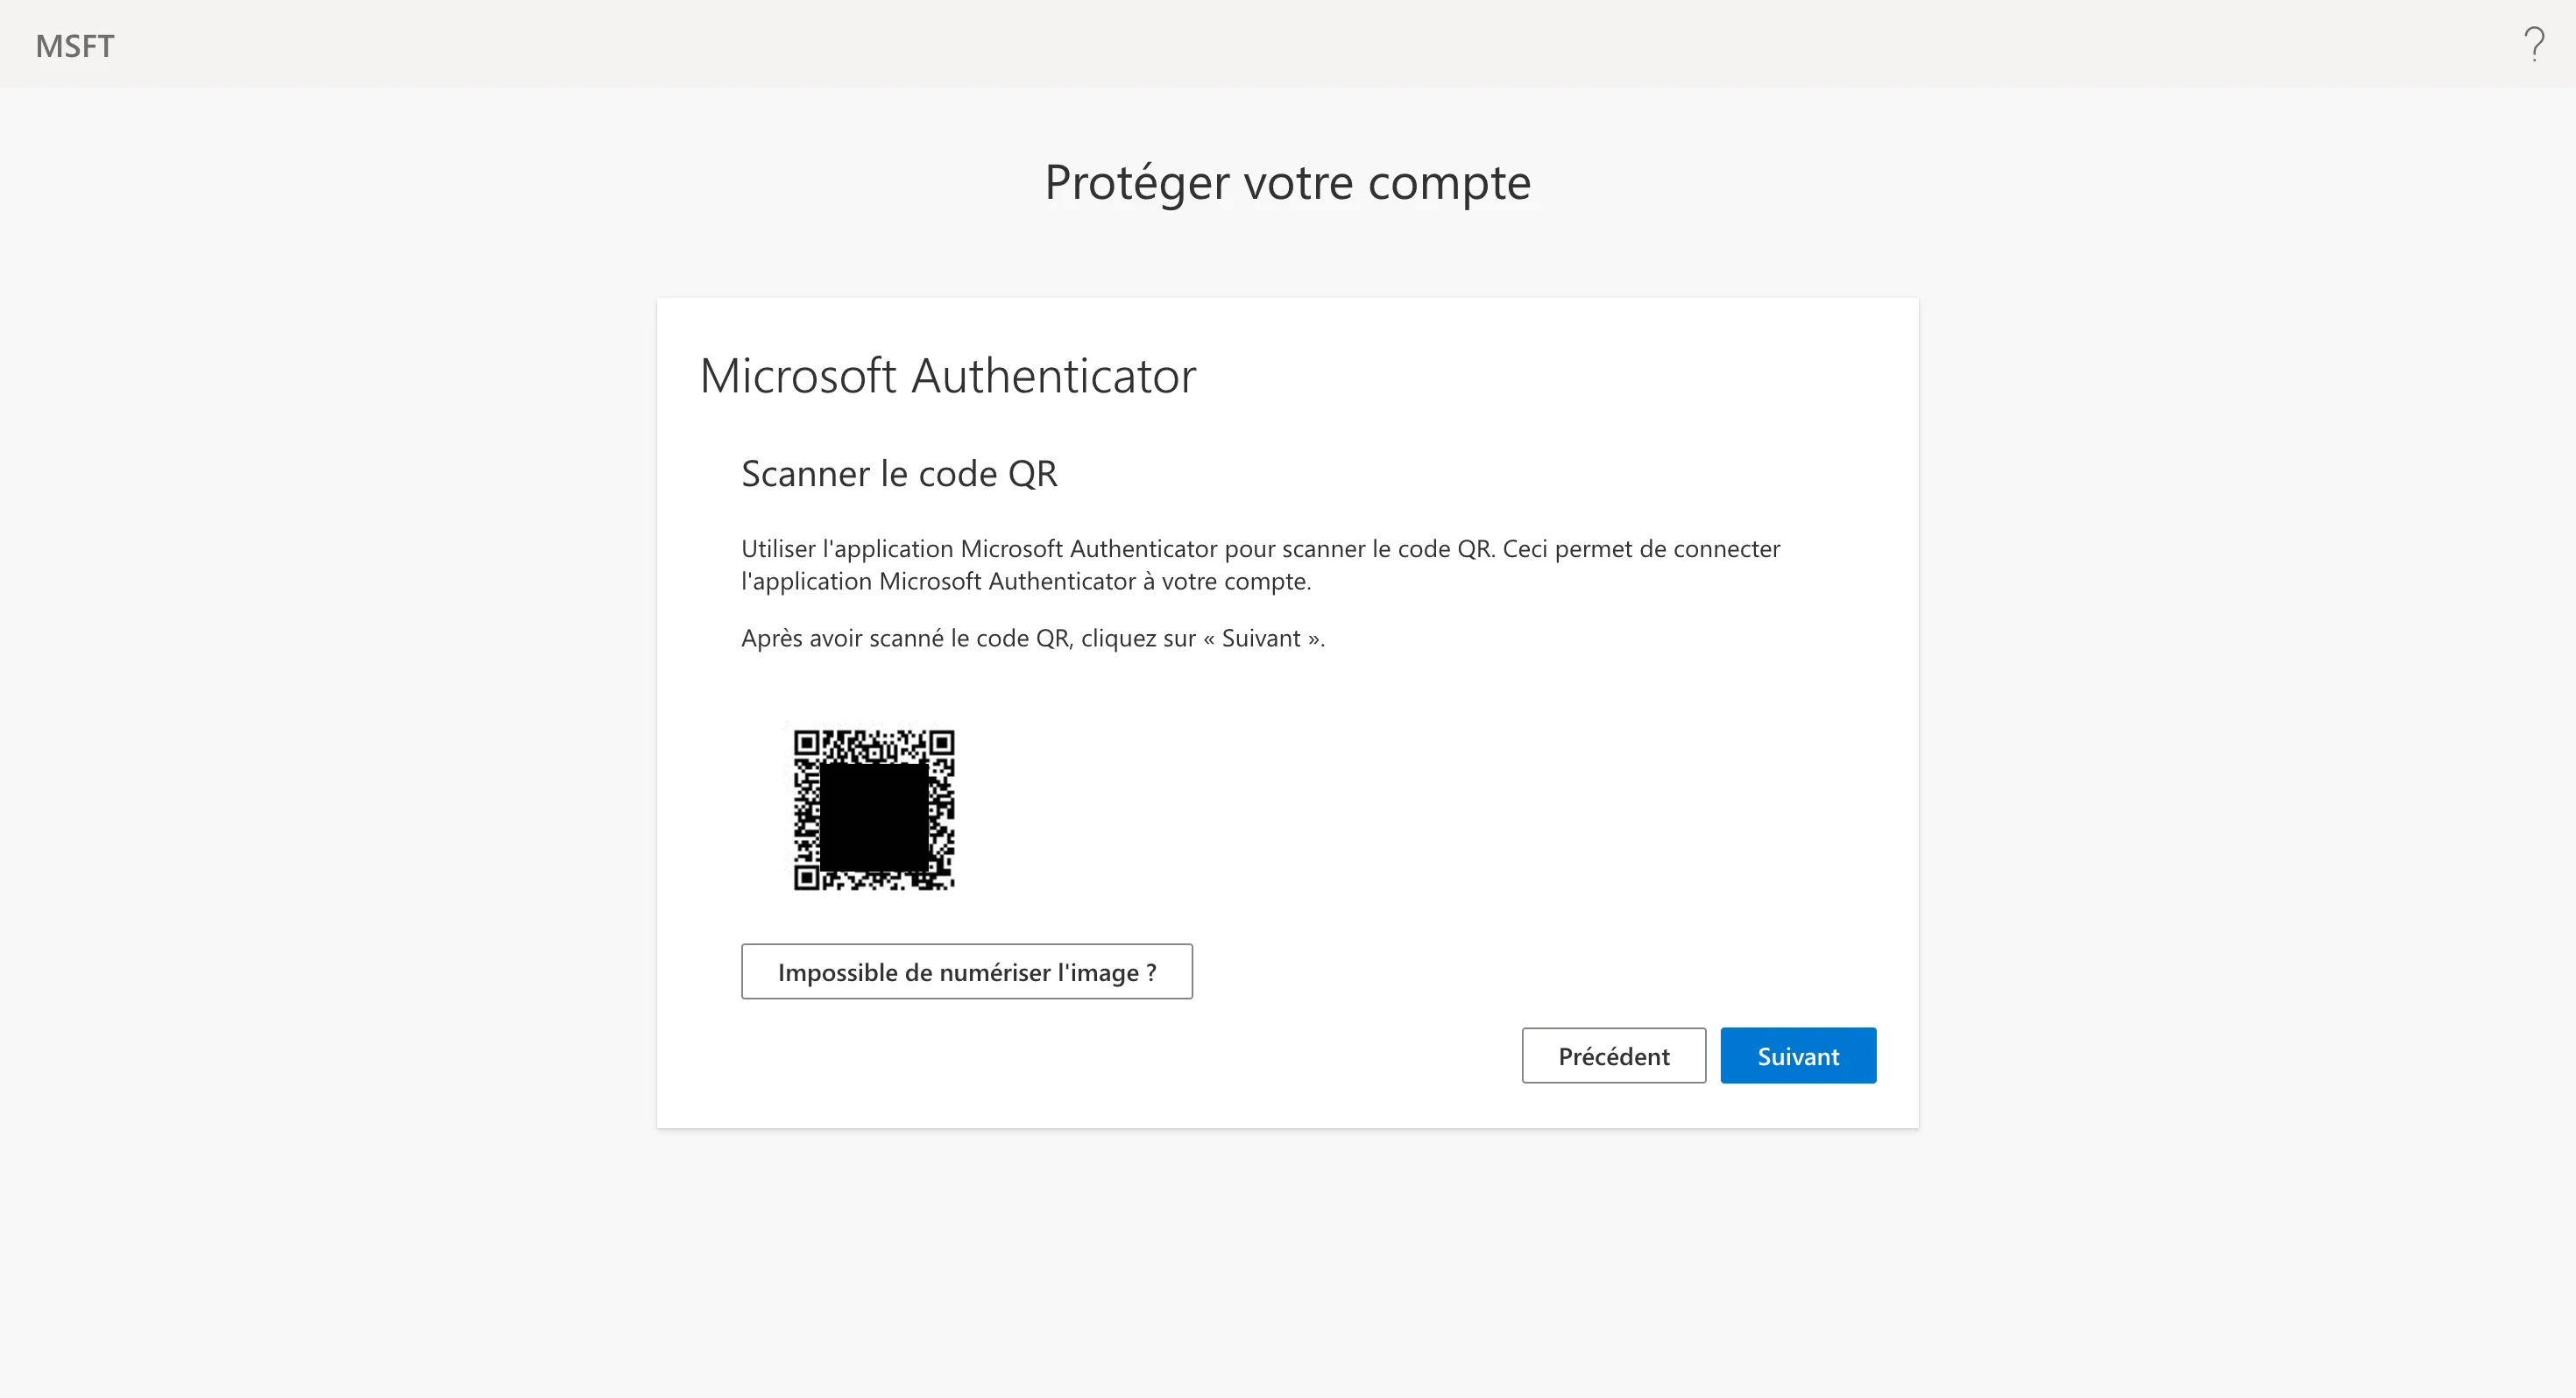
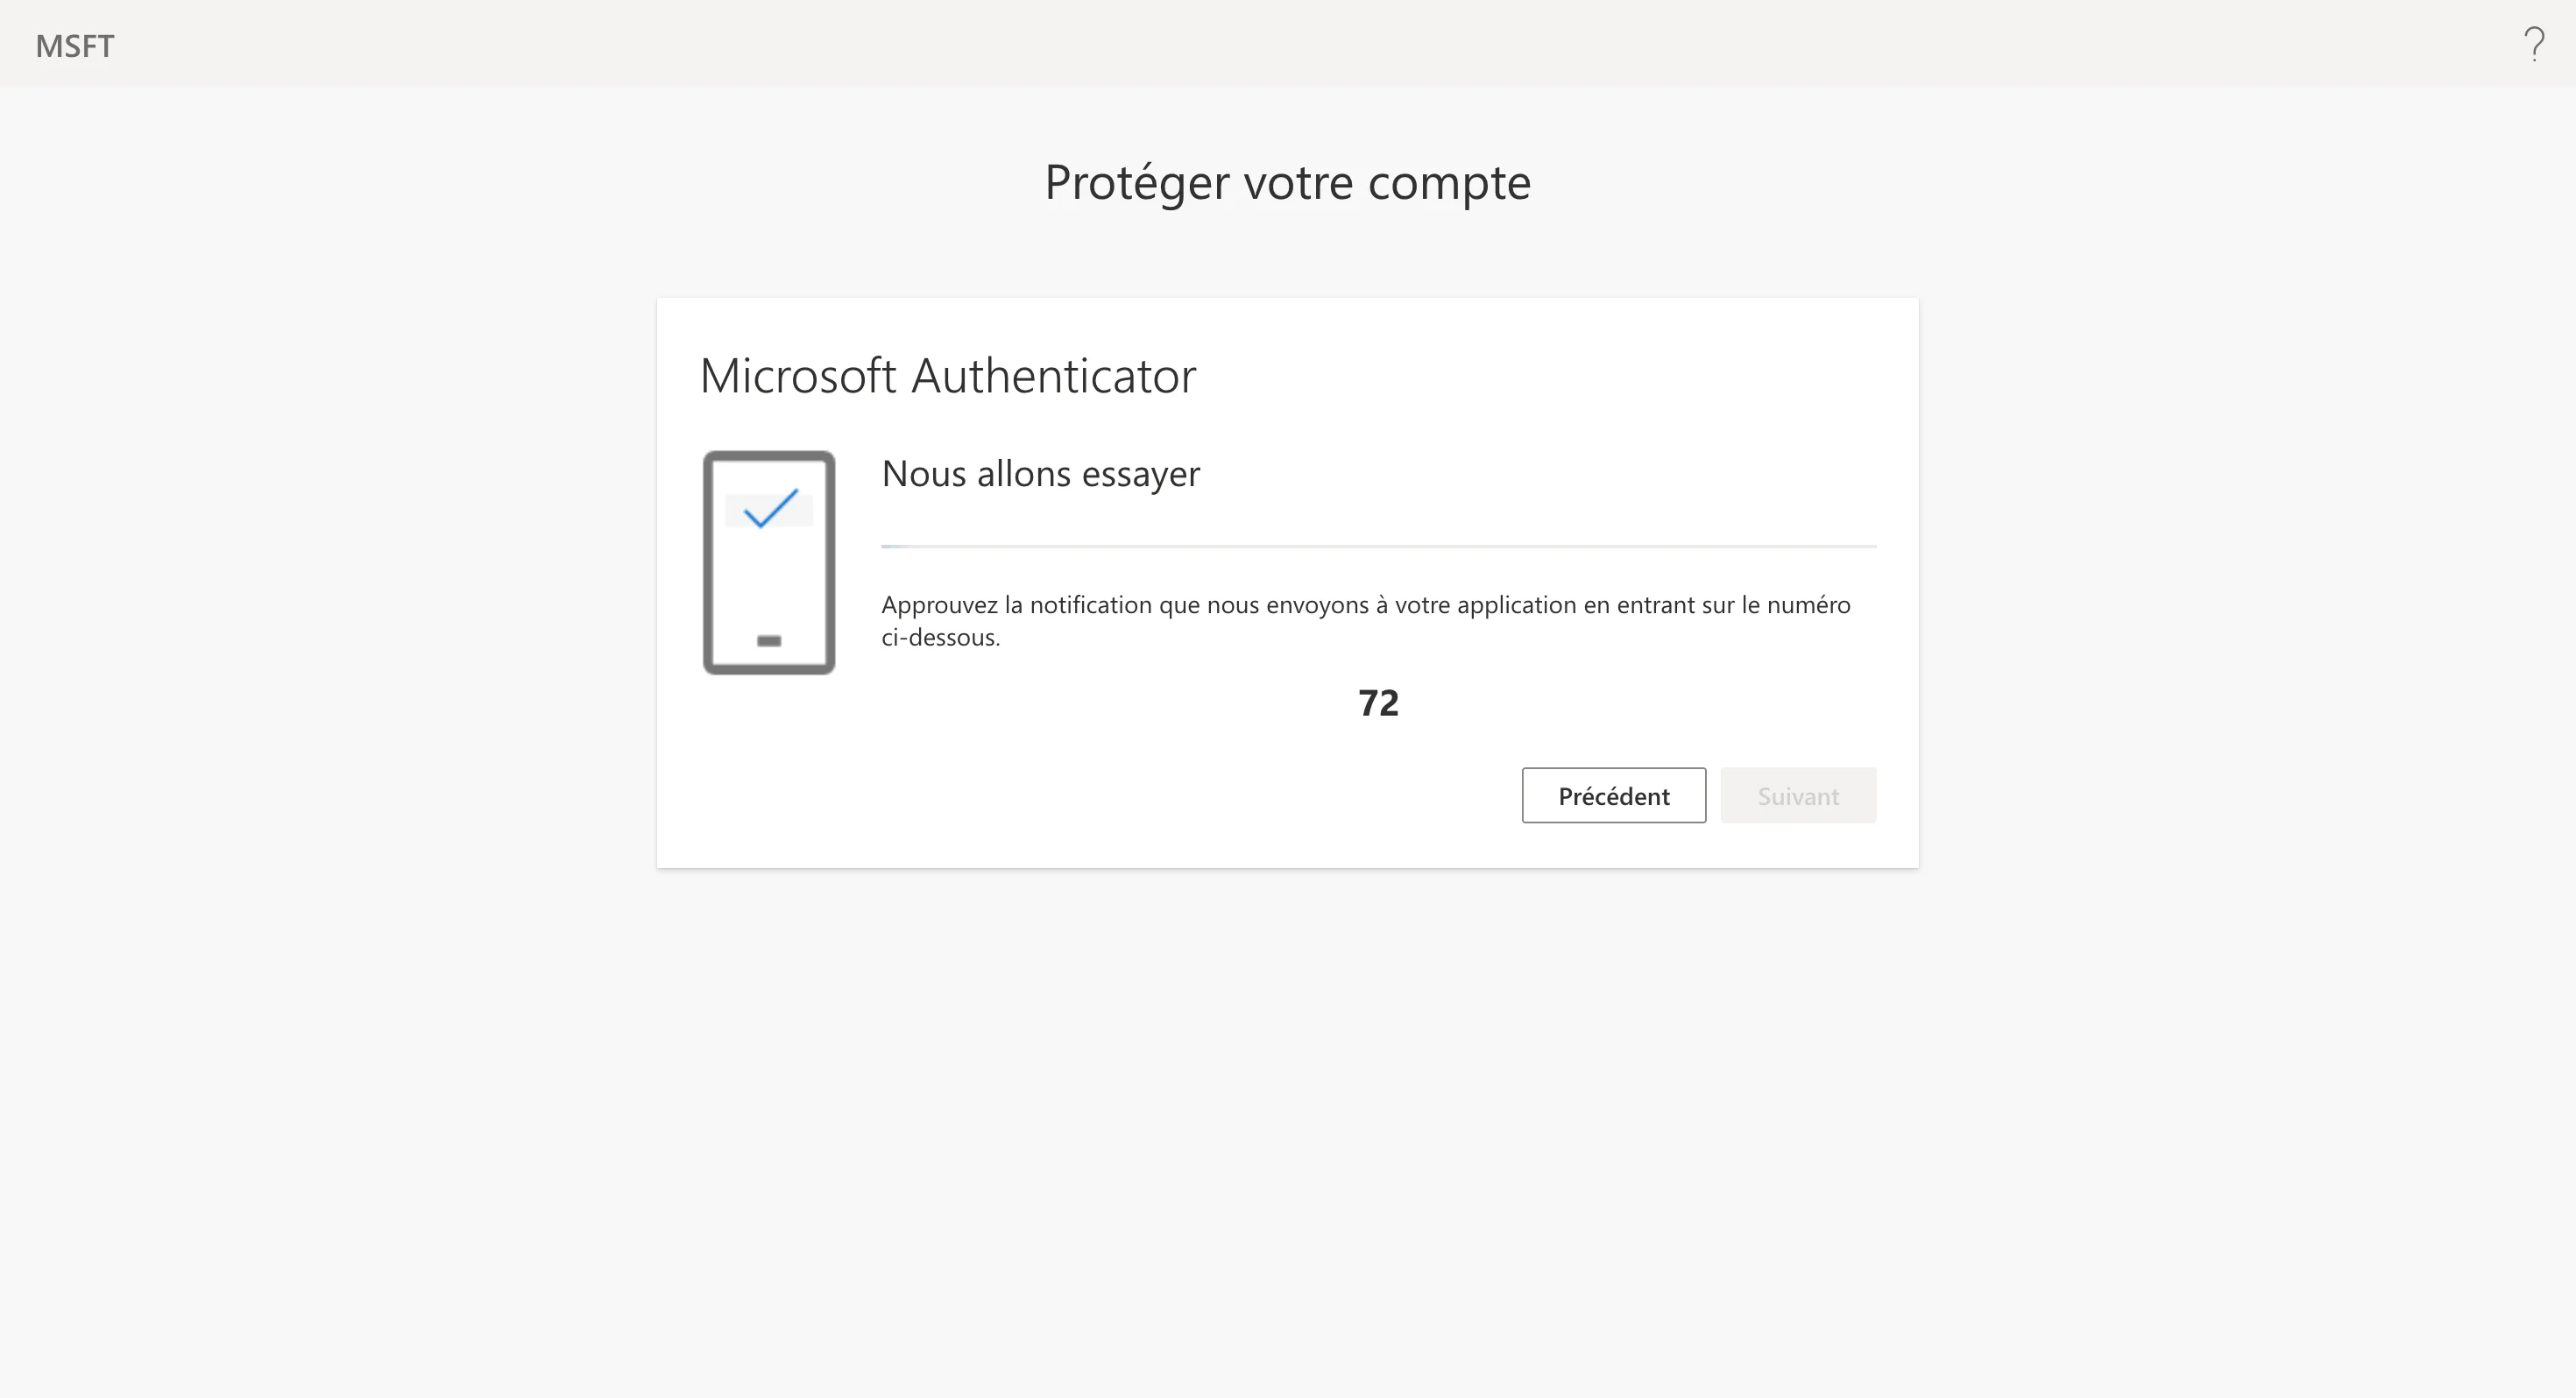
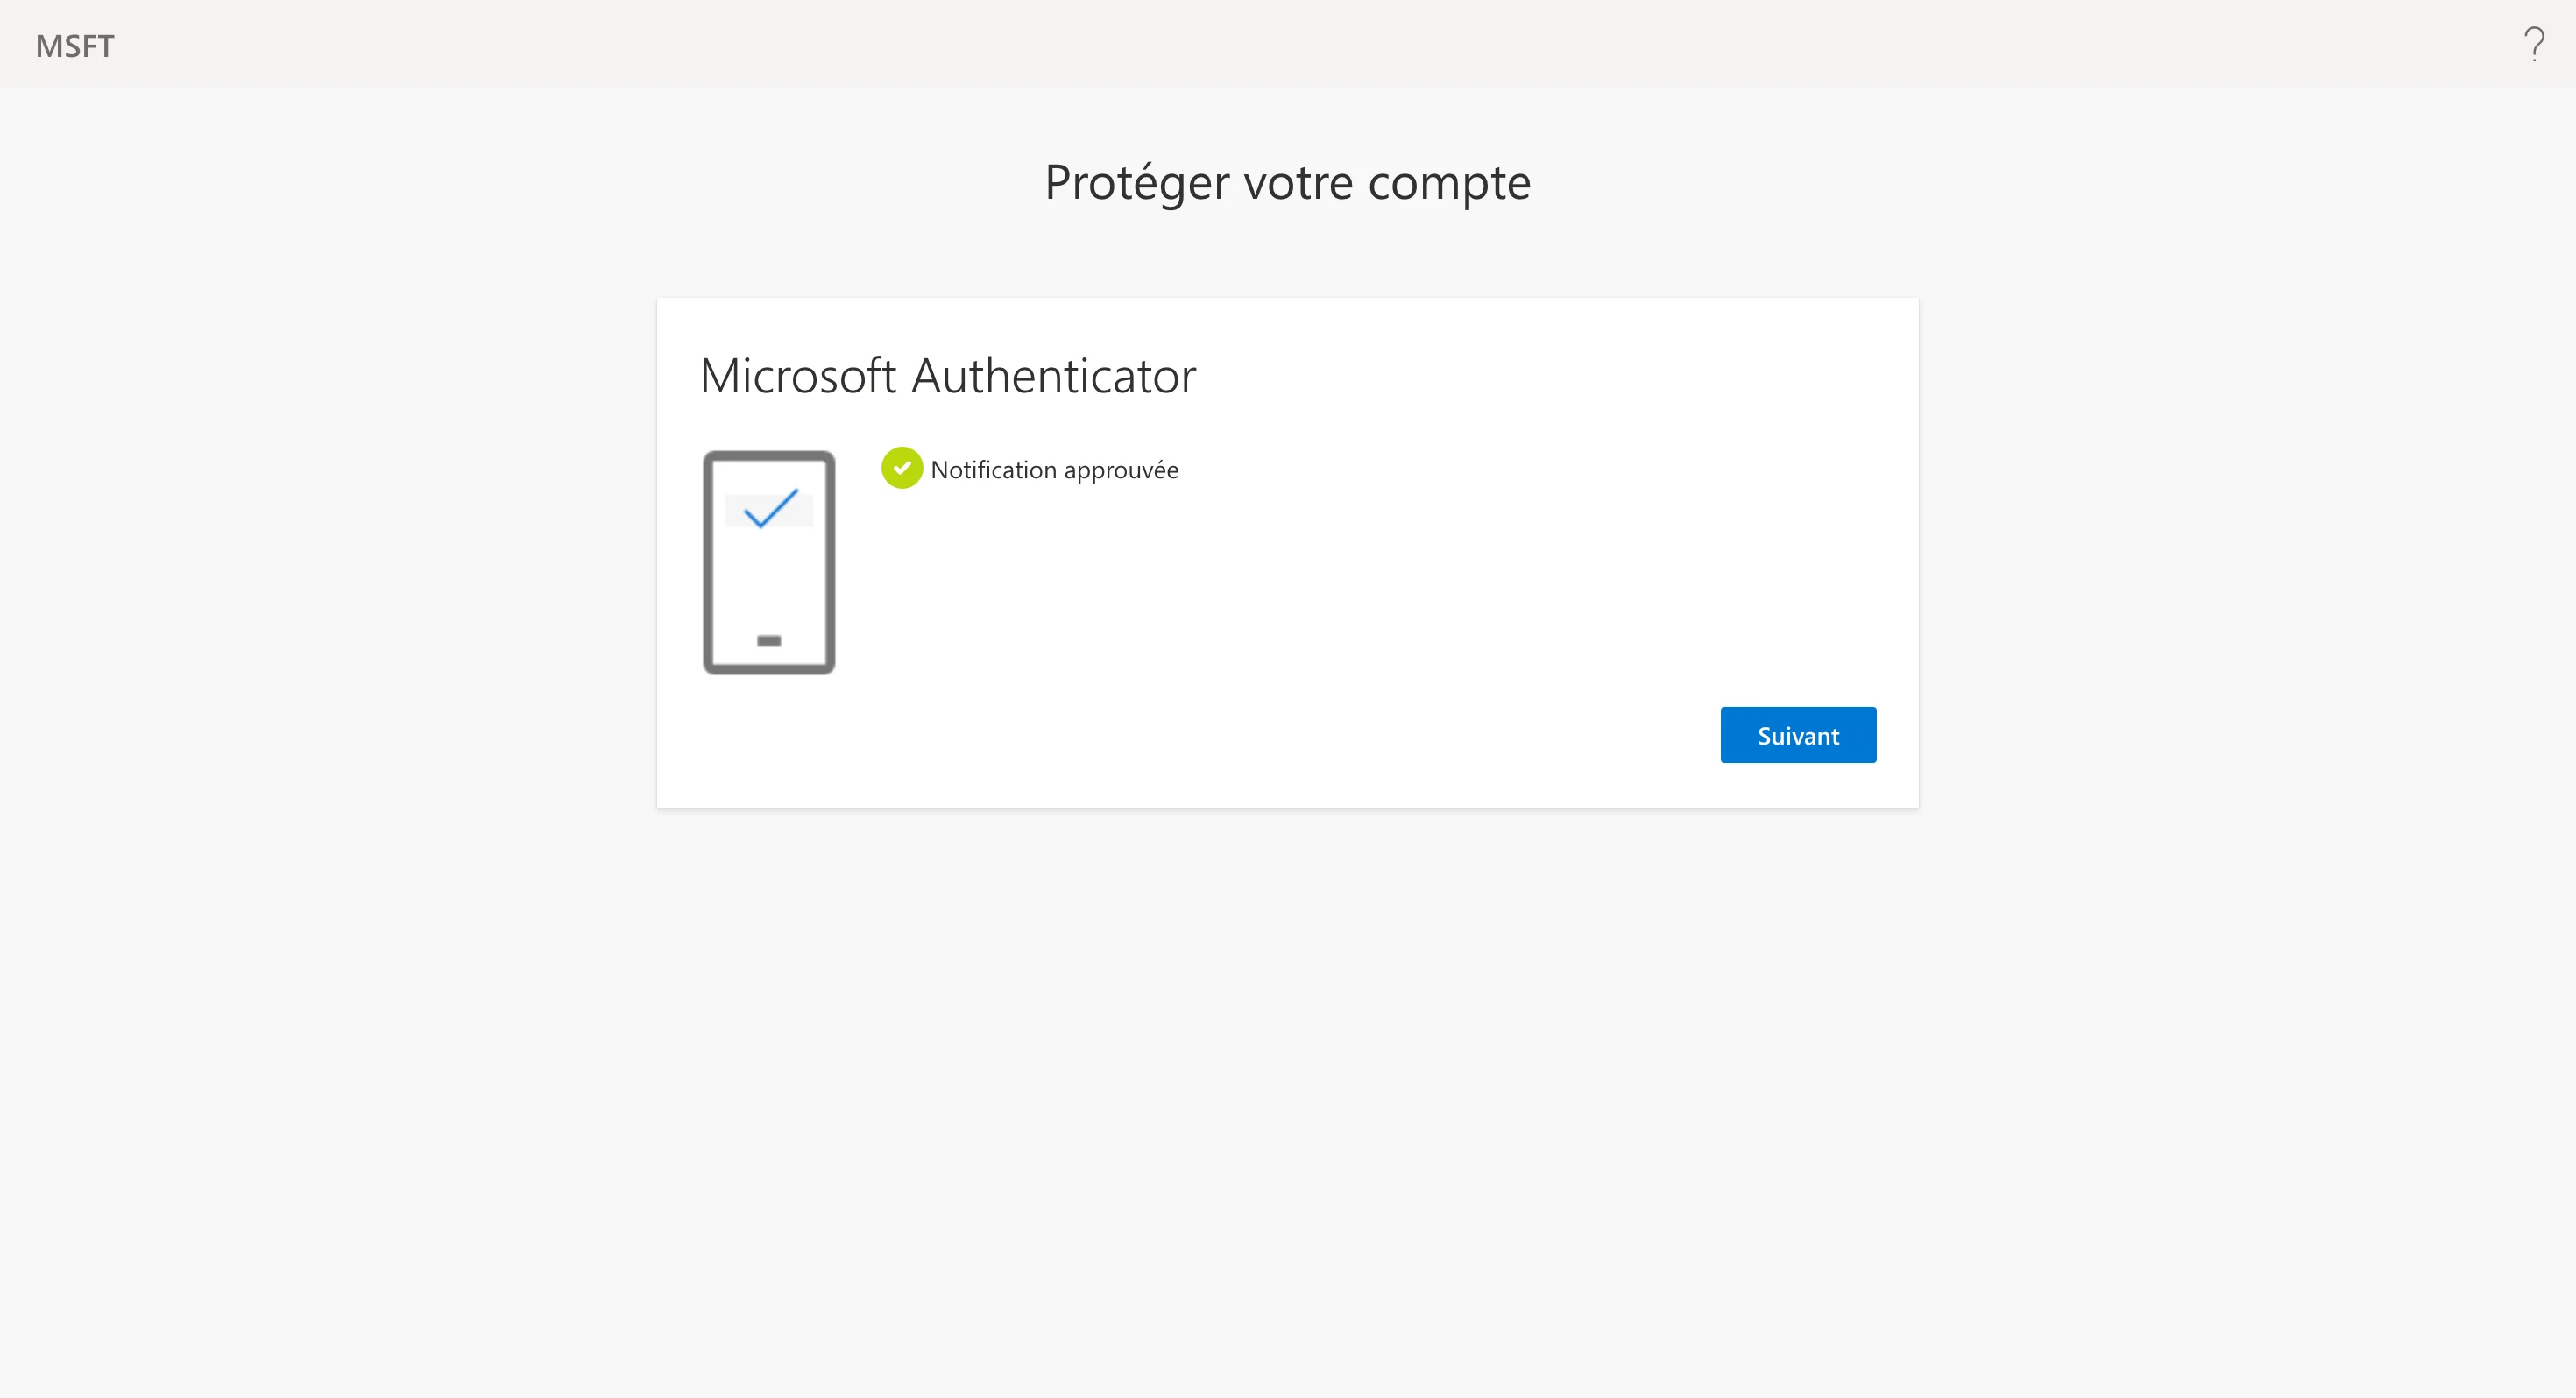
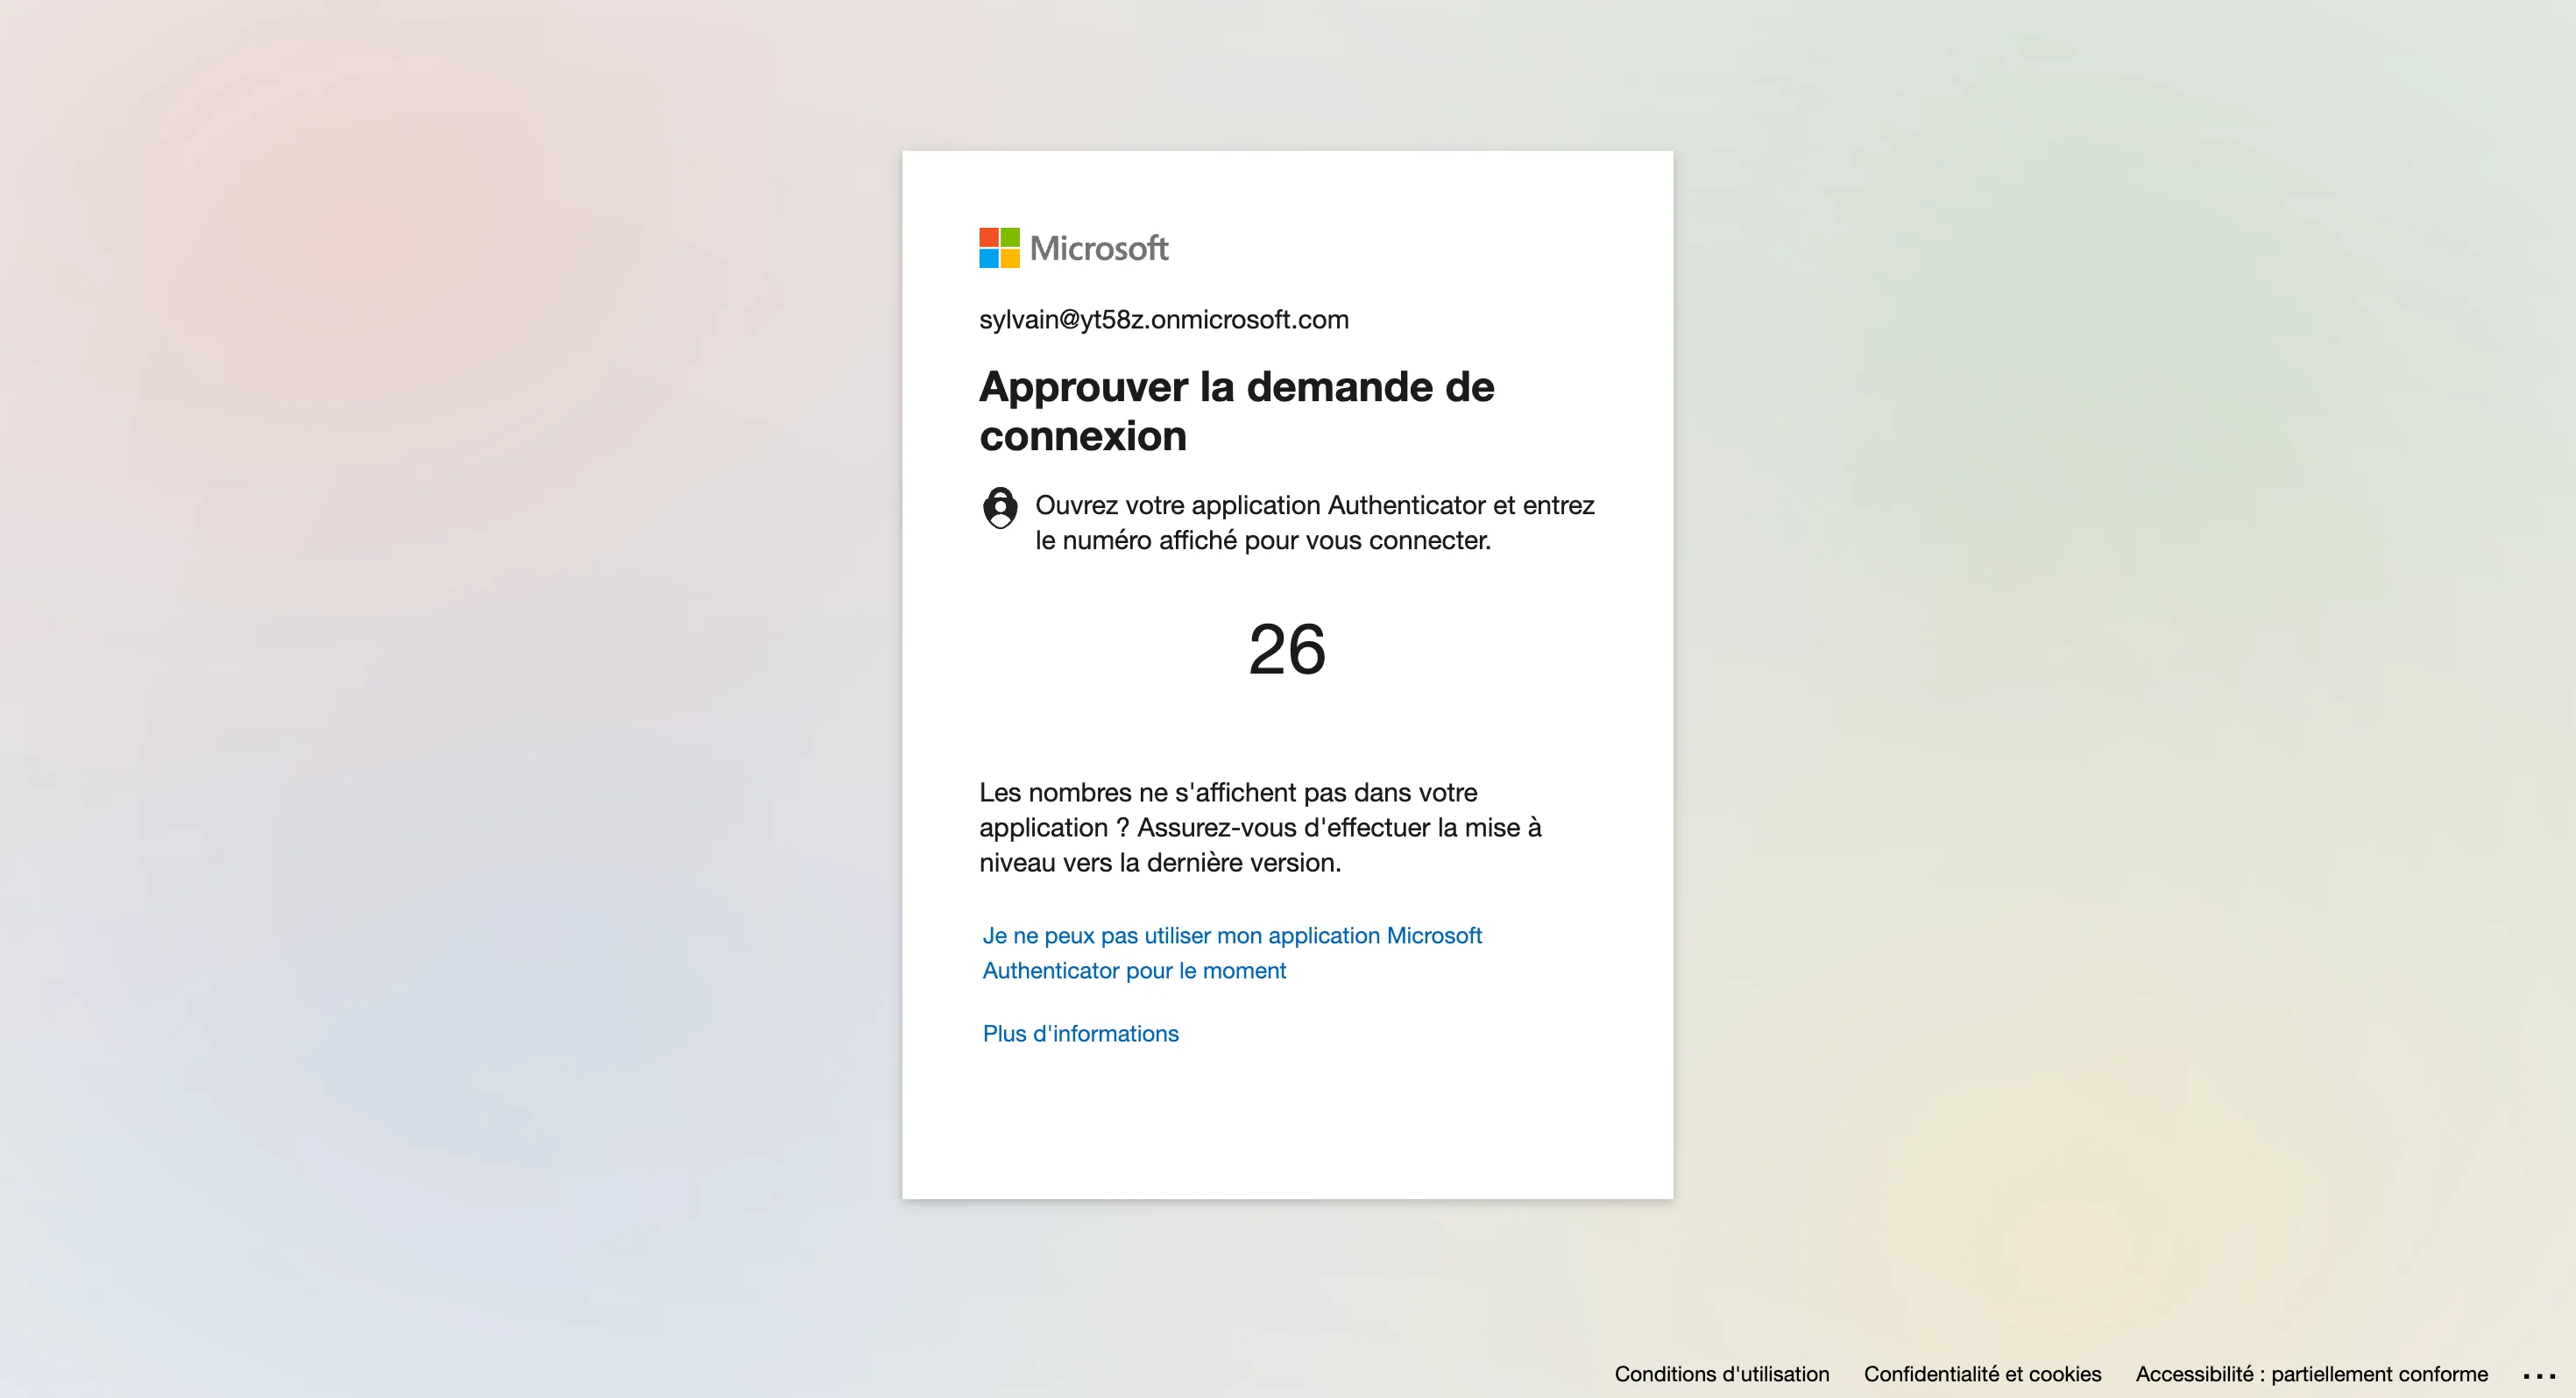
Microsoft Authenticator
SharePoint requires an organization account, so Microsoft will require the Authenticator app to improve login security. Follow the instructions in the Microsoft Authenticator App. The screenshots below show the flow from the QAnswer side.


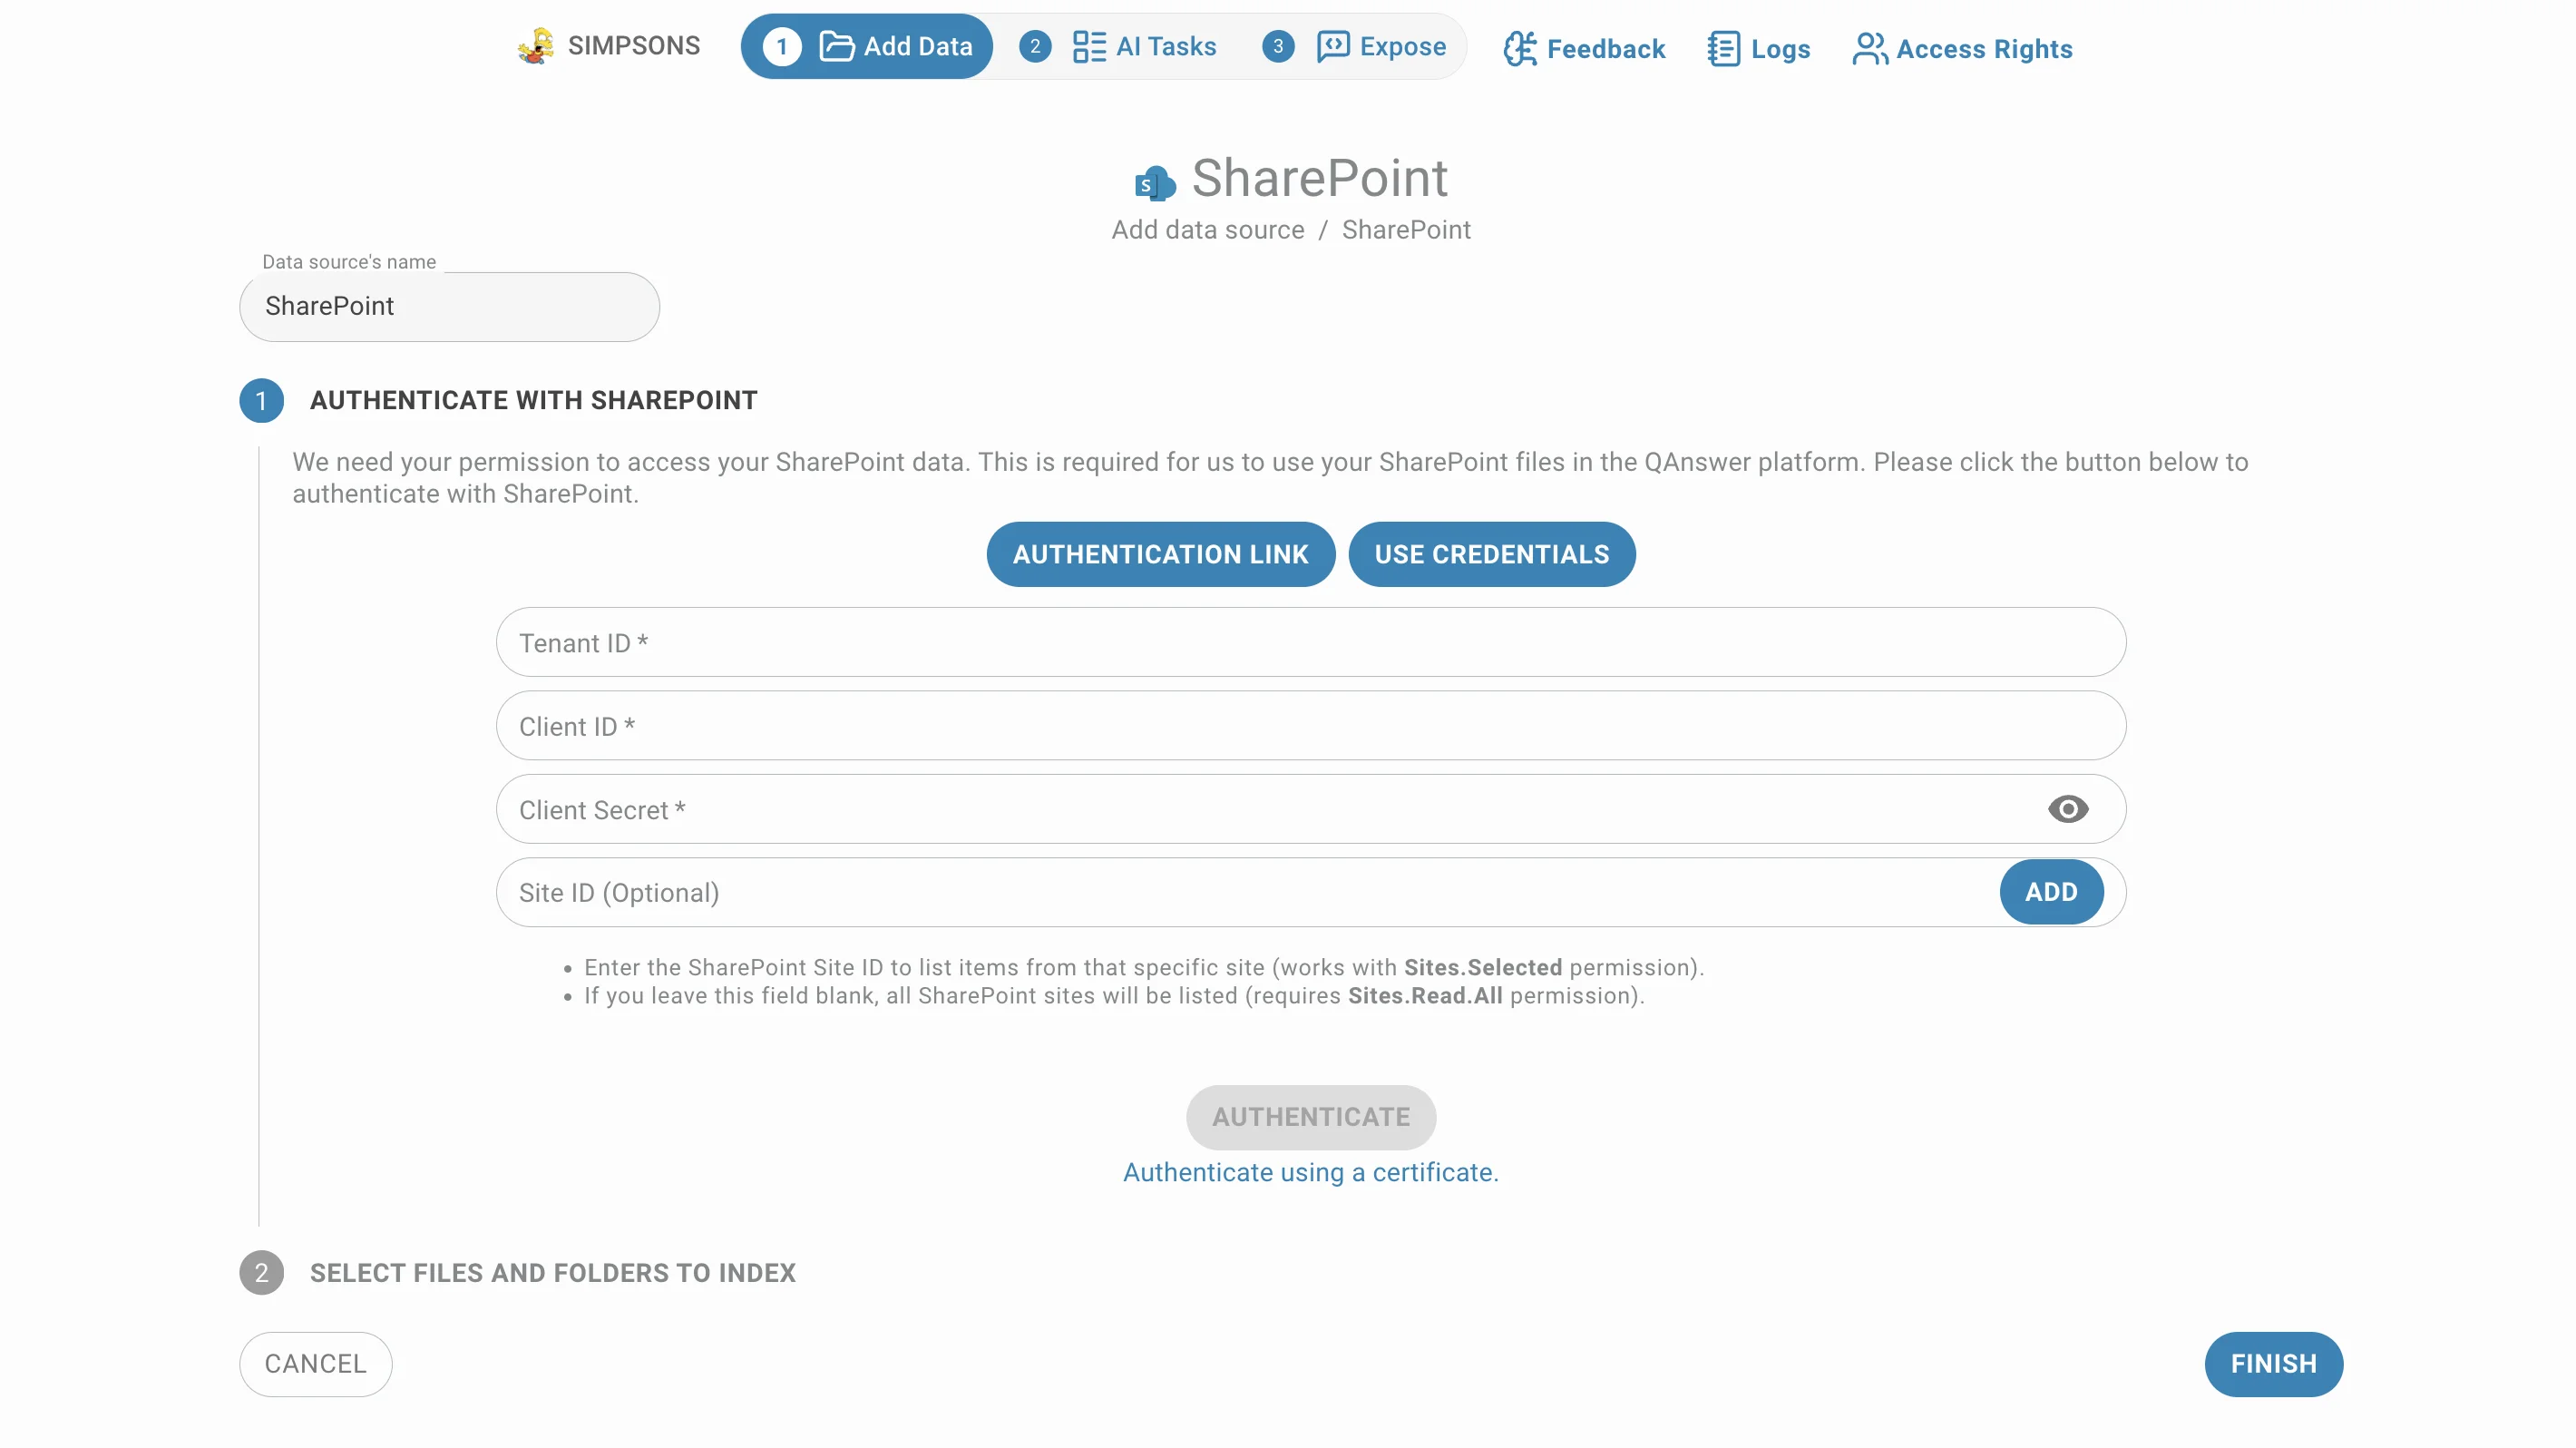
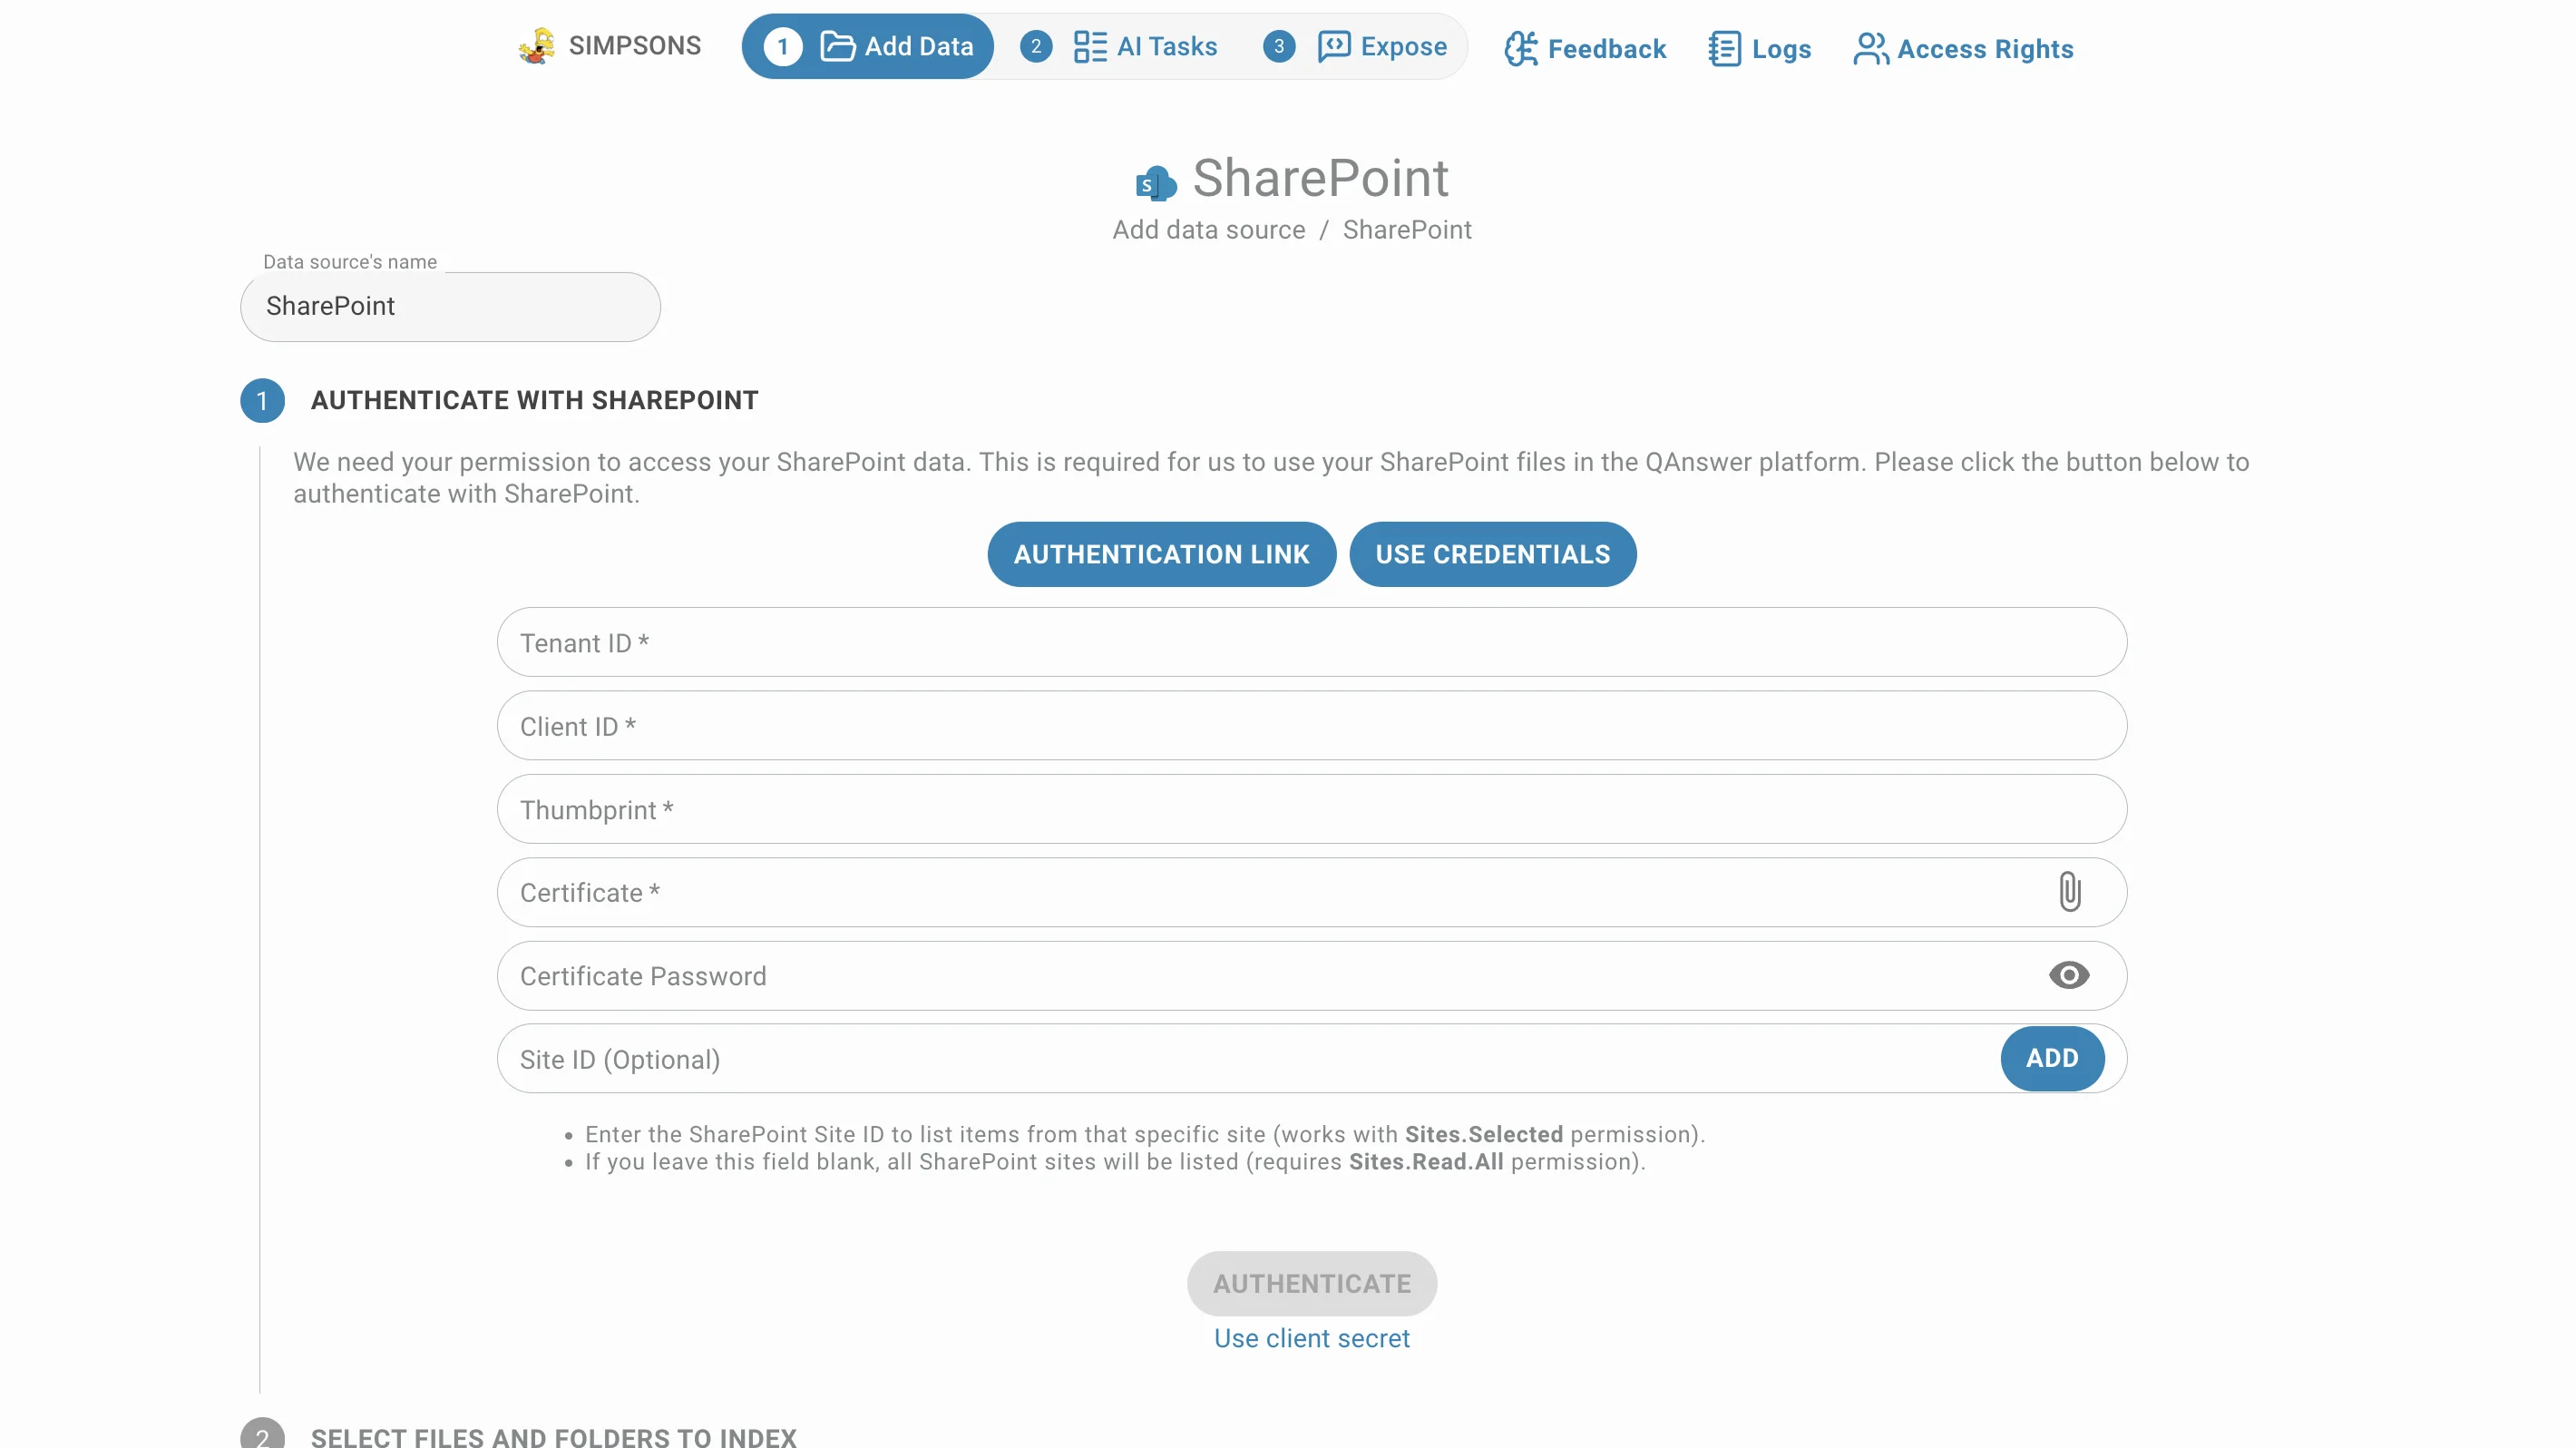
Connection by Use credential
The credential method requires the following connection details:
On the Client secret you will need:
- Tenant Id
- Client Id
- Client Secret
- Site Id (you must check the scope desired on your Azure application settings)
On the certificate version you will need:
- Tenant Id
- Client Id
- Thumbprint
- Certificate file (private one)
- Certificate Password (if you have set one up)
- Client Secret
- Site Id (you must check the scope desired on your Azure application settings)
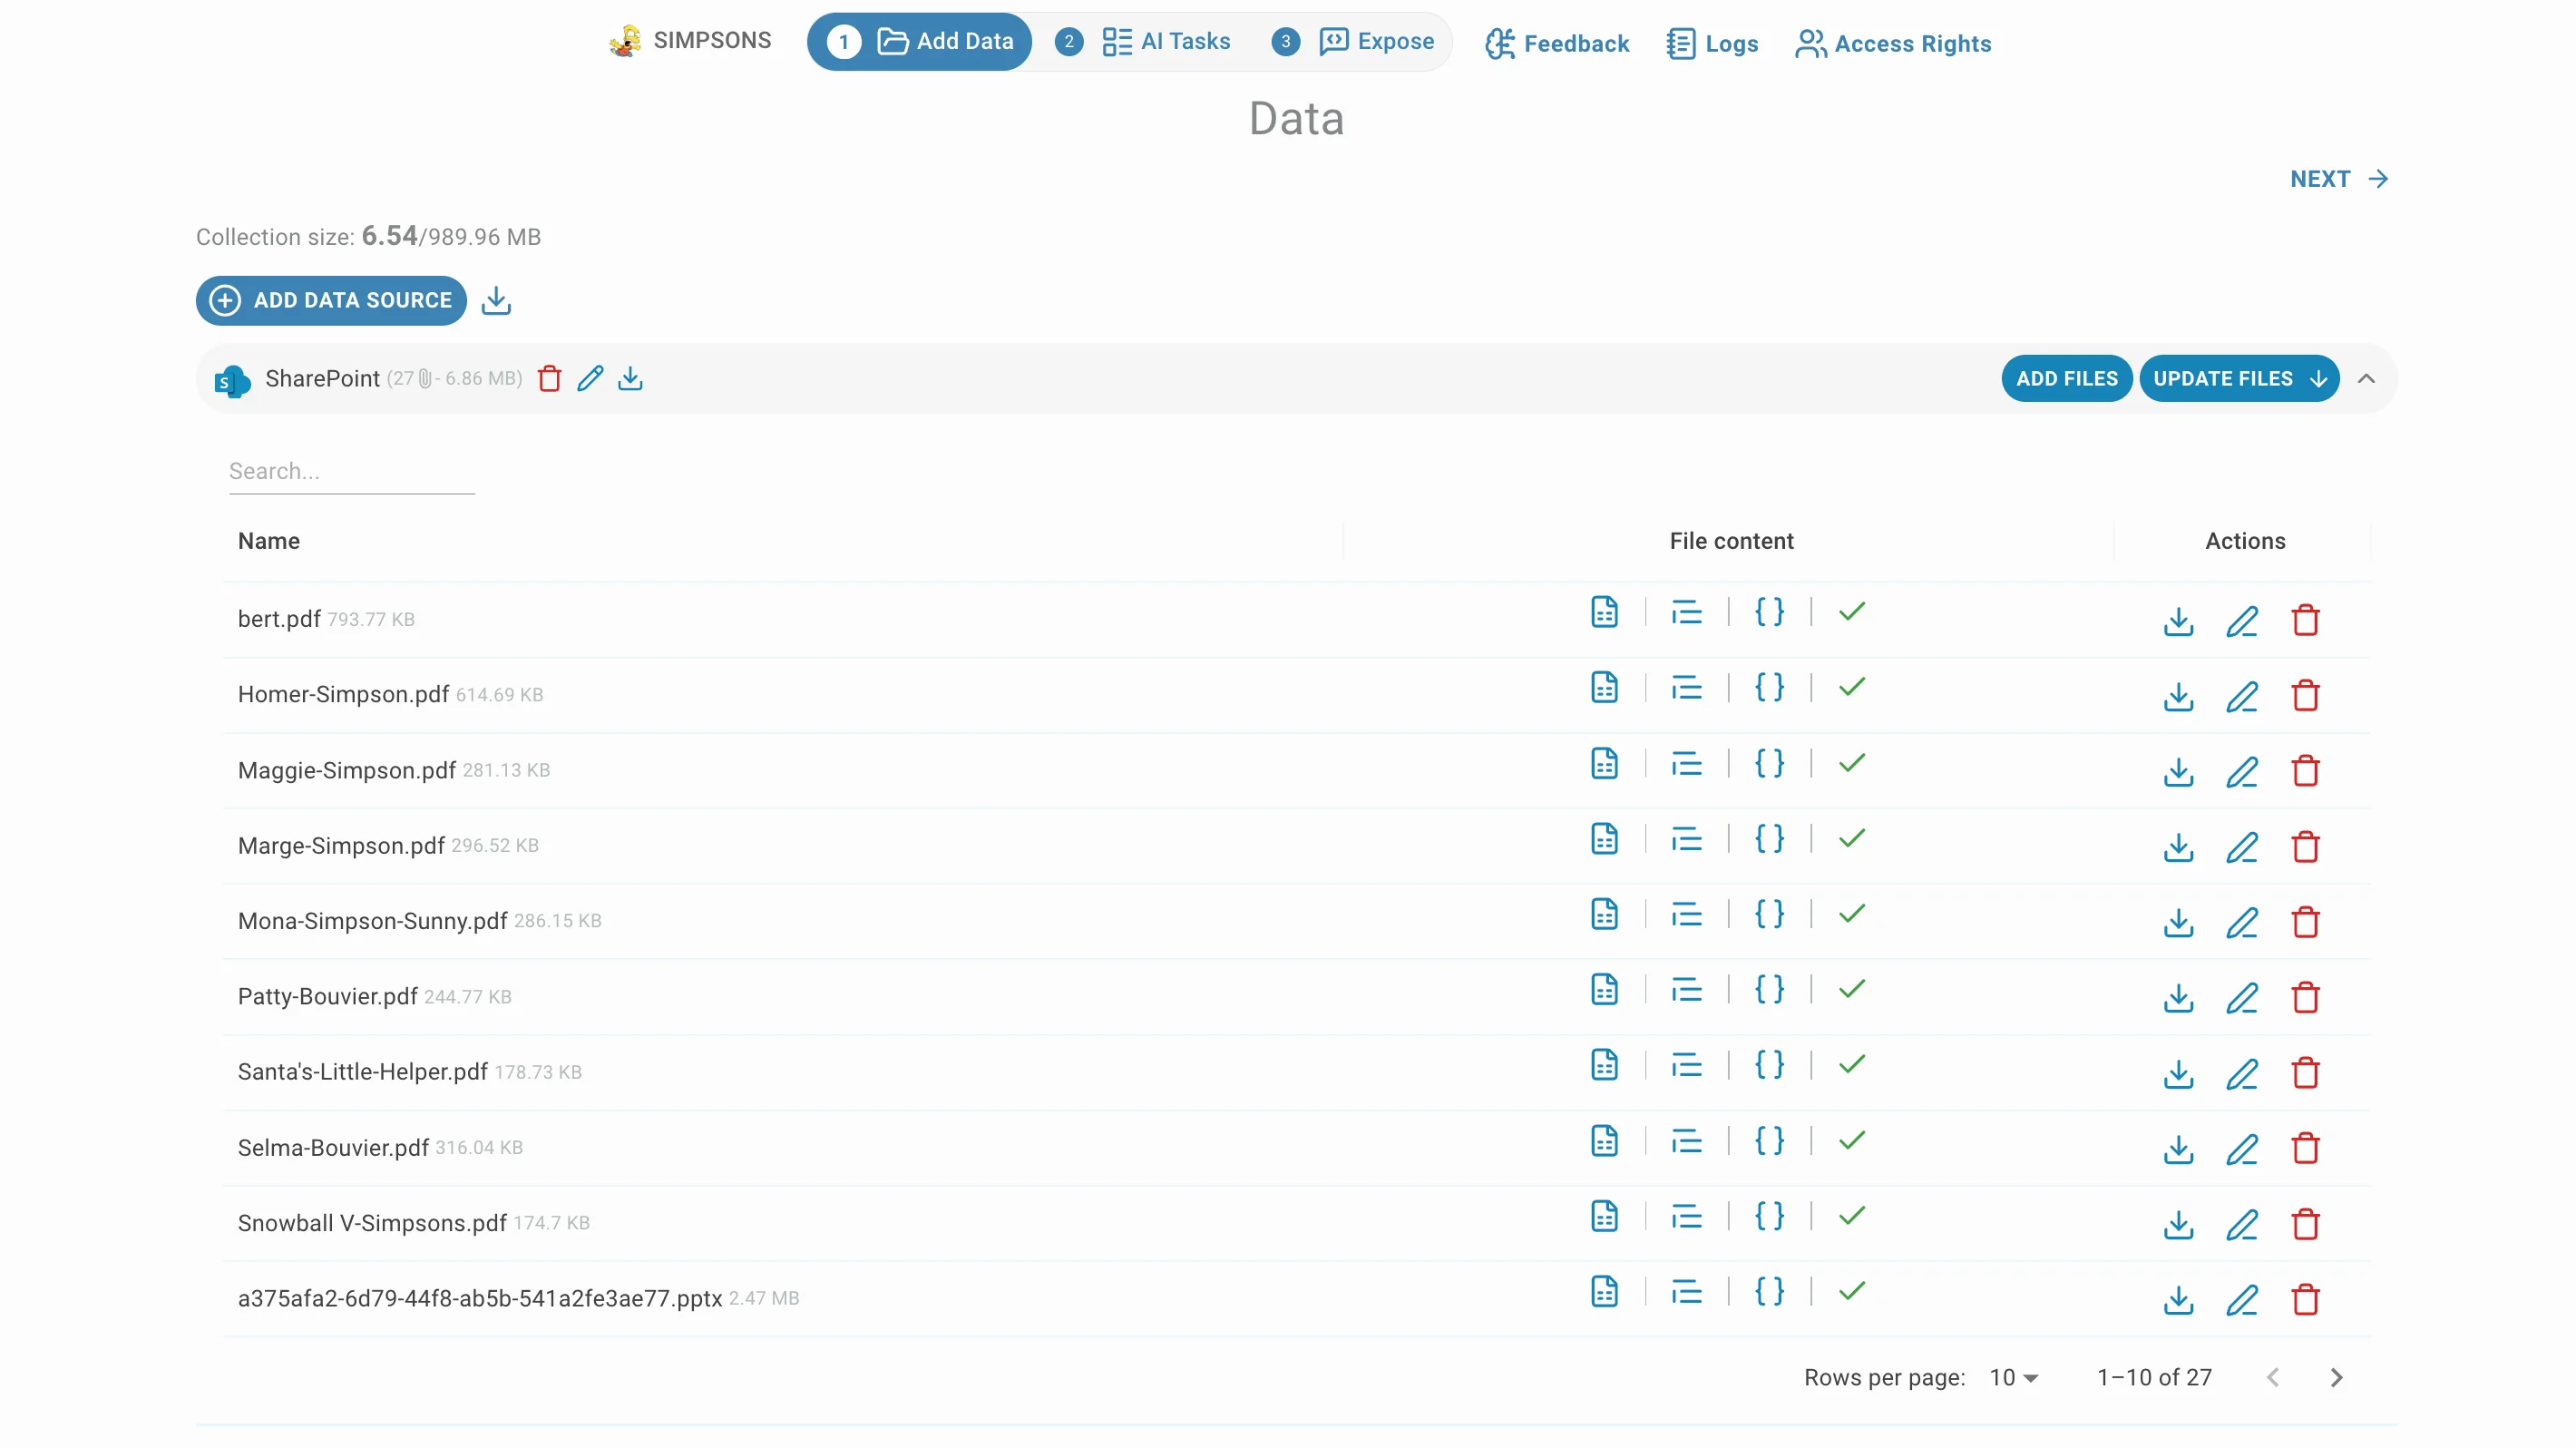
Your SharePoint Files
The contents of your SharePoint folder are now visible in the QAnswer interface.
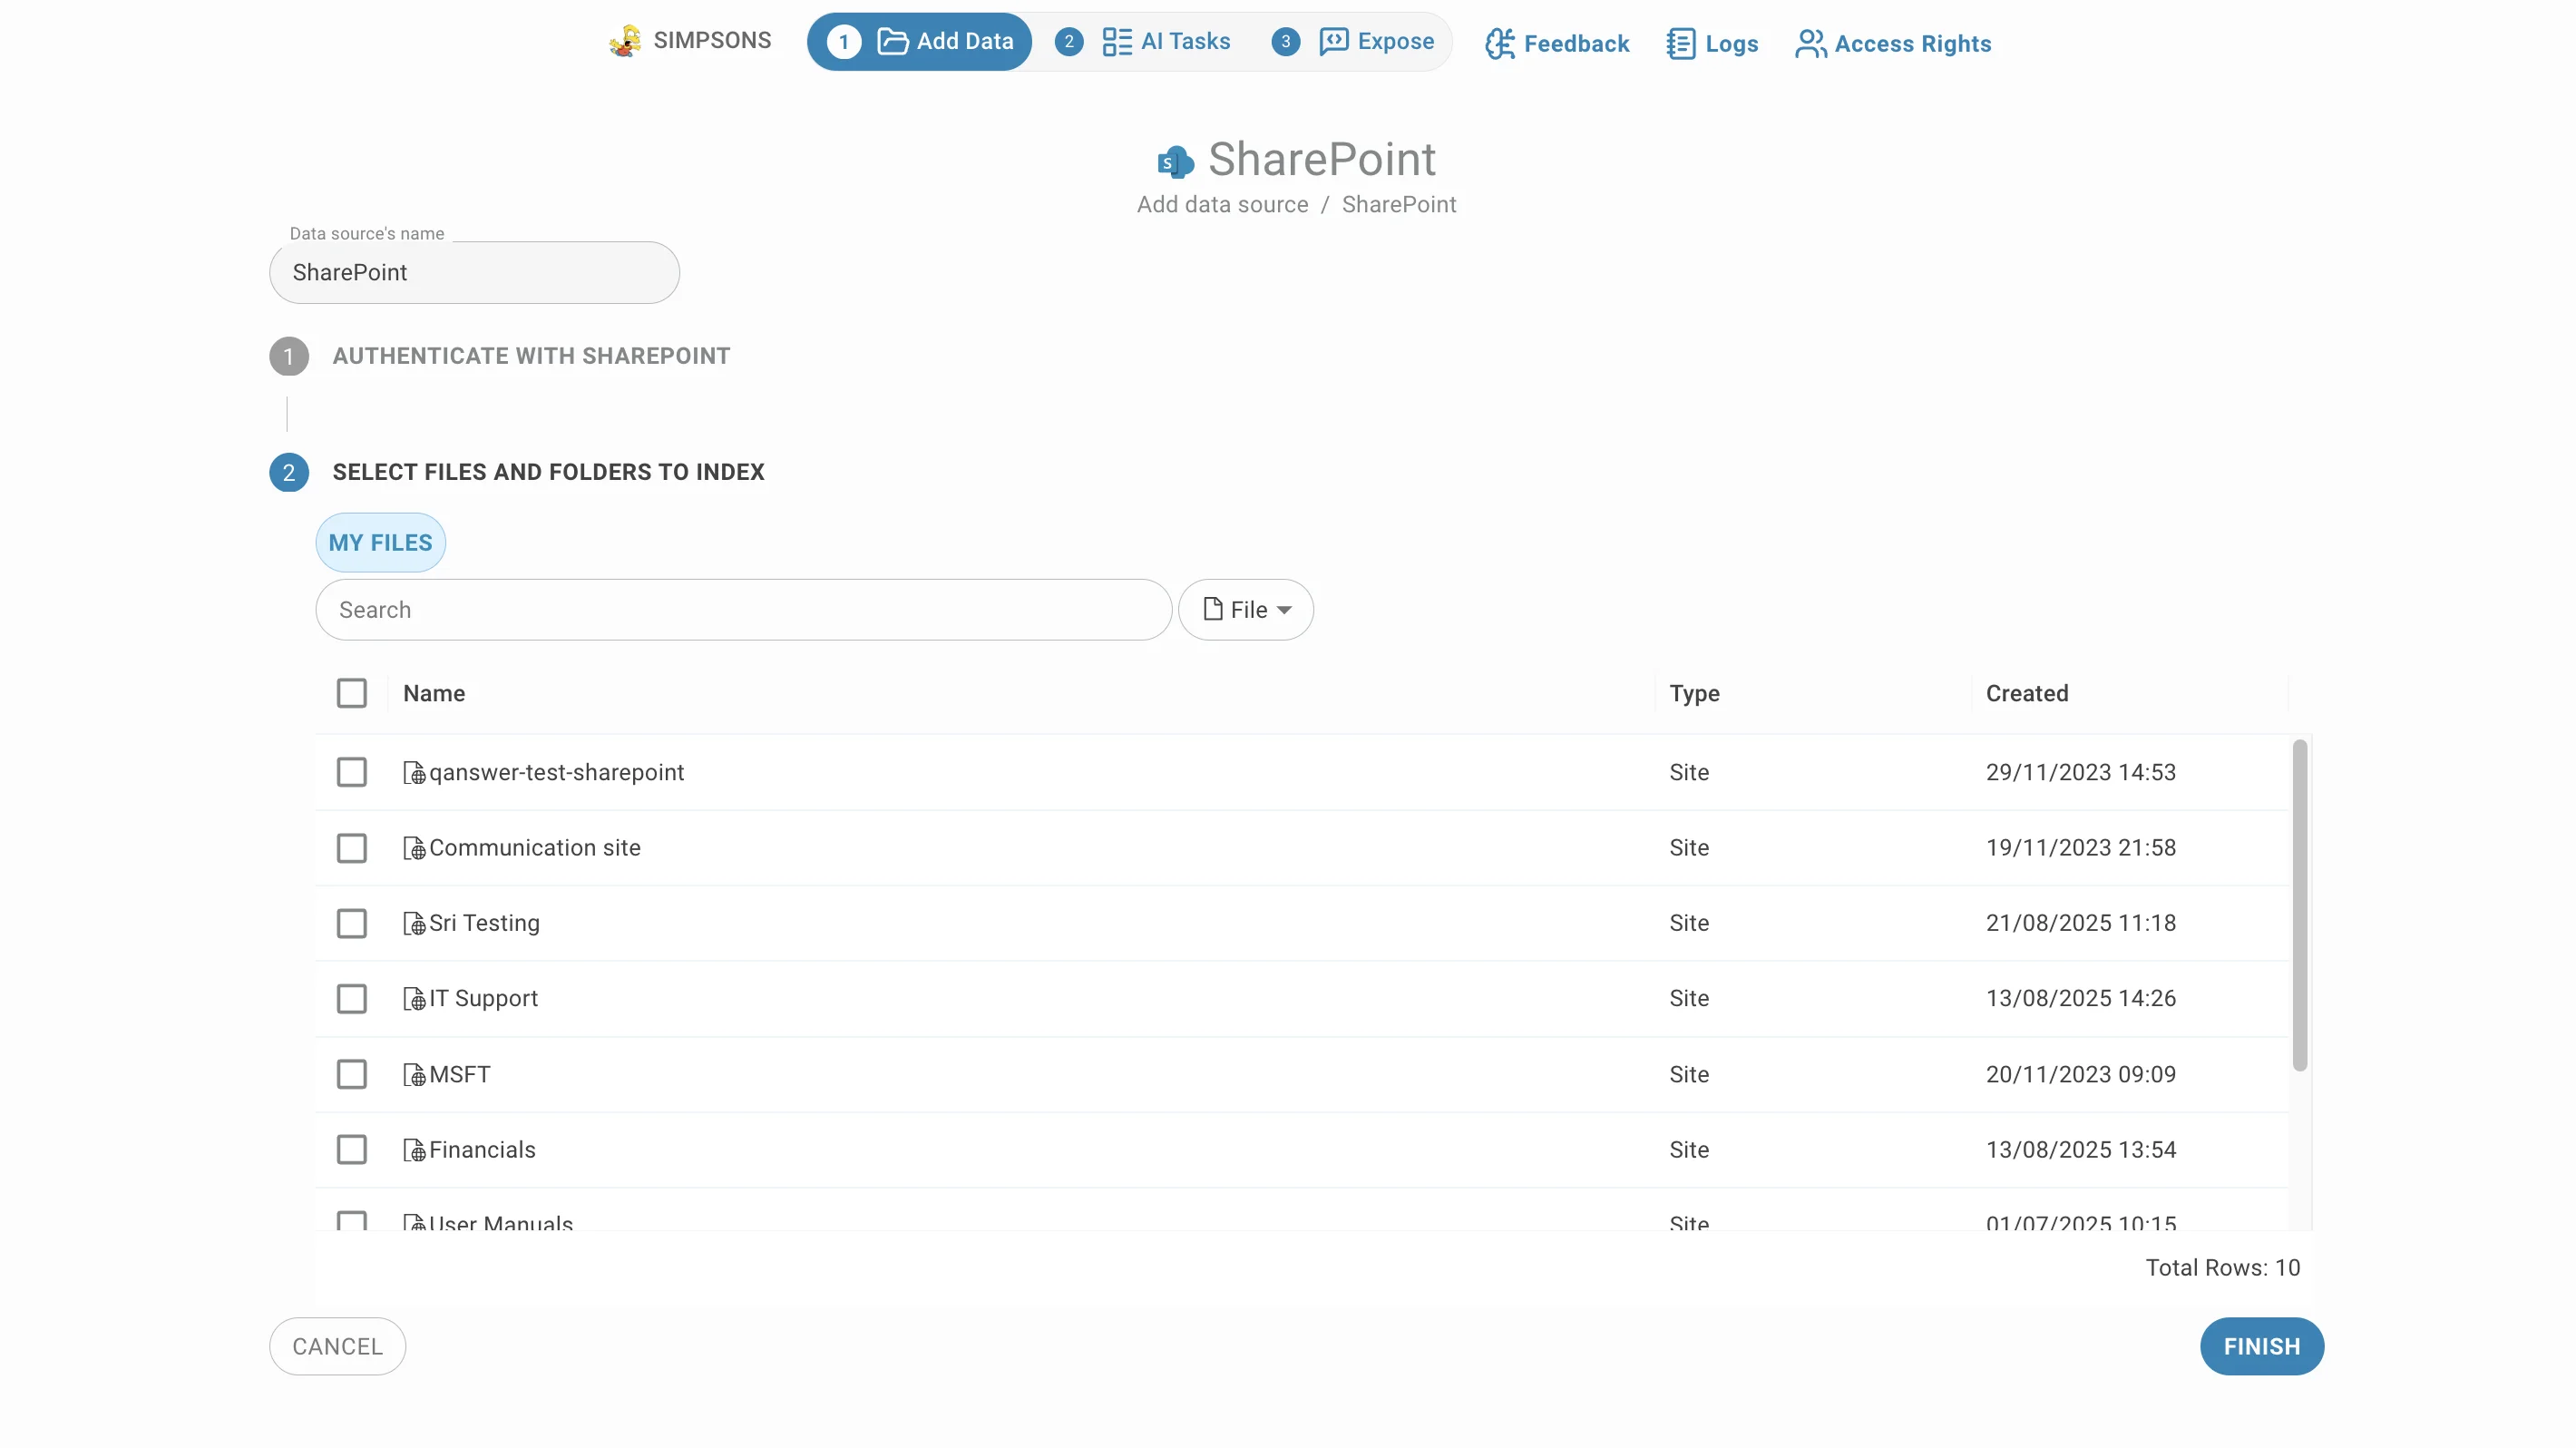
Select the documents to add to the SharePoint connector.
Filter
- Search documents by name using the search bar.
- Filter by file type by clicking Files.
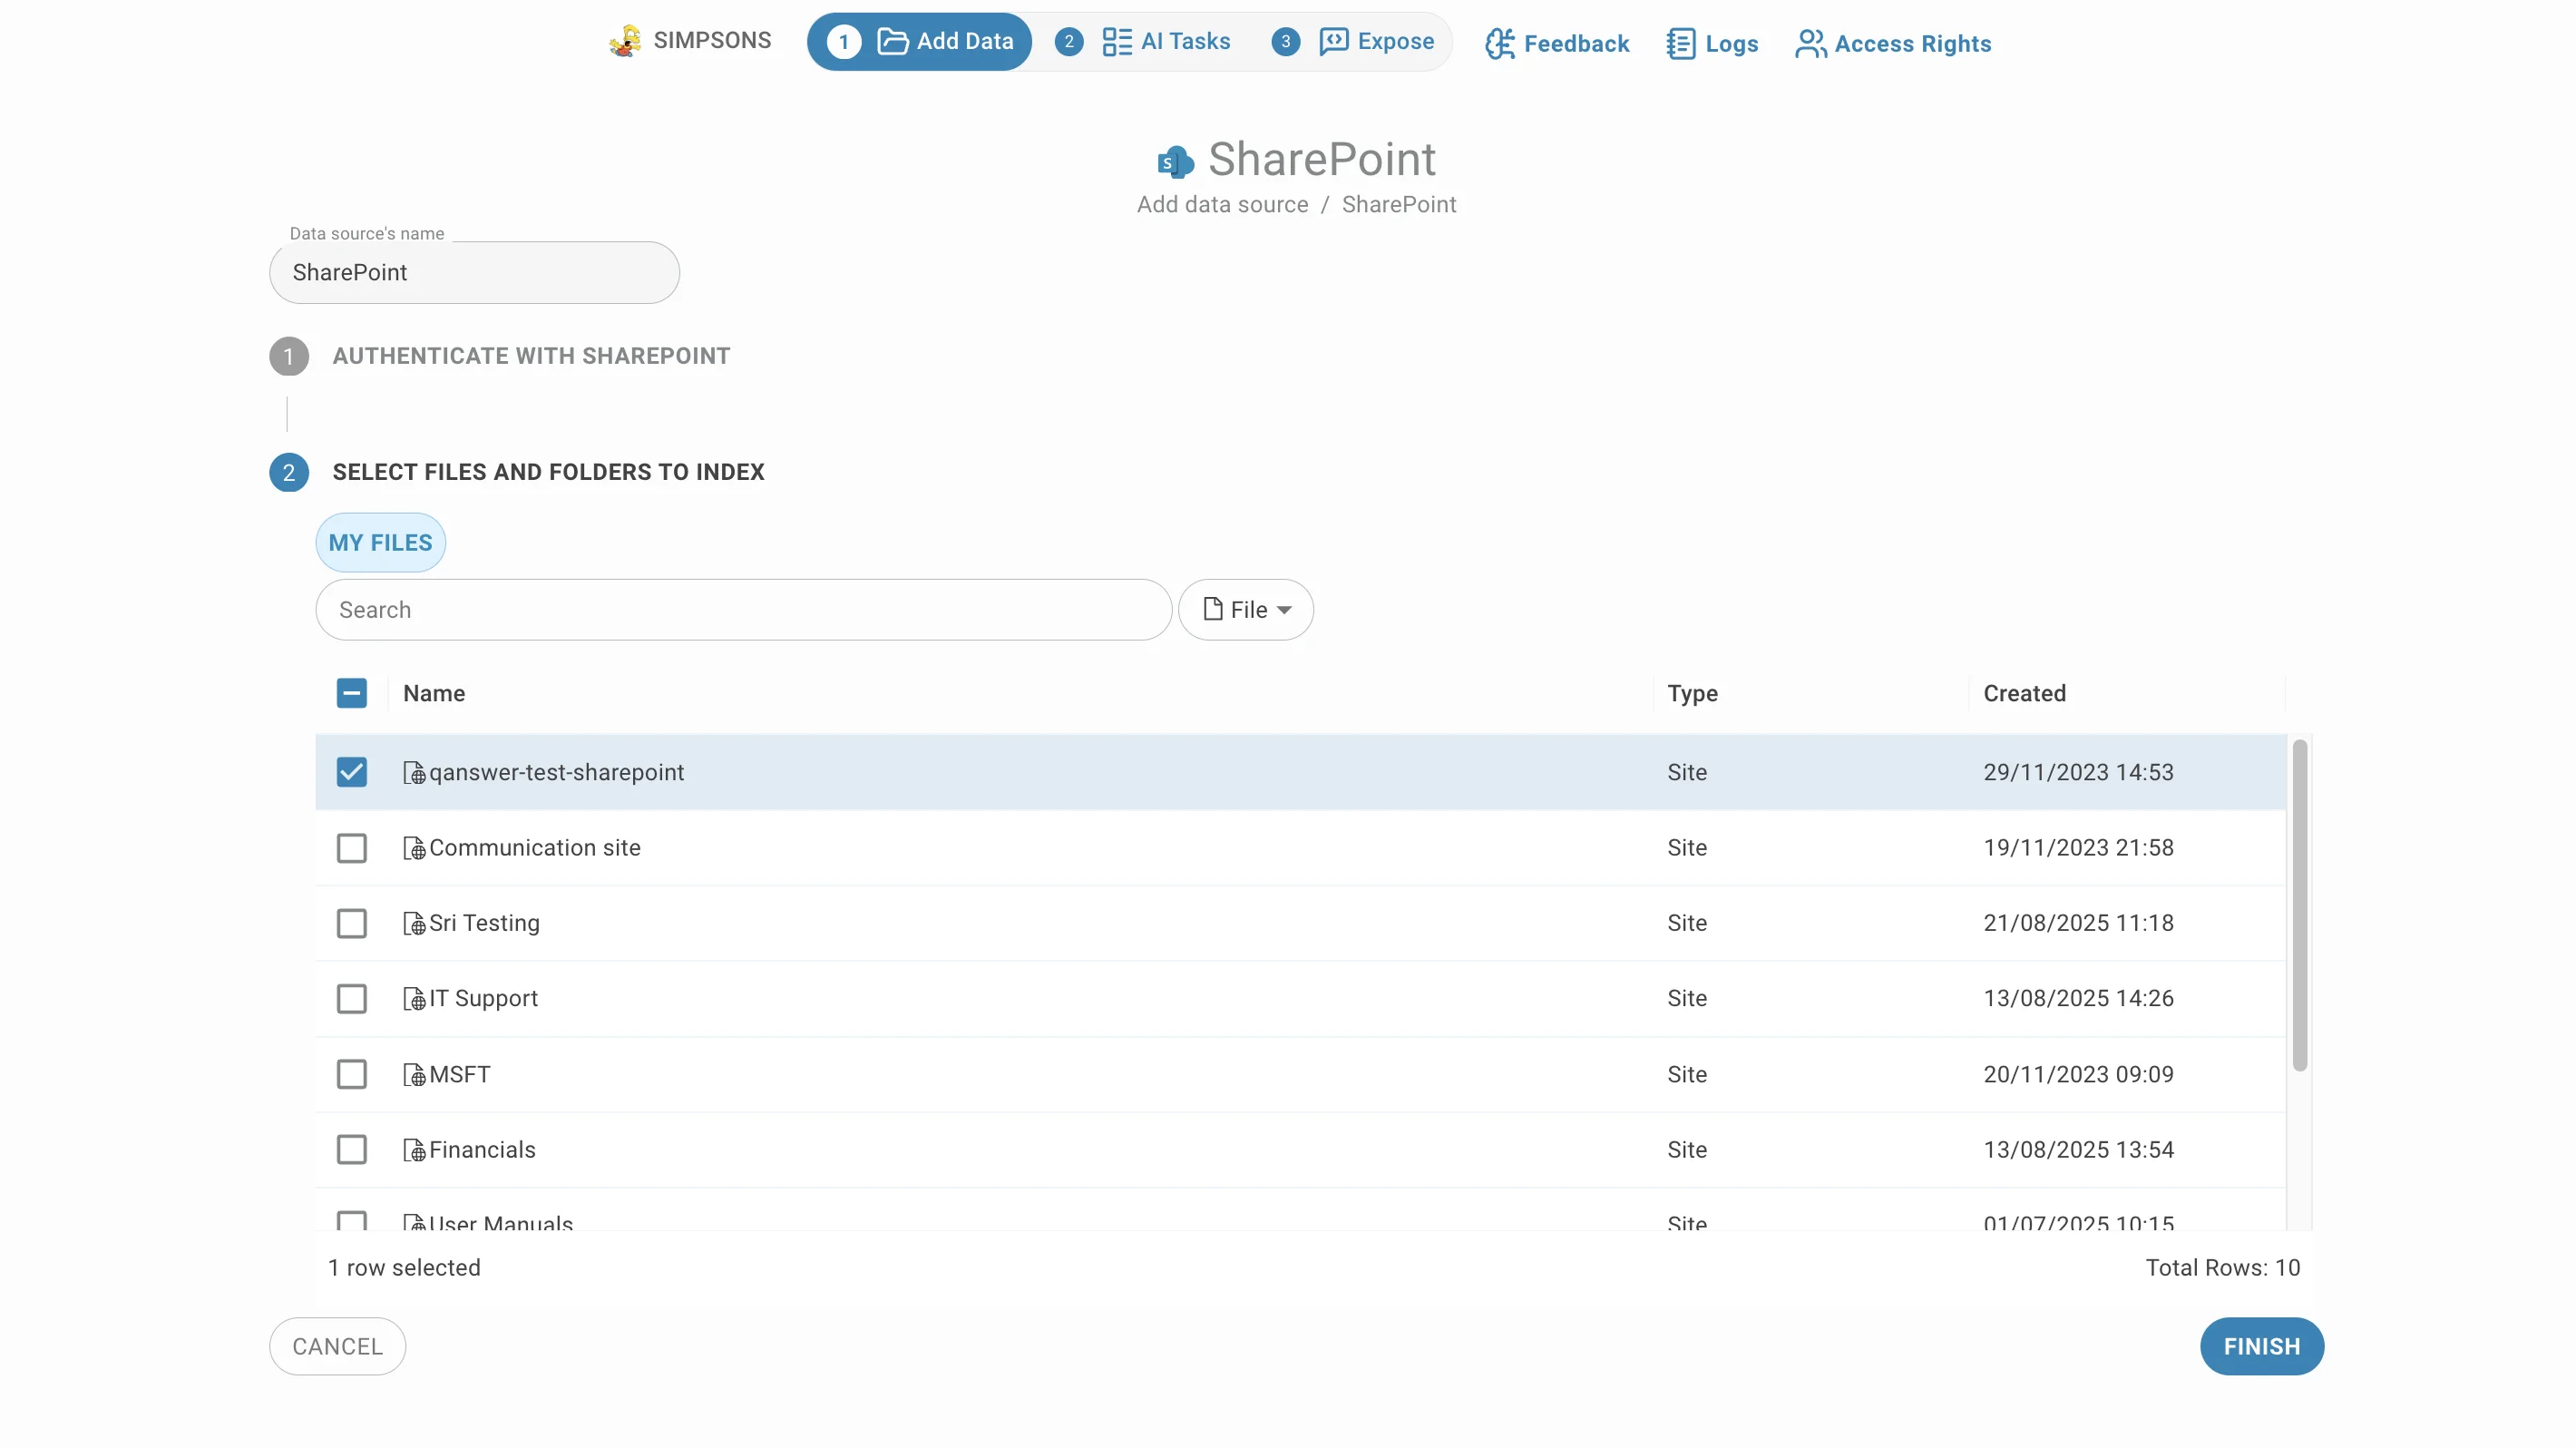
The selected documents are now available to the AI Assistant.
Document-Level Permissions
When a SharePoint site is indexed with document permissions enabled, QAnswer enforces the same access rules as SharePoint itself. Users who access the AI assistant must be authenticated with their Microsoft account — QAnswer will then show each person only the documents they already have access to in SharePoint. Users who are not authenticated, or whose account cannot be recognized, will see no SharePoint content at all.
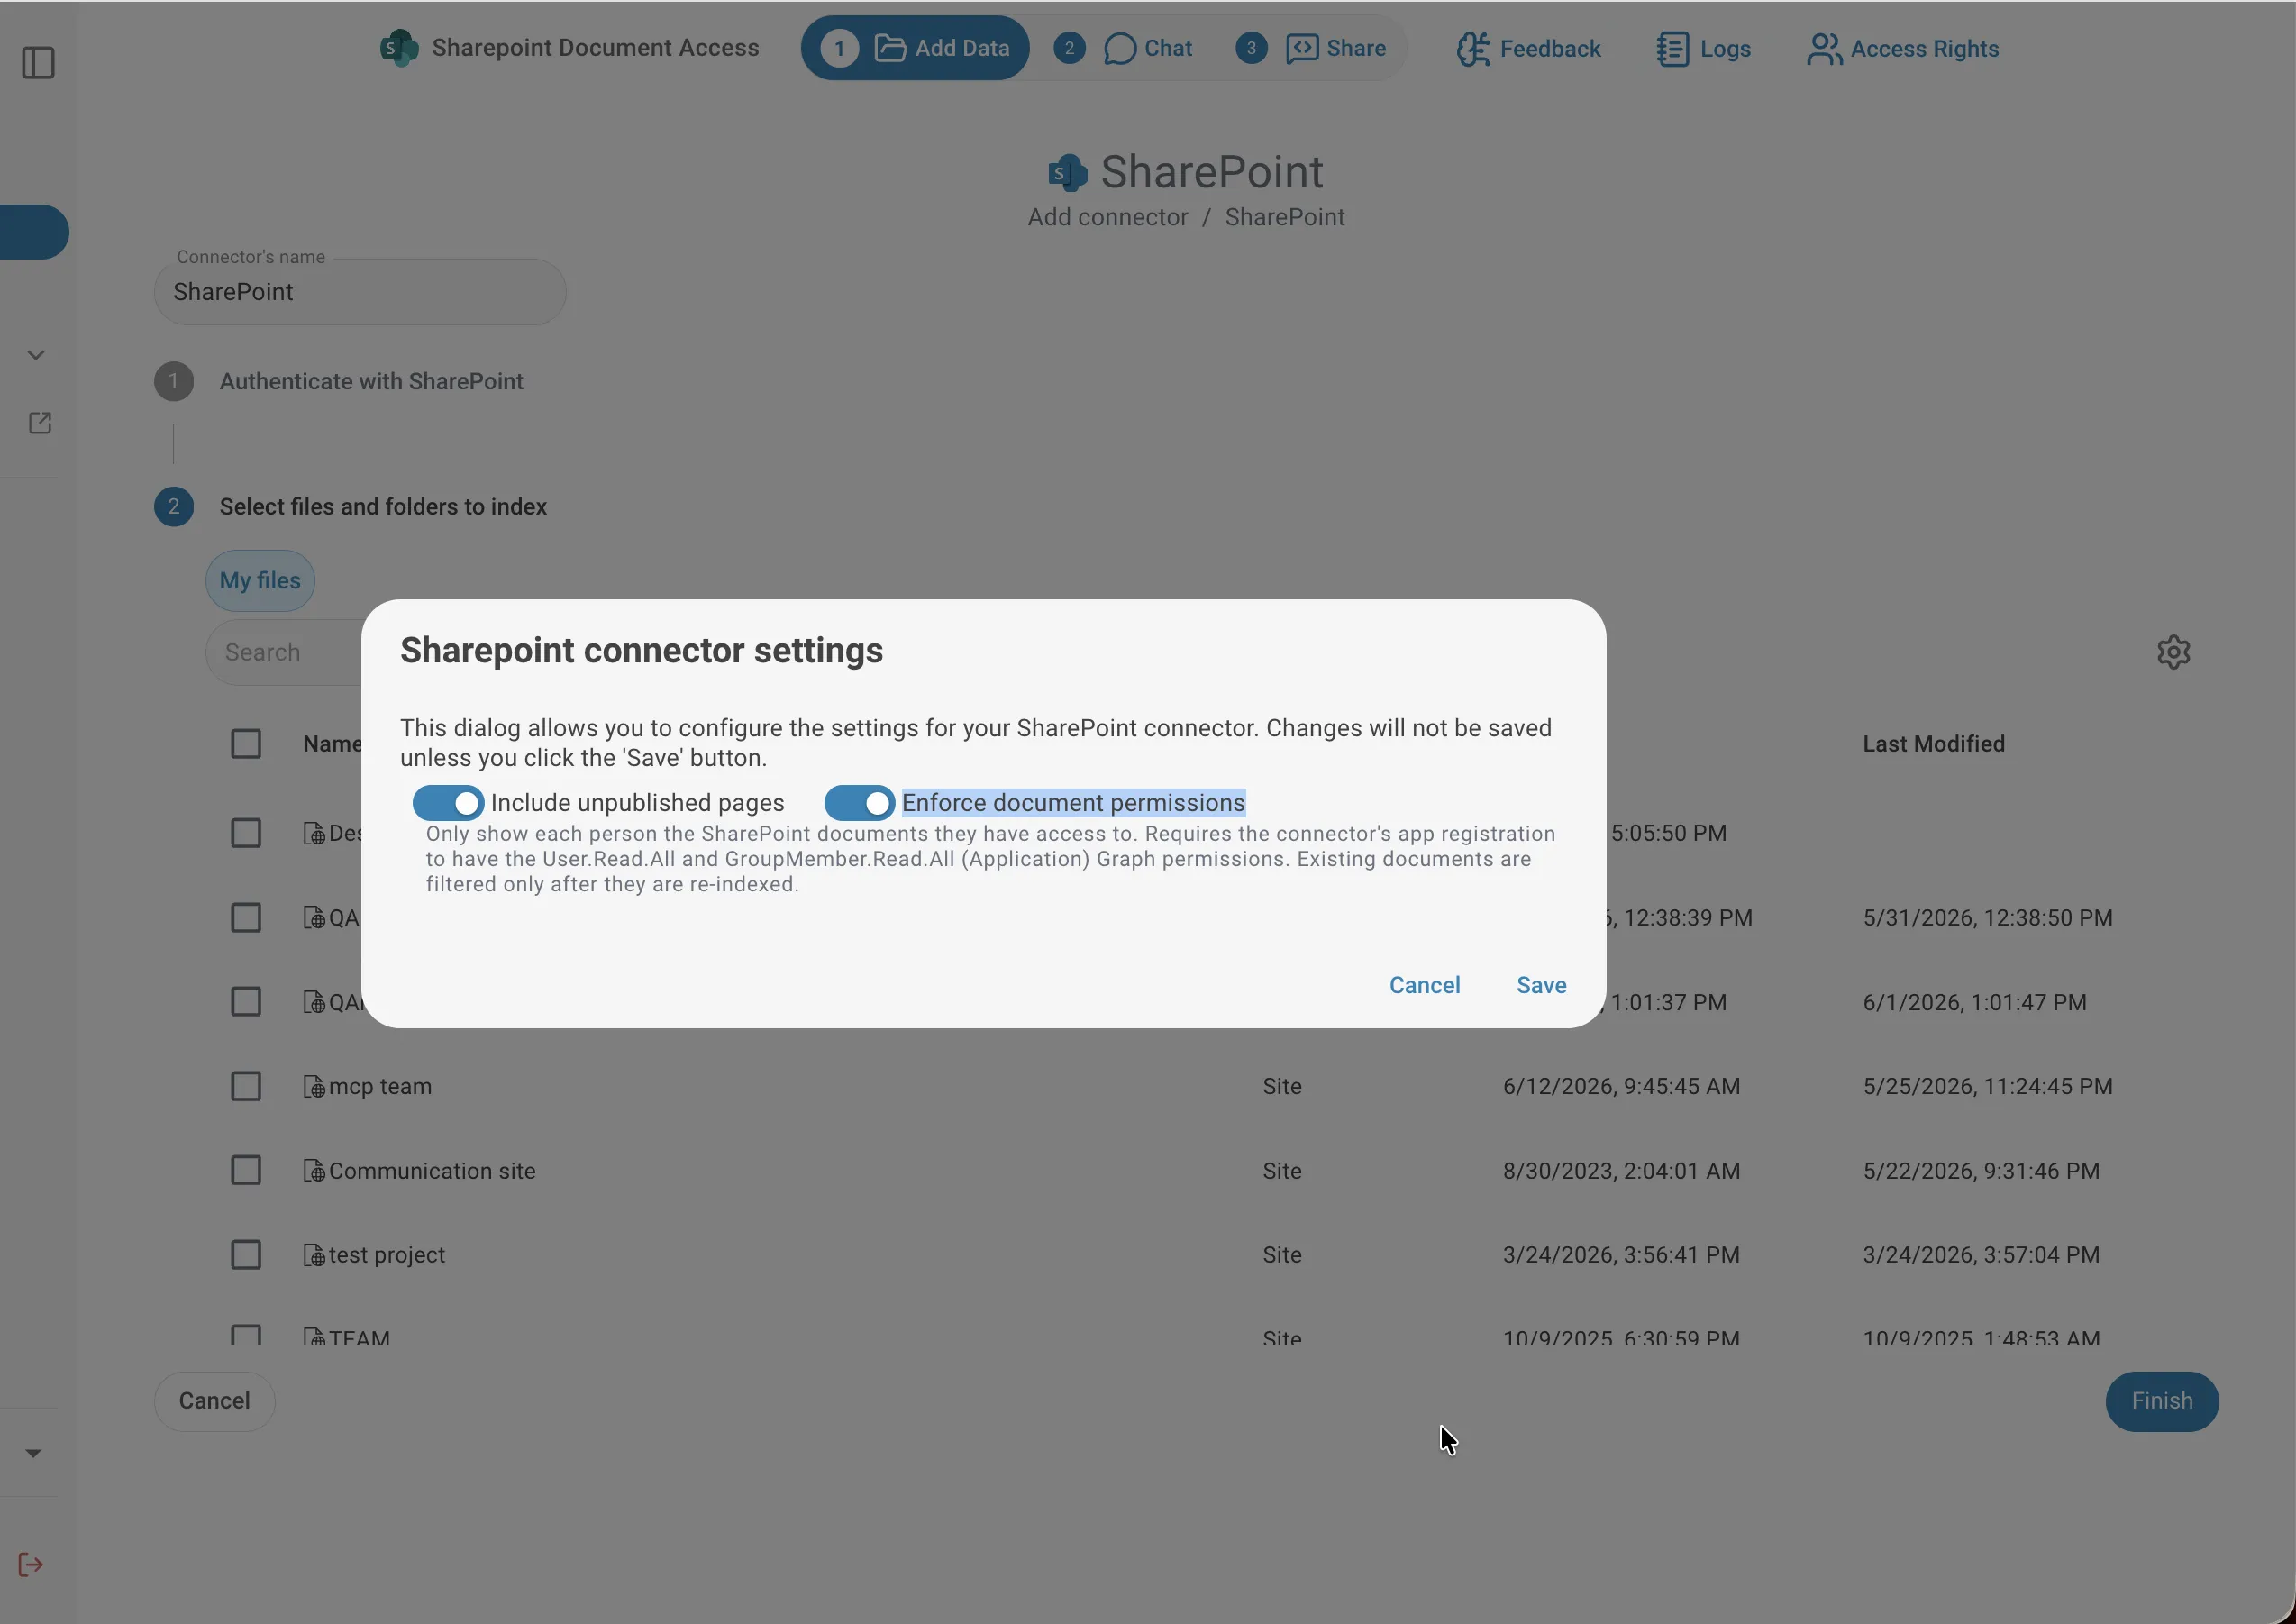
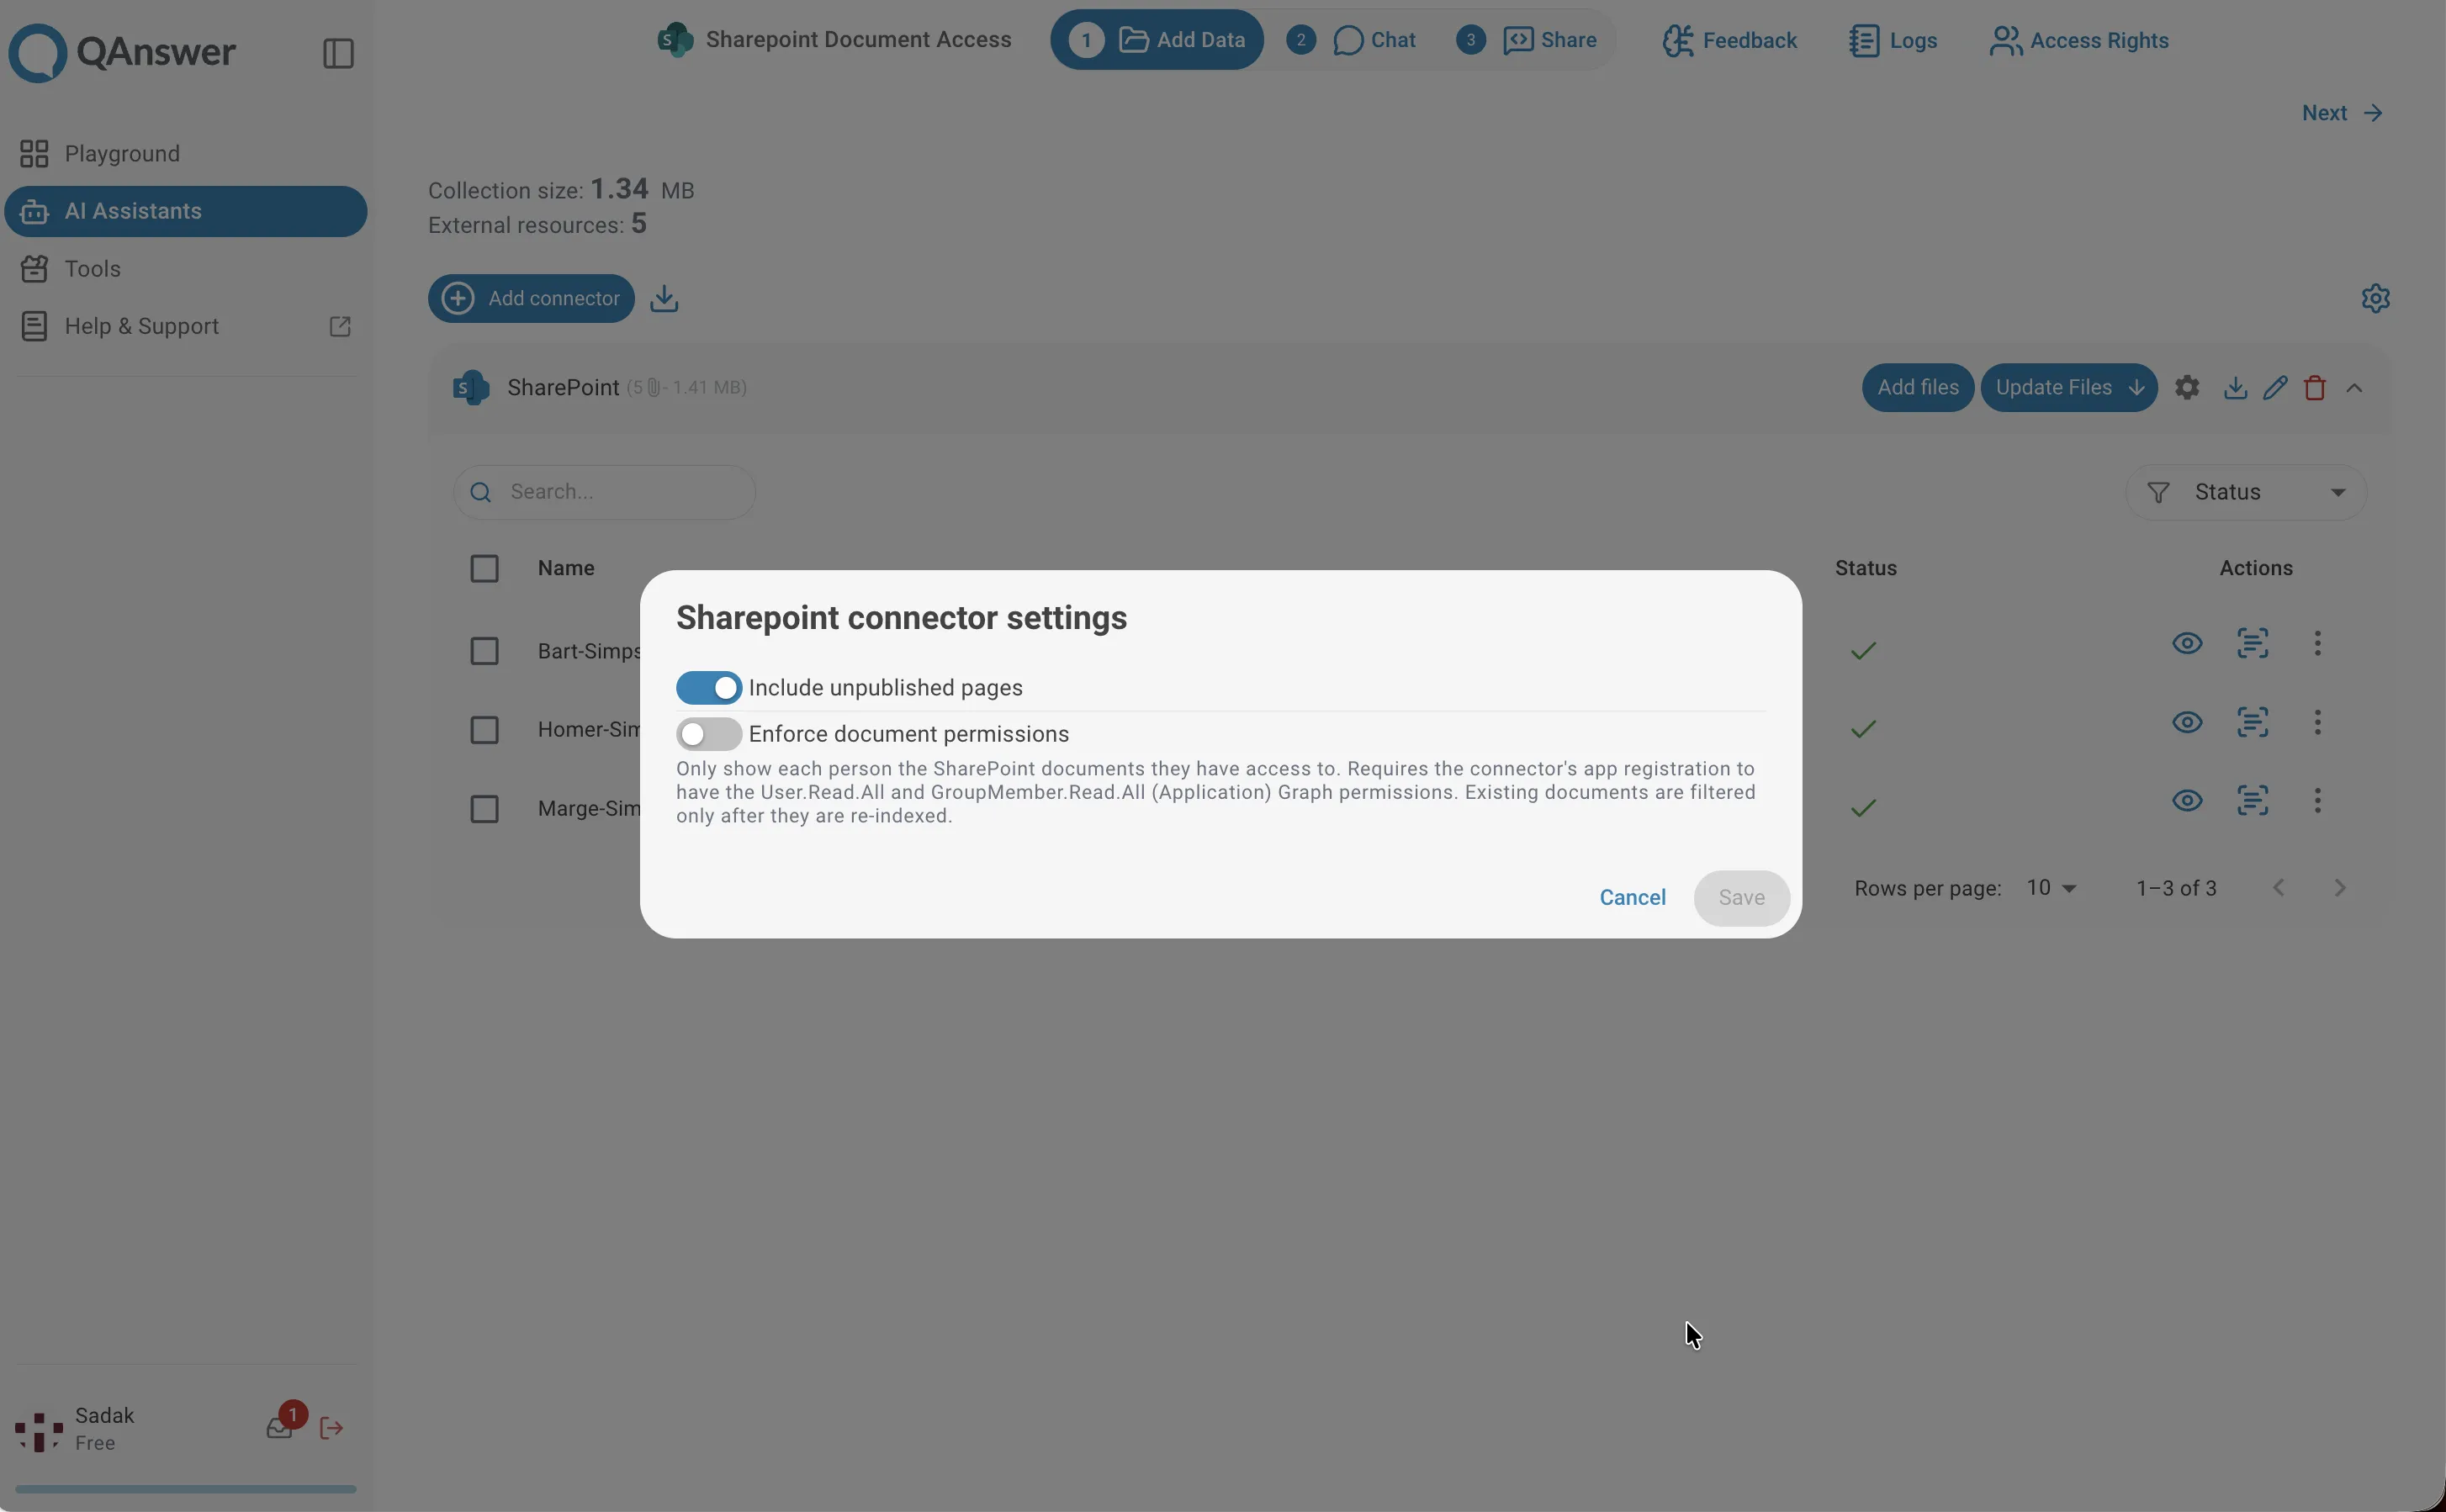
Enabling Permission Enforcement
Open the connector settings and toggle on Enforce document permissions, then click Save.
Disabling the toggle at any time removes all restrictions — all indexed SharePoint documents become visible to everyone who has access to the assistant, regardless of their SharePoint permissions.
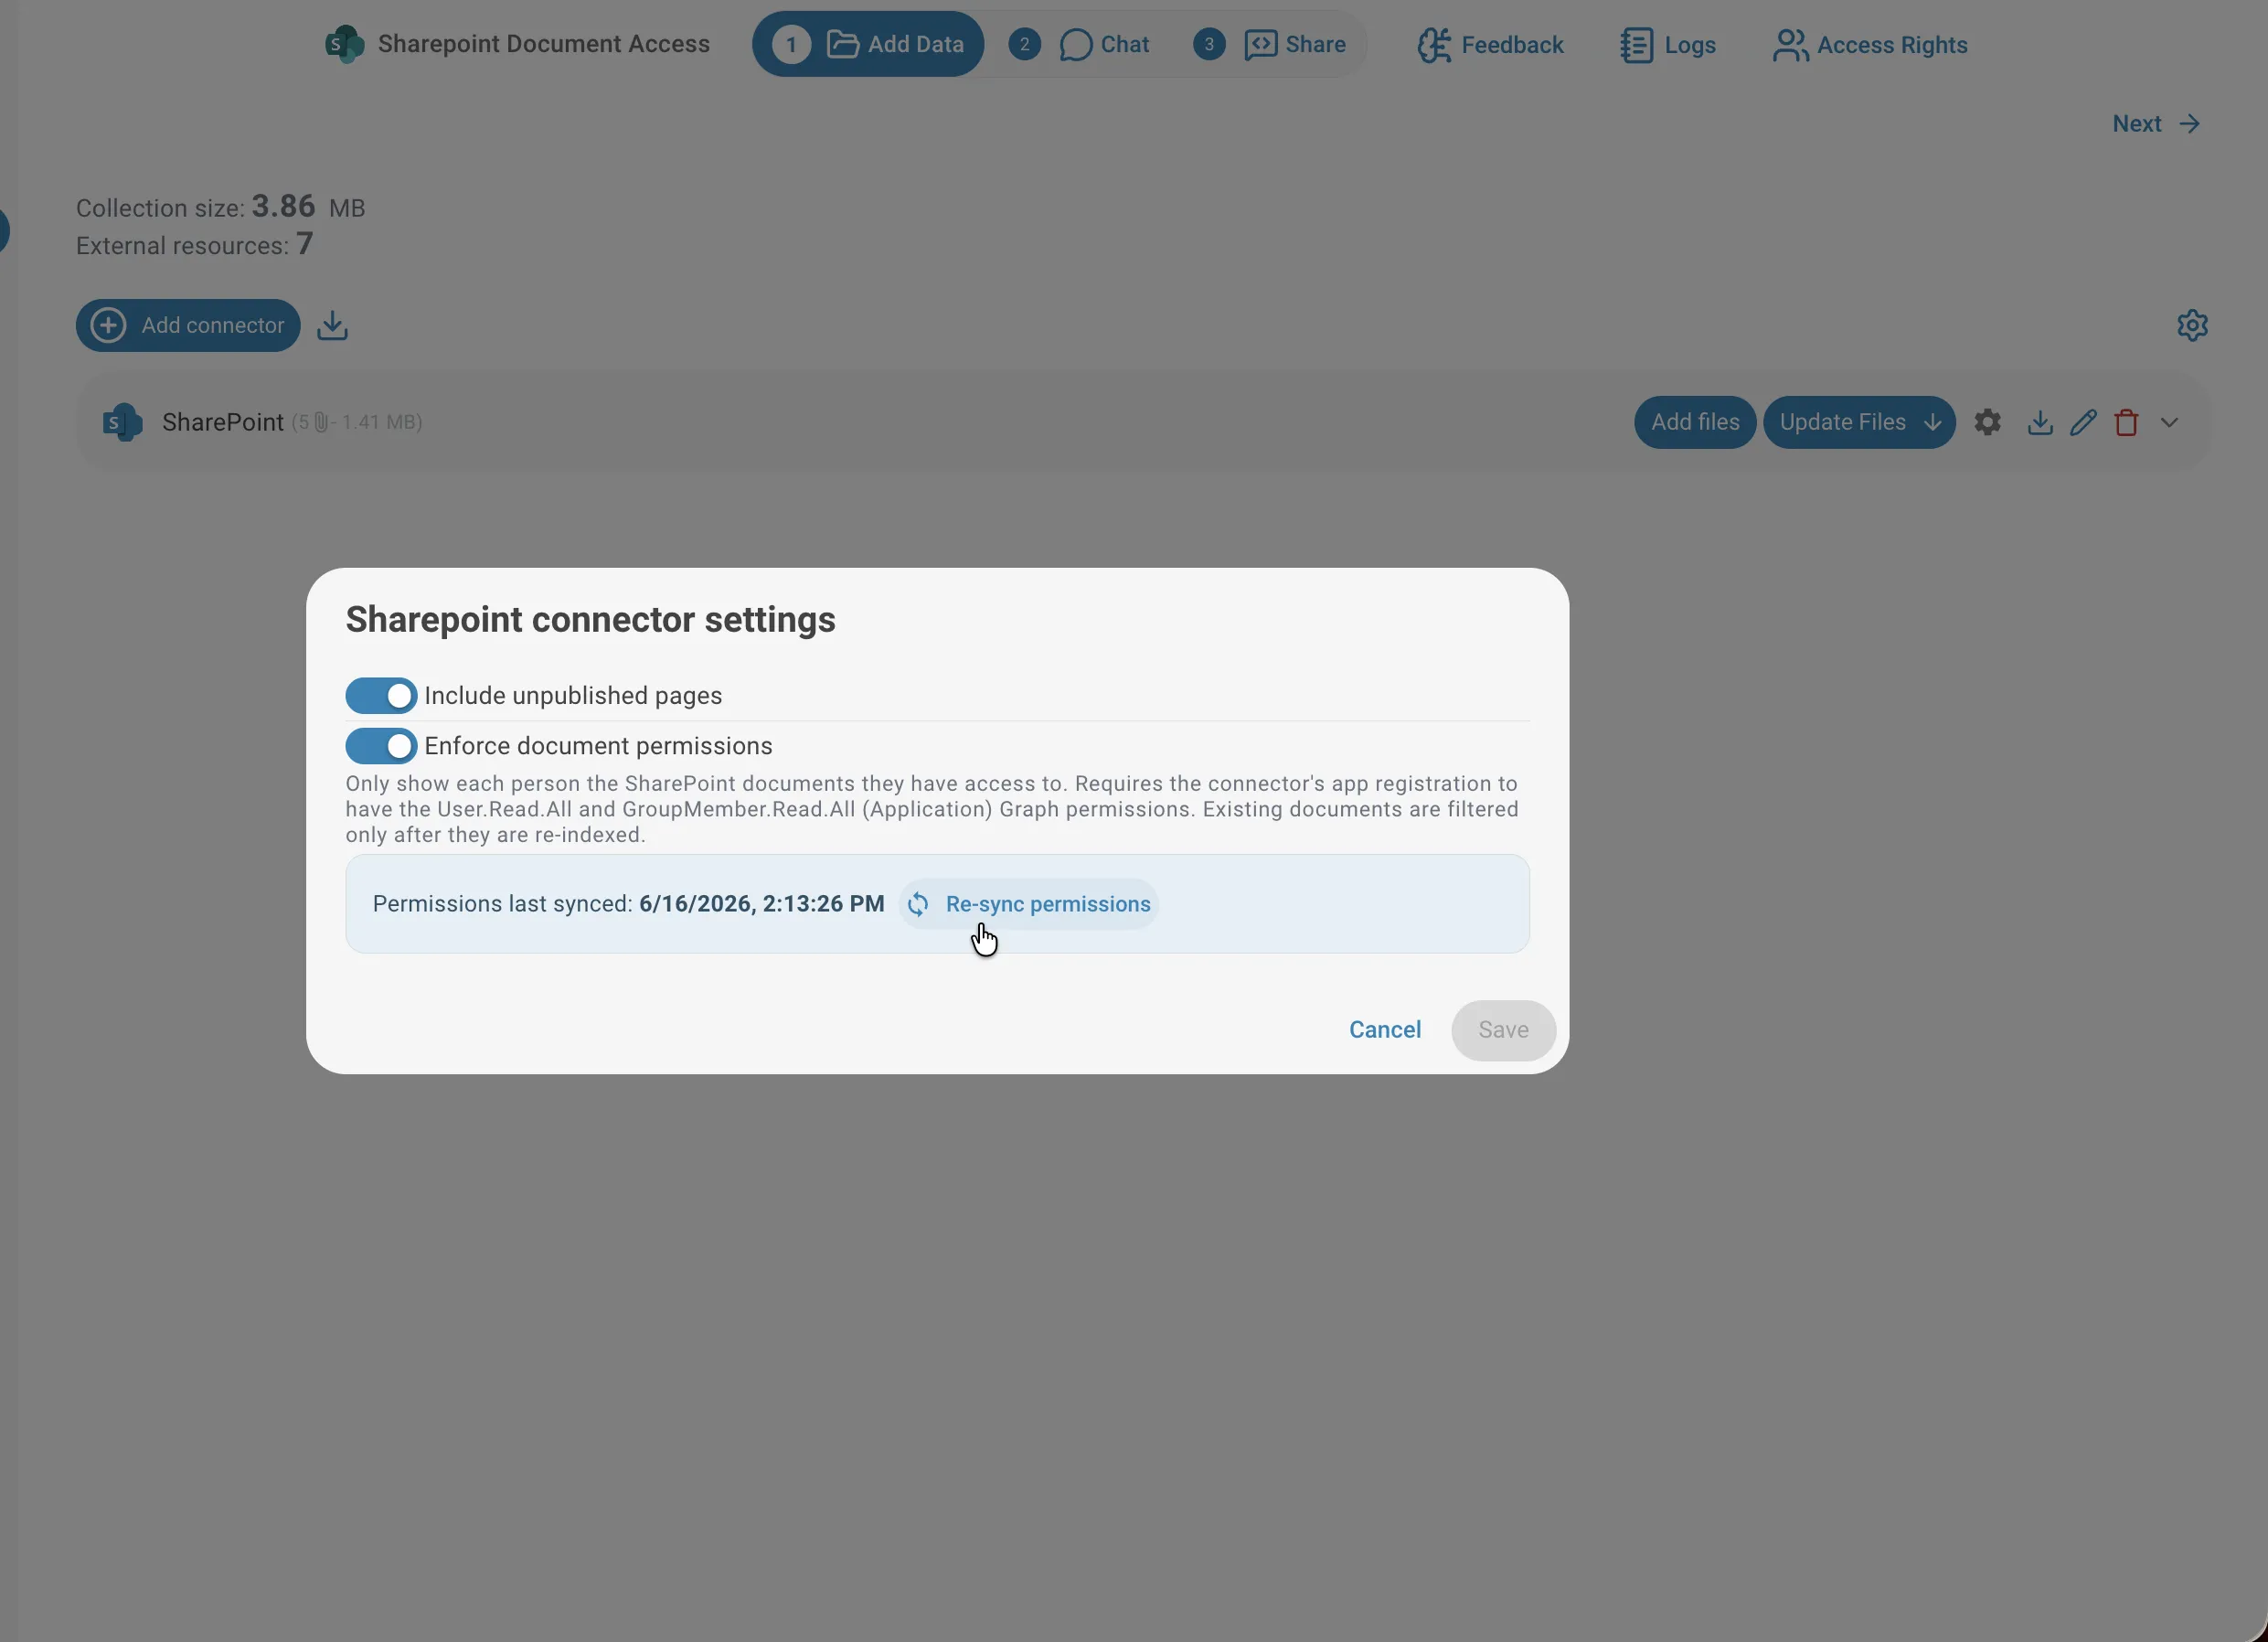
Keeping Permissions Up to Date
When access rights change in SharePoint, you can update QAnswer without re-indexing all content. Open the connector settings and click Re-sync permissions. This updates who can see each document in the background.
Viewing Who Has Access to a File
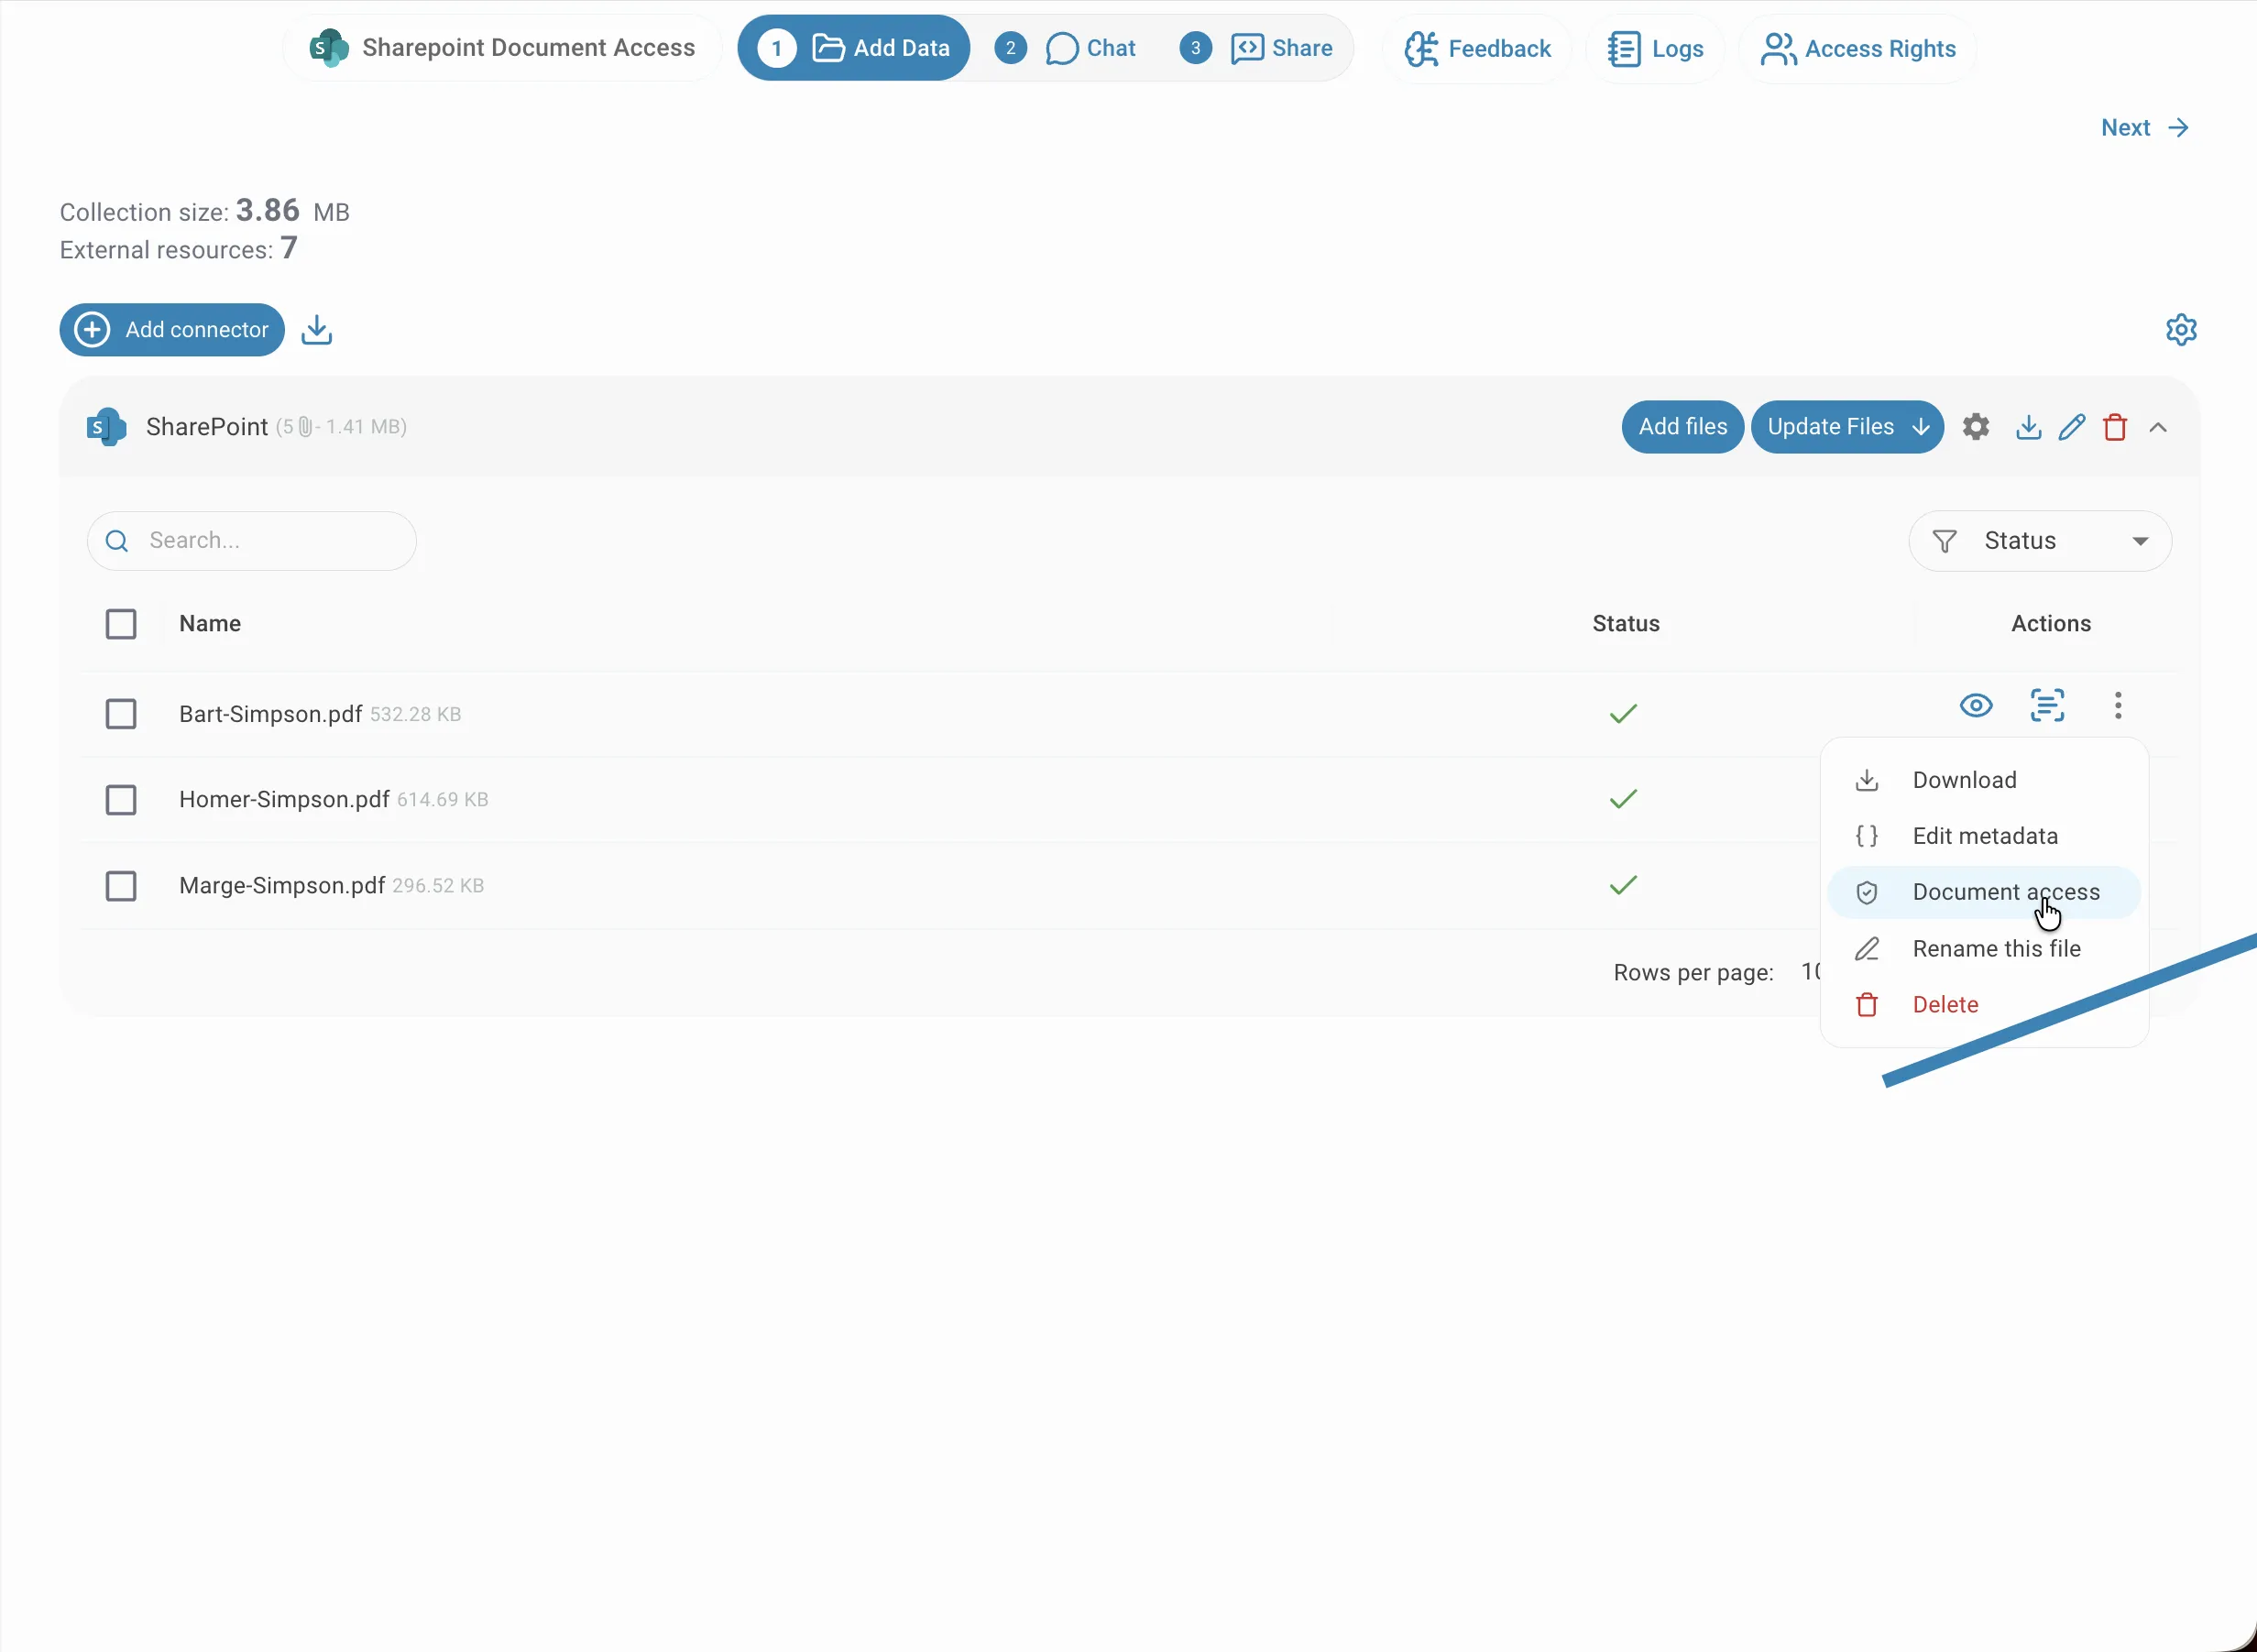
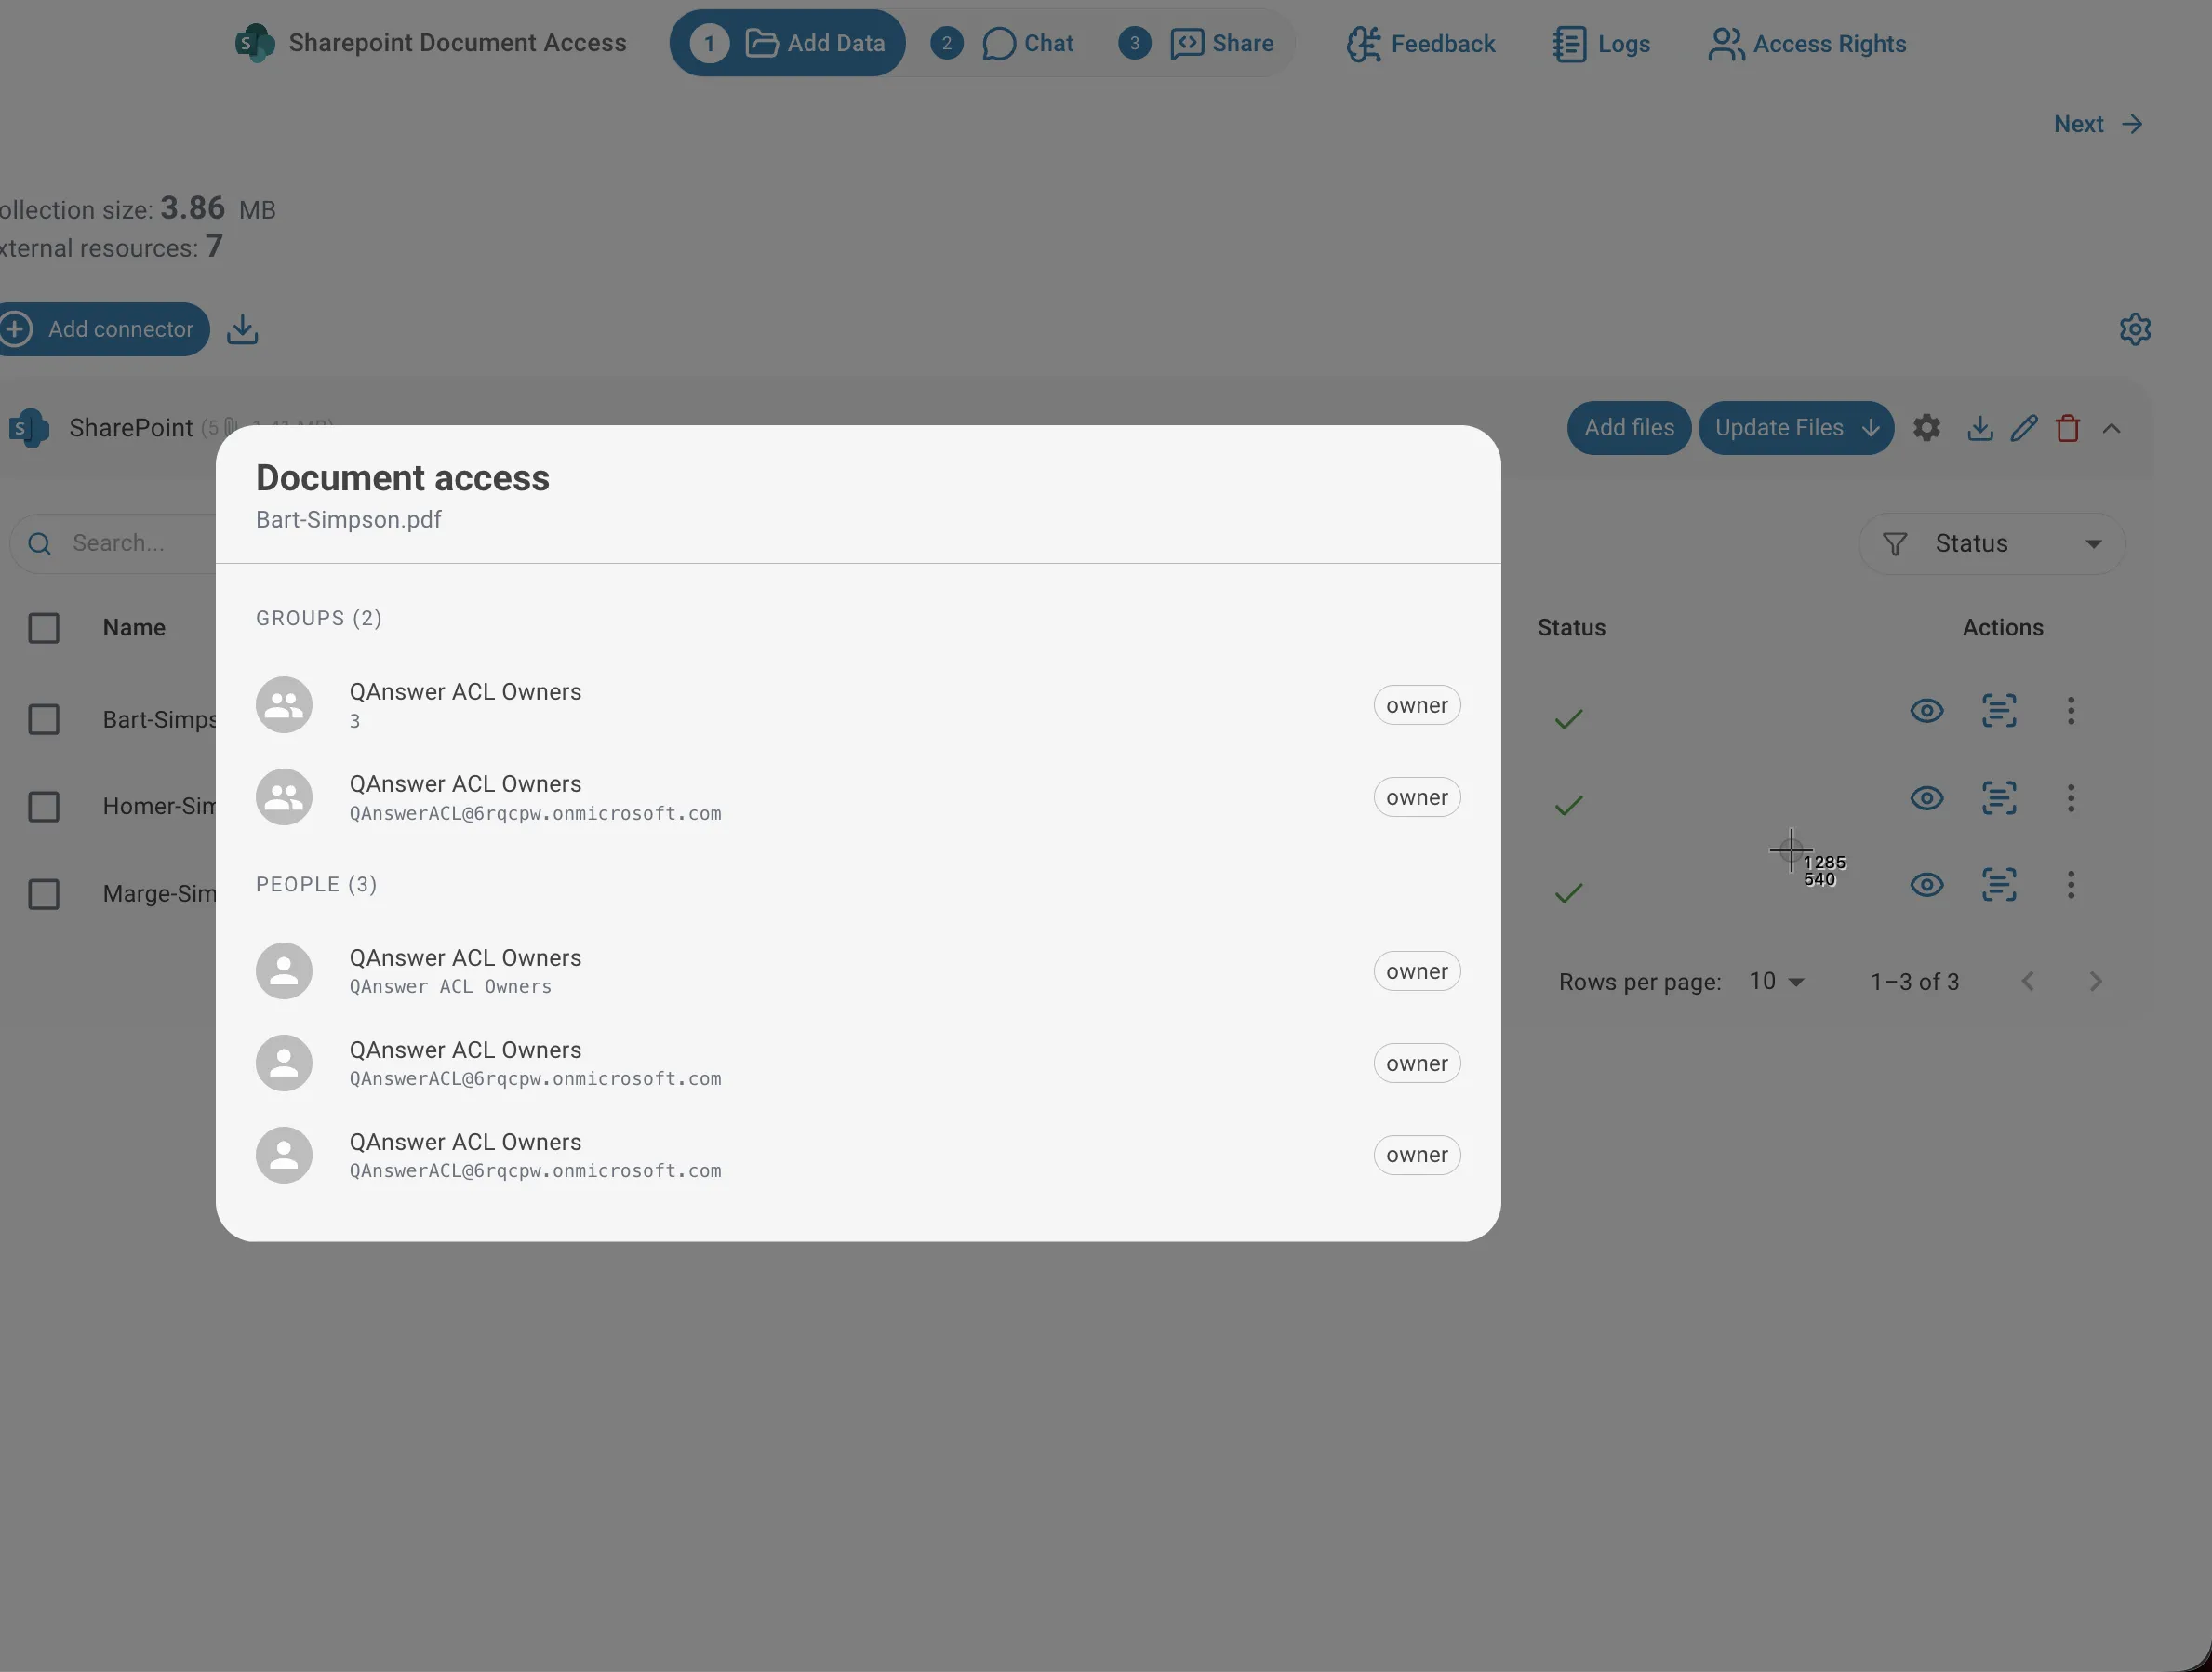
To see who has access to a specific document, click the actions menu (⋮) next to the file and select Document access.
The dialog shows every group and person that has access to that document, along with their permission level (owner, write, or read).

What Users See
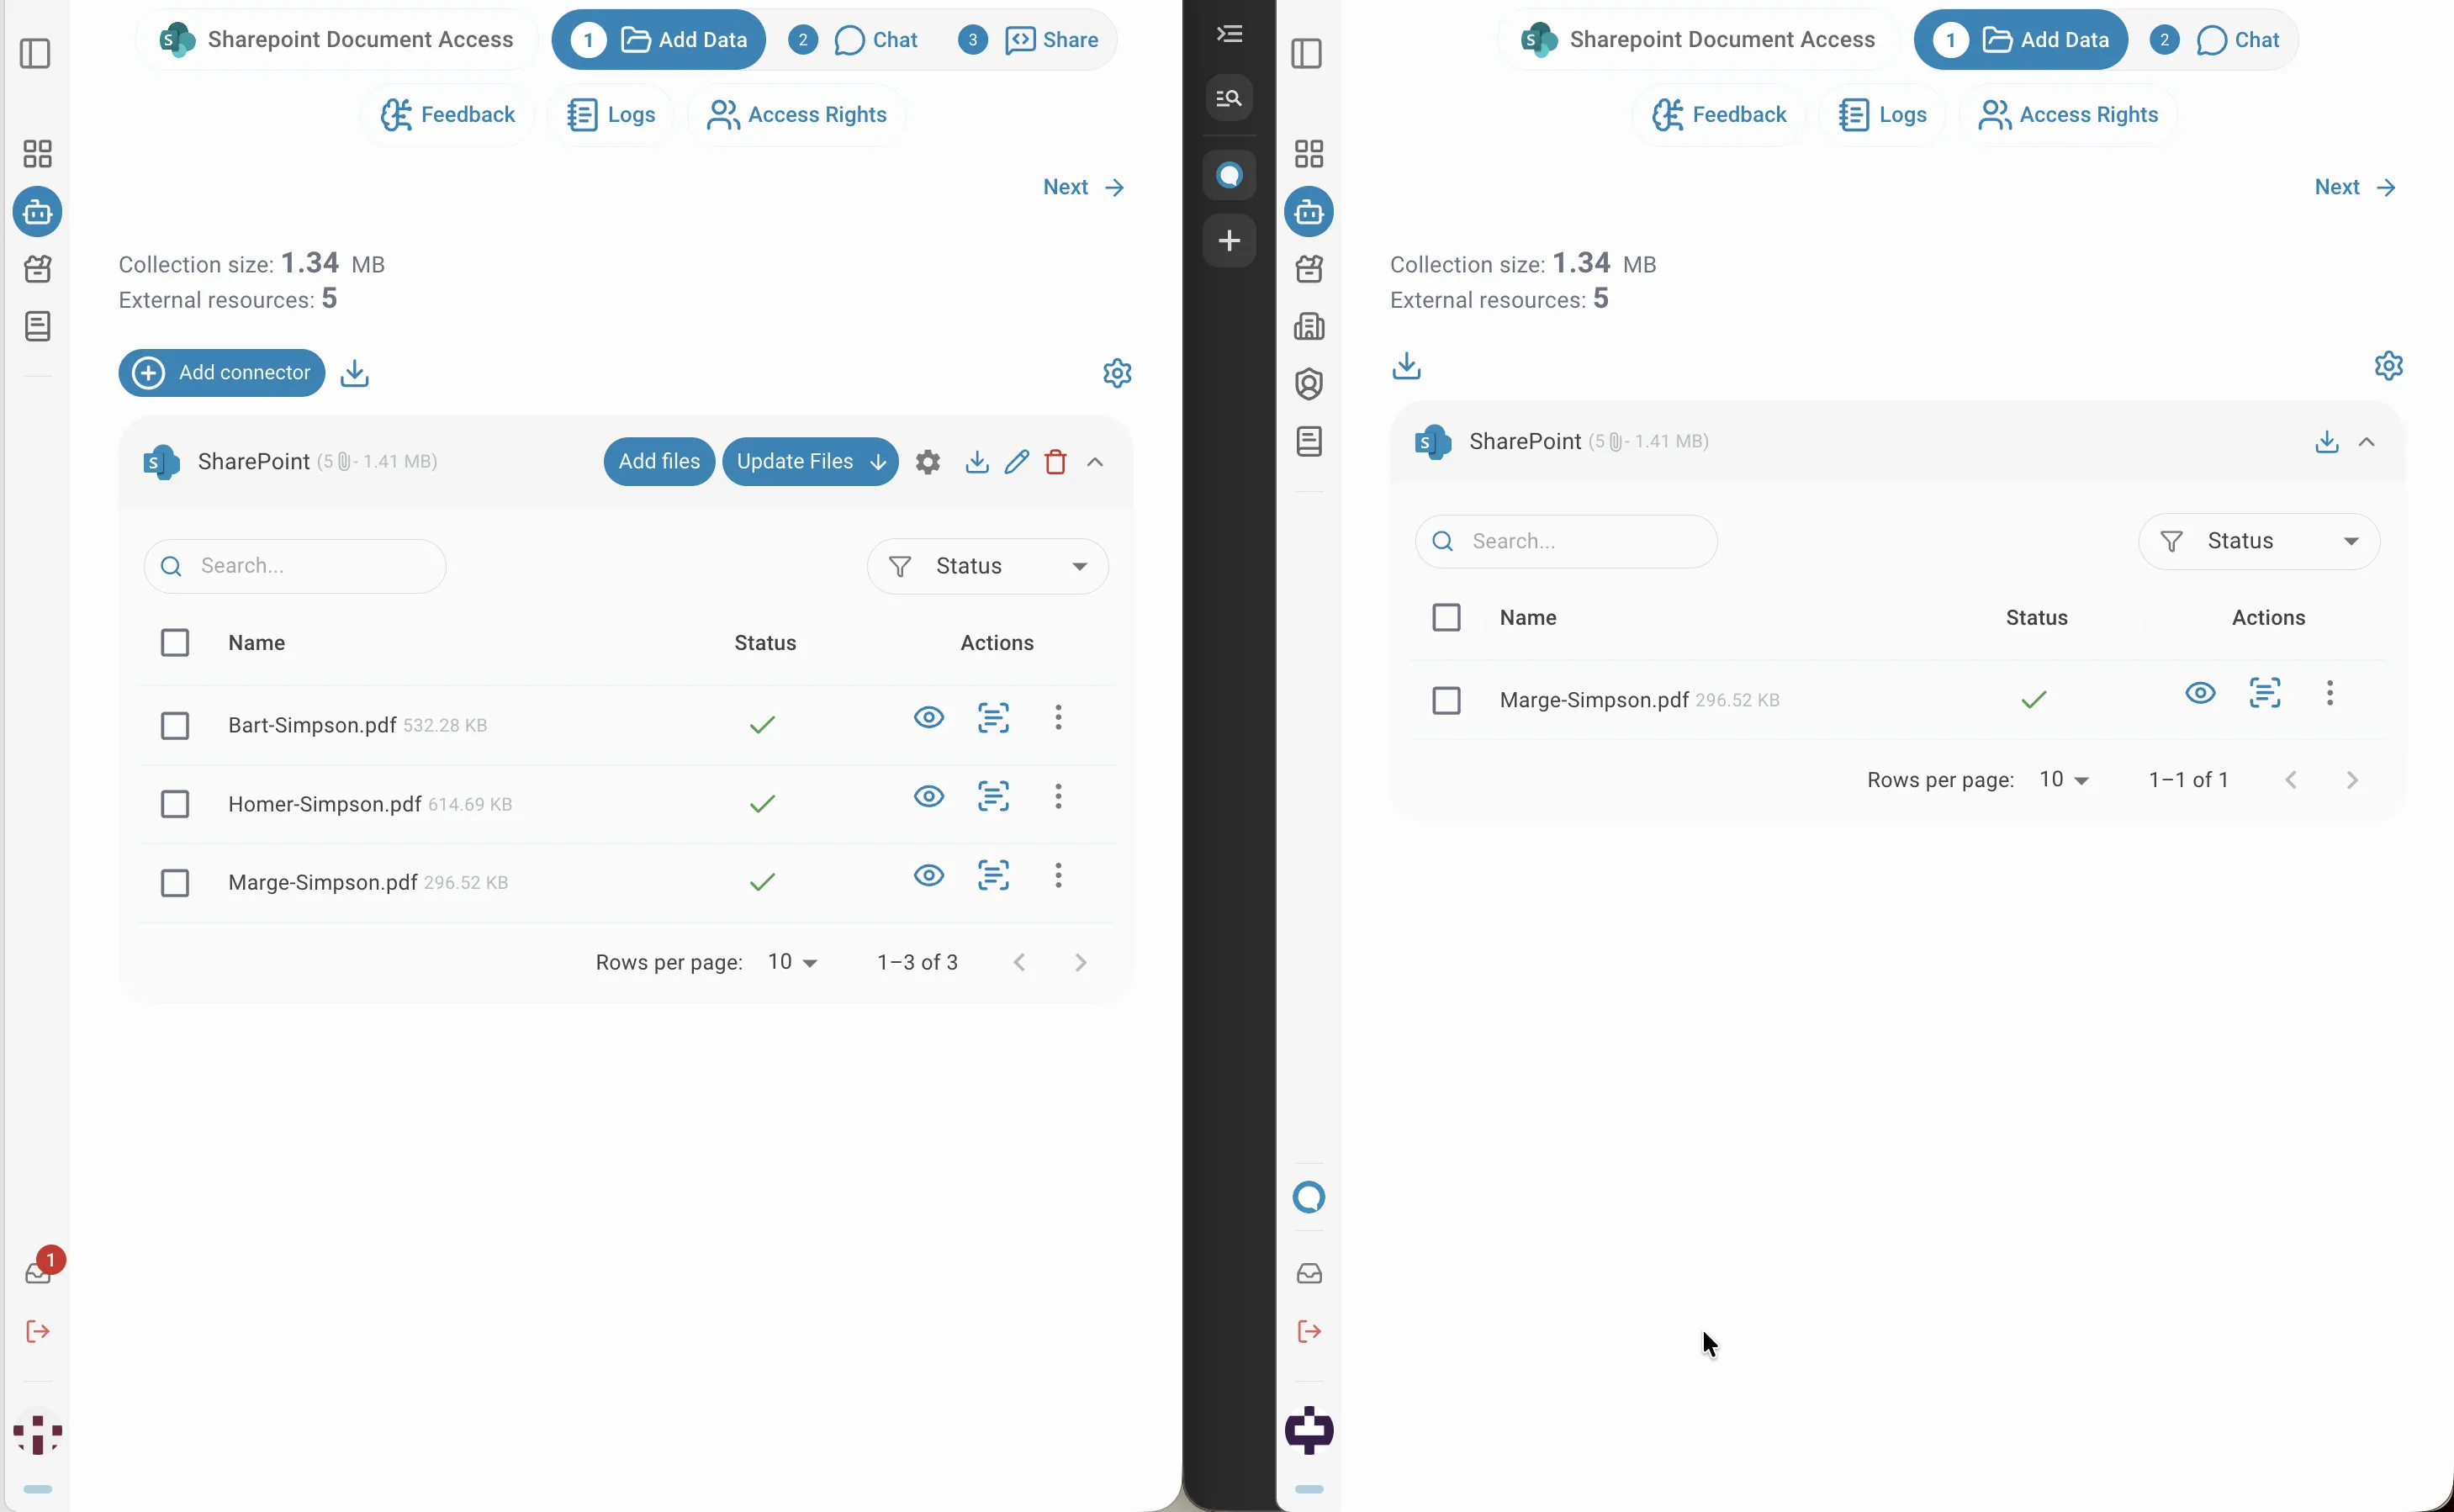
The effect is visible directly in the file list. The user on the left has full access and sees all three indexed documents. The user on the right can only access one — so that is the only document that appears.
Permissions in Search and Chat
The same restriction applies in chat. When both users ask the assistant the same question about which files they can access, each gets an answer based exclusively on their own permissions — the assistant on the left lists all three documents, the one on the right lists only the document that user is allowed to see.
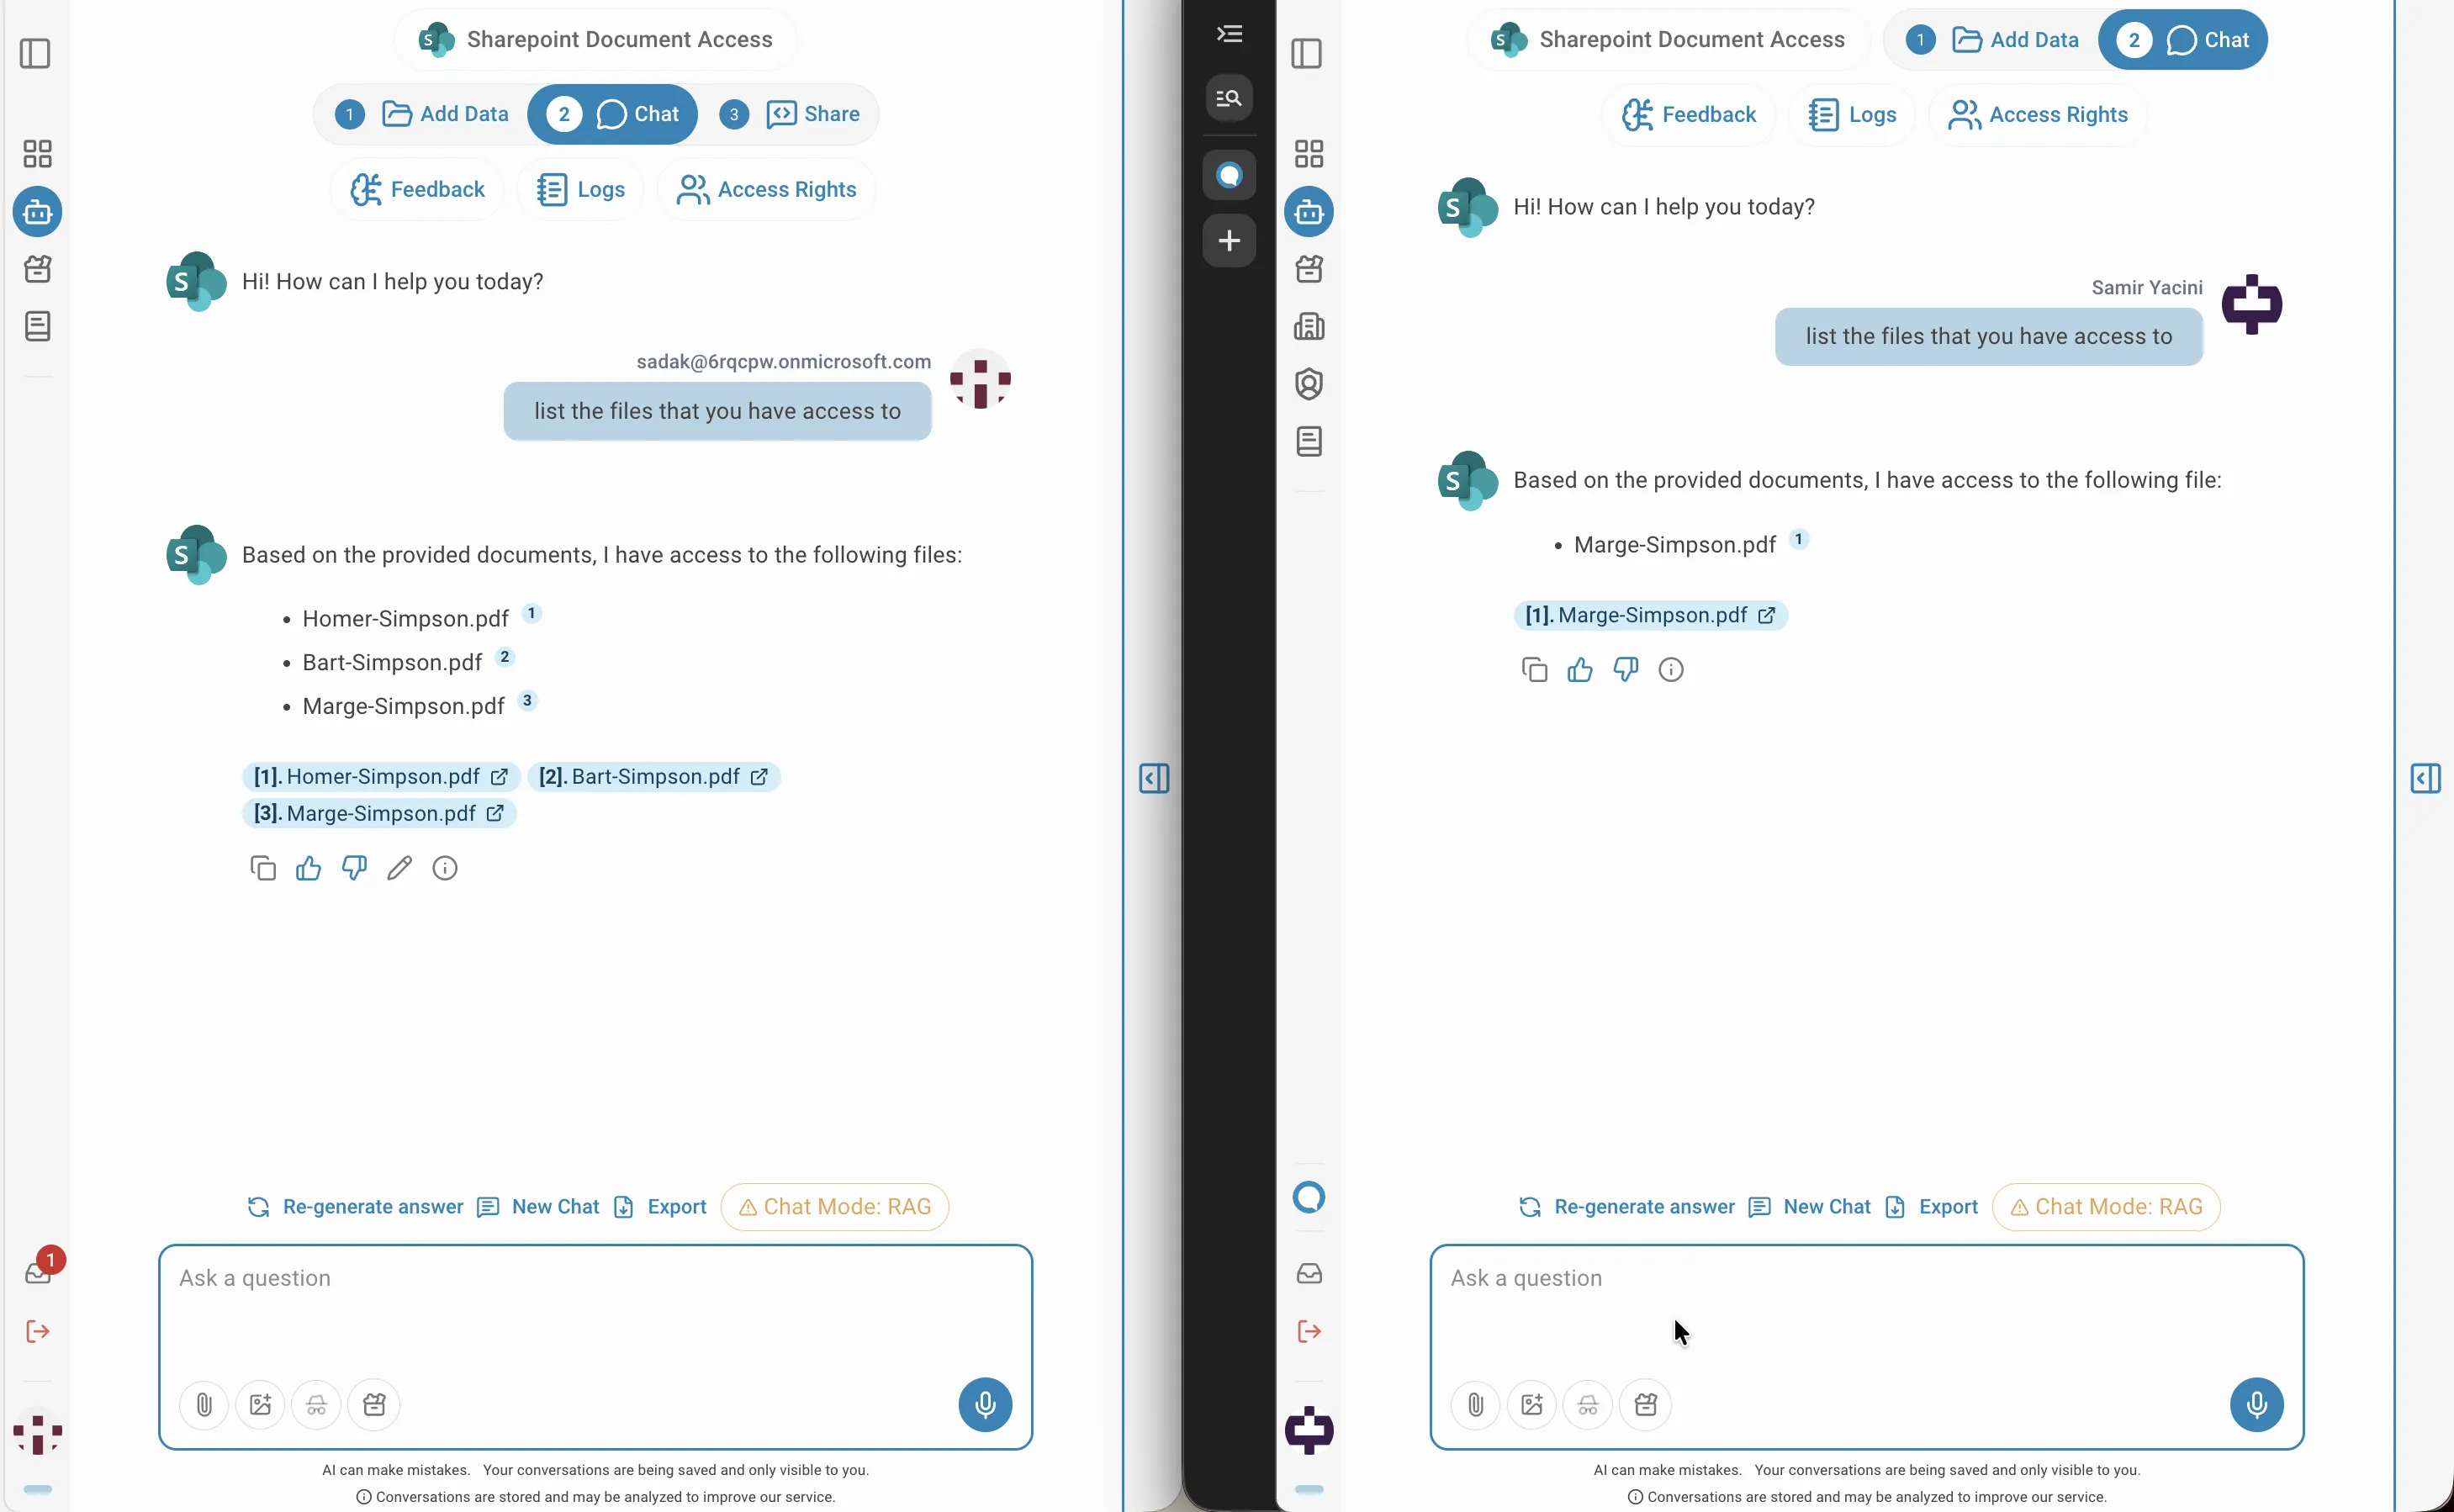
This means two users on the same AI assistant can receive different answers to the same question, depending on which SharePoint documents each of them has access to.