
Access Rights
Everything about who can reach an AI assistant lives in one place: the Share dialog. From there you give individual users, whole teams and whole organizations access, decide whether people outside QAnswer can use the assistant, and generate API keys for programmatic access.
Opening the Share dialog
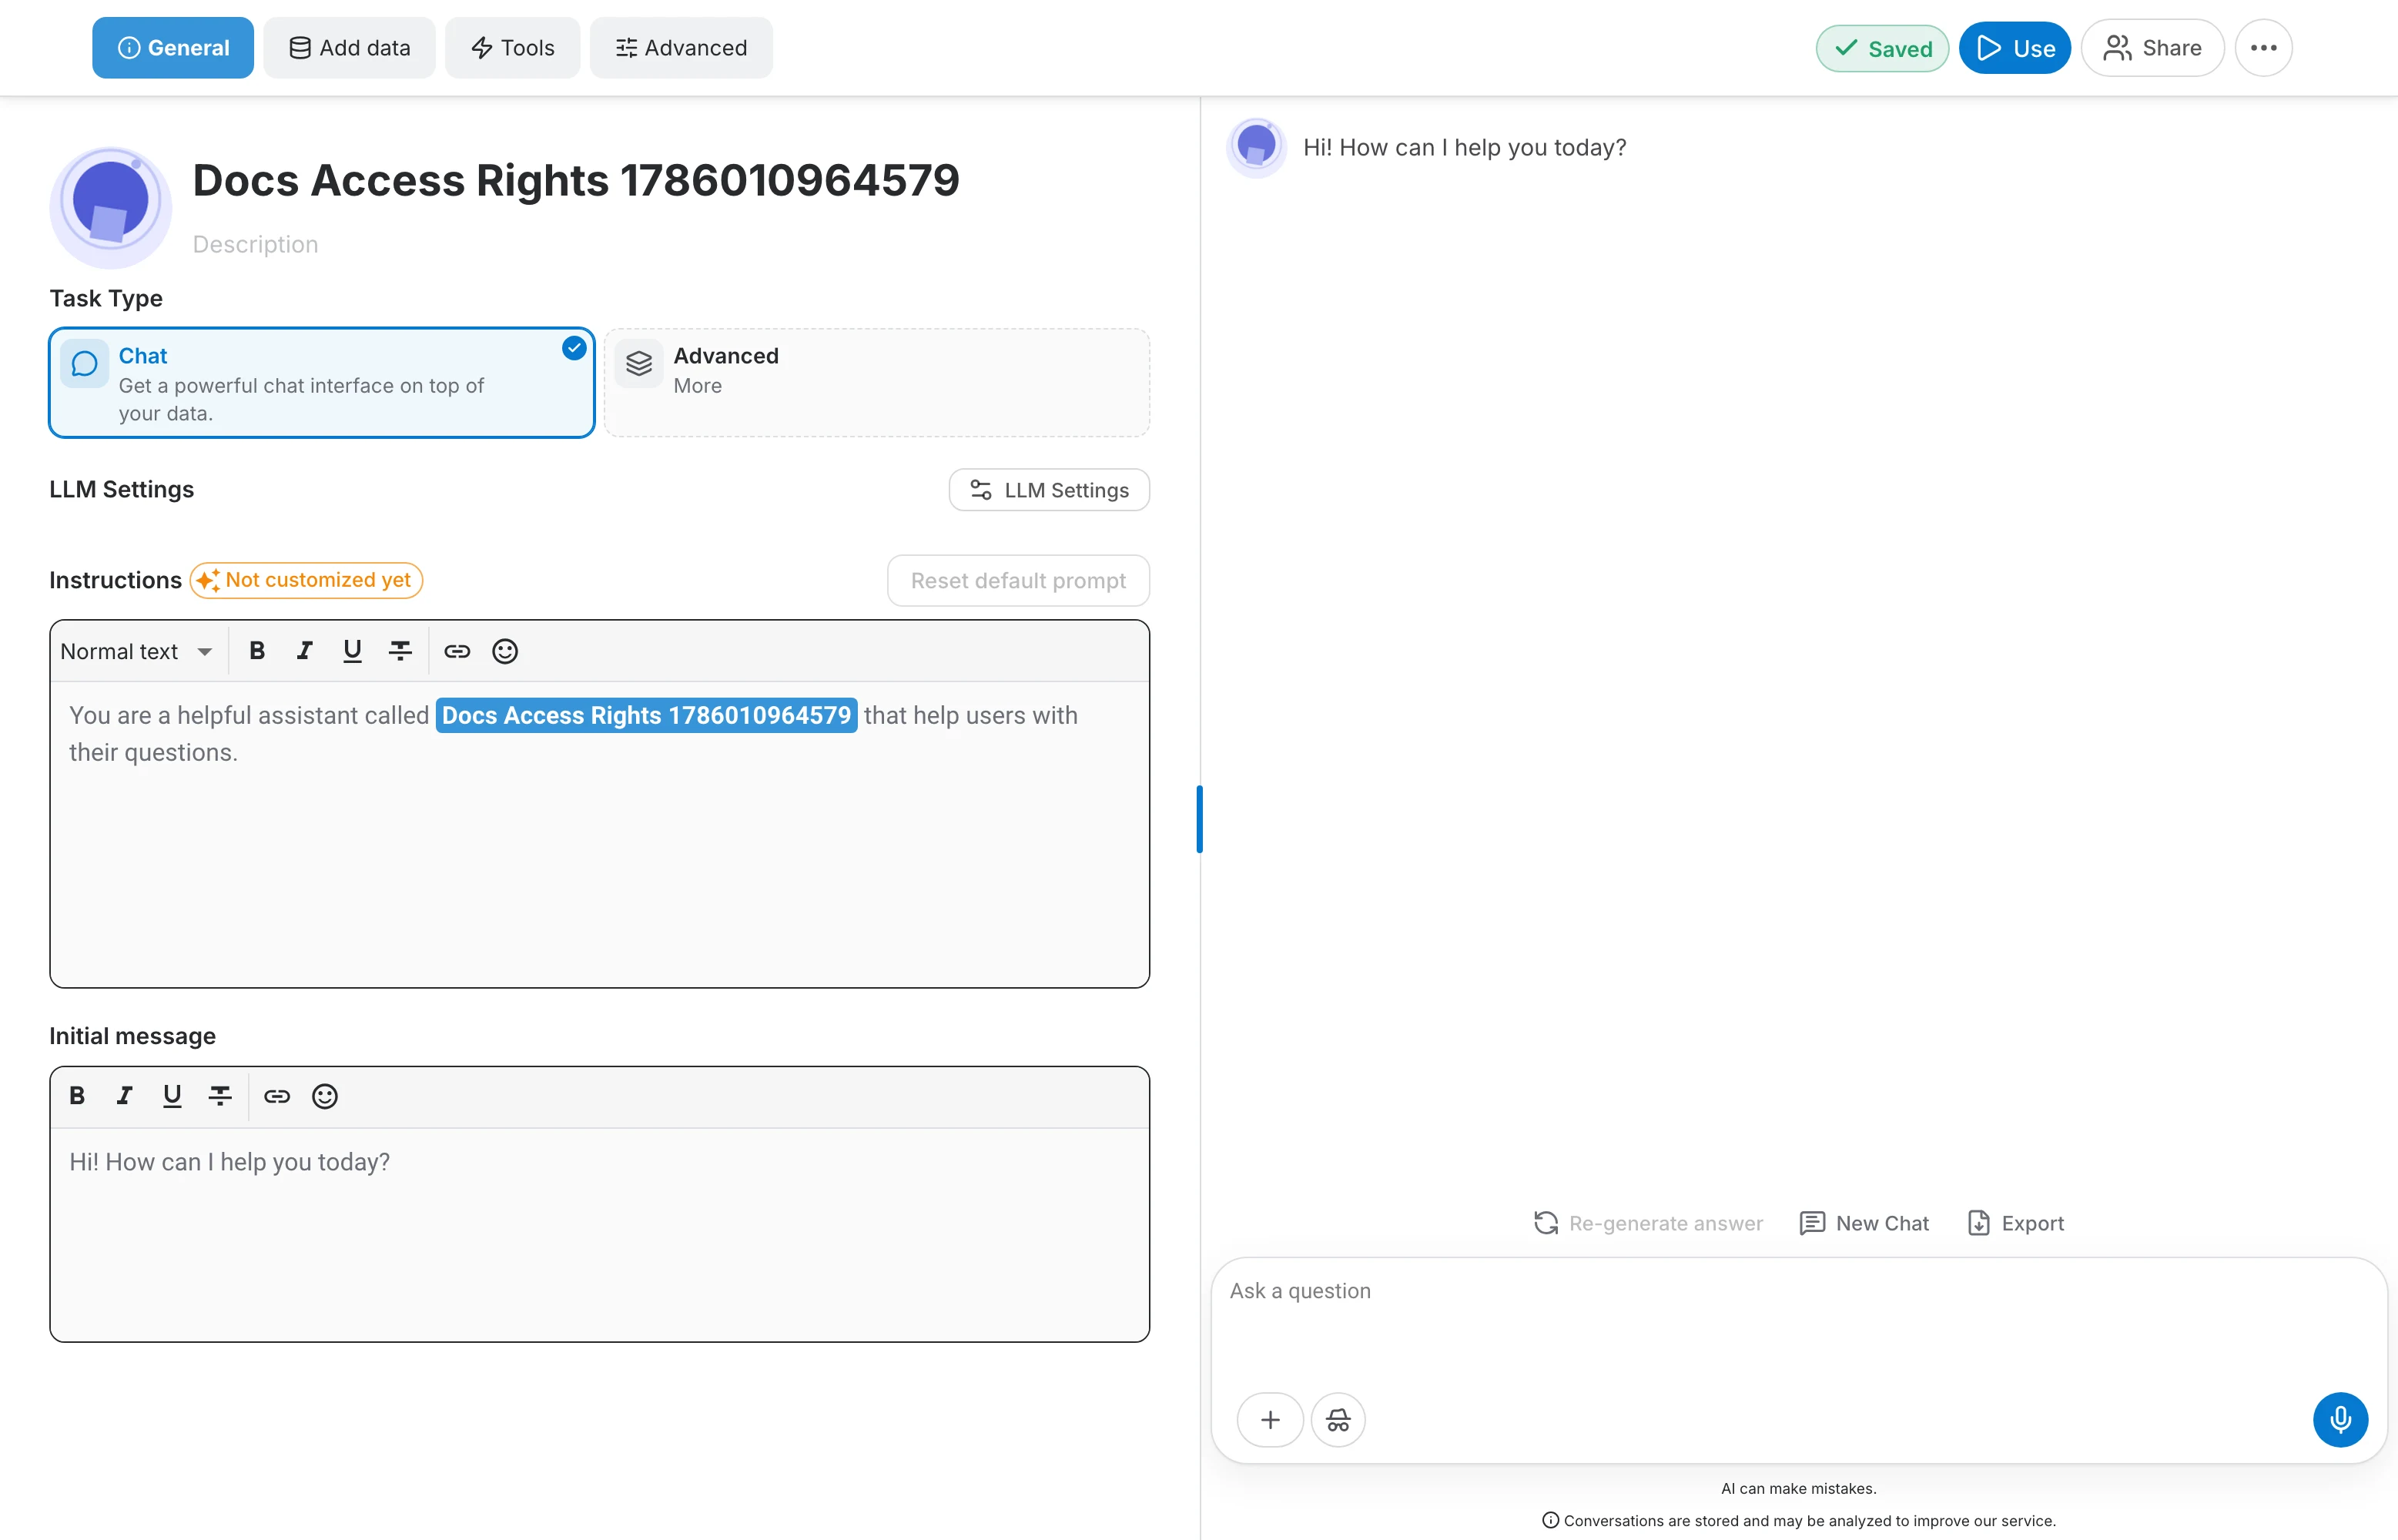
Click the Share button. It is available in two places:
- In the assistant editor, in the toolbar at the top right, next to Use and the ⋯ menu.
- On the assistant's own page, next to Edit and the ⋯ menu.
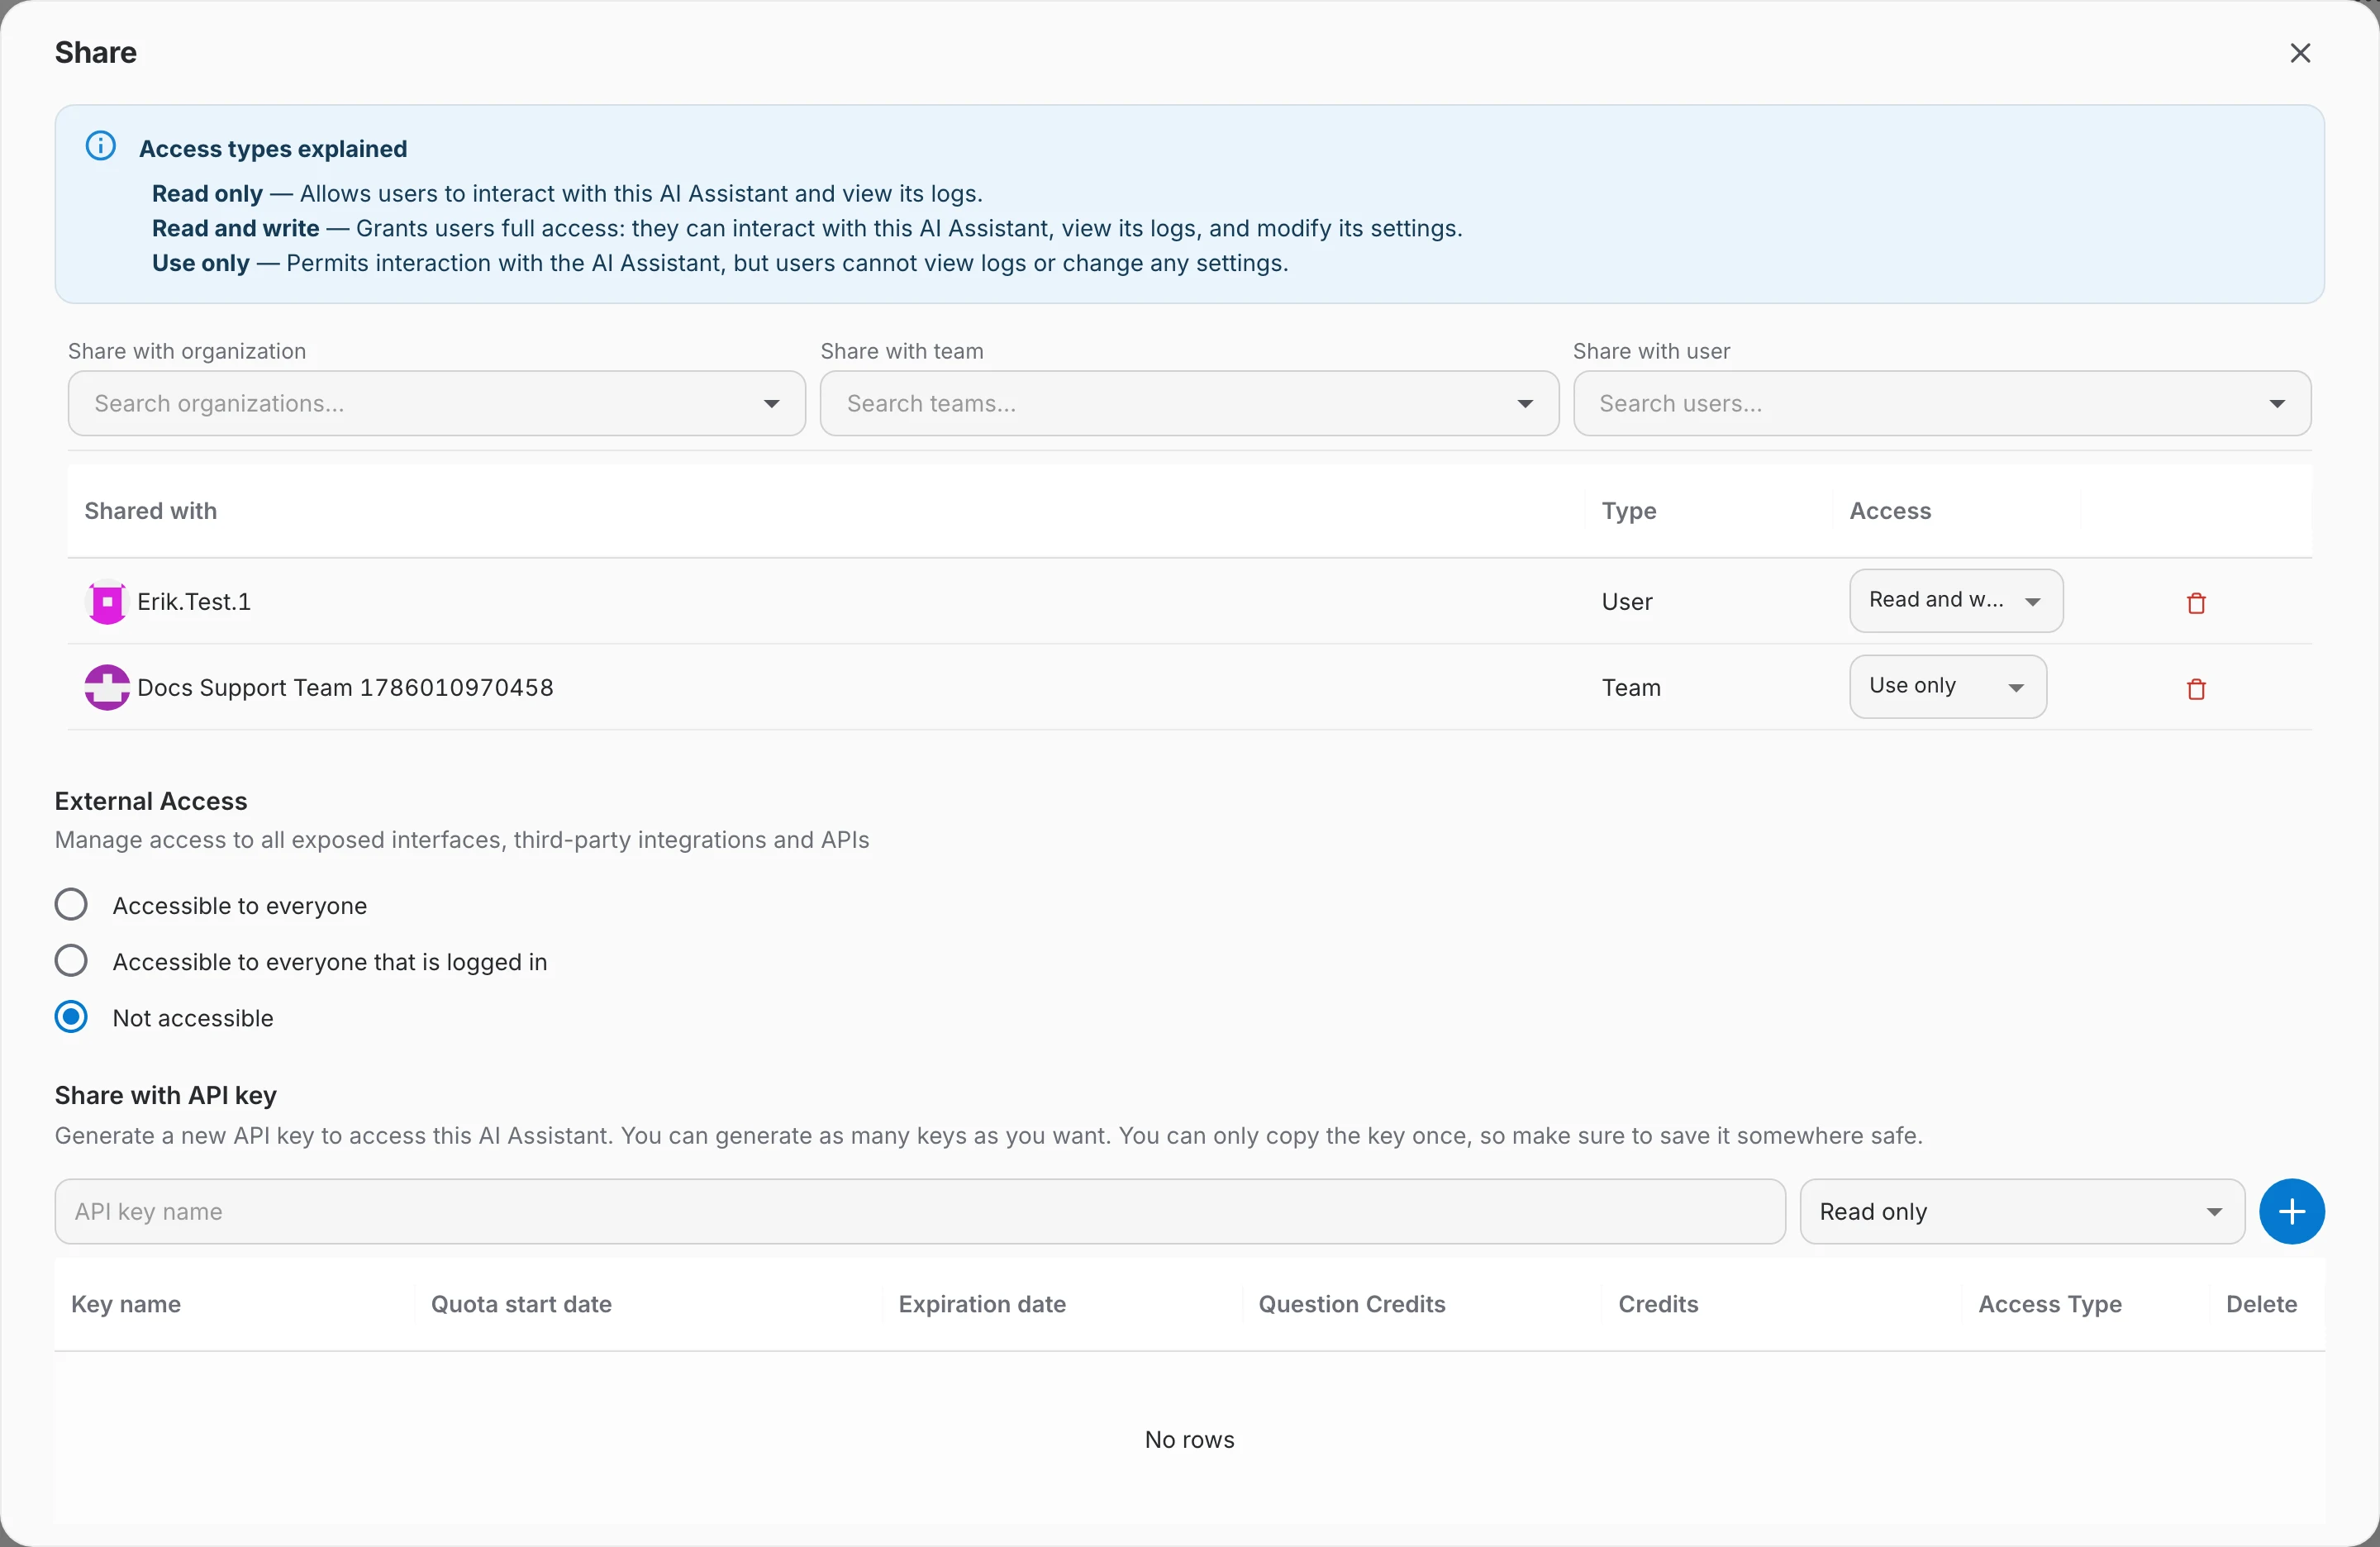
The dialog is a single scrolling panel with four parts, from top to bottom:
- Access types explained — a reminder of what each access level allows.
- Sharing — the three search fields and the list of everyone the assistant is already shared with.
- External Access — who can reach the assistant through exposed interfaces, integrations and APIs.
- Share with API key — generate and manage API keys scoped to this assistant.
Access types
Every share — whether it targets a user, a team or an organization — carries one of three access levels. The blue box at the top of the dialog repeats them so you never have to guess.
- Use only – Permits interaction with the AI Assistant, but users cannot view logs or change any settings.
- Read only – Allows users to interact with this AI Assistant and view its logs.
- Read and write – Grants users full access: they can interact with this AI Assistant, view its logs, and modify its settings.

| Access type | Chat with the assistant | View logs | Modify settings and data | Share and manage keys |
|---|---|---|---|---|
| Use only | ✅ | ❌ | ❌ | ❌ |
| Read only | ✅ | ✅ | ❌ | ❌ |
| Read and write | ✅ | ✅ | ✅ | ✅ |
| Owner | ✅ | ✅ | ✅ | ✅ |
Sharing with users, teams and organizations
All three kinds of target are managed in one list. Sharing with a team or an organization is the quickest way to onboard a group: everyone who belongs to it inherits the access level, and people who join later get it automatically.
Adding someone
- Open the Share dialog.
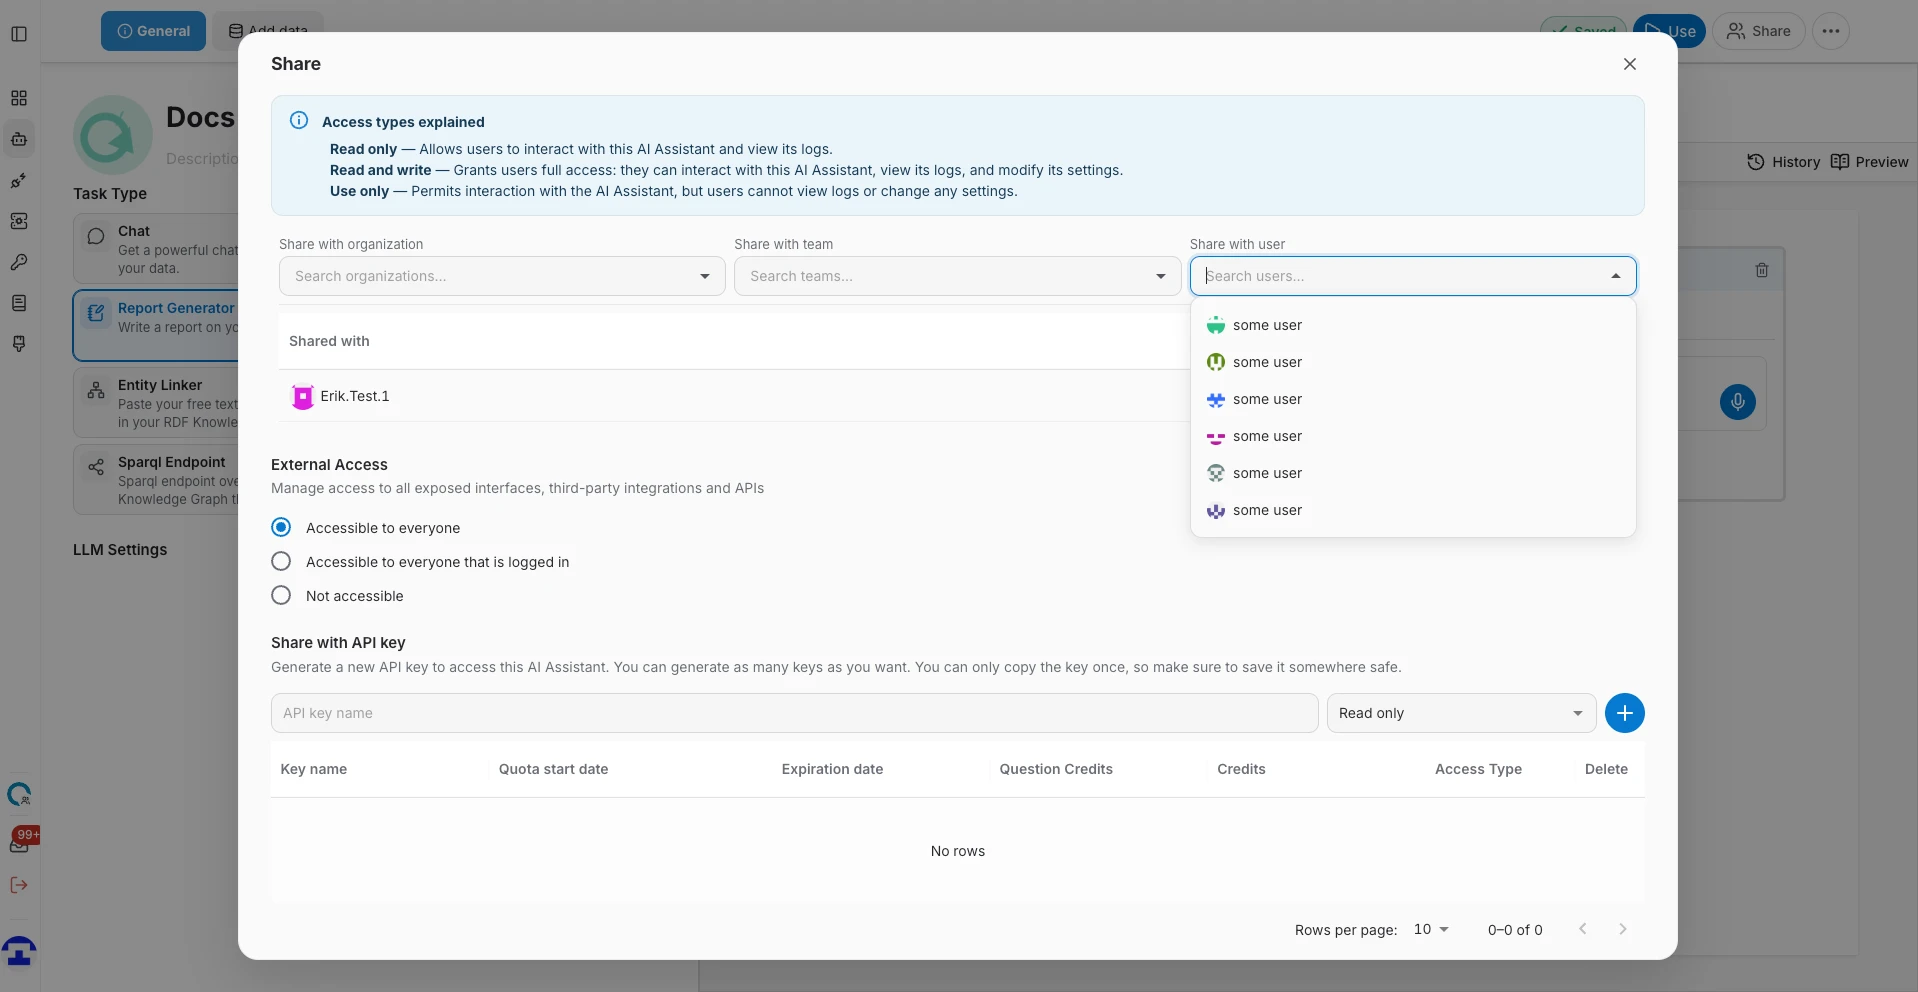
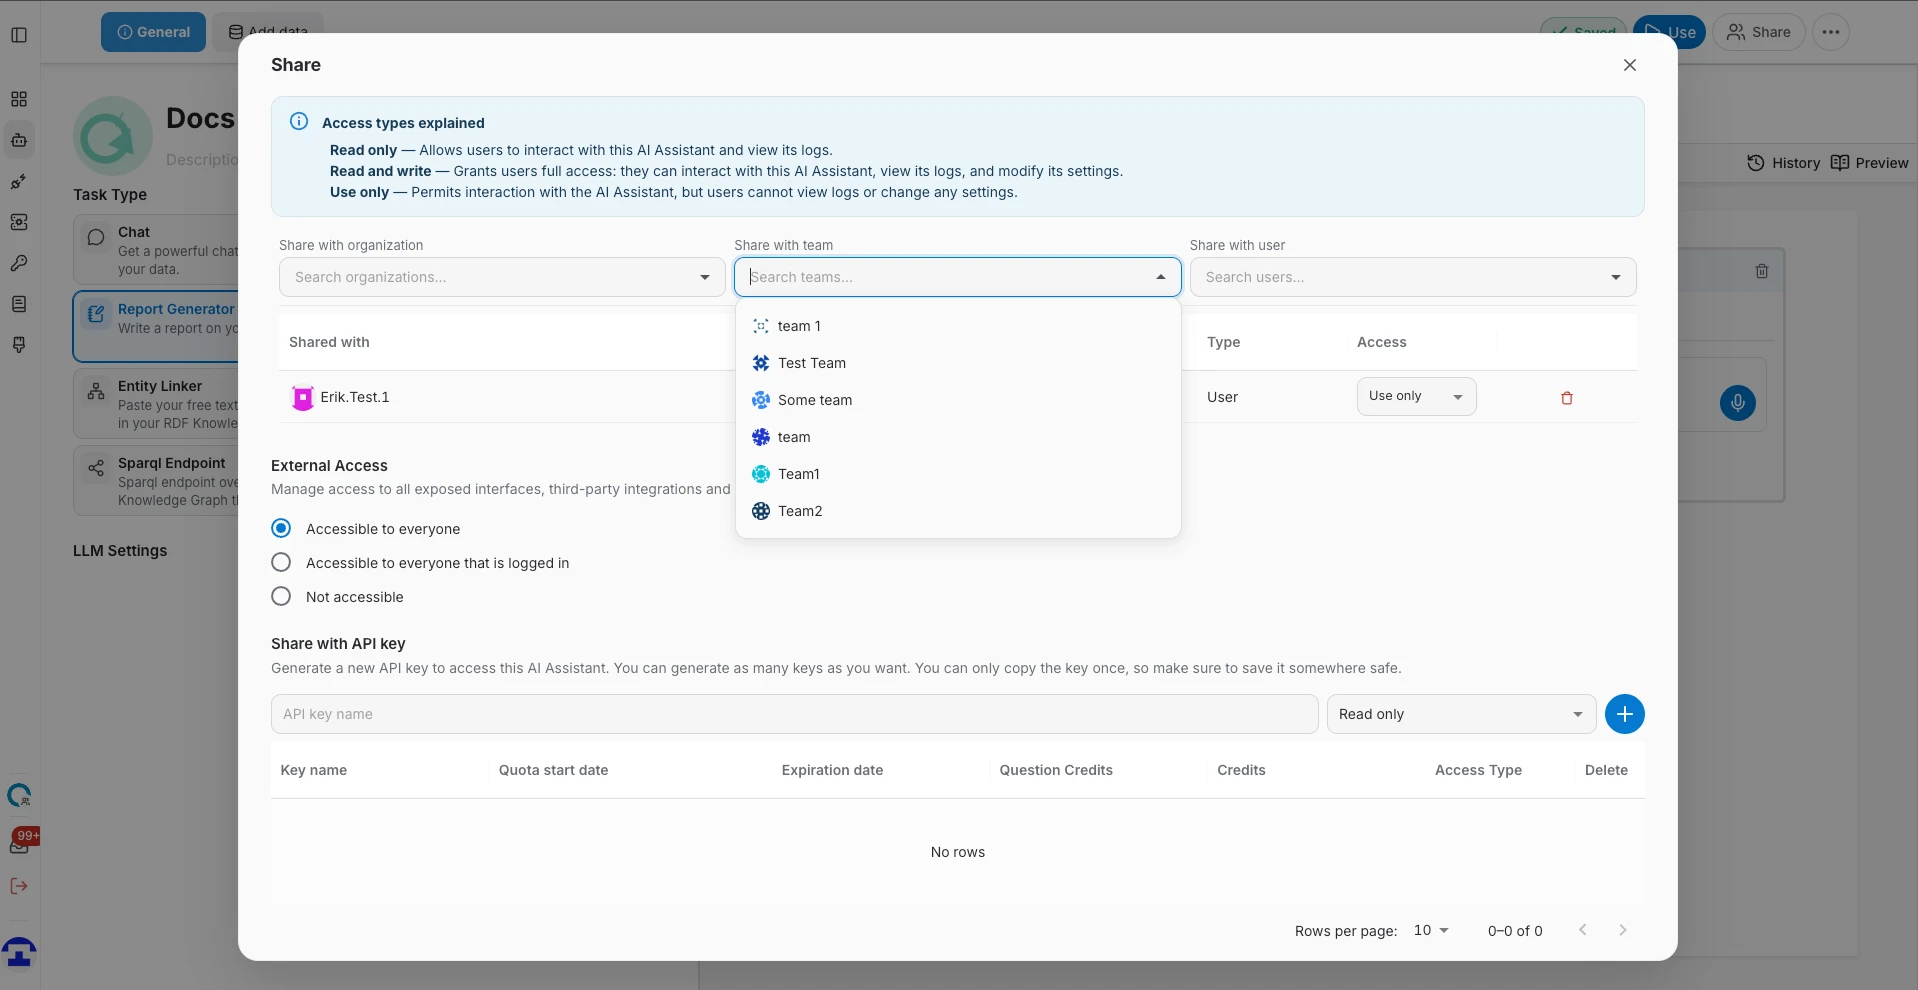
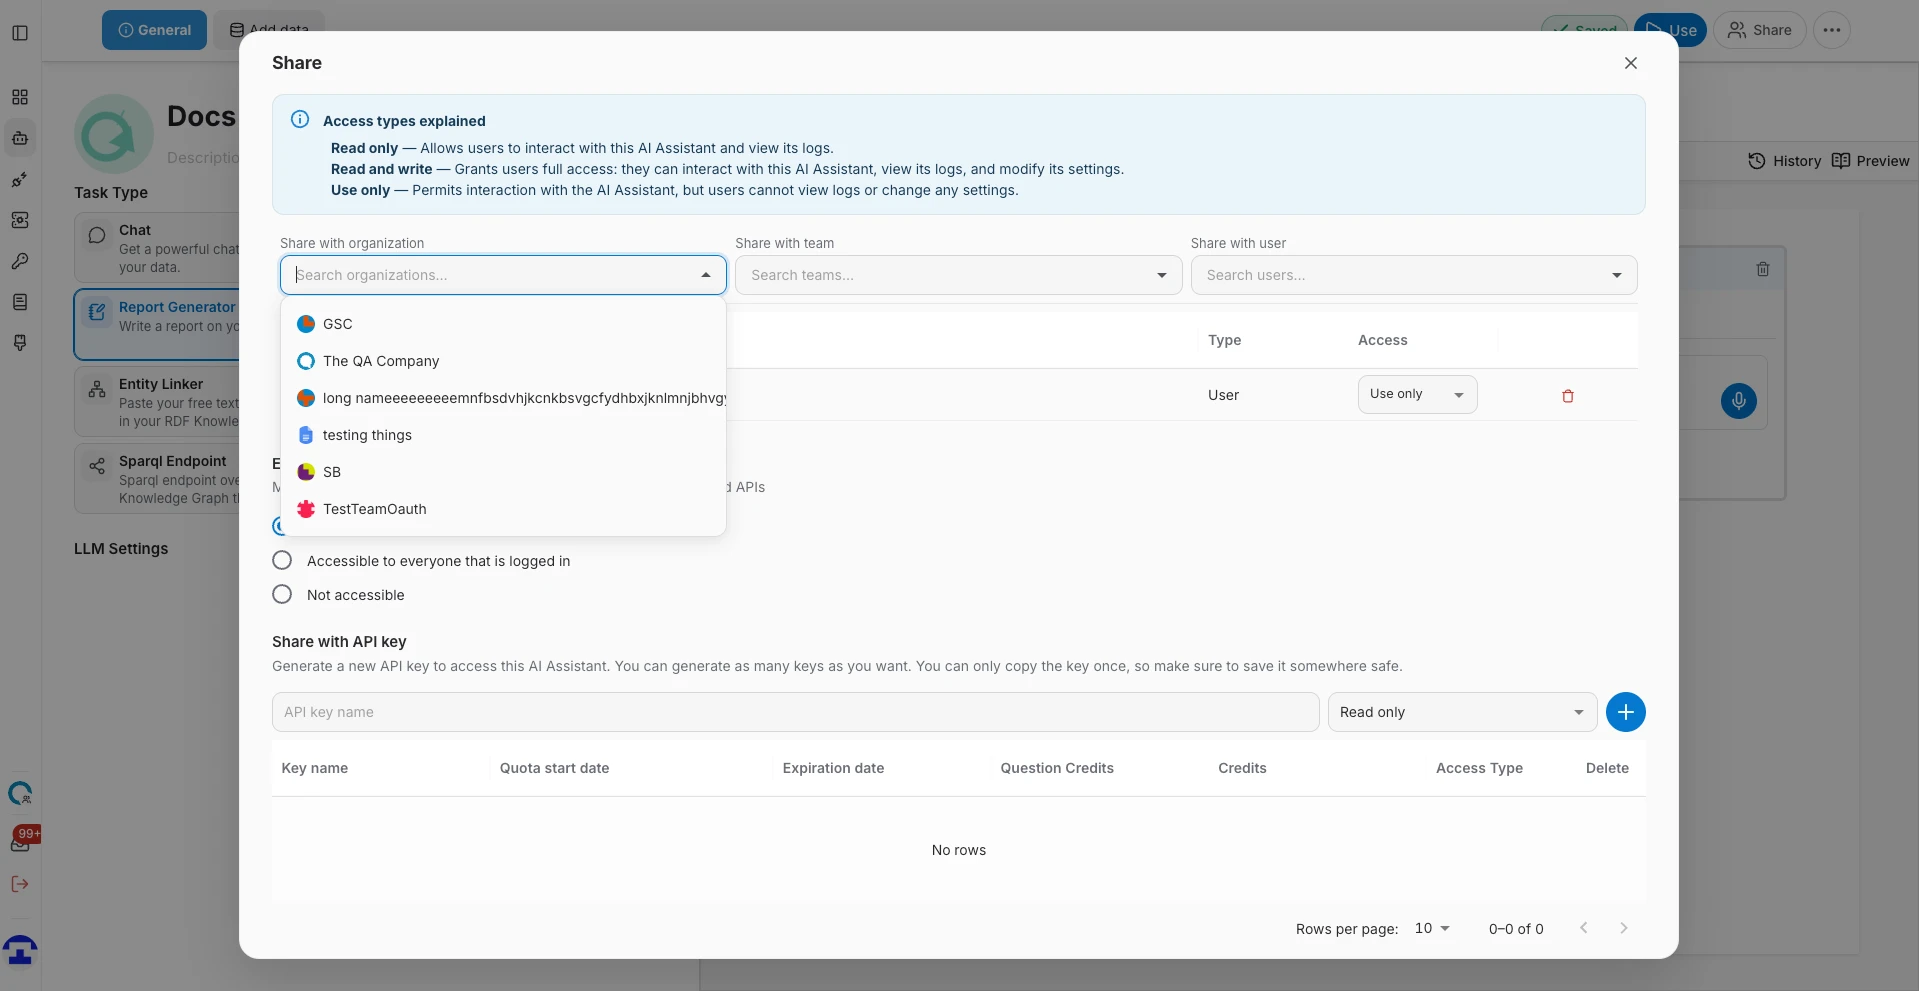
- Click the field that matches what you want to add — Share with organization, Share with team or Share with user — and start typing. The list is searched on the server as you type, and scrolling loads more results.
- Click a result in the drop-down.
There is no confirmation button: picking a result shares the assistant straight away, the field clears itself and a new row appears in the list below.
Users are listed as name (username), so you can tell two people with the same display name apart.
The list of shares
Everything the assistant is shared with appears in a single table with four columns:
- Shared with – the logo or avatar and the name of the user, team or organization.
- Type – Organization, Team or User.
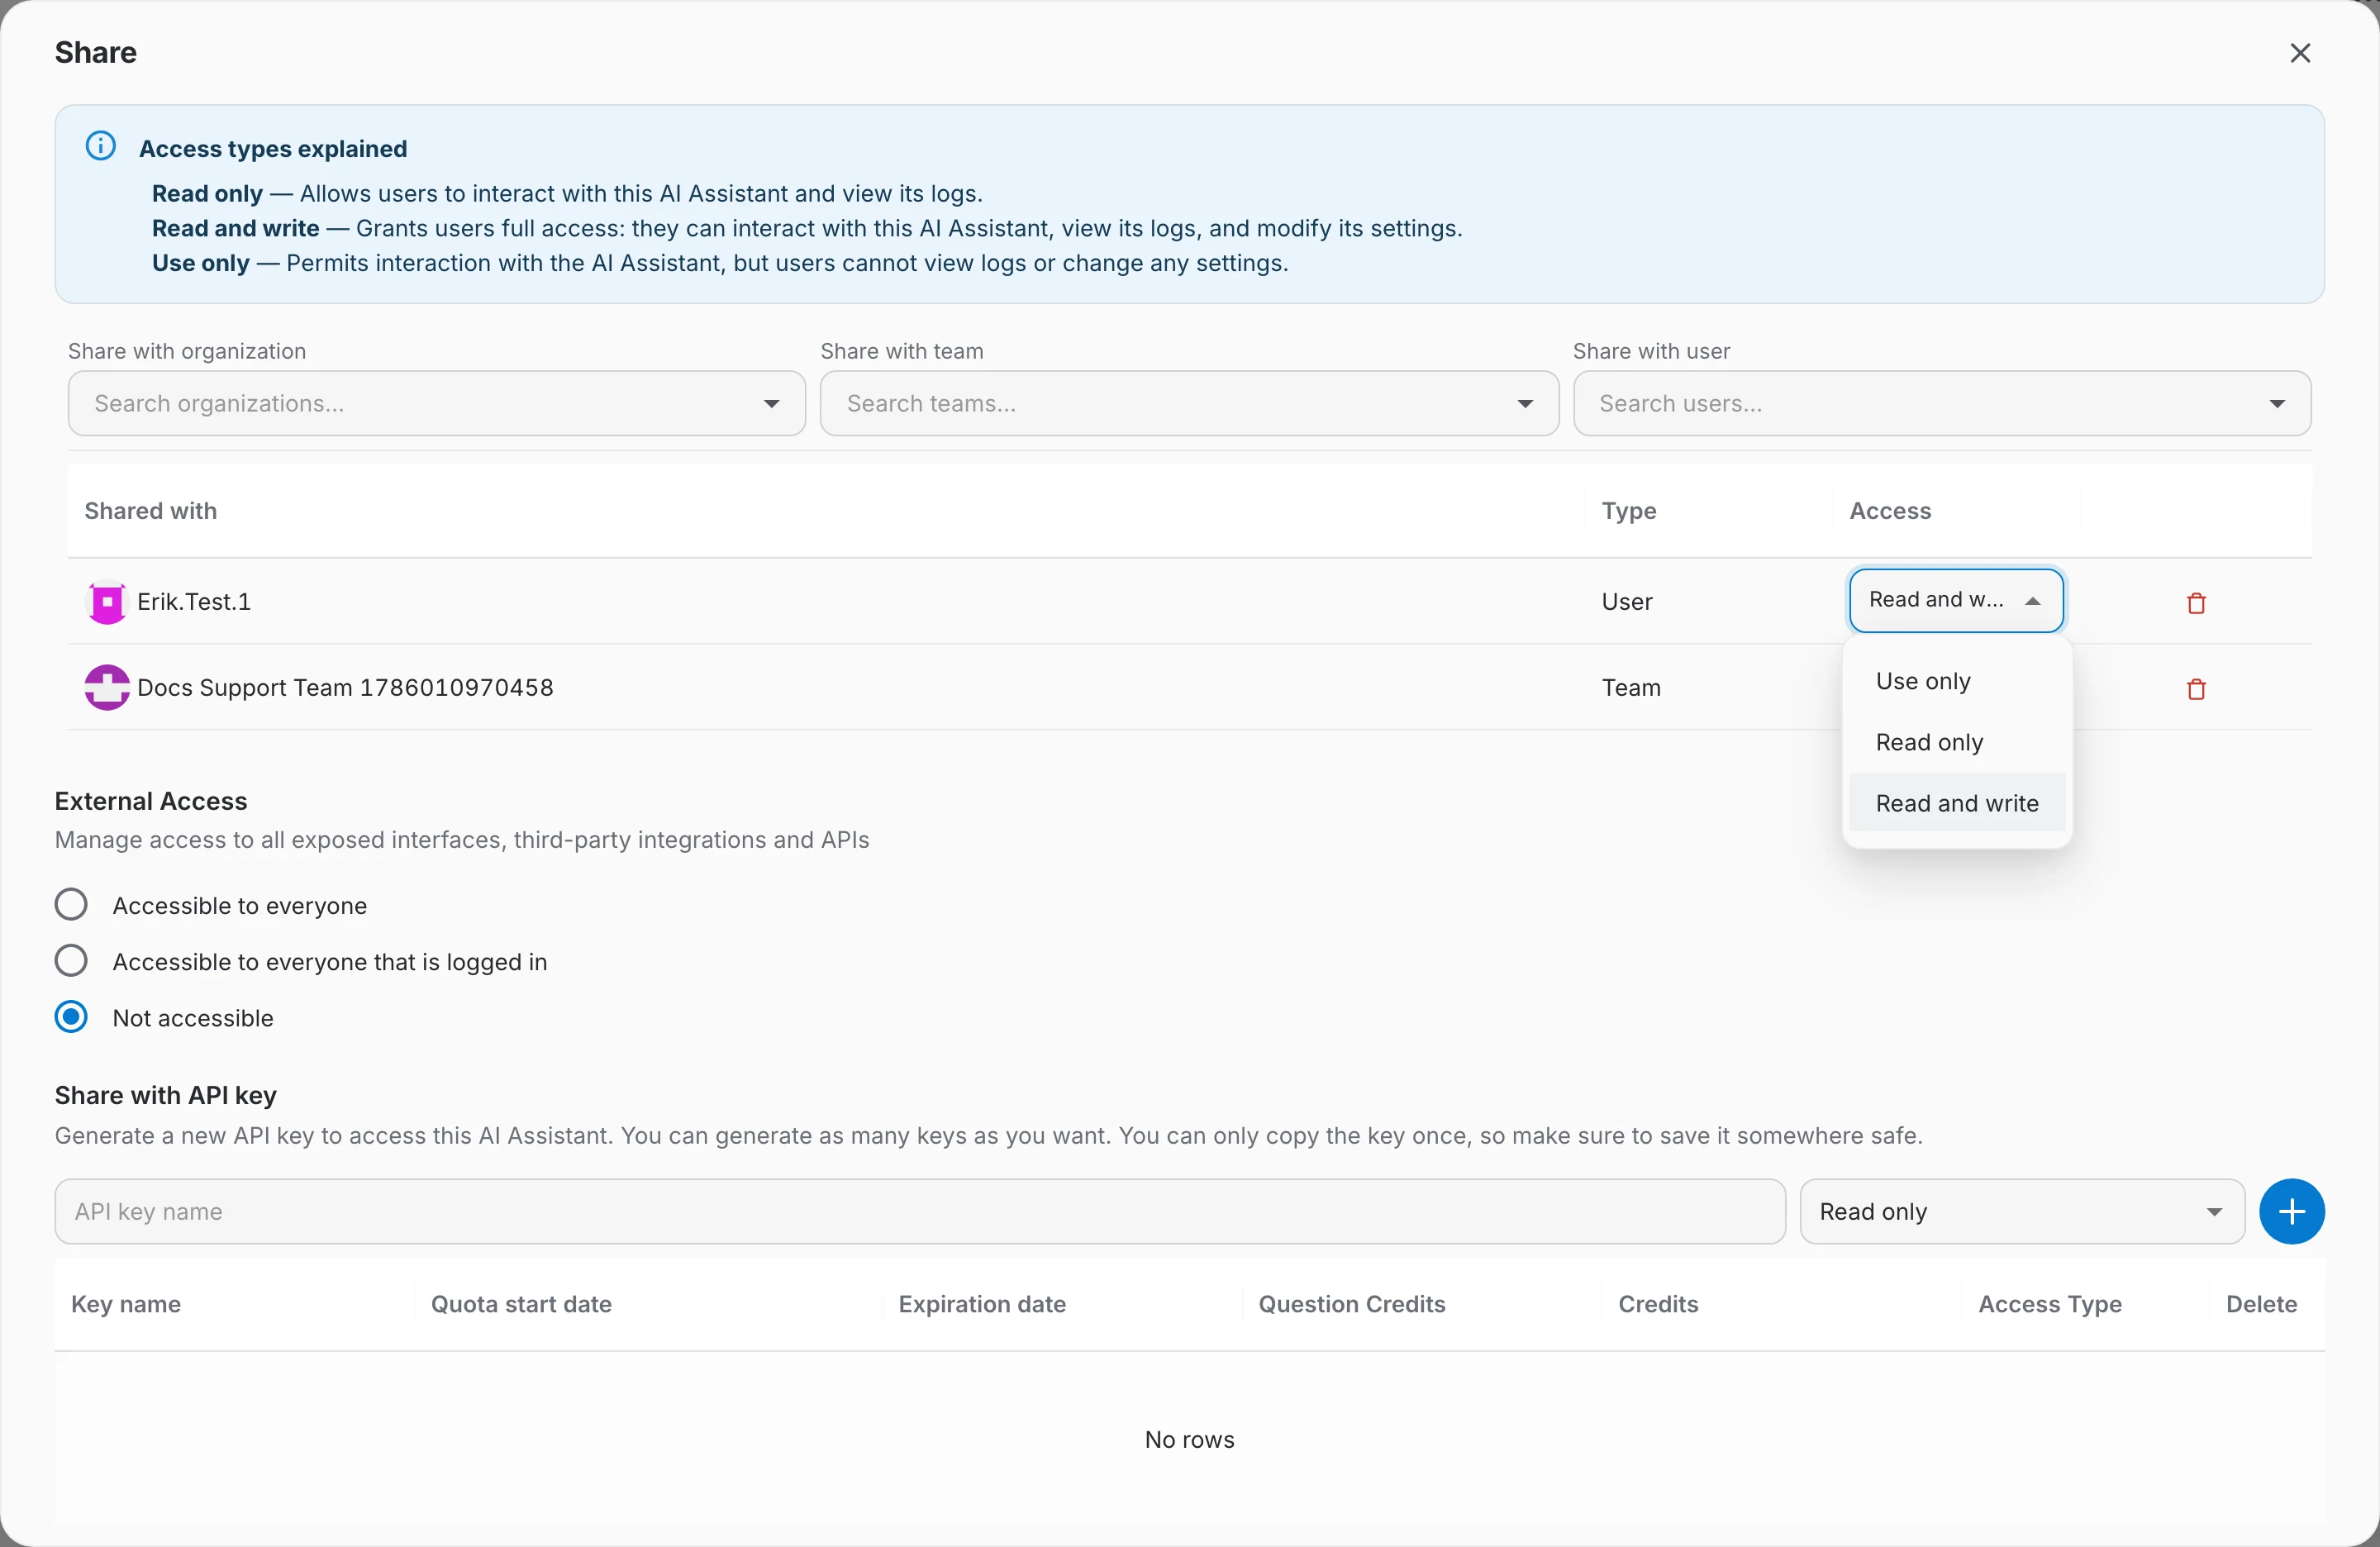
- Access – a drop-down with Use only, Read only and Read and write. If you cannot manage the assistant, the level is shown as plain text instead.
- Actions – the buttons available on that row — remove, or approve, reject and cancel for a request that is still pending.
While nothing is shared, the table shows "Not shared with any organization, team or user".

Changing or removing access
- To change an access level, pick a different value in the Access drop-down of the row. It takes effect at once — the previous design asked you to confirm this in a warning dialog, the redesign no longer does.
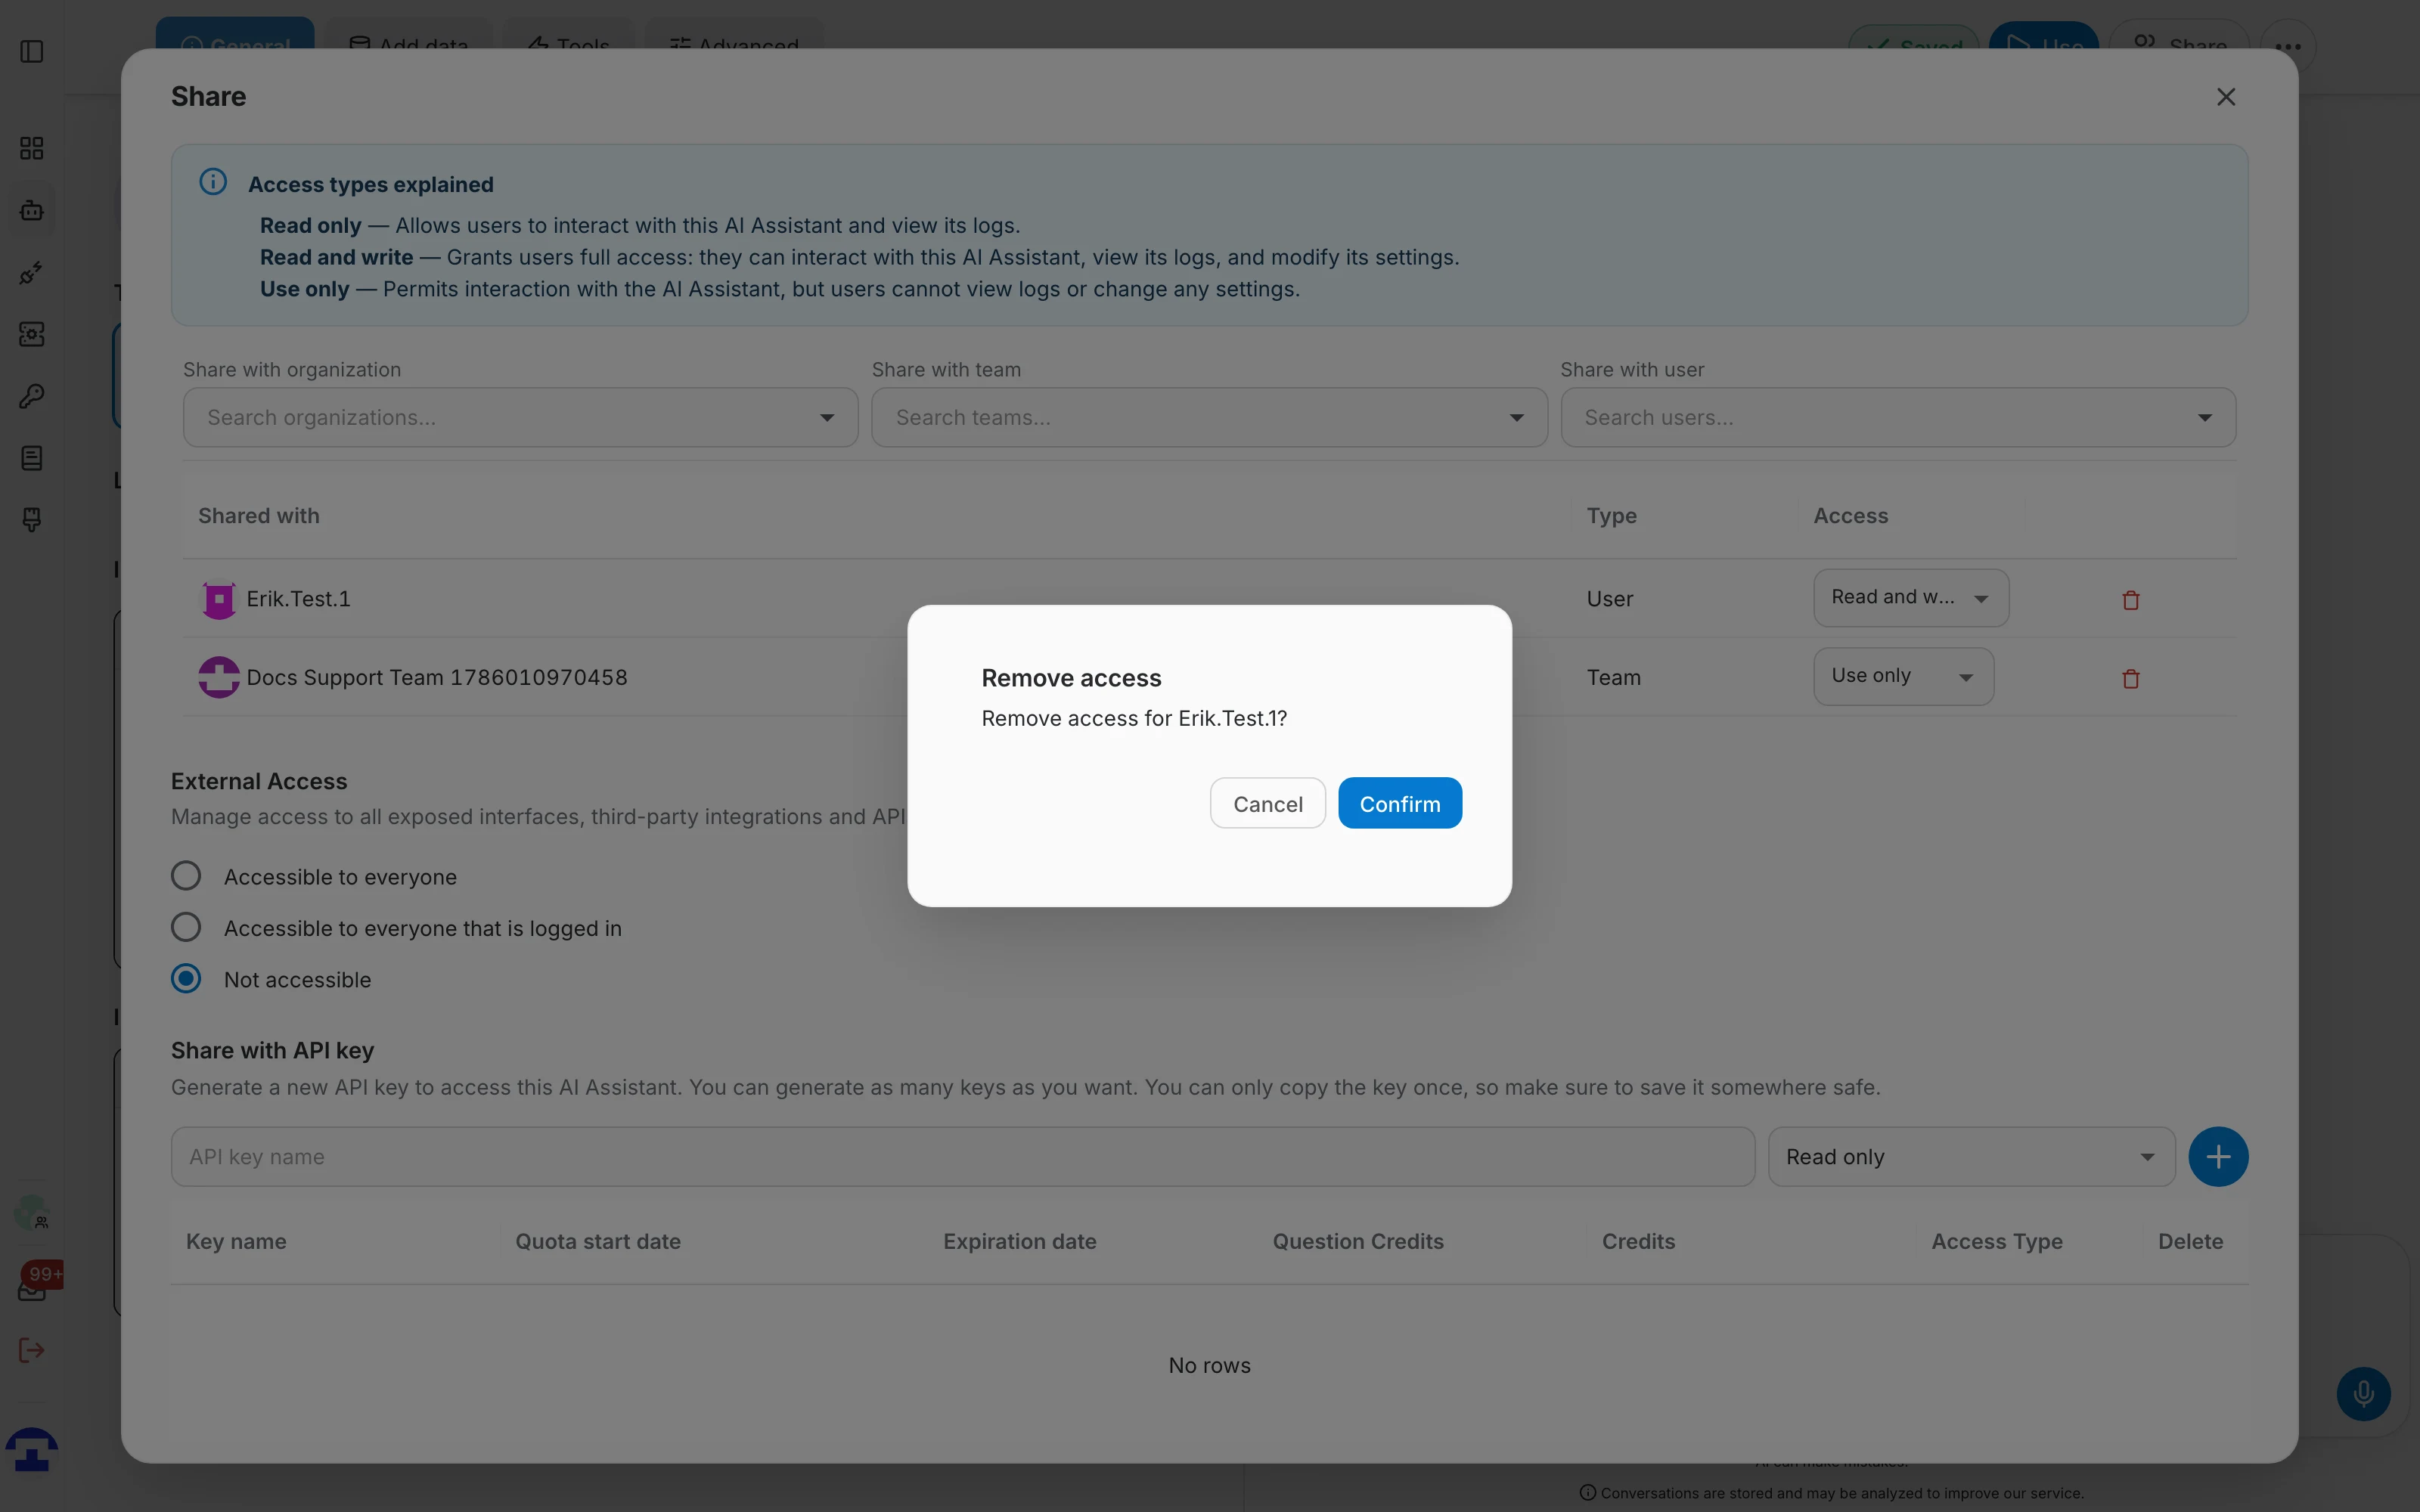
- To remove a share, click the red bin at the end of the row and confirm in the Remove access dialog.
Share requests and approval
Sharing an assistant with an organization or a team is not always yours to decide. When you pick one you do not administer, QAnswer does not grant the access — it files a request that an administrator of that organization or team approves or rejects.
When a share becomes a request
You do not do anything different: you add the organization or the team from the ordinary Share with organization / Share with team field. What happens next depends on whether you administer it.
- If you administer the organization or team, the share is granted immediately and the row appears like any other.
- If you are only a member, QAnswer answers "Share request sent — awaiting admin approval" instead.
- The request then sits at the top of the list with an orange Awaiting approval badge. While it is pending you can withdraw it with the Cancel request (✕) button on that row.
Approving a request
An administrator who opens the same dialog sees the pending rows with an editable Access drop-down and two buttons:
- Approve grants the access level currently selected on that row — so you can approve a request at a lower level than the one that was asked for.
- Reject declines the request and removes the row.
Organization administrators also get a Pending Share Requests panel on the organization's assistants page, listing every waiting request as "'<user>' wants to share '<assistant>'" with Approve and Reject buttons and a shortcut that opens the assistant's configuration.
External Access
The External Access section controls who can reach the assistant through everything you expose — the public chat page, the widget, the CMS plugins and the public API. Pick one of three options:
- Accessible to everyone – anyone with the link can use the assistant, no QAnswer account required.
- Accessible to everyone that is logged in – any signed-in QAnswer user can use it, but anonymous visitors cannot.
- Not accessible – only the people, teams and organizations listed above can use it. This is the default for a new assistant.

External Access decides who may use the exposed interfaces; how you expose them is covered in Expose your assistant.
Share with API key
An API key lets an application talk to this assistant without a user account. You can create as many as you need, each with its own access level, and revoke them one by one.
- Scroll to Share with API key at the bottom of the dialog.
- Type a name in the API key name field — something that says which application will use it.
- Choose the access level next to it: Read and write, Read only or Use only.
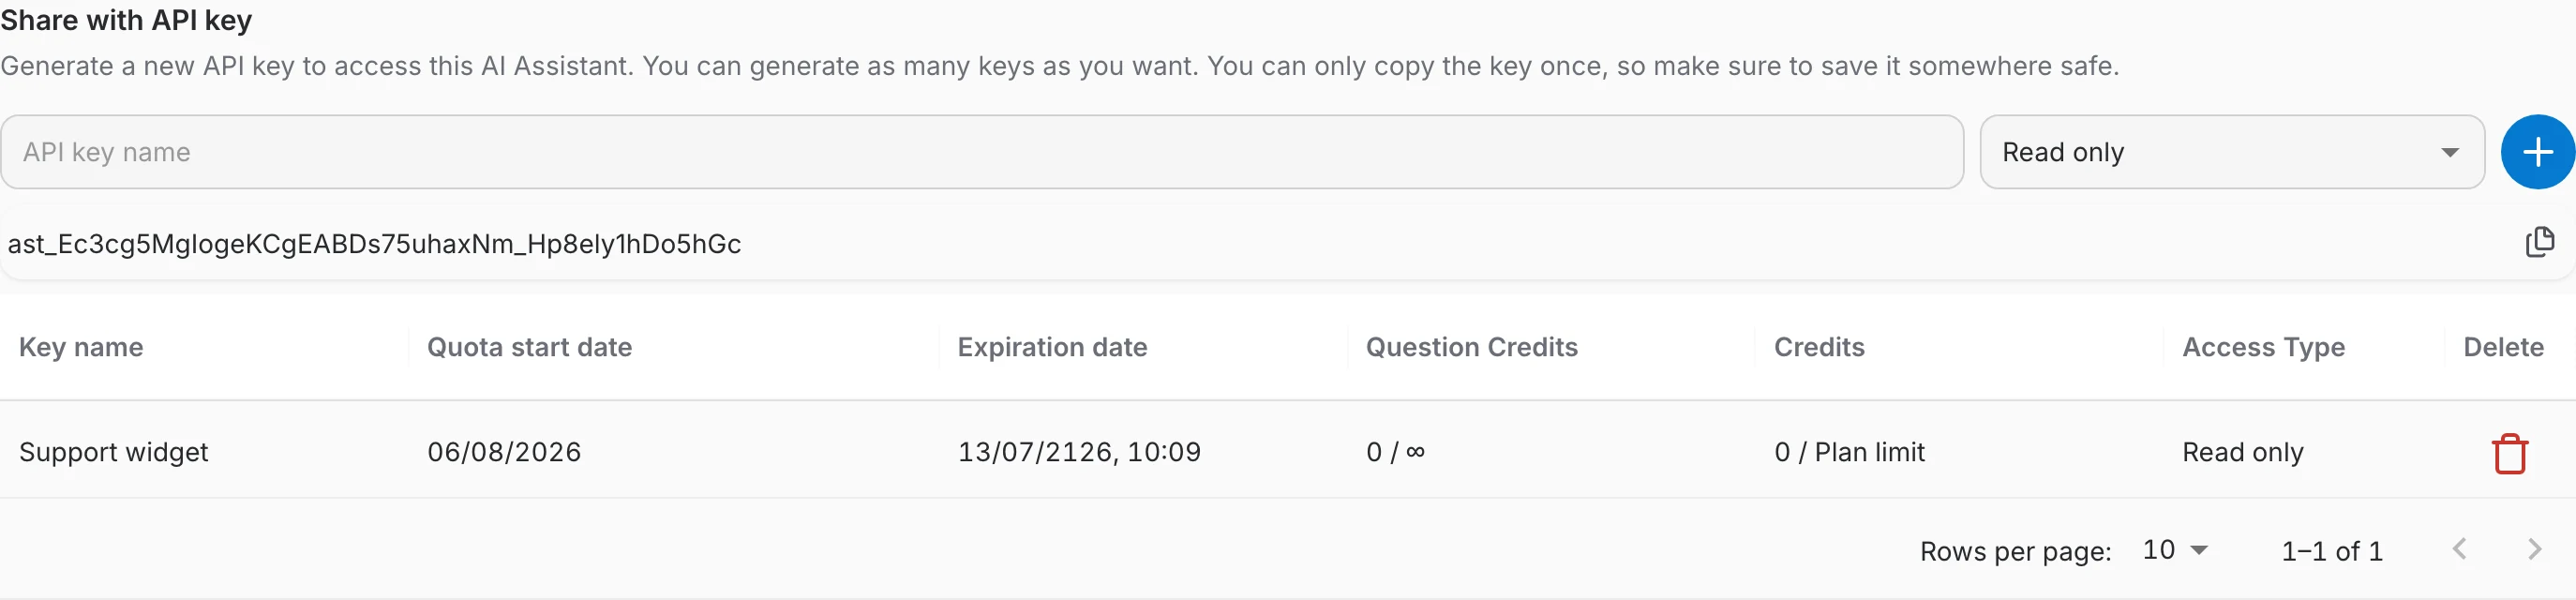
- Click the round + button, or press Enter. The key is generated and shown once, just below the form — click it to copy it.

Personal API keys
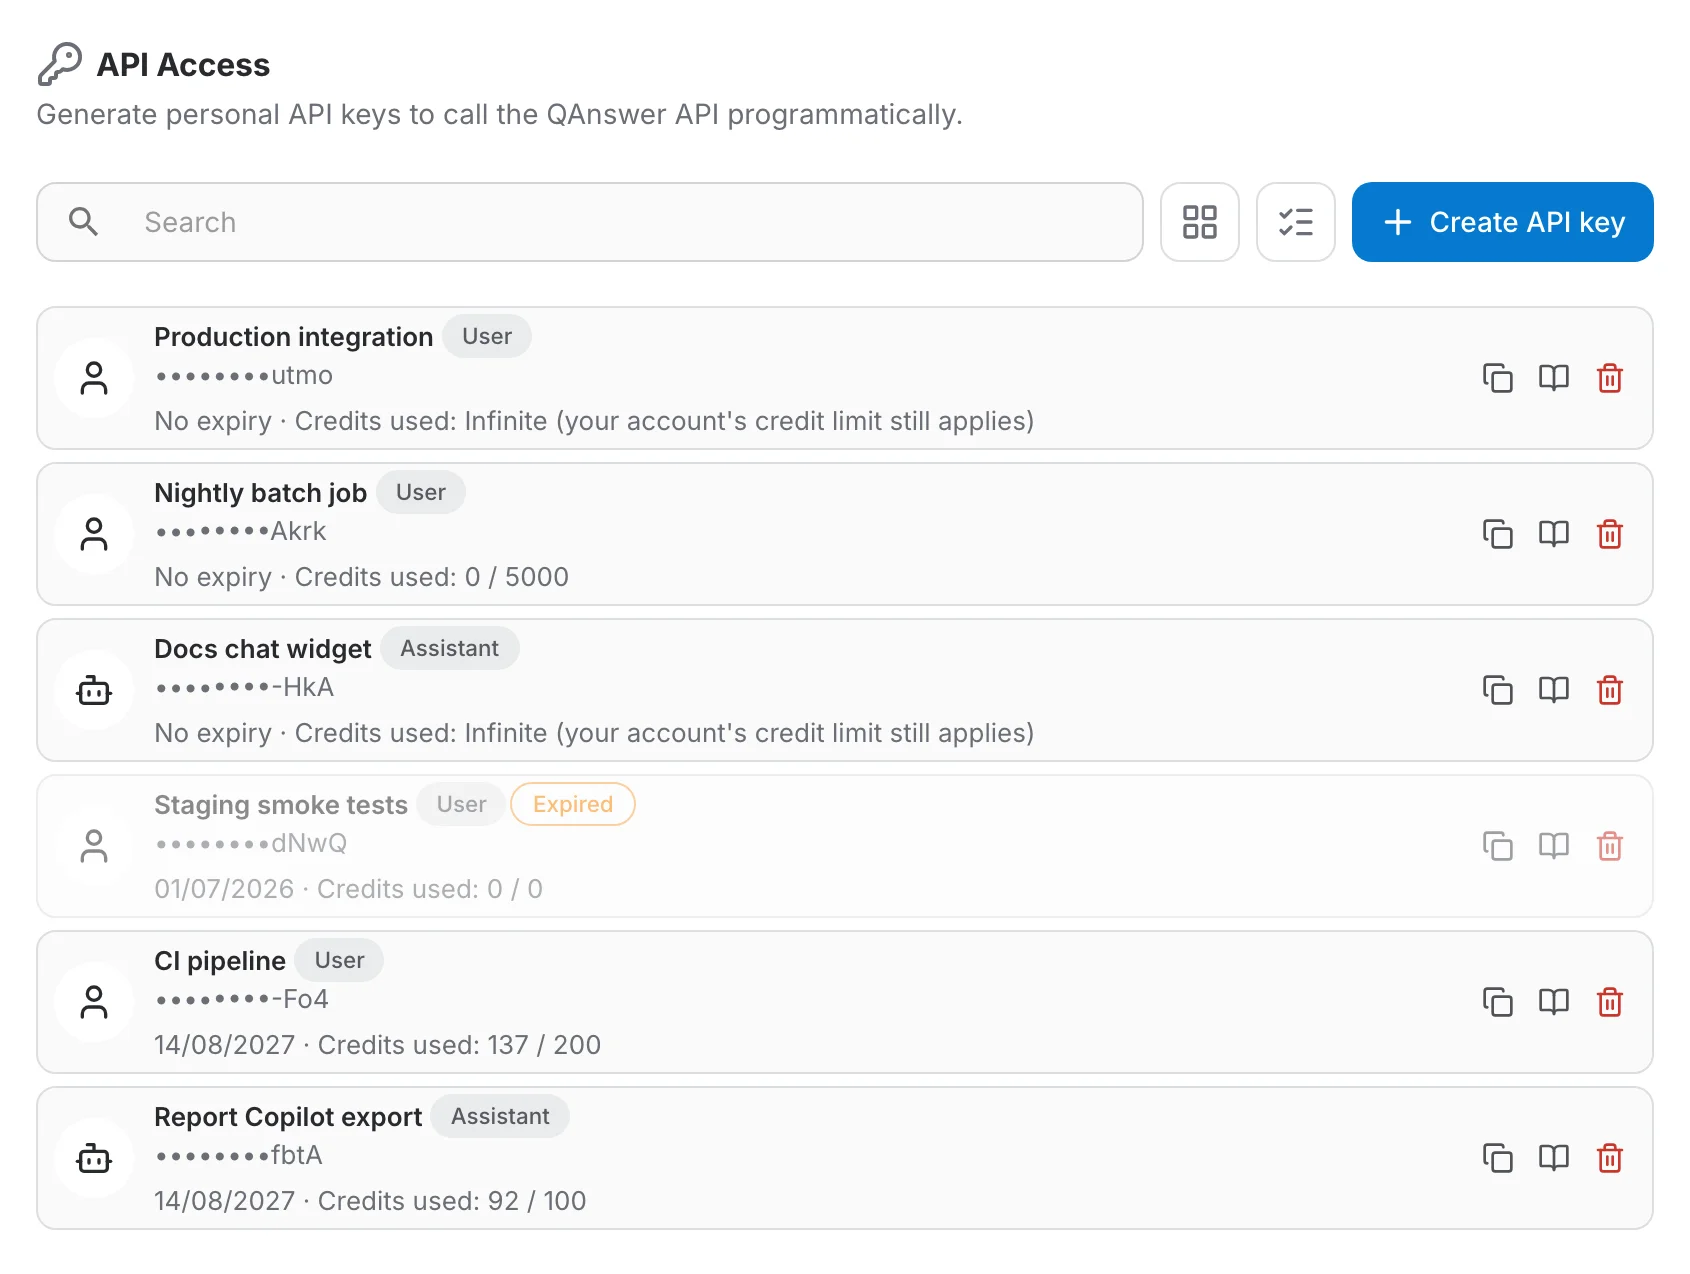
The keys above are bound to this assistant. Keys that belong to you rather than to a single assistant are created on the API Access page of your profile, which also lists the assistant-bound ones so you can track and revoke everything in one place:
- Create API key opens a small dialog with a Name and an optional Expiry date, question credit quota and credit capacity — the per-assistant form has none of these, so this is where you set them.
- The new key is shown once in a banner at the top of the list, with a Copy button.
- Each row shows the key name, a badge with the kind of key it is, its expiry (or "No expiry") and its credit usage, with icons to copy it, open its usage details, or revoke it.
See API Access for the full page, including what each kind of key is allowed to call.
Transferring ownership
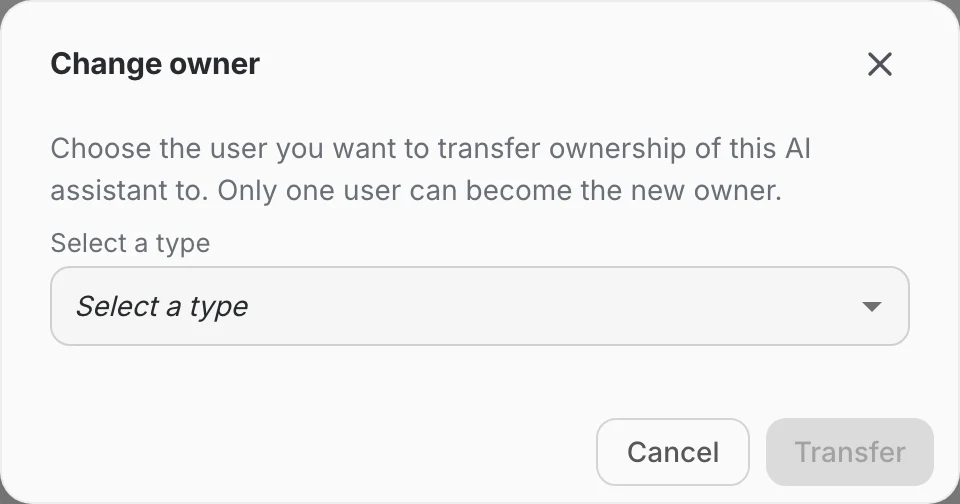
The owner is not an entry in the sharing list — ownership is transferred in its own flow, and it can go to a person or to a group. There is only ever one owner at a time.
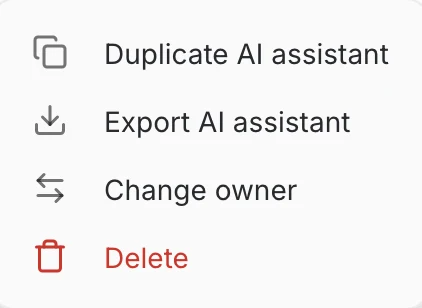
- Open the ⋯ menu of the assistant and choose Change owner.
- In Select a type, pick what kind of owner you are handing it to.
- Search for the new owner in the field that appears below.
- Click Transfer and confirm.
Which types are offered depends on what you belong to:
- A user – always available. The assistant becomes that person's personal assistant.
- A team – only if you are in at least one team. The assistant becomes a team assistant.
- An organization – only if you belong to at least one organization. The assistant becomes an organization assistant.
- Admin (no owner) – platform administrators only. The assistant is left with no owner and is managed by the platform.
What changed from the previous design
If you knew the old Access Rights page, here is what moved:
- Access rights are no longer a separate page in the assistant menu — they are a dialog behind the Share button.
- The three separate sections for users, teams and organizations were merged into one table with a Type column, and the free-text fields became searchable drop-downs.
- The team-only Under Review / Approved badges were replaced by the general share-request flow, which now also covers organizations and shows up in an admin panel.
- Changing an access level no longer opens a confirmation dialog; it applies immediately.
- Removing an organization or a team share now requires a platform administrator.
- Read-only viewers can open the dialog and see who the assistant is shared with, instead of being locked out of it.