Admin User
Application users
Use this interface to manage all users of the platform: create and remove accounts, adjust roles, and configure quotas.
In on premise mode, only an administrator can create users. The default admin login is:
- username: admin
- password: 123456
See Installation to change the default configuration settings.
Only the admin can access the admin page. Access it via the navigation bar or by navigating to /admin.
Table view and list view
The default table view shows all users in a dense grid. Each row displays user identity, contact info, and inline controls for Activated, Blocked, LLM File Parsing, Enhanced Context, Role, Pricing Plan, and Quota AI Assistants.
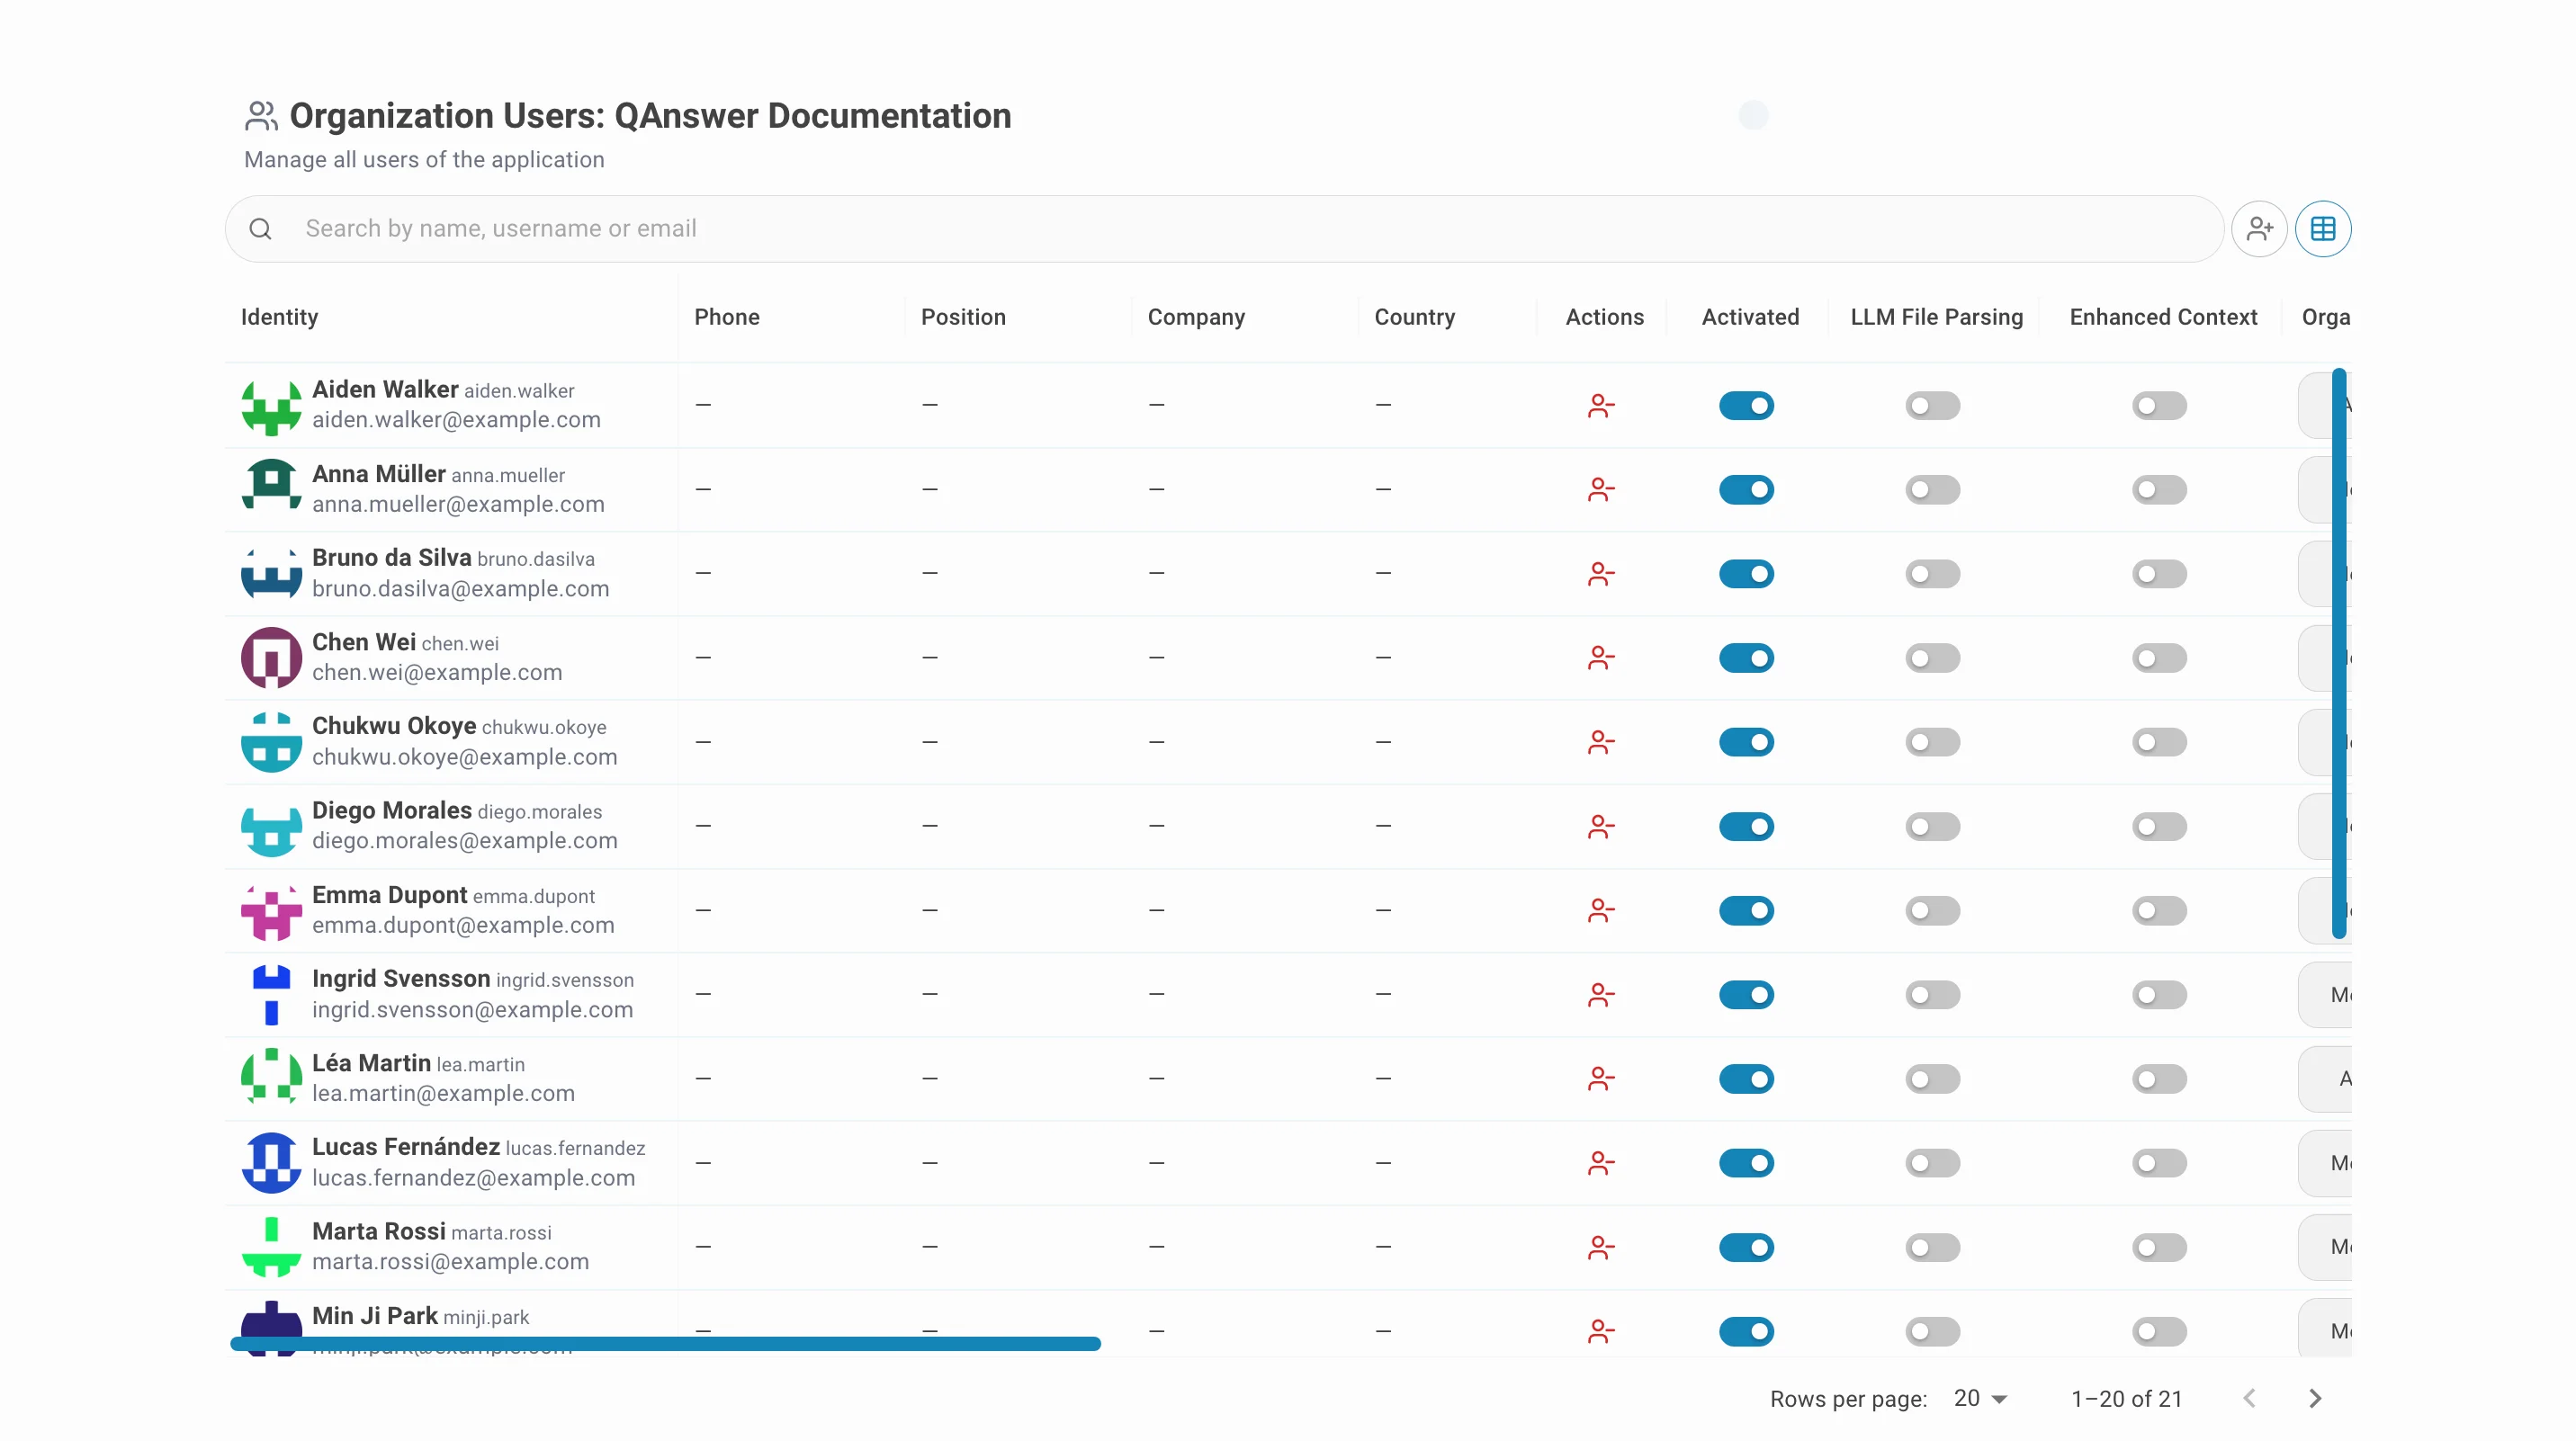
Click the view toggle in the toolbar to switch to list view. Selecting a user from the left panel opens a full detail panel on the right.
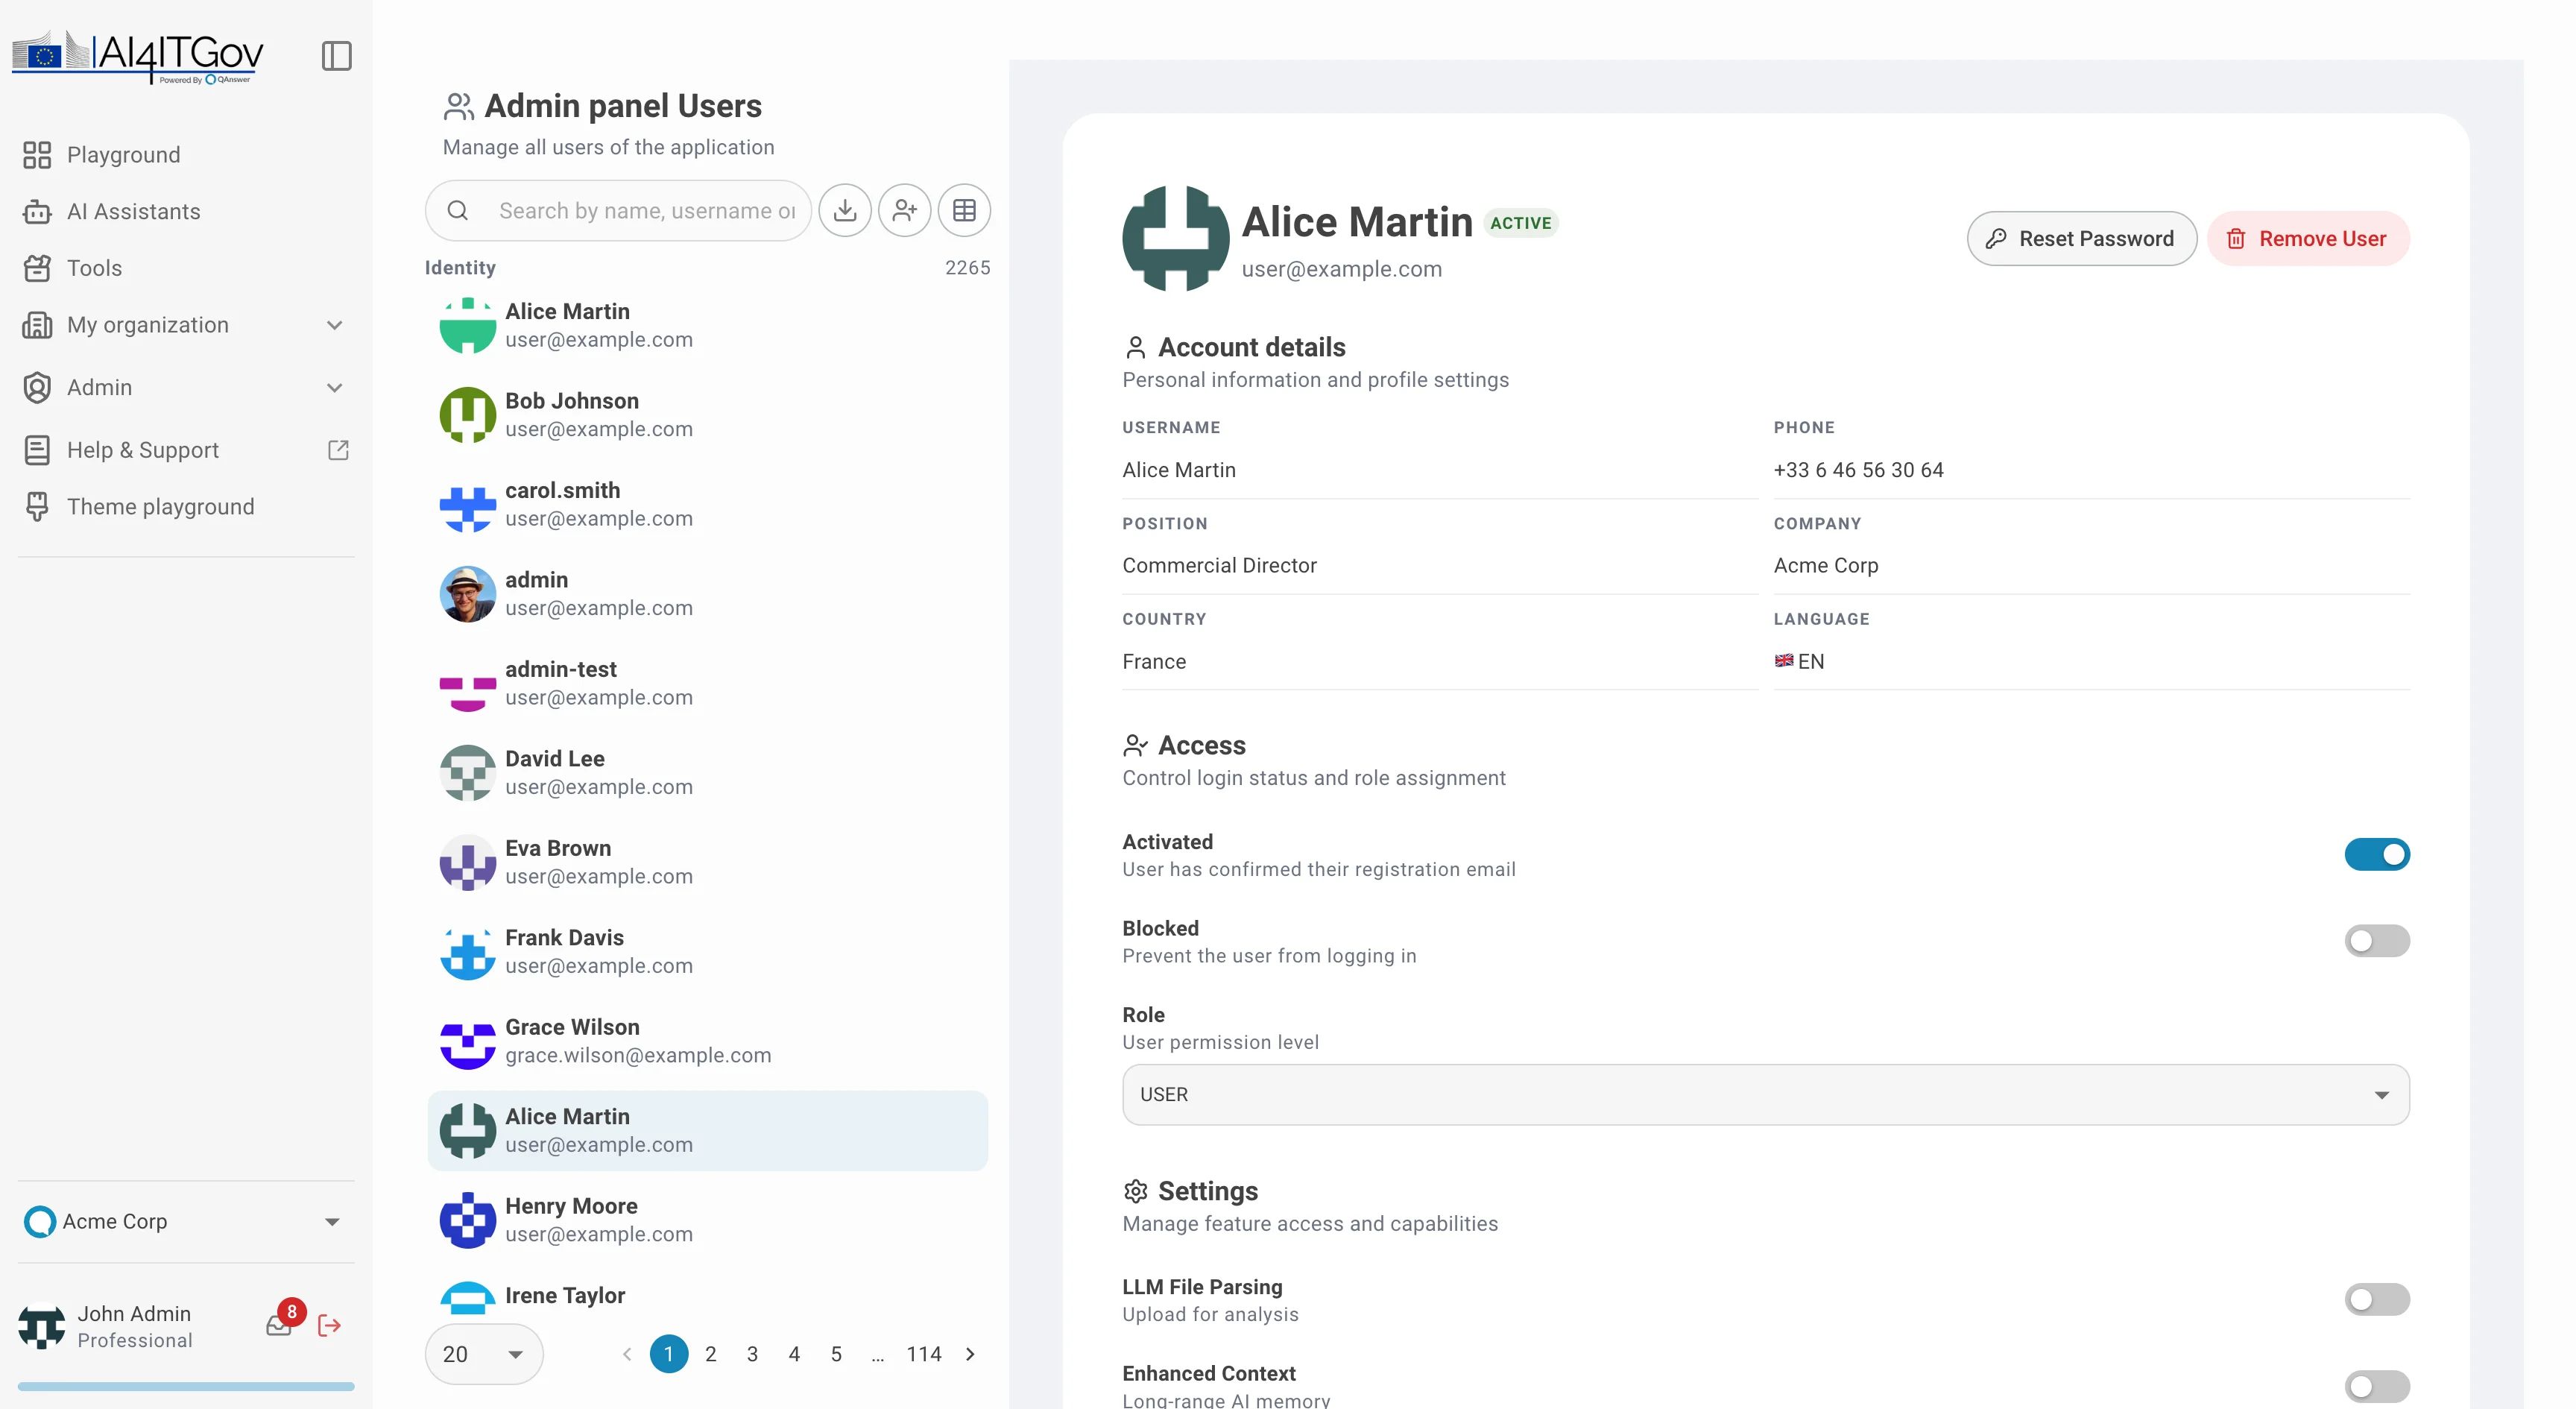
User detail panel
The detail panel groups all settings into clearly labelled sections:
- Account details — read-only profile fields: name, phone, position, company, country, and interface language.
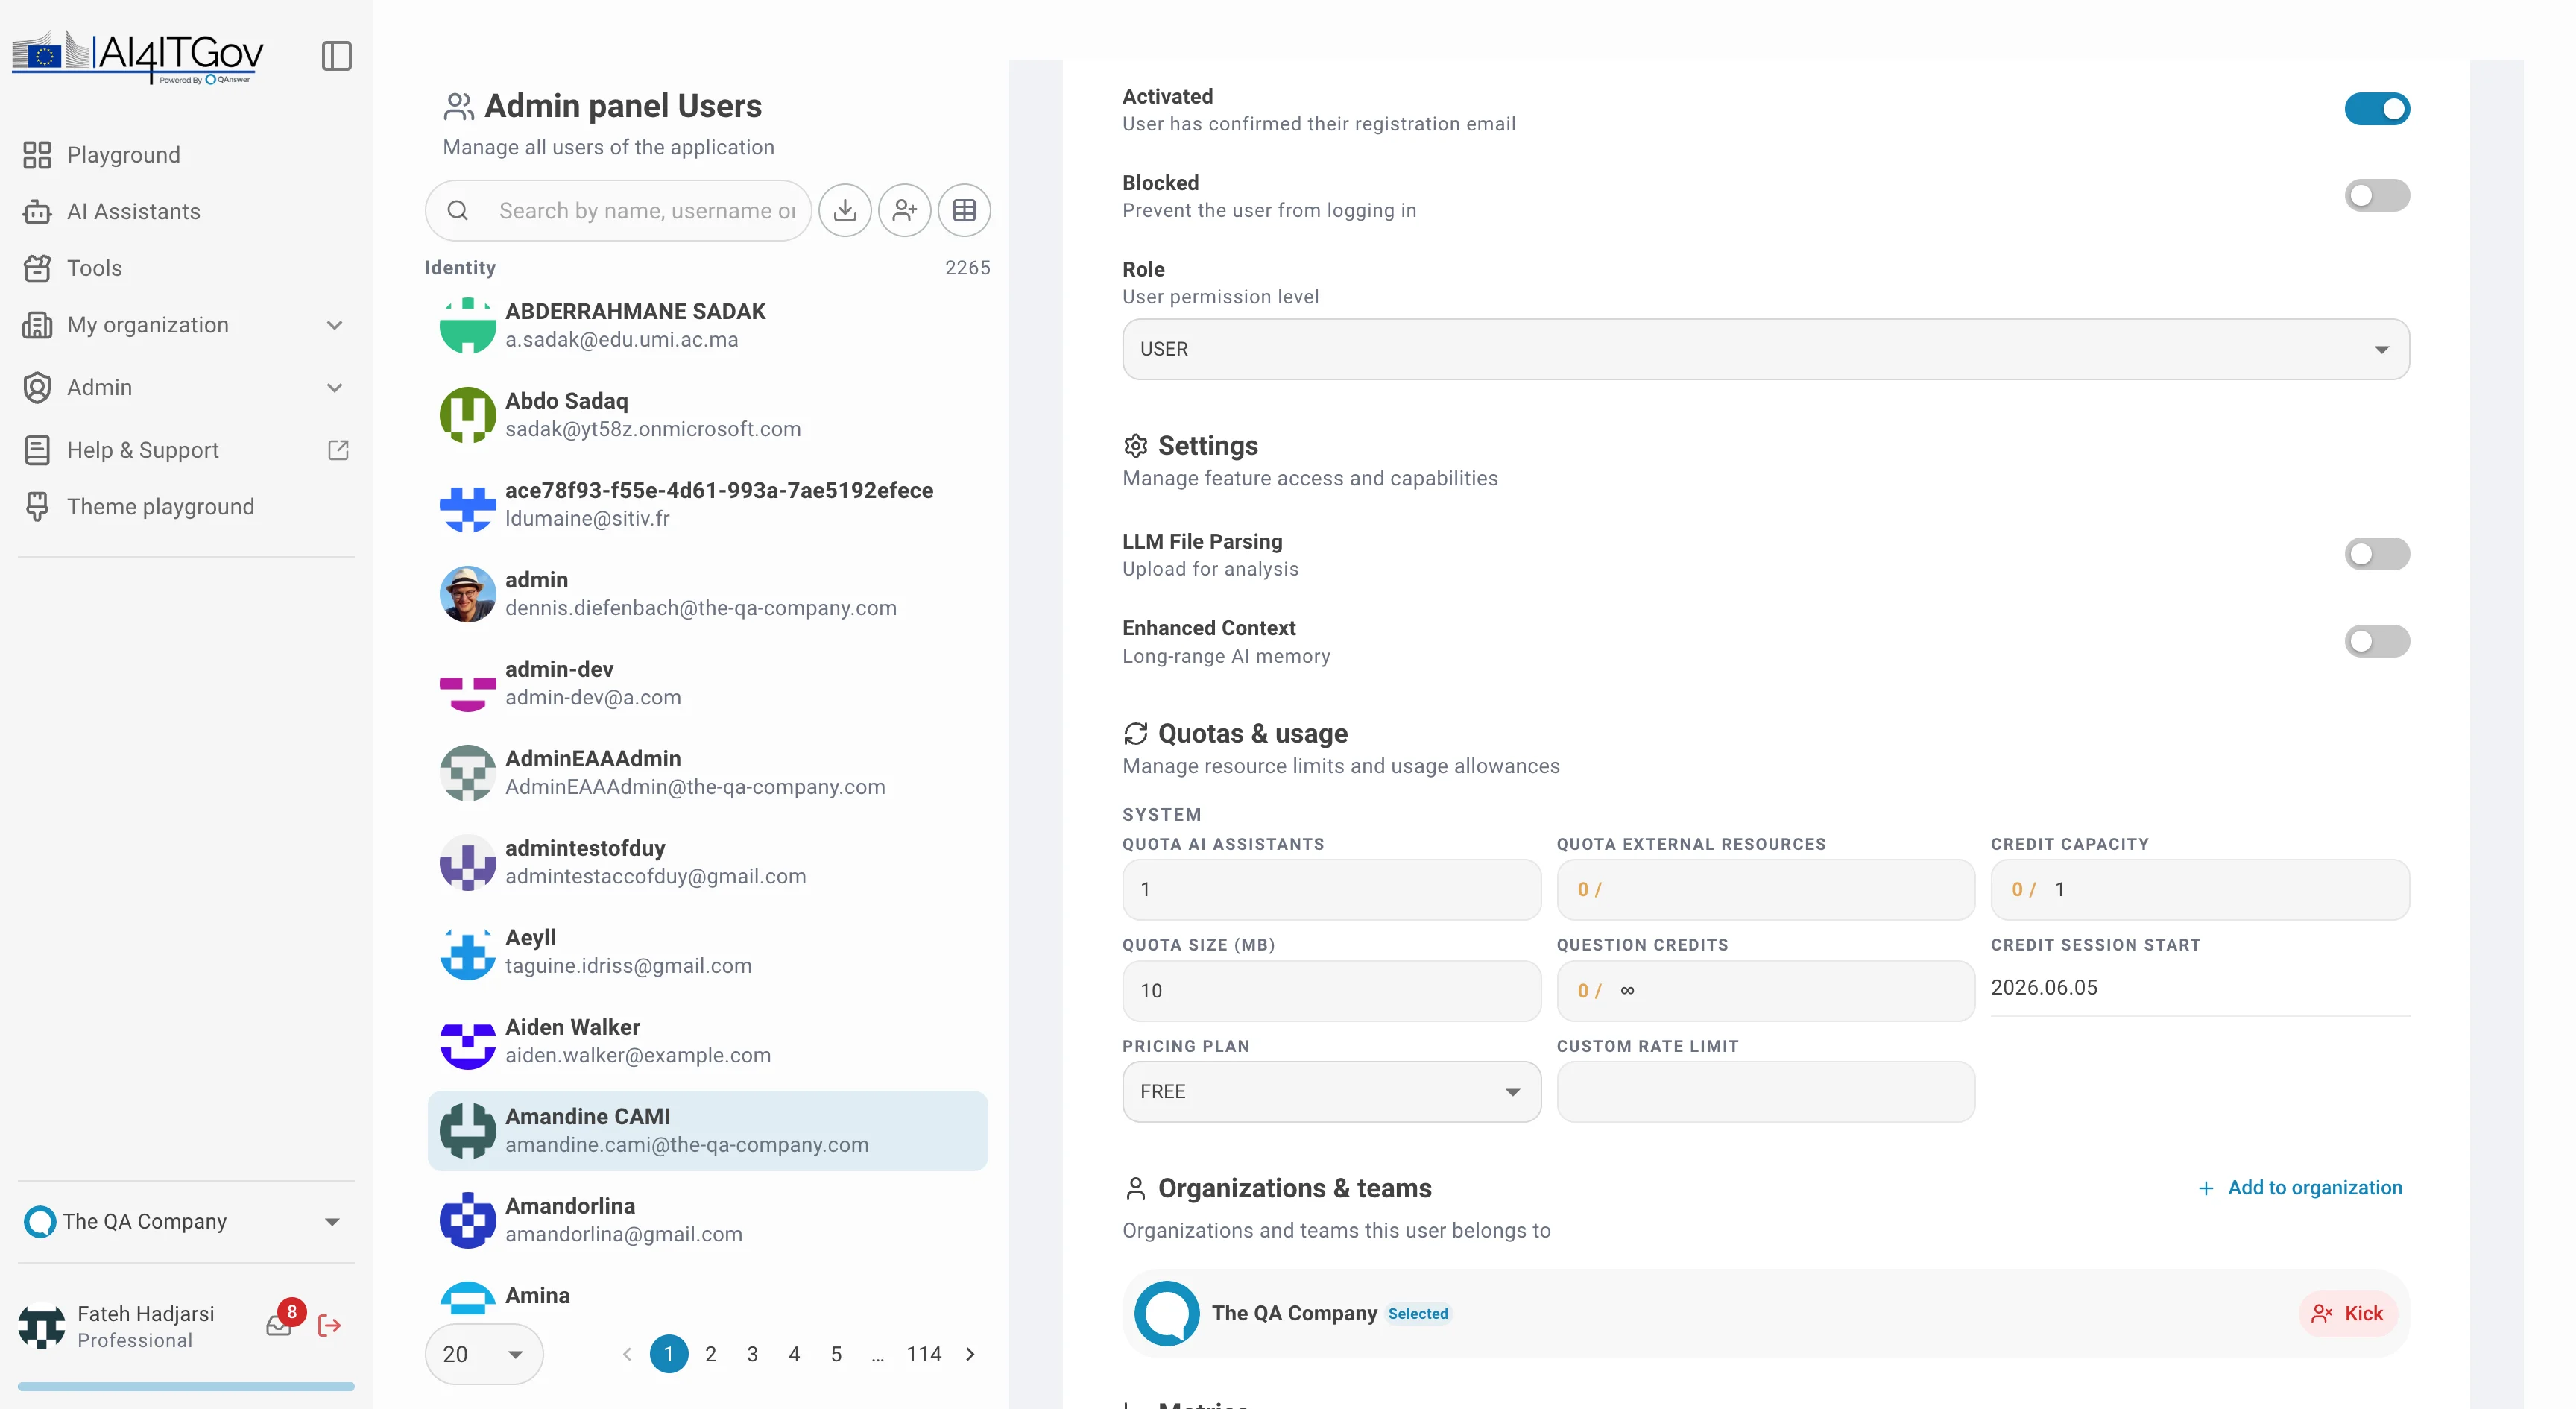
- Access — enable or disable the account, block login, and set the system-wide role (User or Admin).
- Settings — toggle LLM File Parsing (file upload for analysis) and Enhanced Context (long-range AI memory).
- Quotas & usage — set limits for AI assistants, storage (MB), question credits, external resources, credit capacity, rate limit, and pricing plan.
- Organizations & teams — add the user to an organization or remove them from one.
- Metrics — read-only activity data: creation date, last login, credits used, OAuth login status, and more.

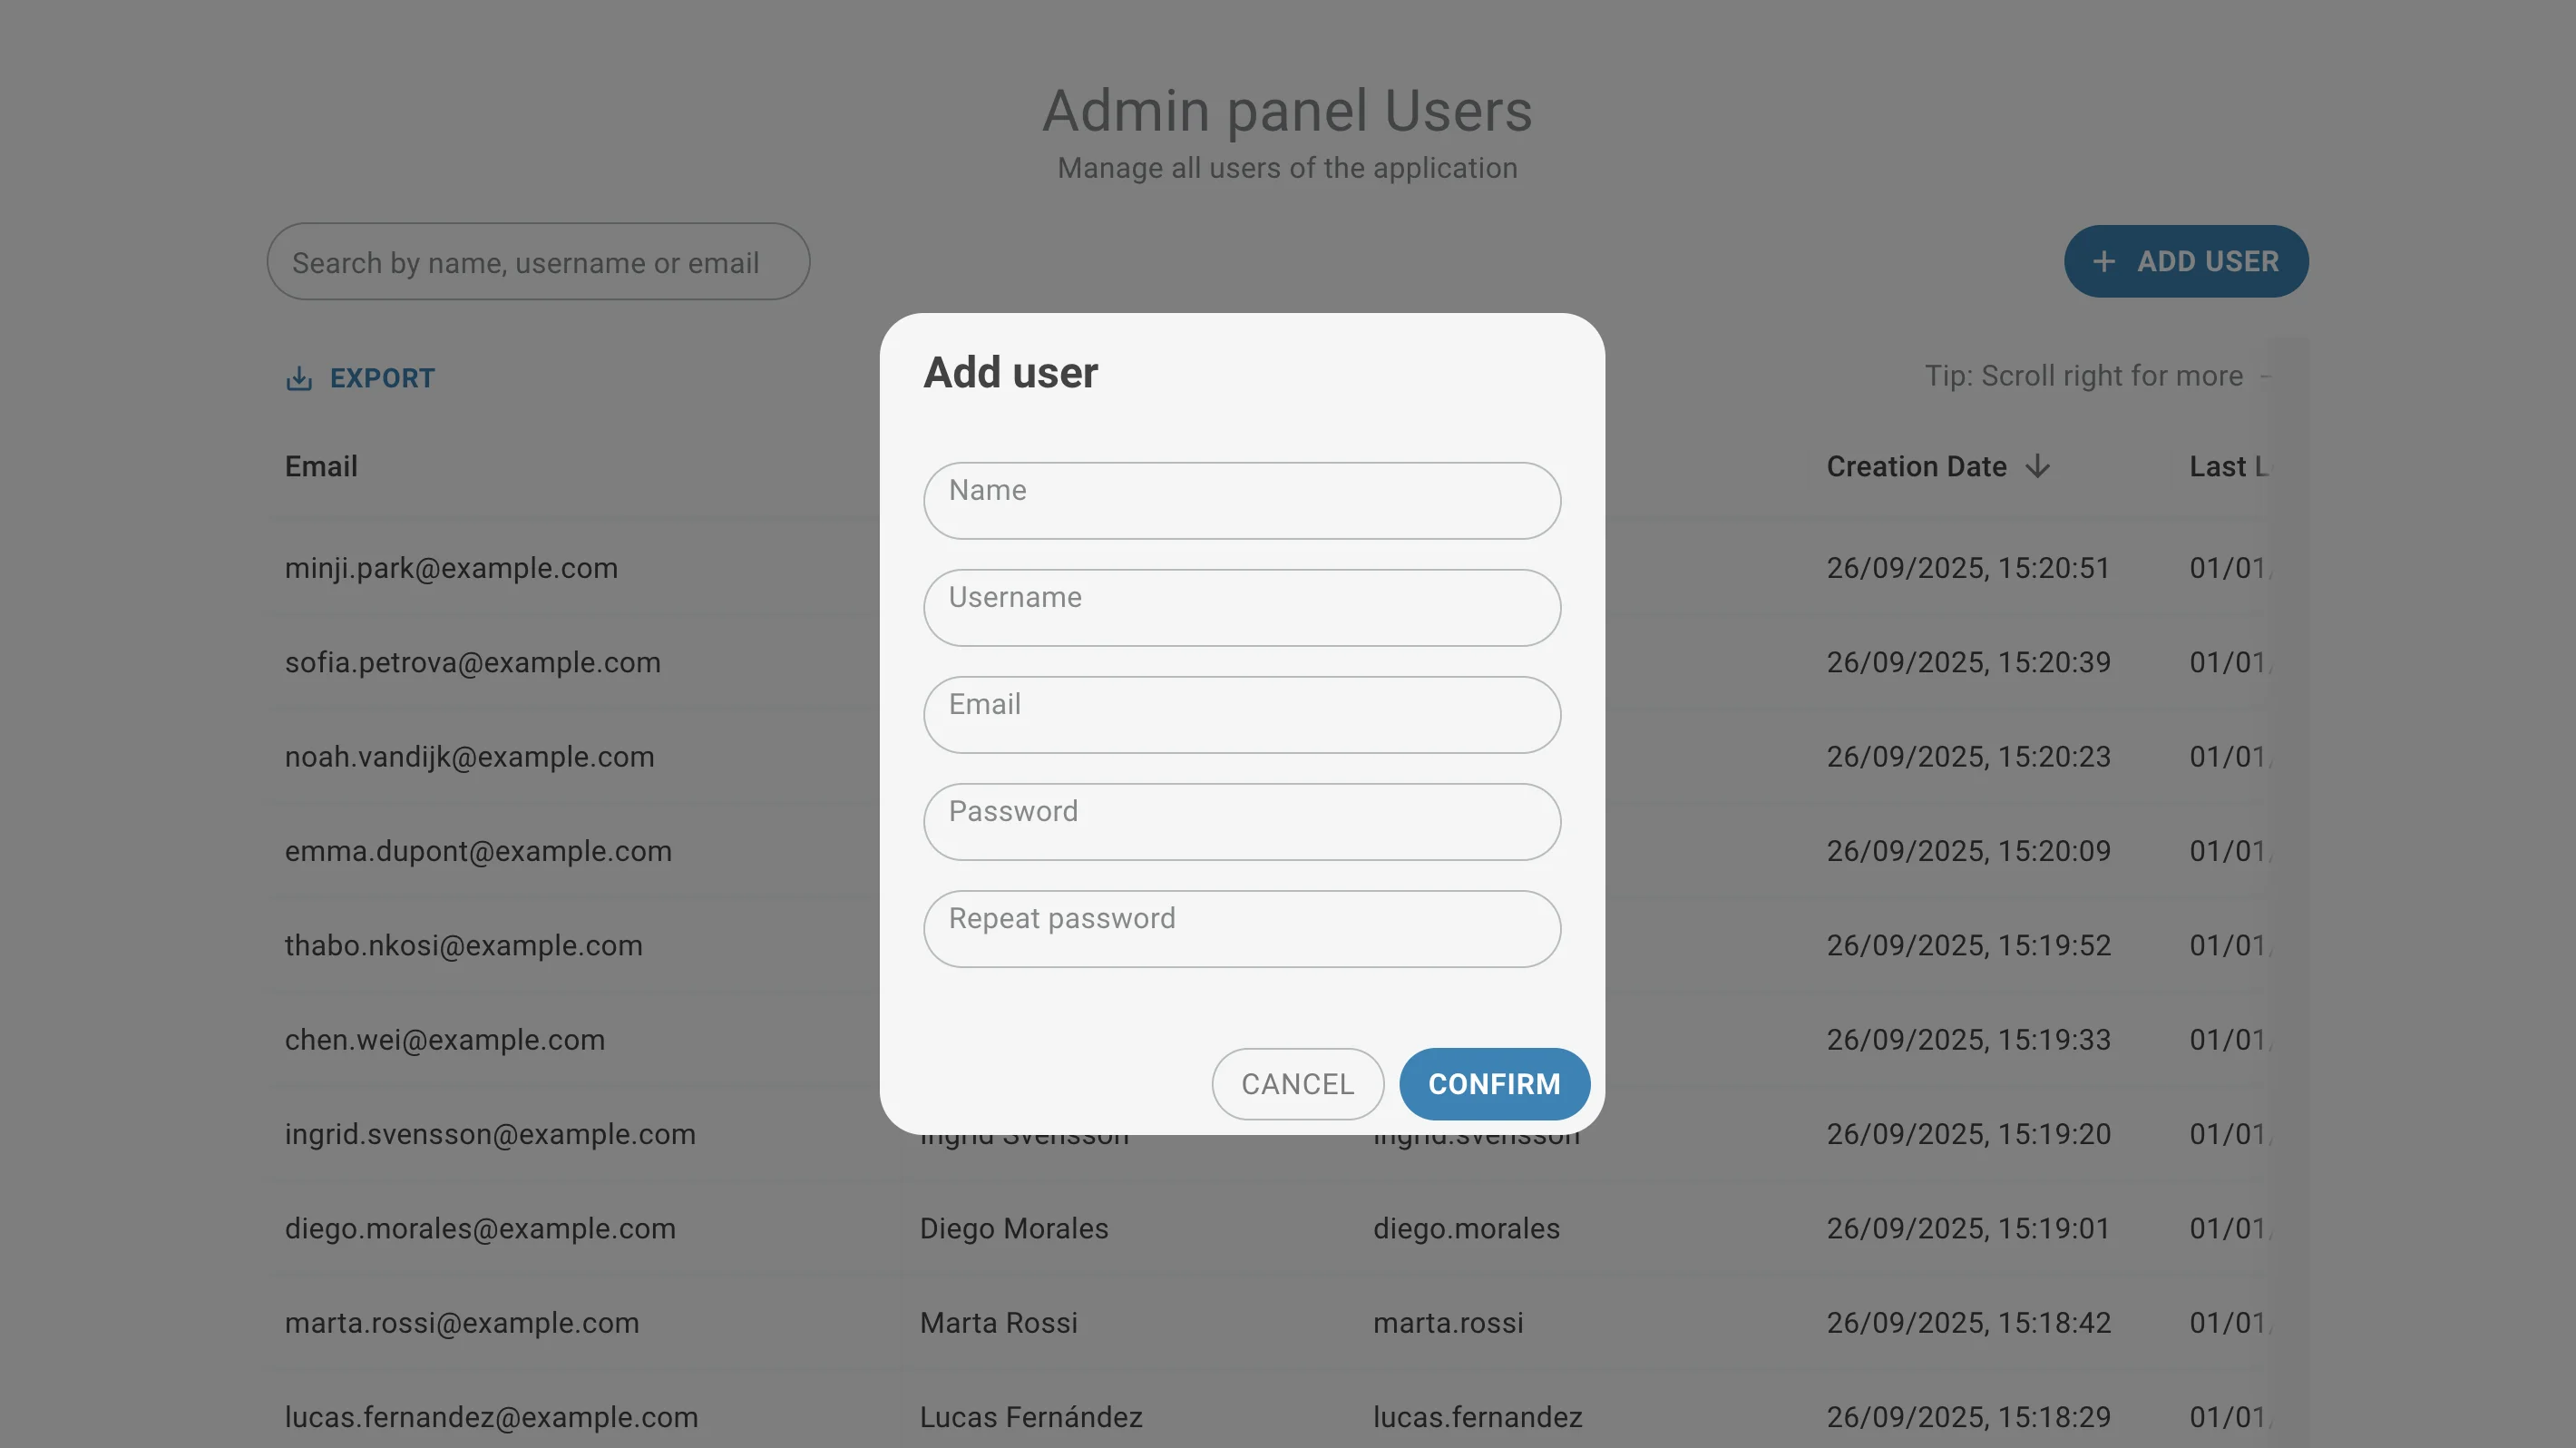
Add a user
Click the add-user icon in the toolbar to open the creation form:
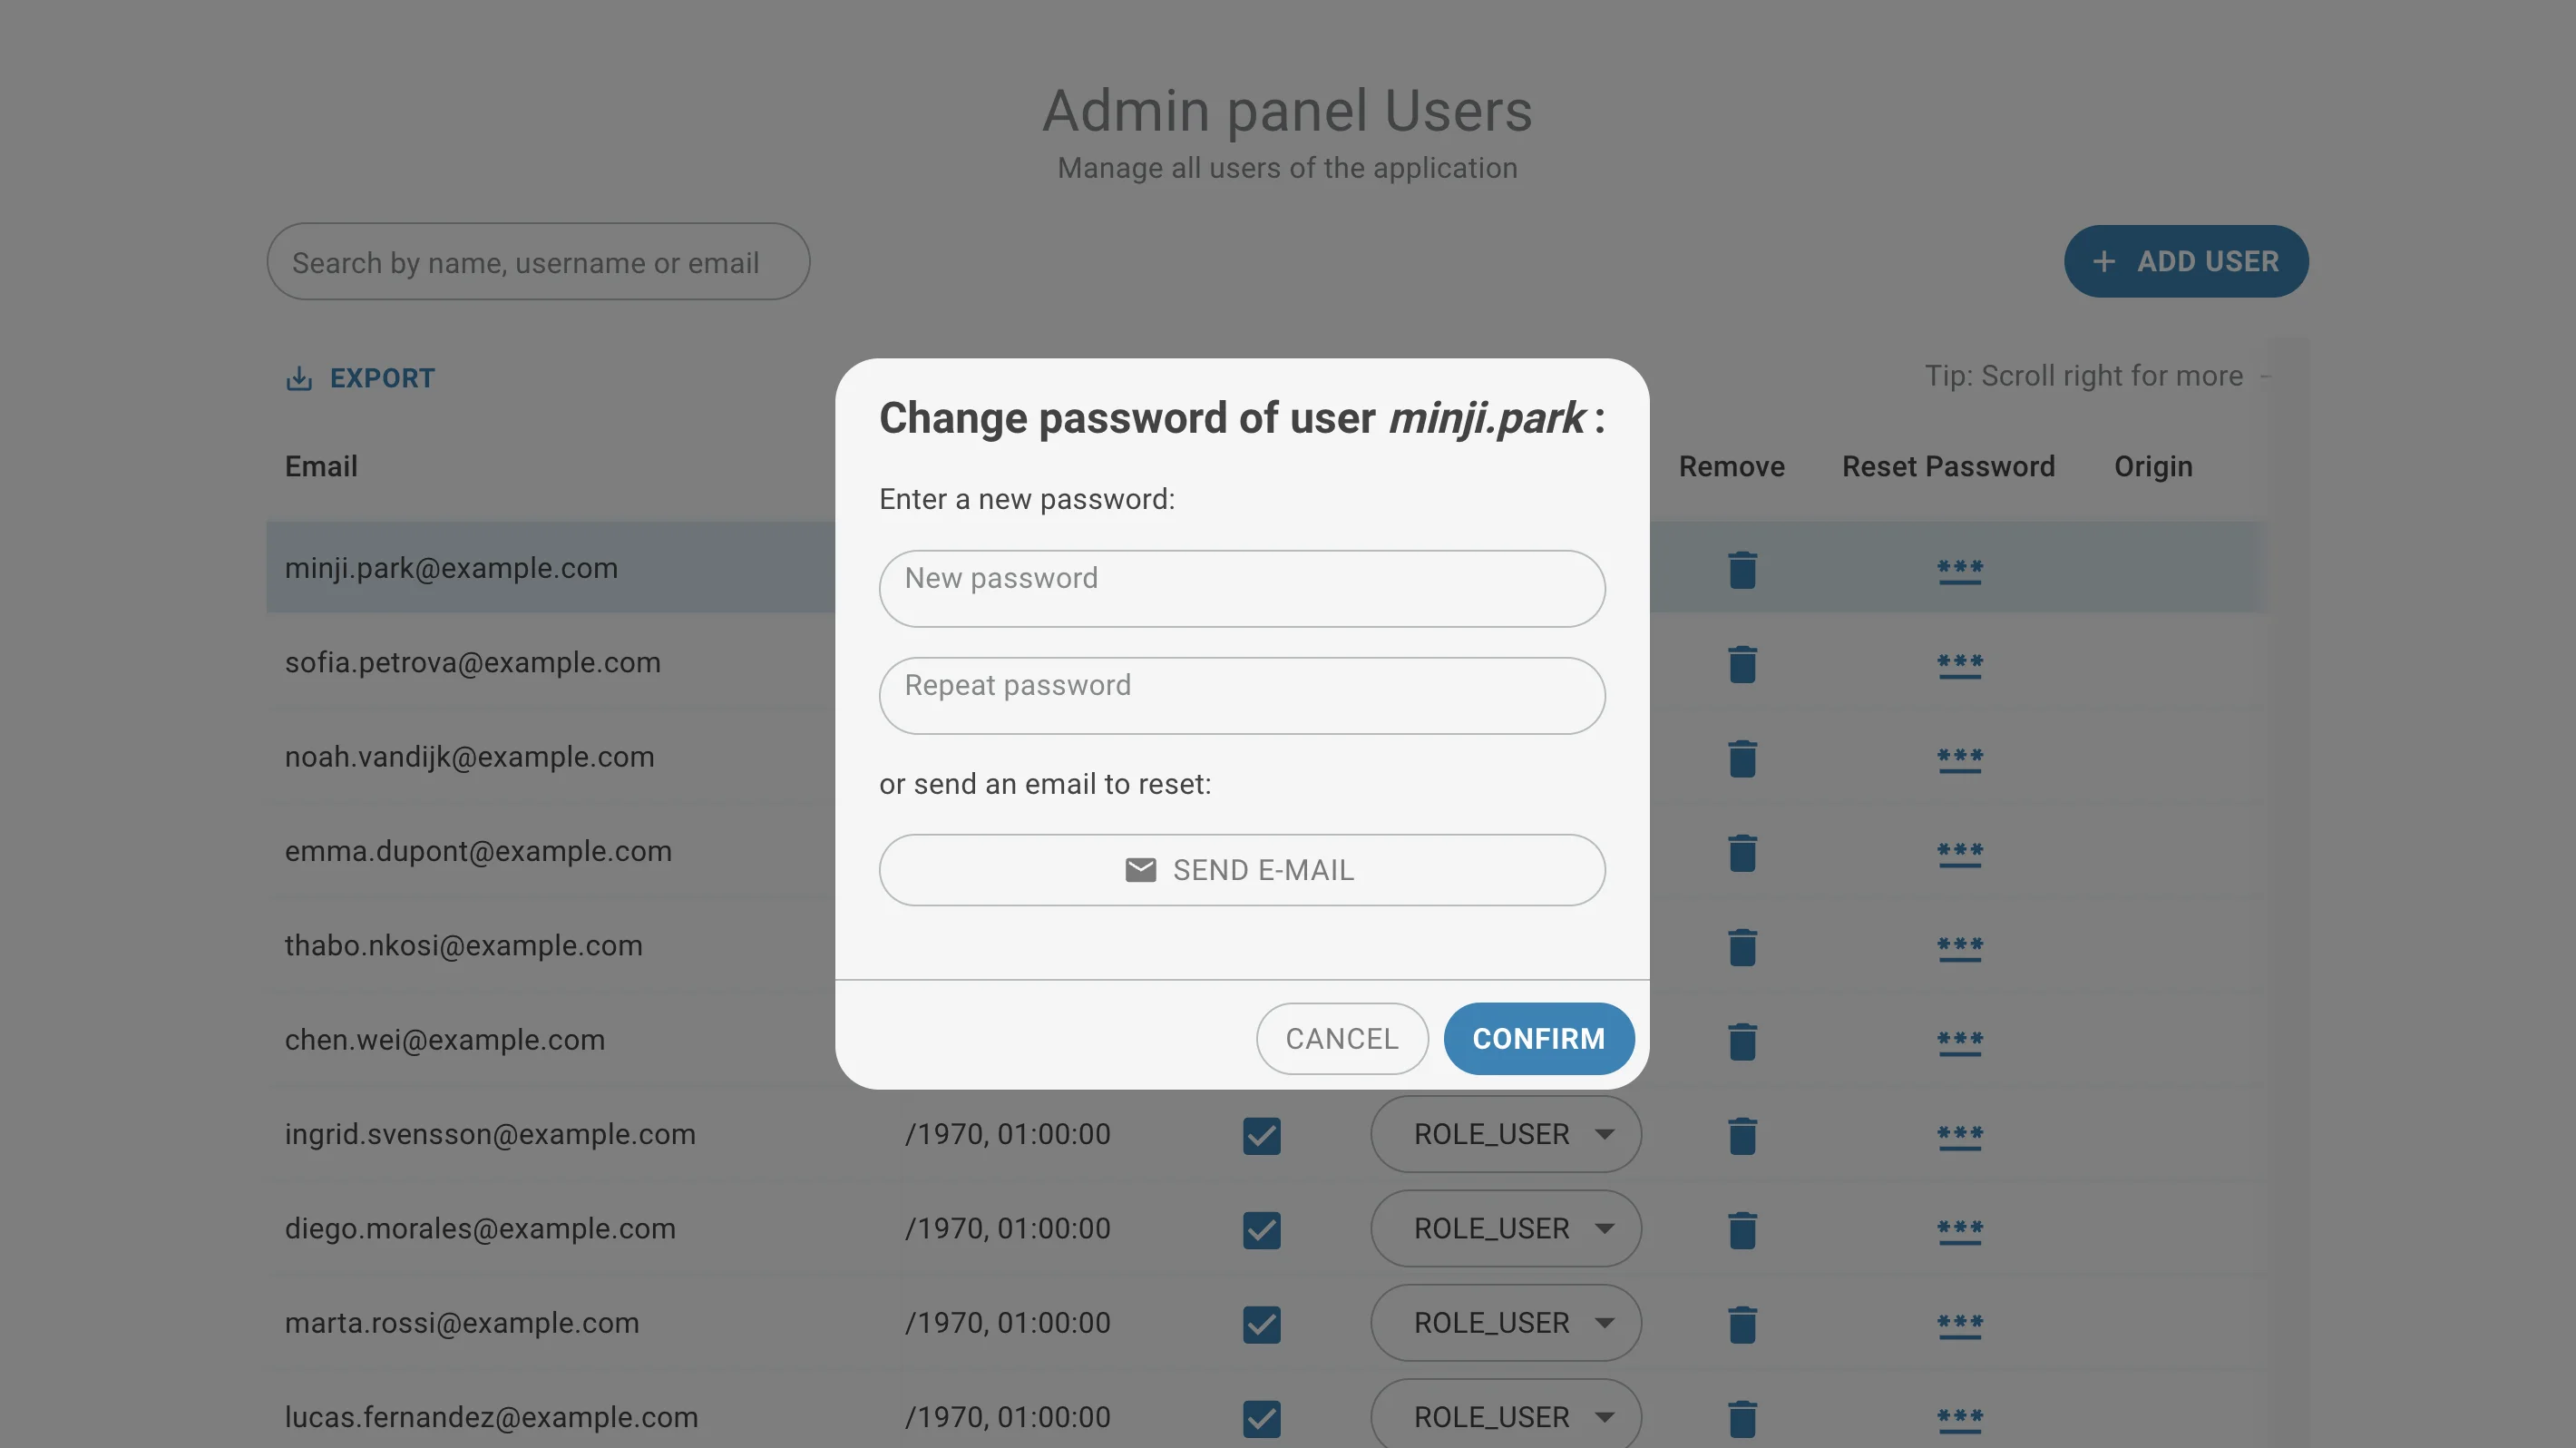
Reset a user's password
Click "Reset Password" in the detail panel header, or the key icon in the table view Actions column:
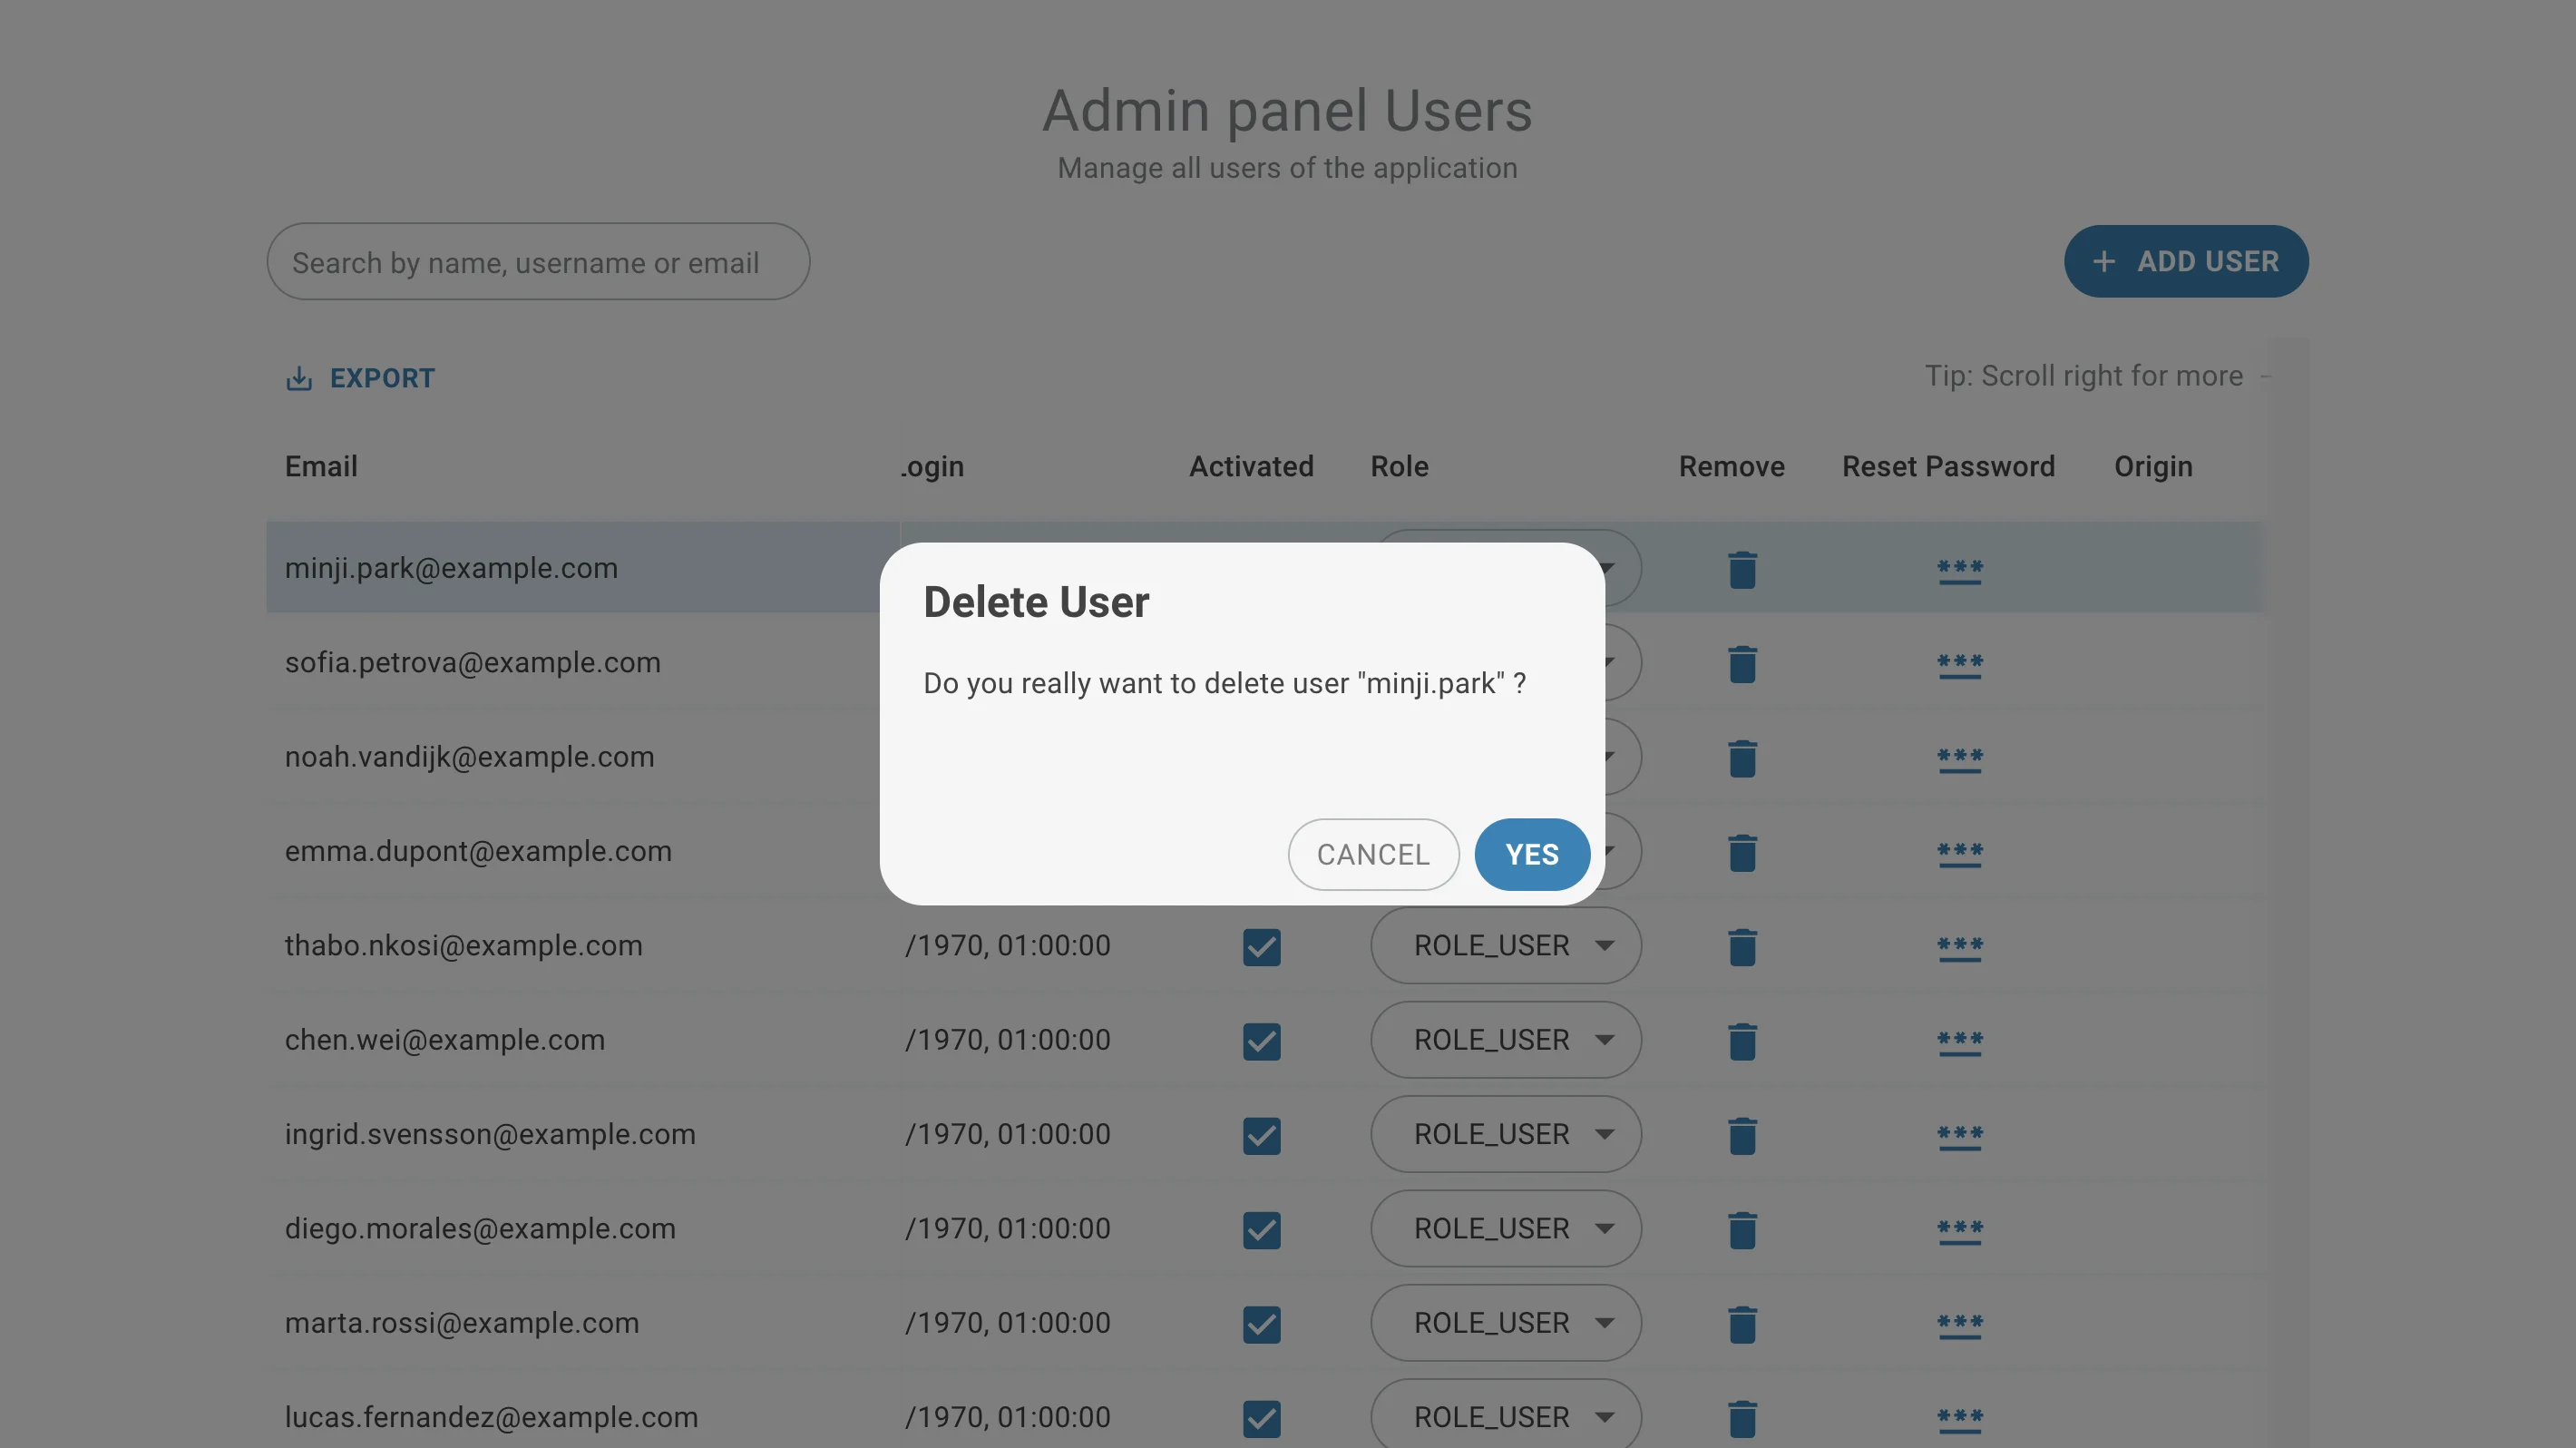
Remove a user
Click "Remove User" in the detail panel header, or the trash icon in the table view Actions column: