Microsoft Teams
Video Tutorial
Microsoft Teams
Watch on Tutorials page →
There are two ways to connect your AI Assistant to Microsoft Teams. Pick the one that matches your setup.
Method 1: Setup Link (Shared App)
Quick, per-user setup using the shared QAnswer Teams app. Best for individuals.
Prerequisites
Your Teams administrator must grant permission to install third-party apps before proceeding. Attempt to install the QAnswer app to verify access. If installation fails, contact your Teams administrator to install it for the organization or to grant the required permissions.
Install
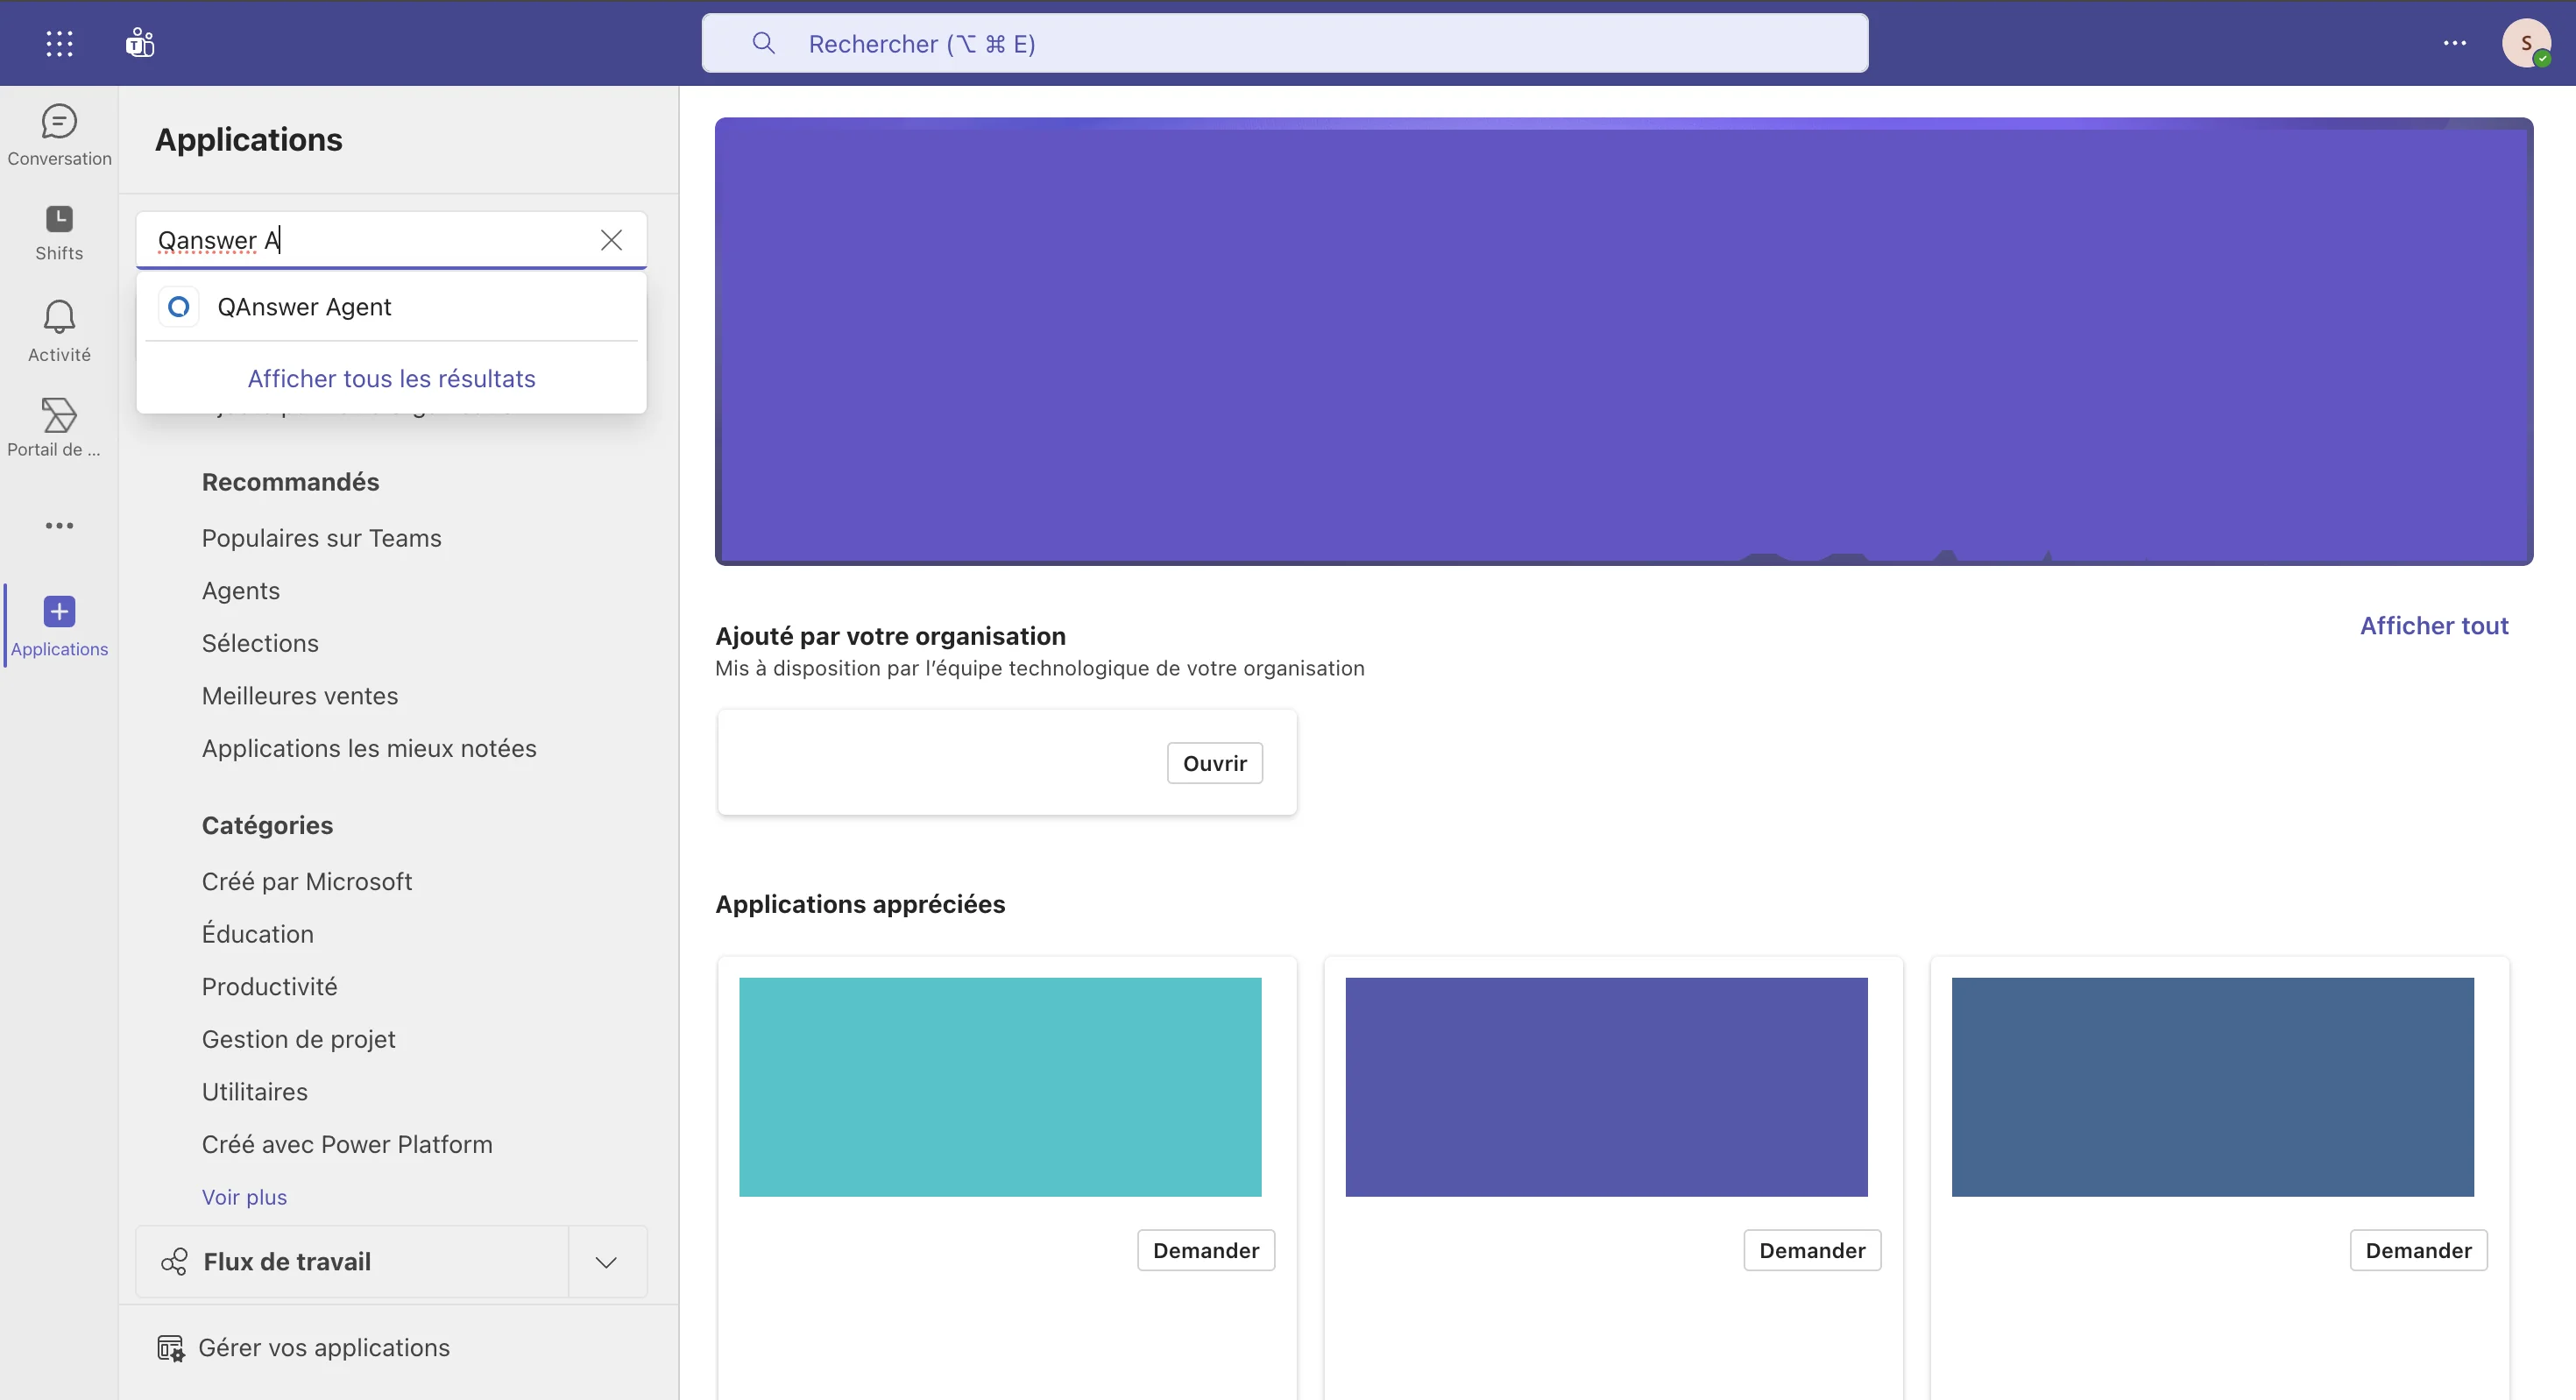
In Teams:
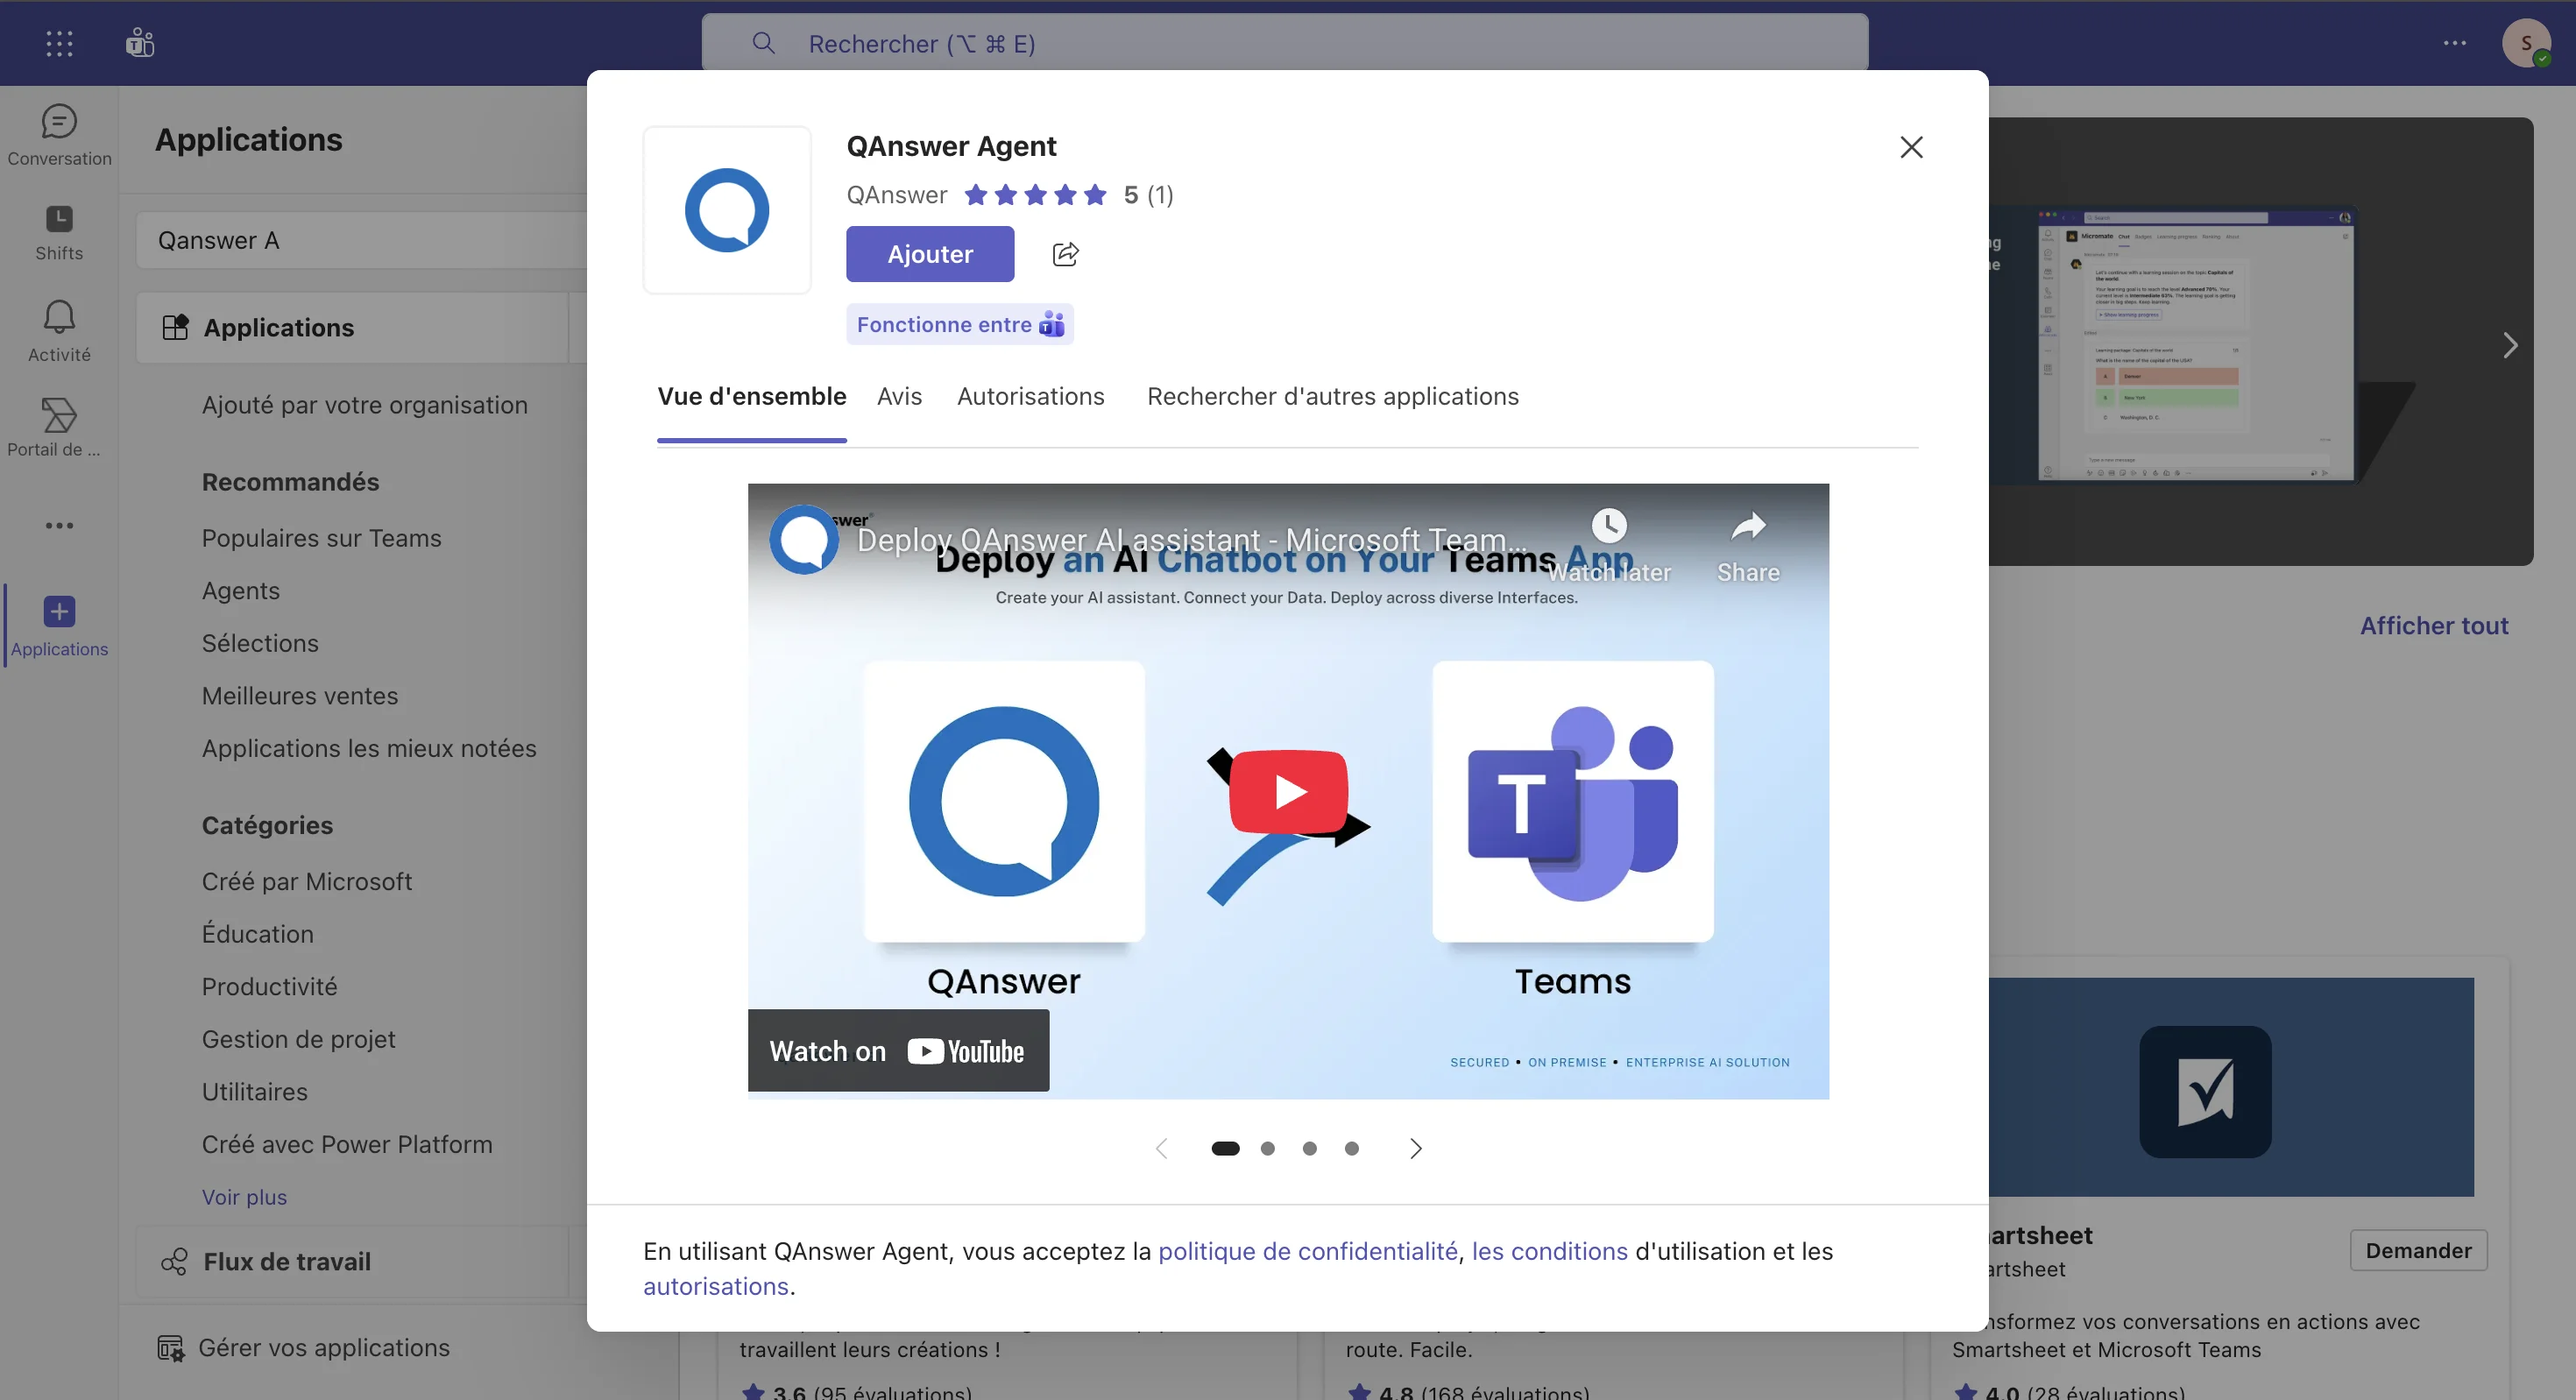
- Go to the Applications tab and Search for the QAnswer Agent app.
- Click on Add to install the app.
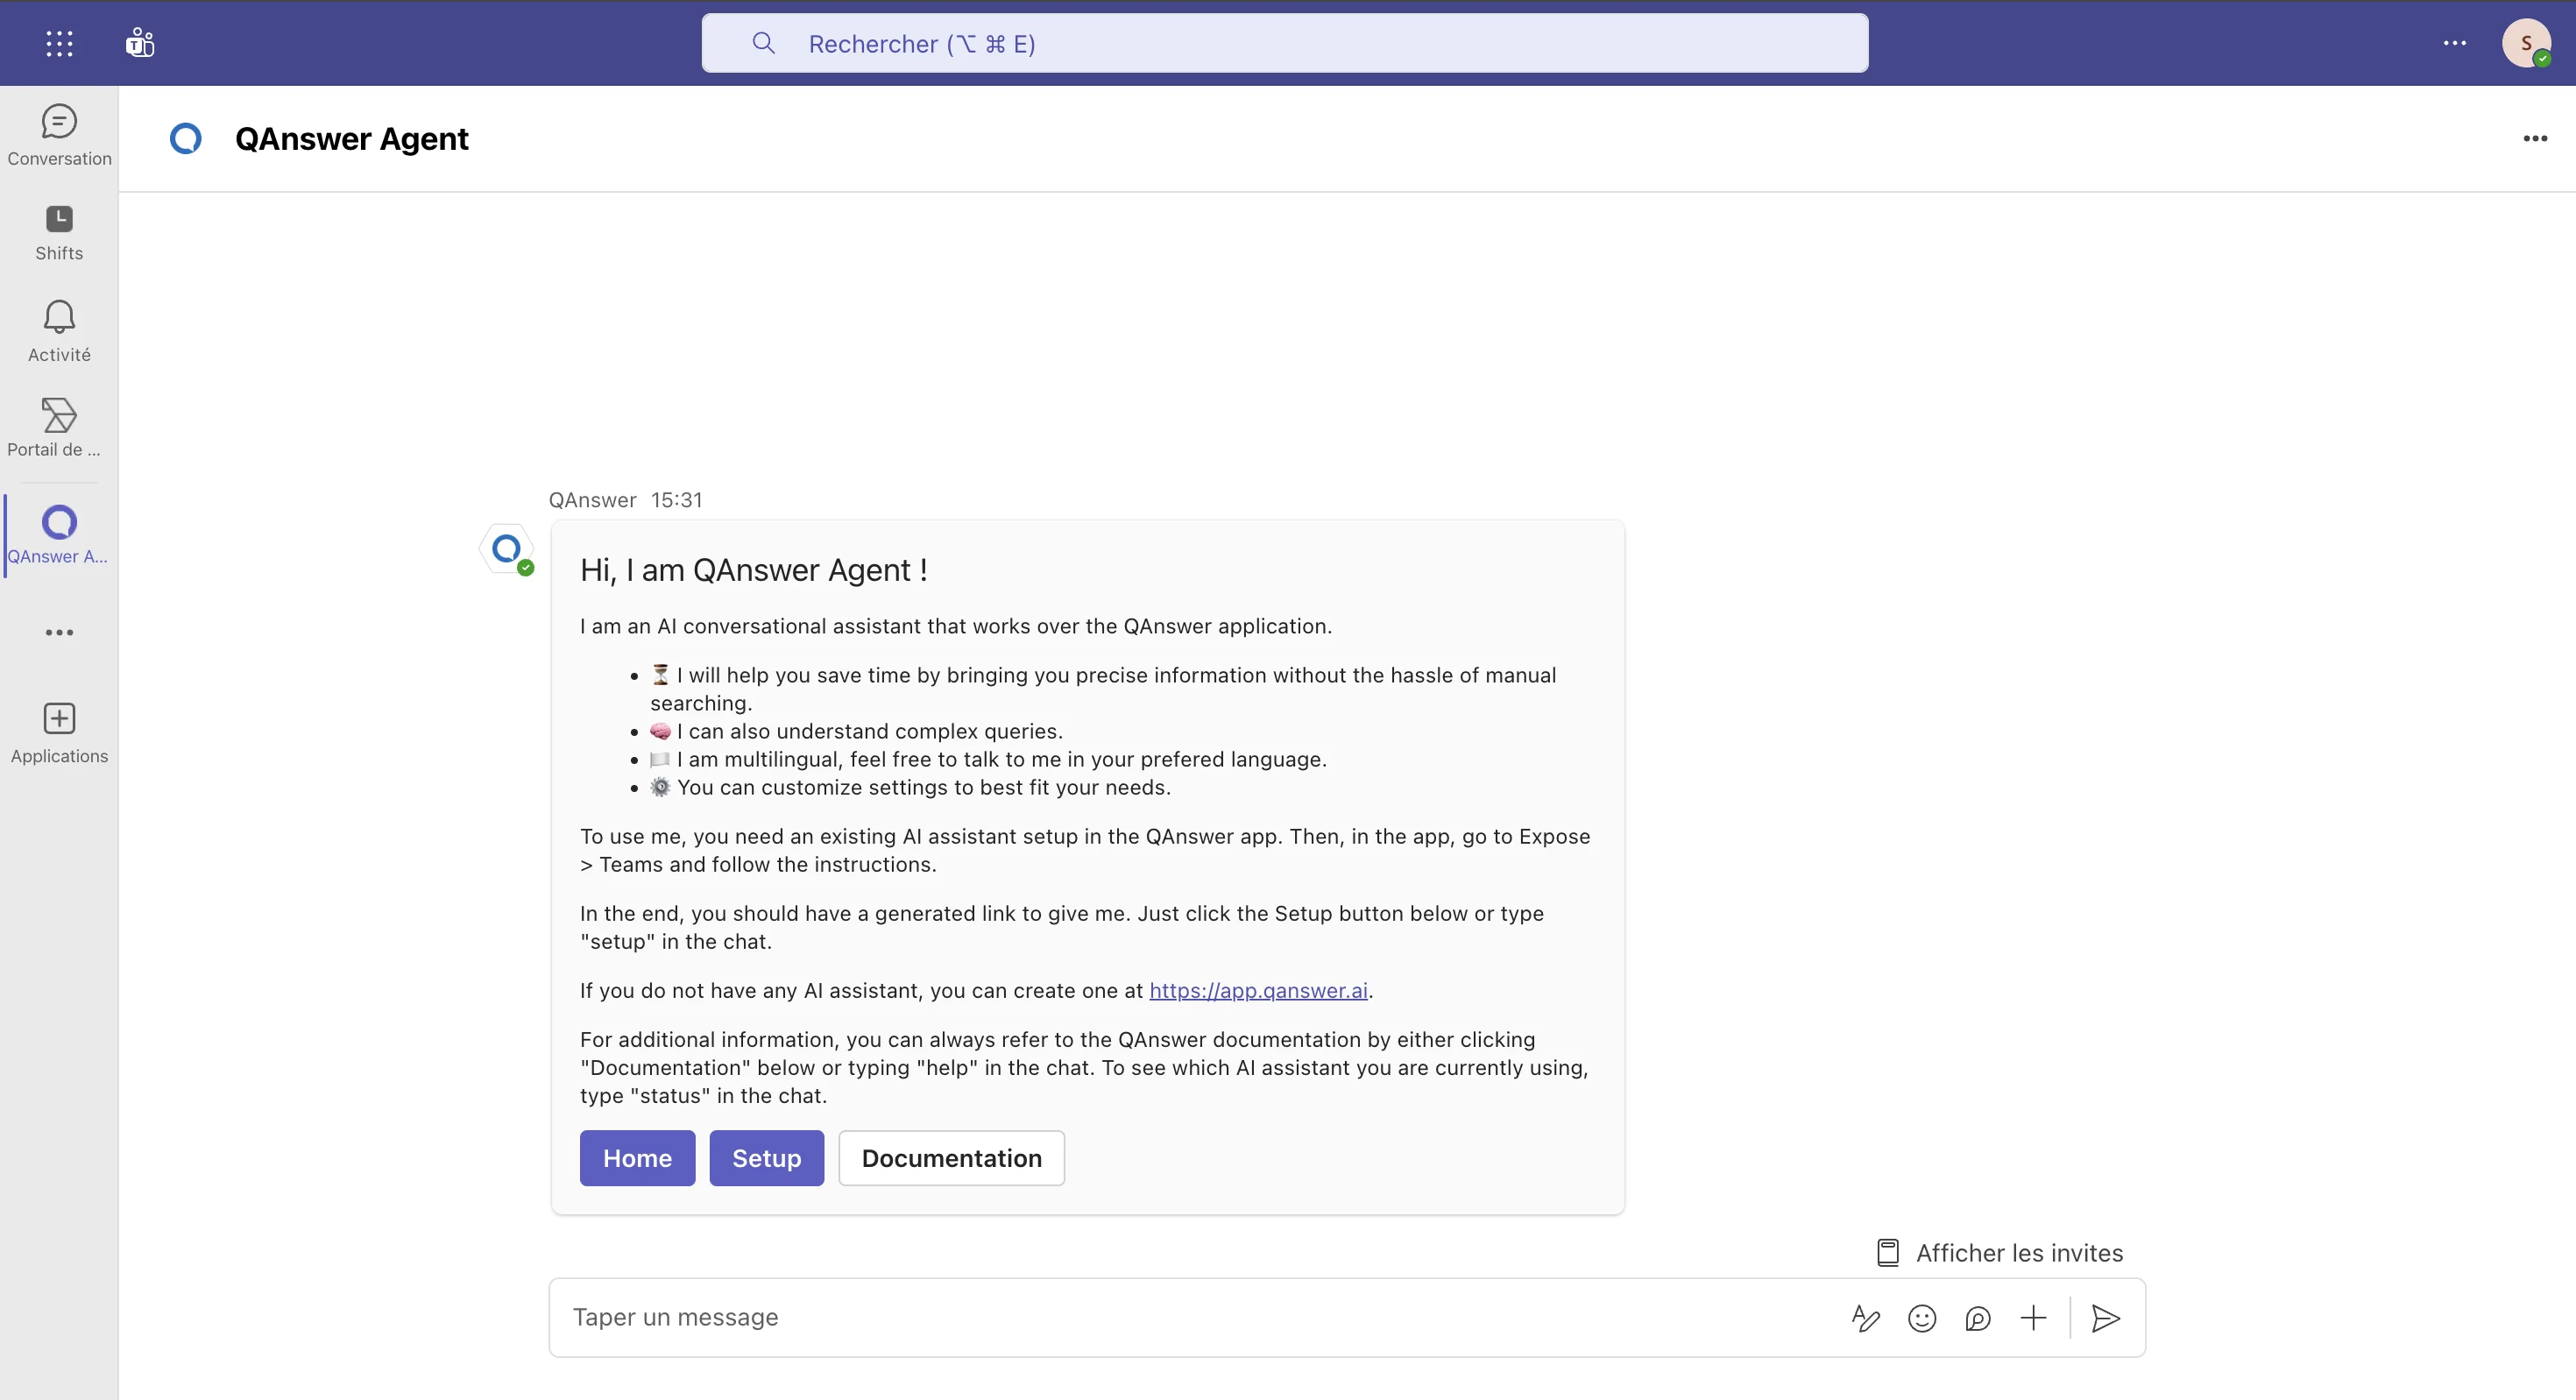
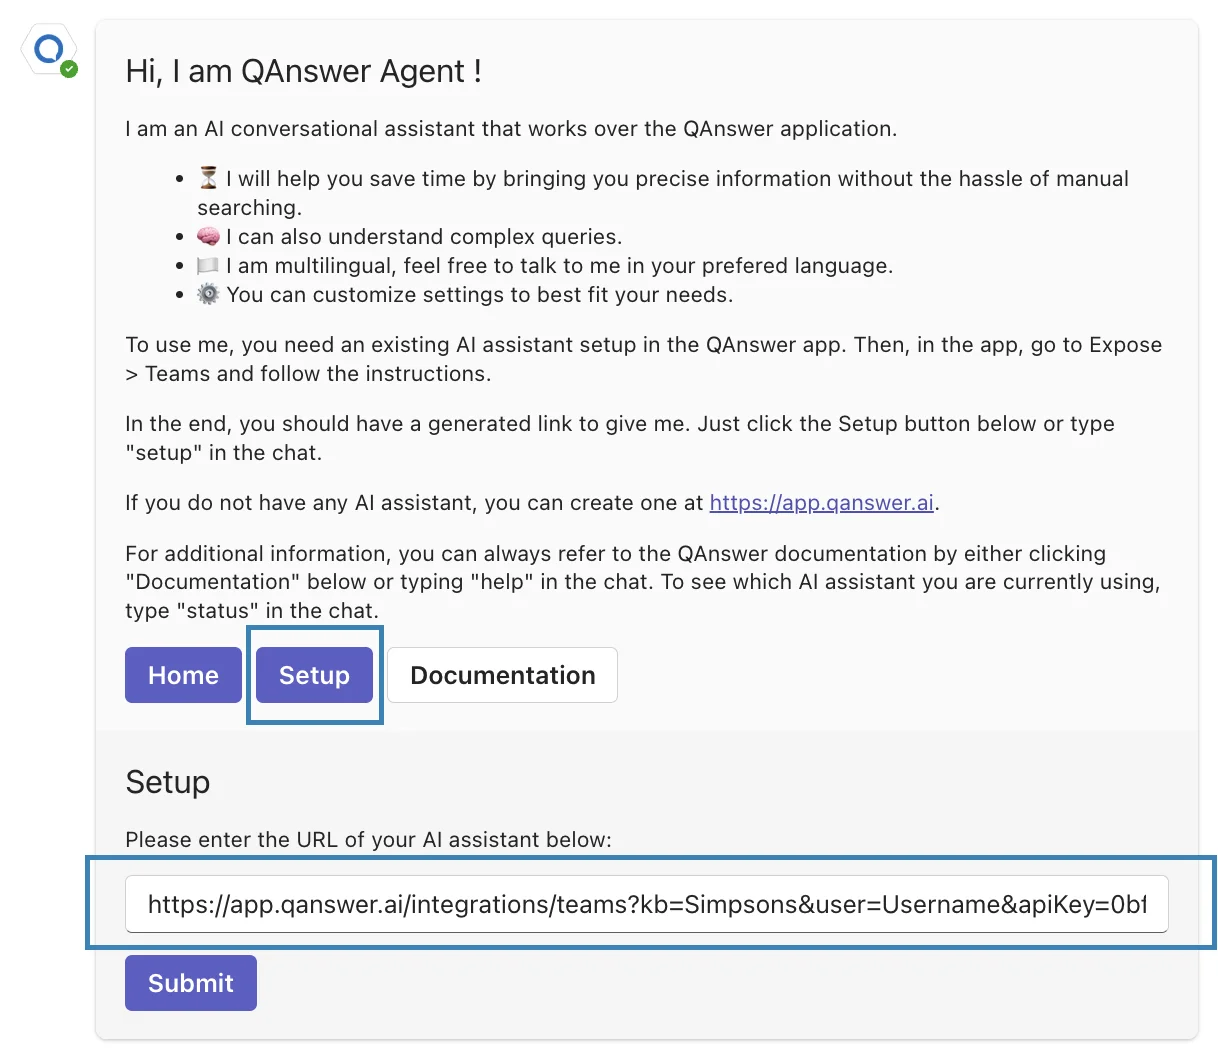
Setup
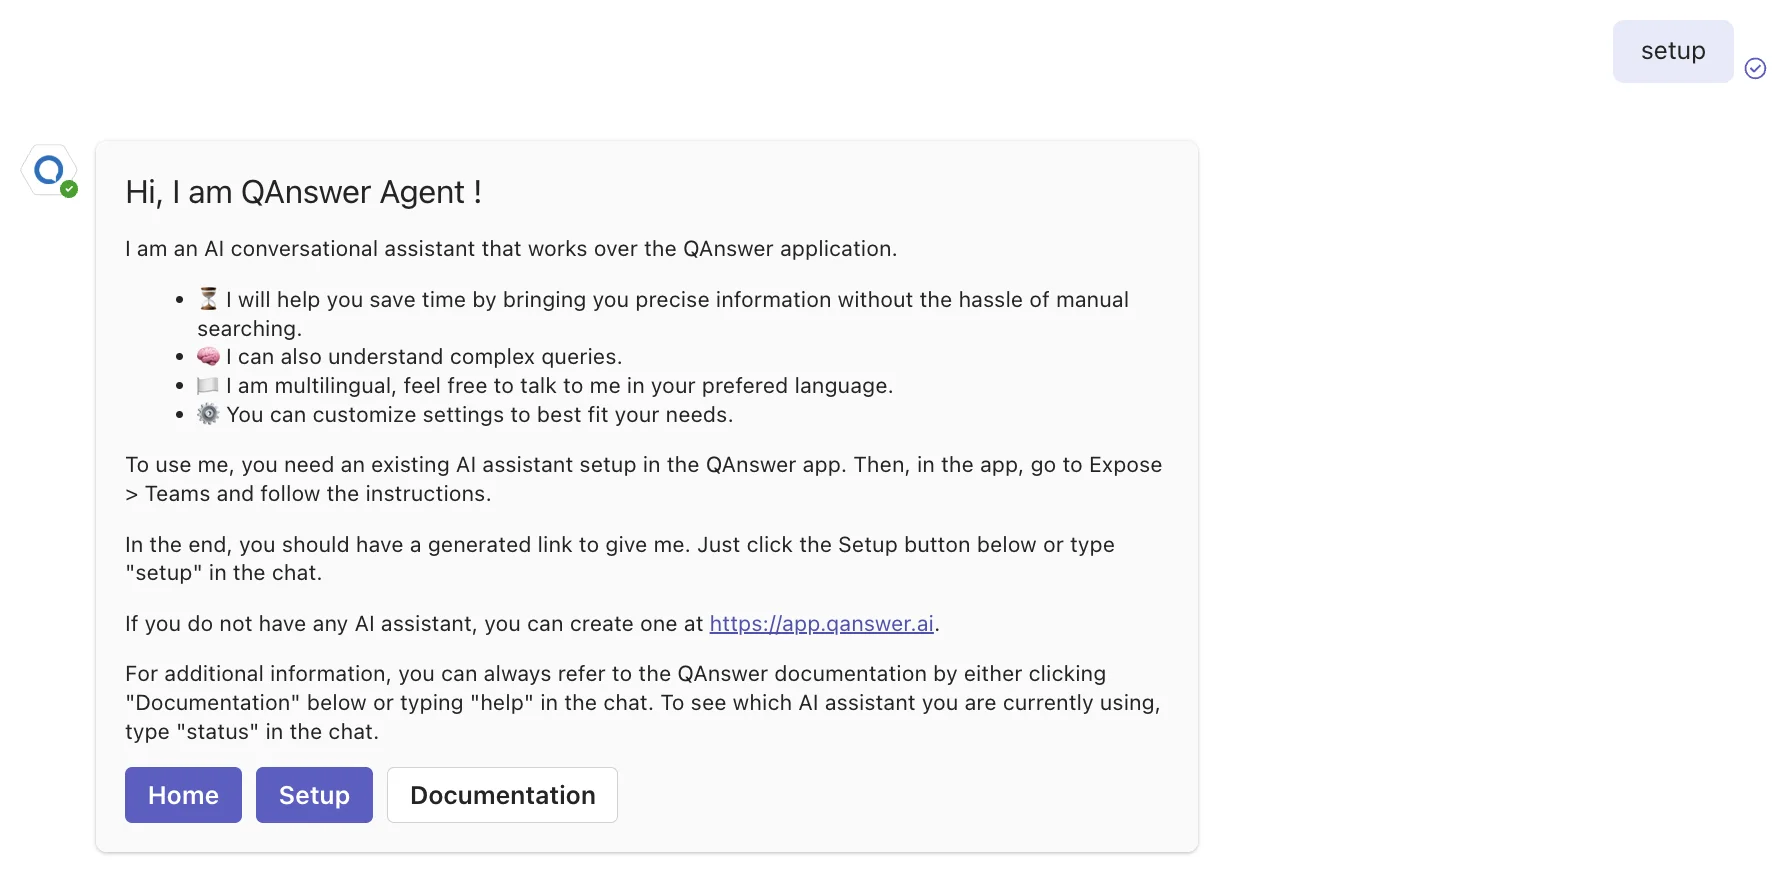
- In the new conversation with the bot, type in the setup text field.
- Enter the URL generated in the QAnswer Teams Expose page. This URL is unique to your AI Assistant — do not share it. Generating this link automatically creates a read-only API key for your AI Assistant.


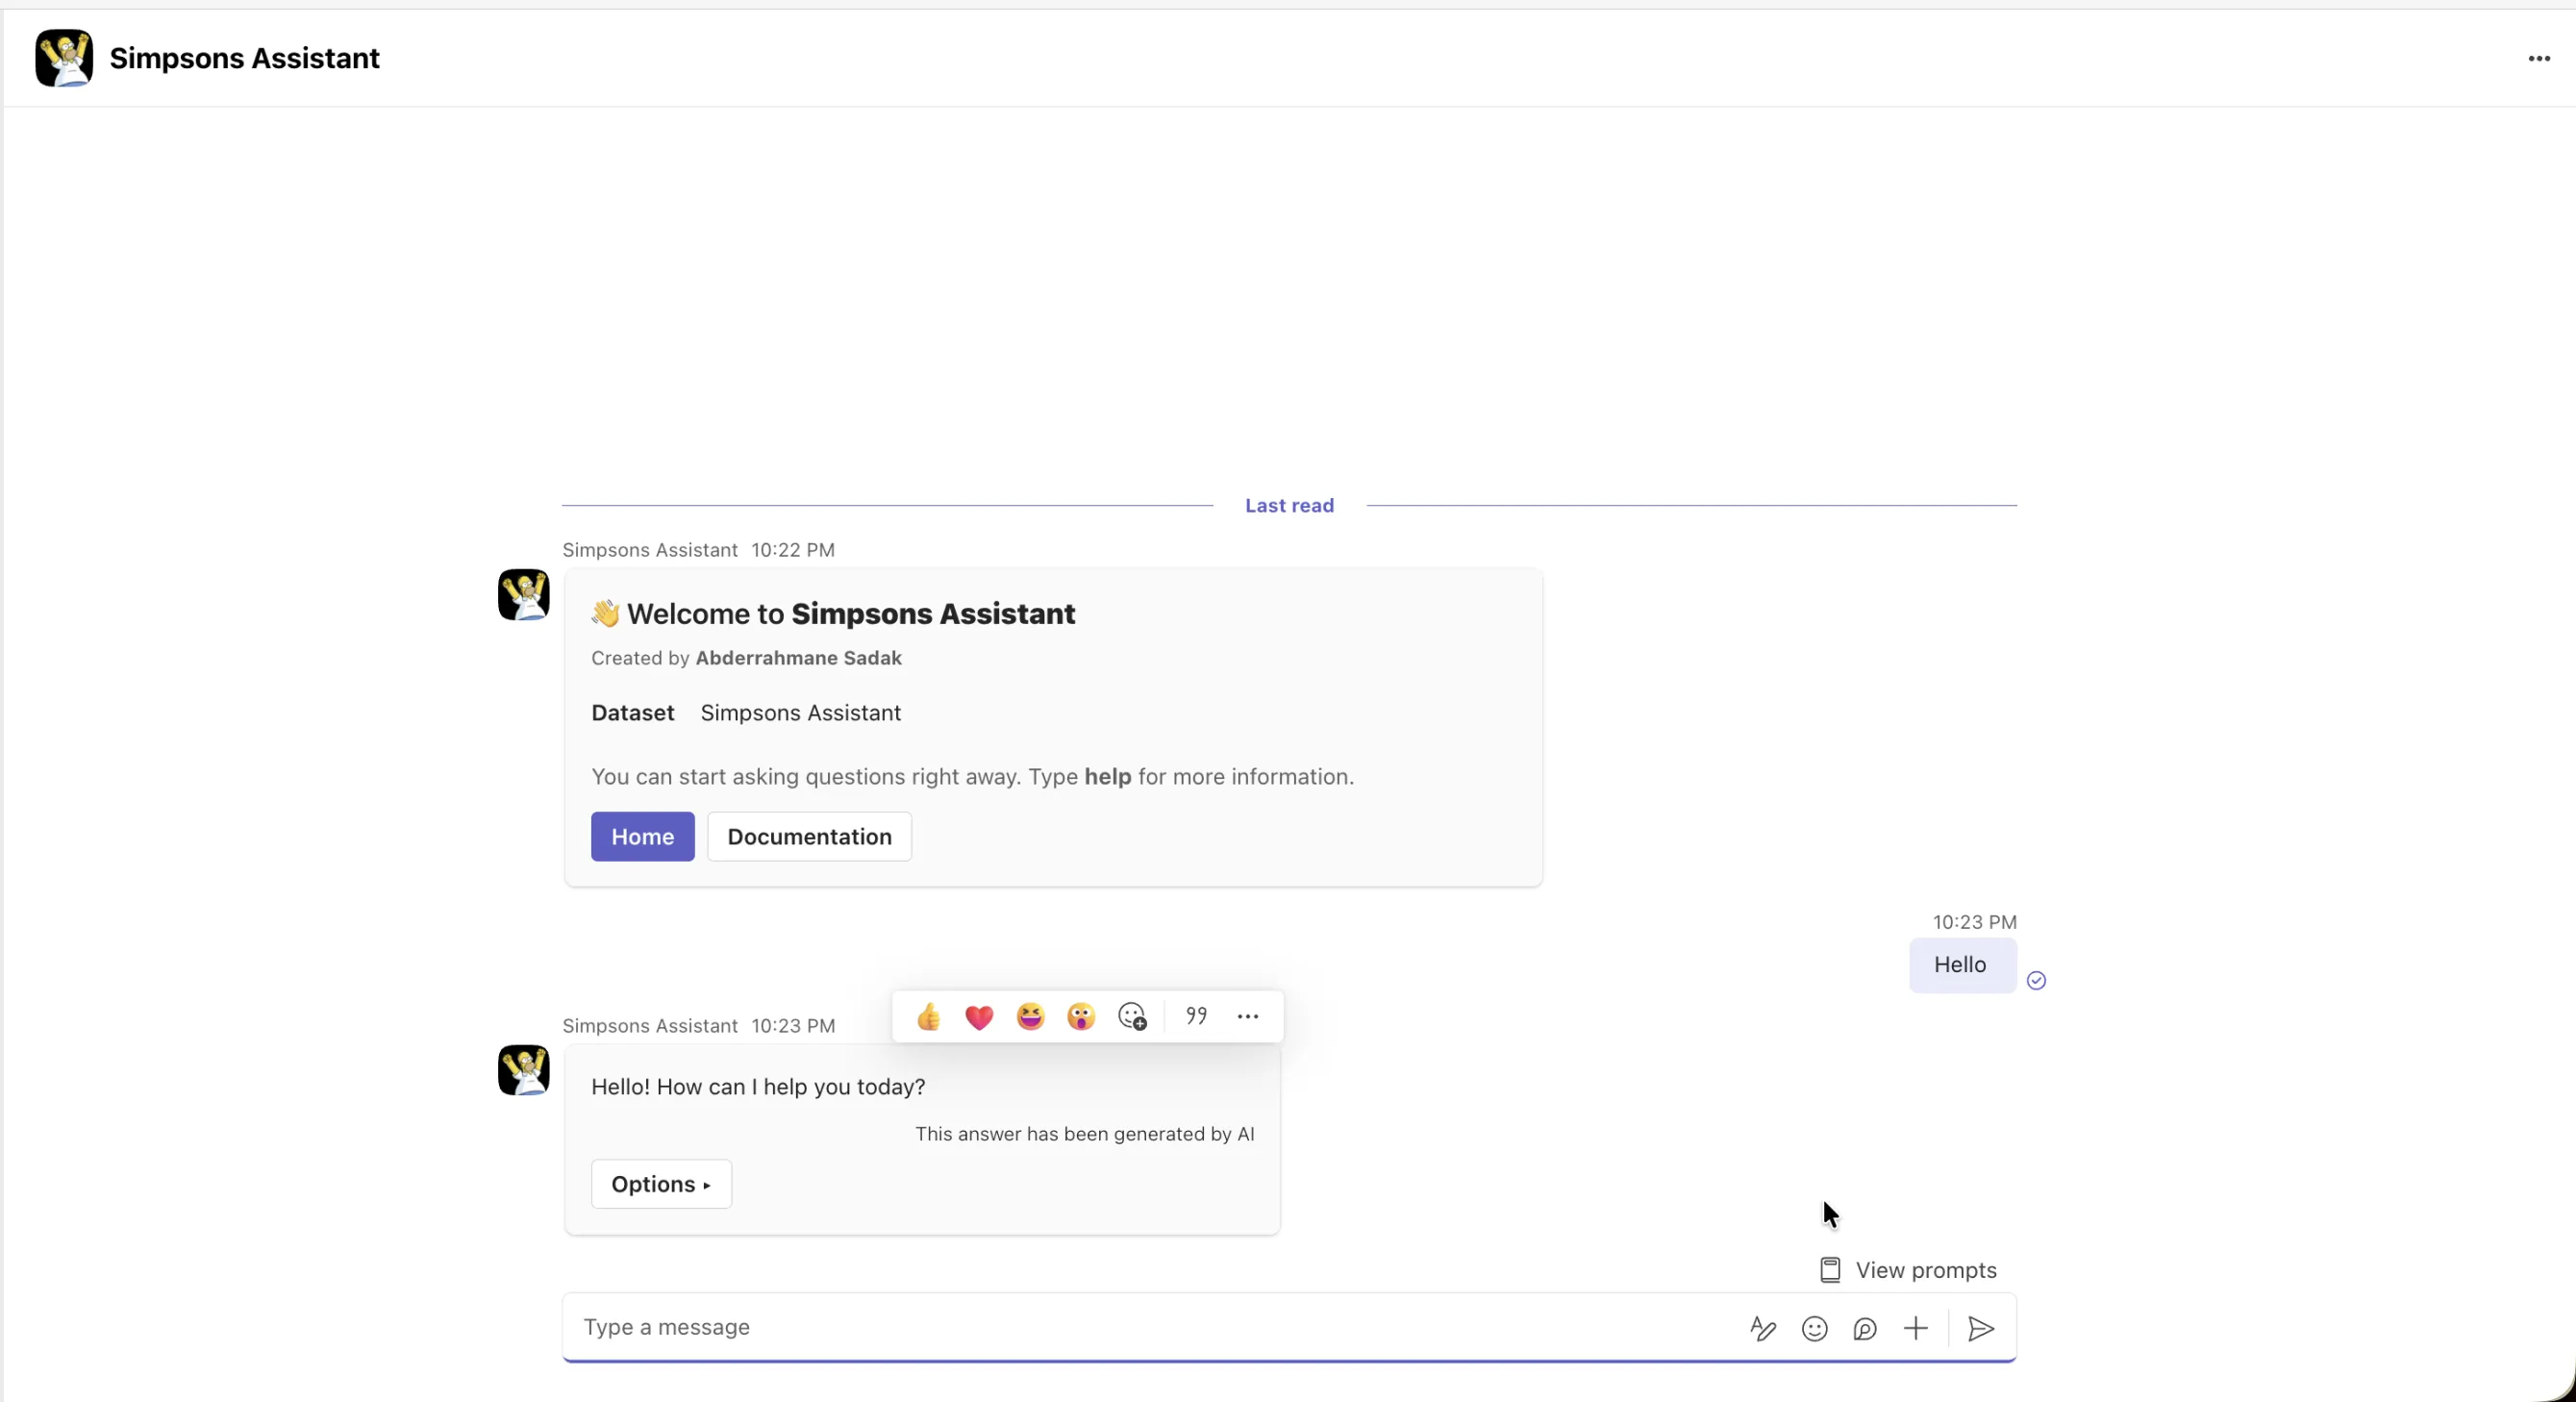
Use the QAnswer app on Teams
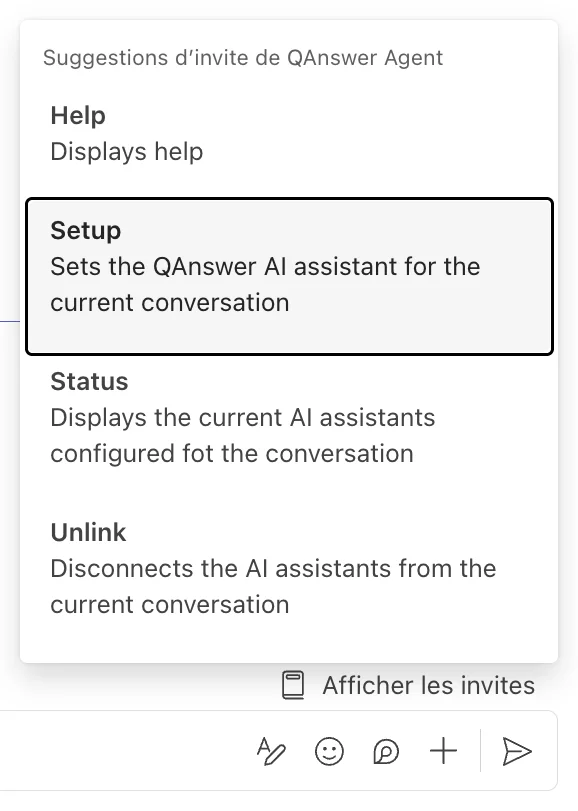
After setup, click the Show the prompt (Afficher les invites) button in the top right corner of the chat bar to view available commands.
- Help: display a link to this page.
- Setup: configure another AI Assistant.
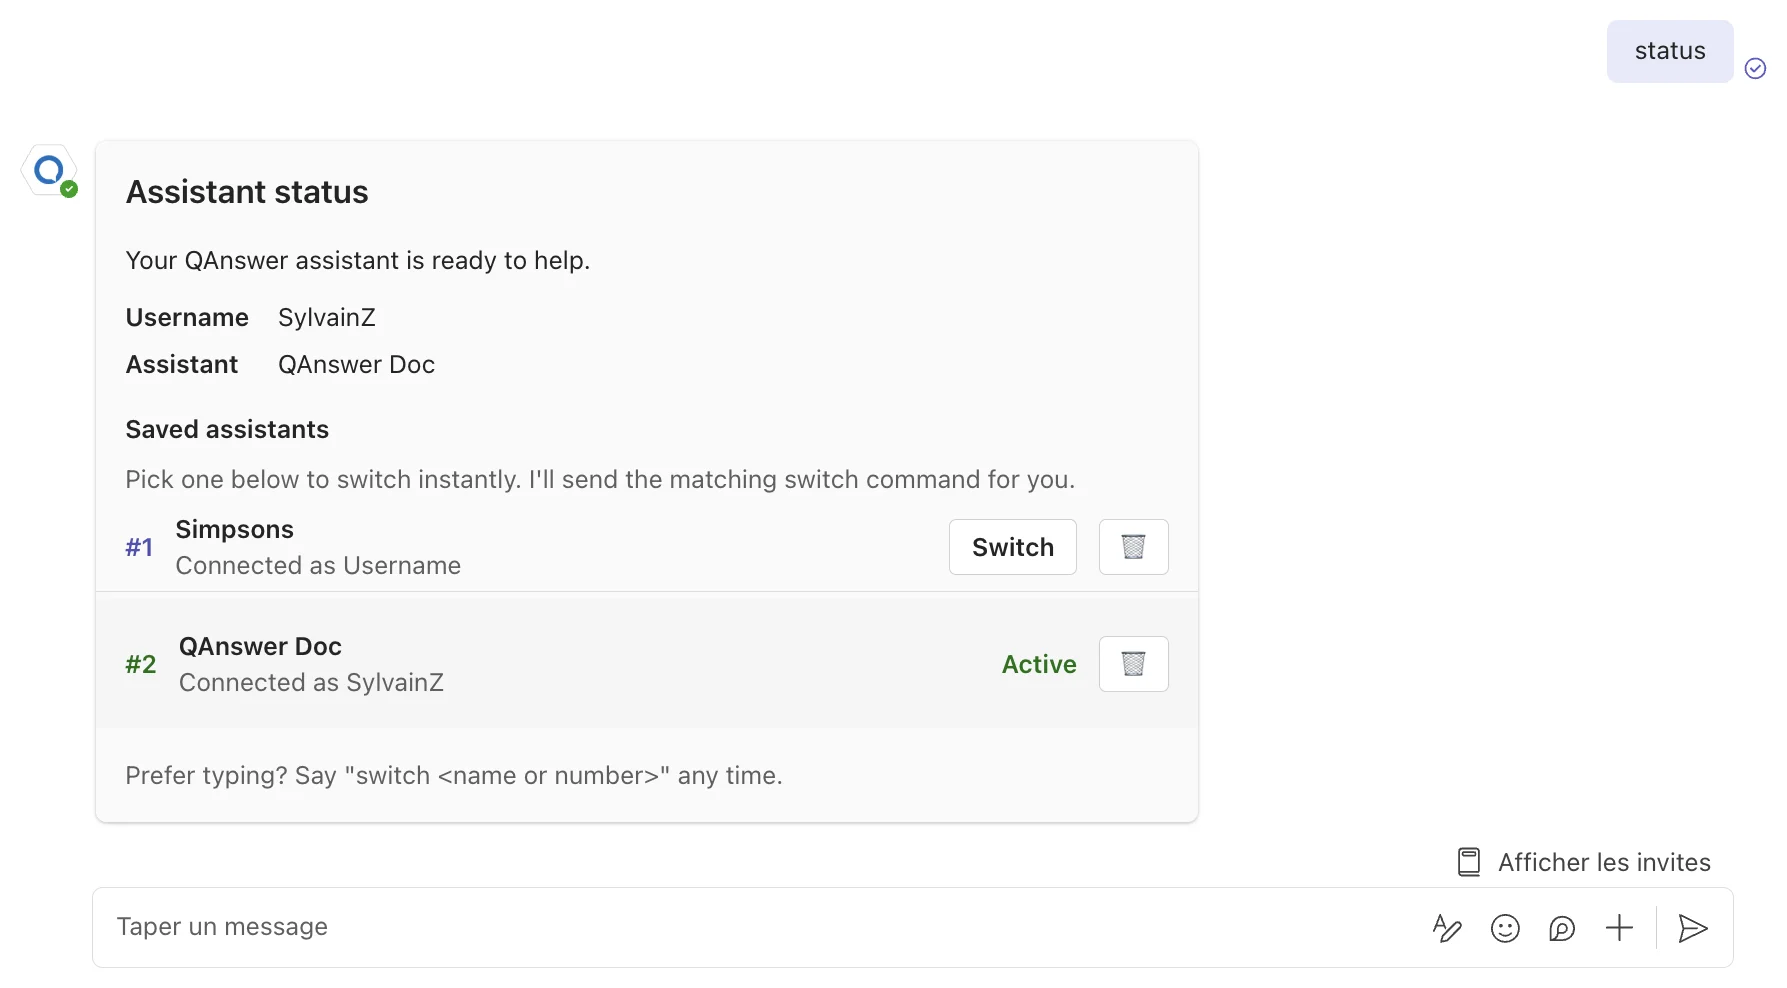
- Status Switch: switch between assistants. The active assistant answers questions.
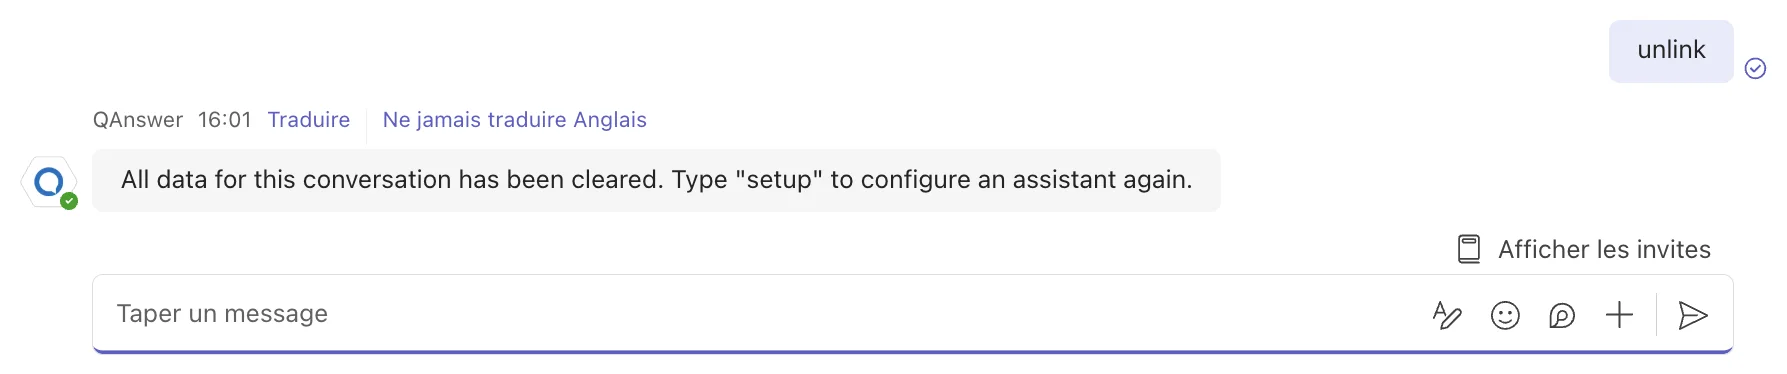
- Unlink: remove all current assistants from the QAnswer app.
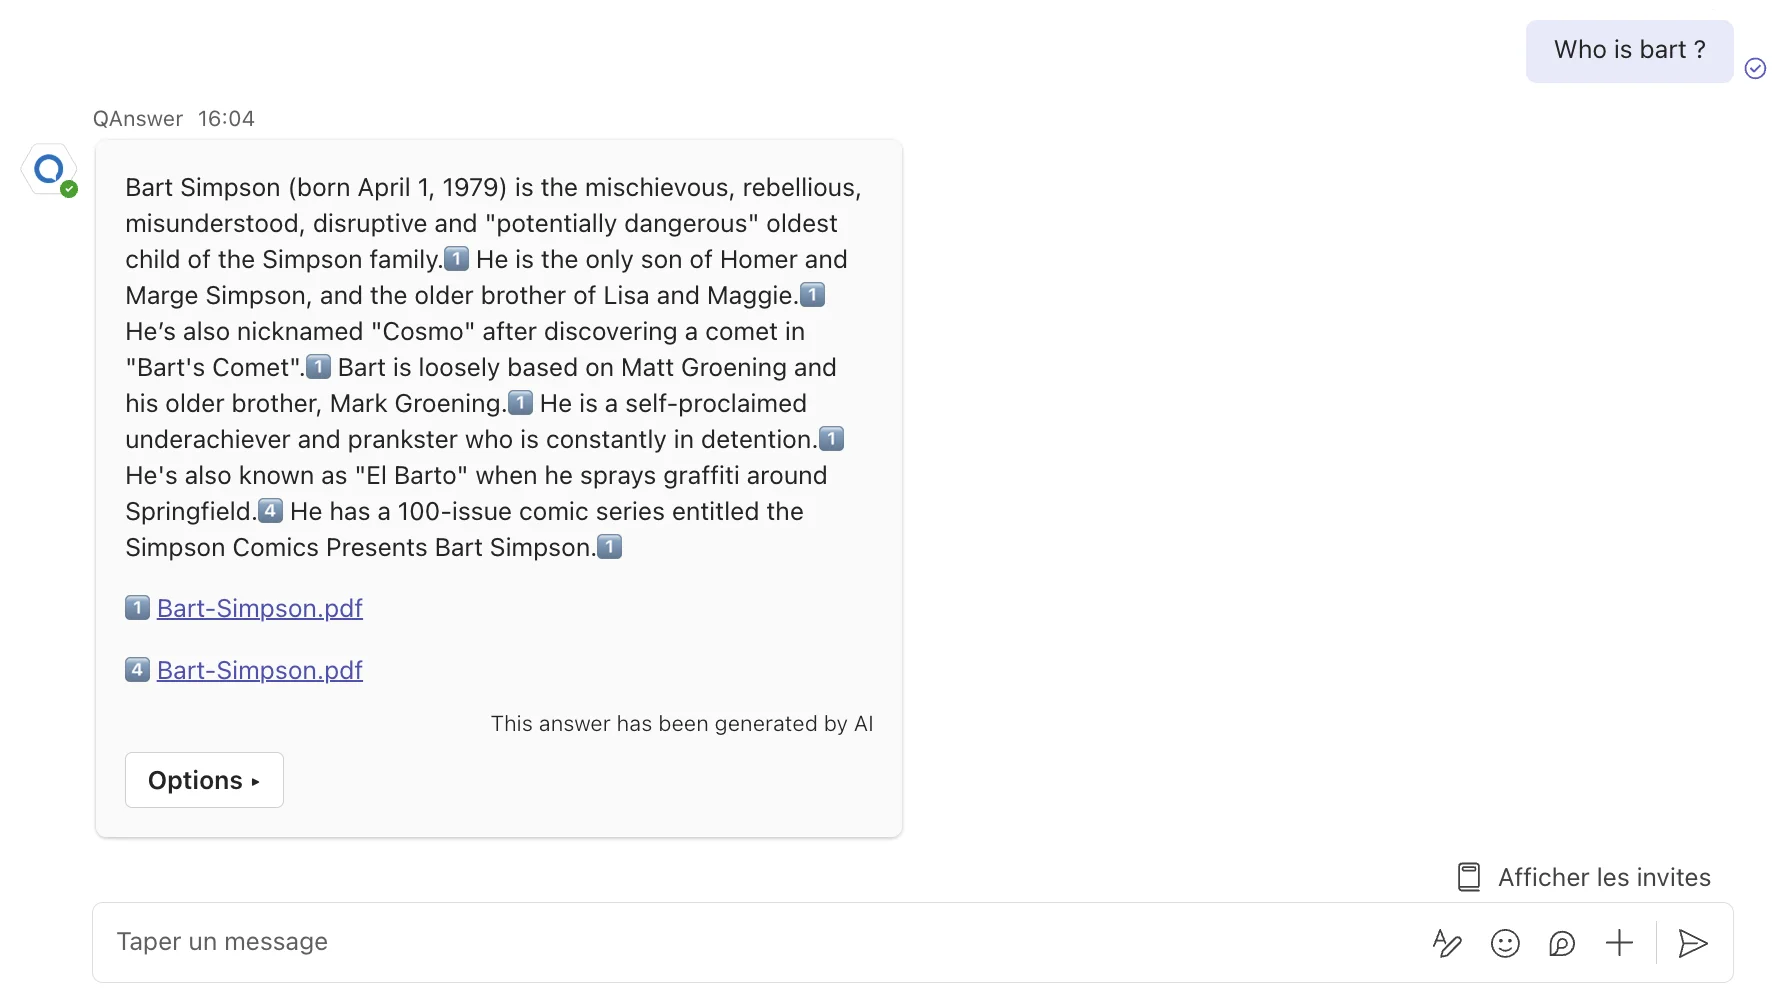
Once the QAnswer Agent is set up, ask questions to your AI Assistant directly from Teams.
Method 2: Custom Bot (Azure)
For organizations that want their own branded Teams bot. Publishes a tenant-branded Teams app linked to your assistant — no per-user setup link to share.
Step 1 — Create the Azure Bot
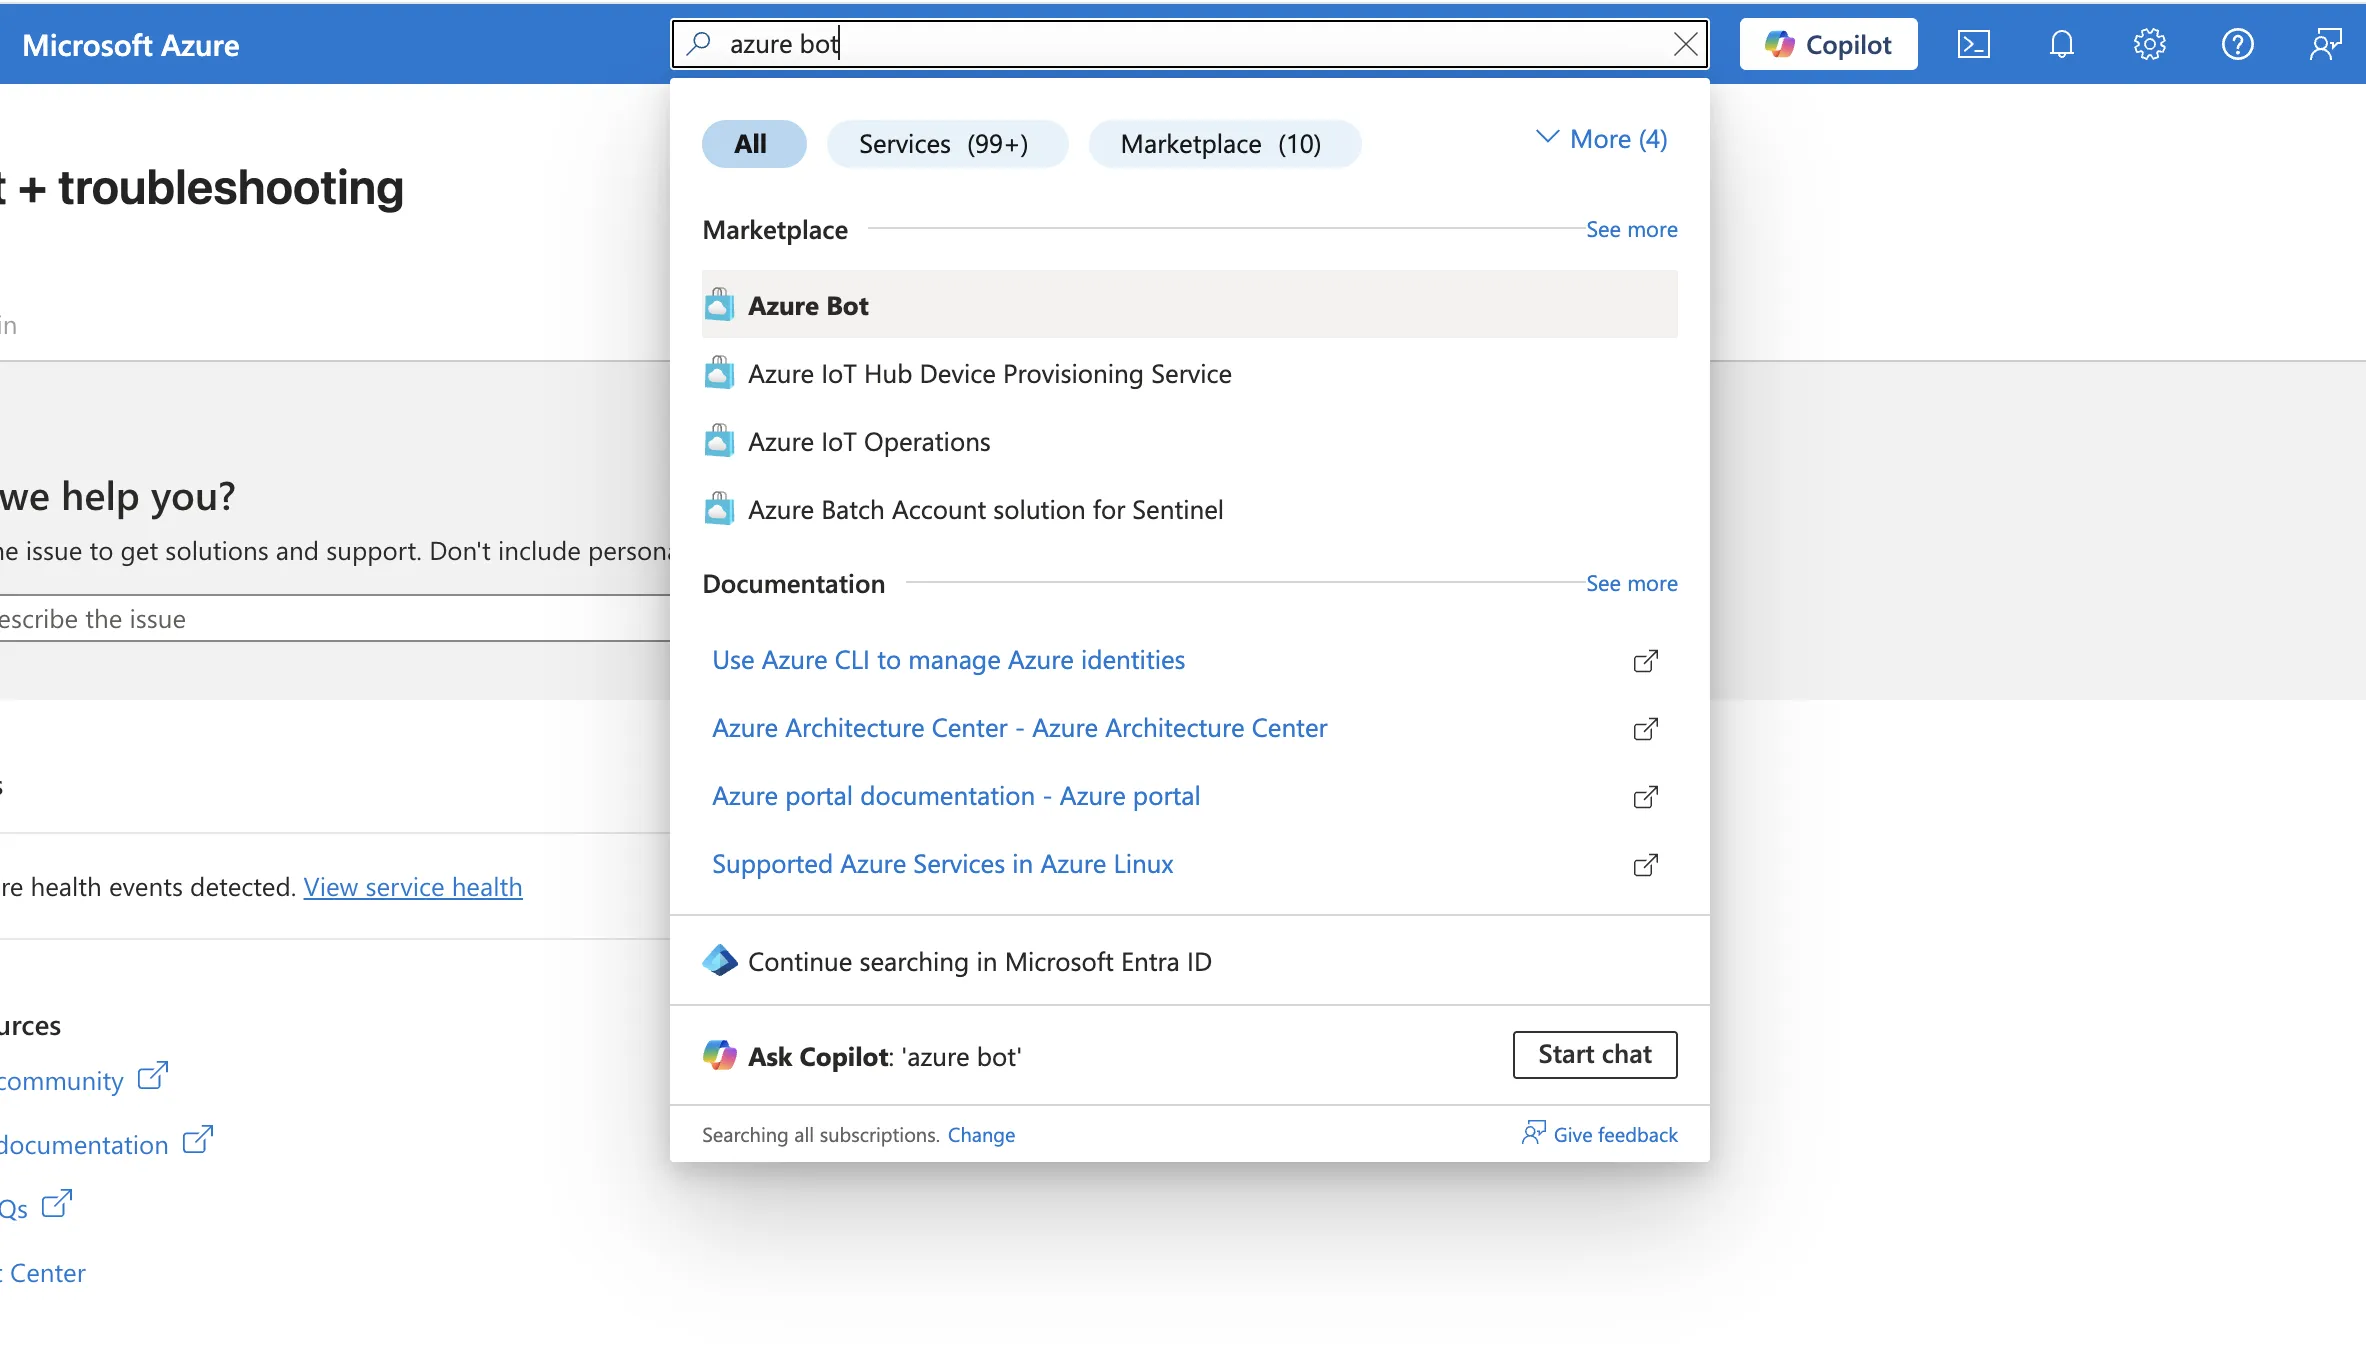
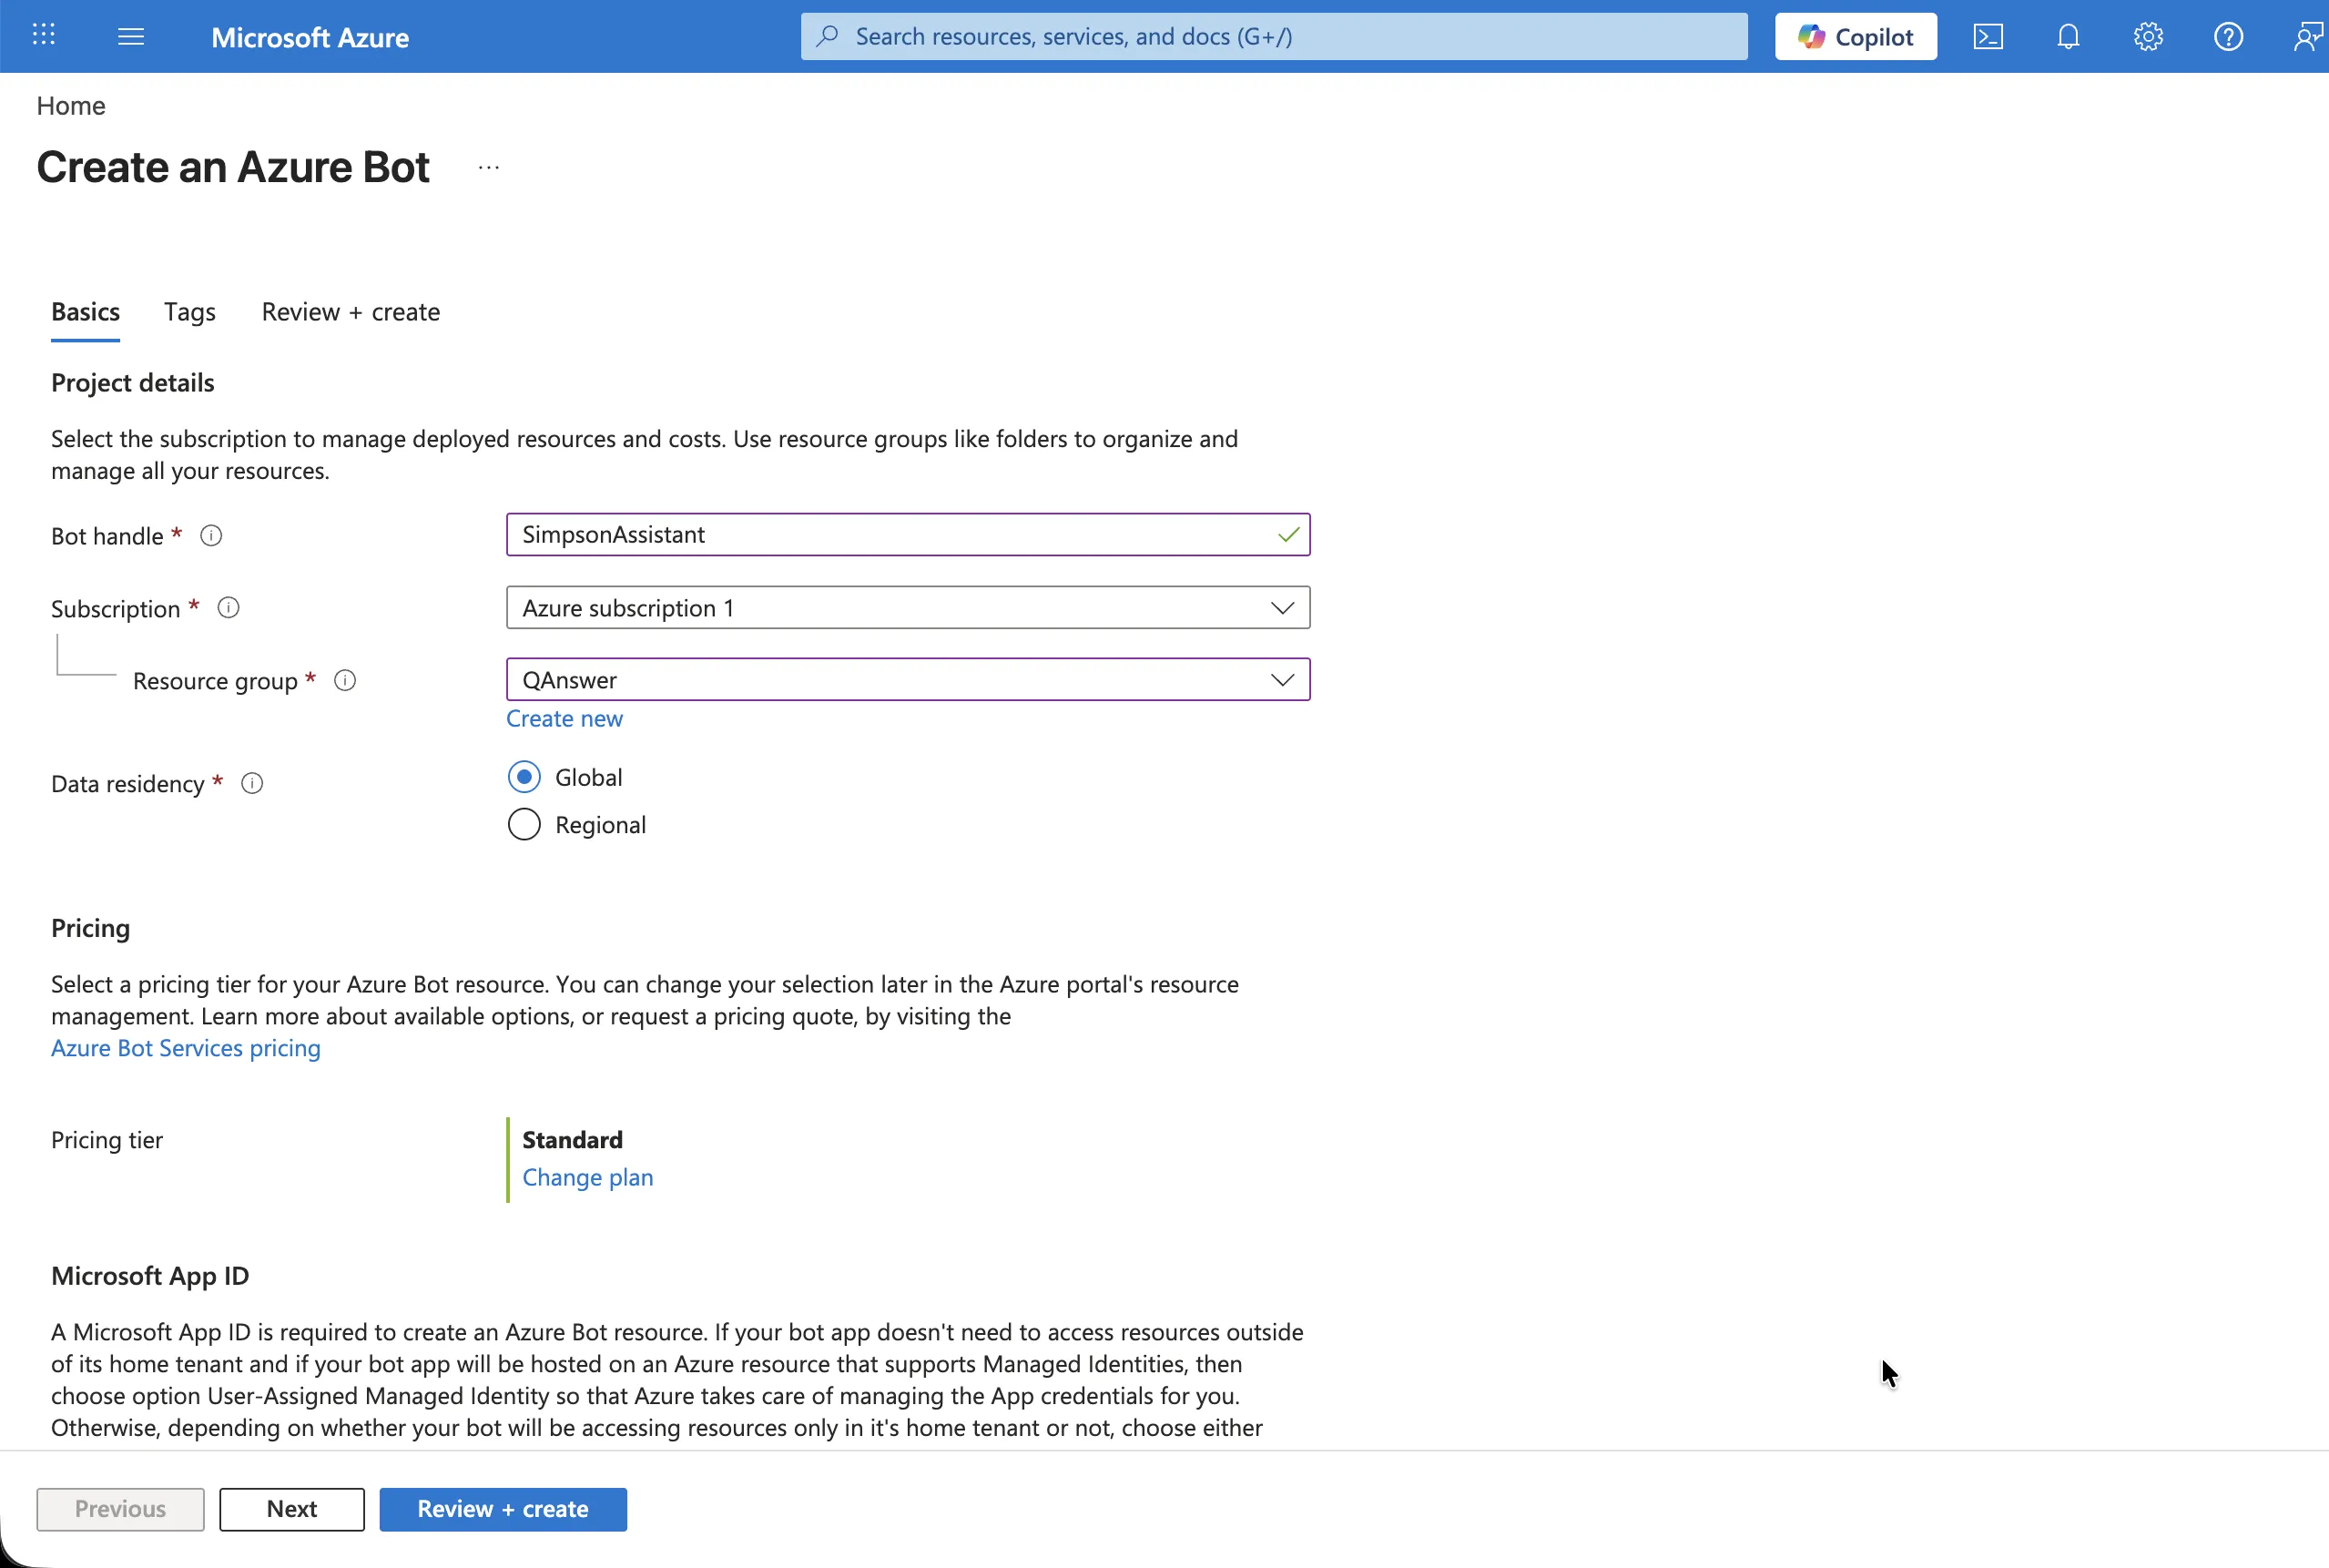
In the Azure portal, search for "Azure Bot" and create a new Azure Bot resource. Give it a bot handle, choose a subscription and resource group, and select your preferred Microsoft App ID type.
Open the Azure portal · Docs: Create an Azure Bot
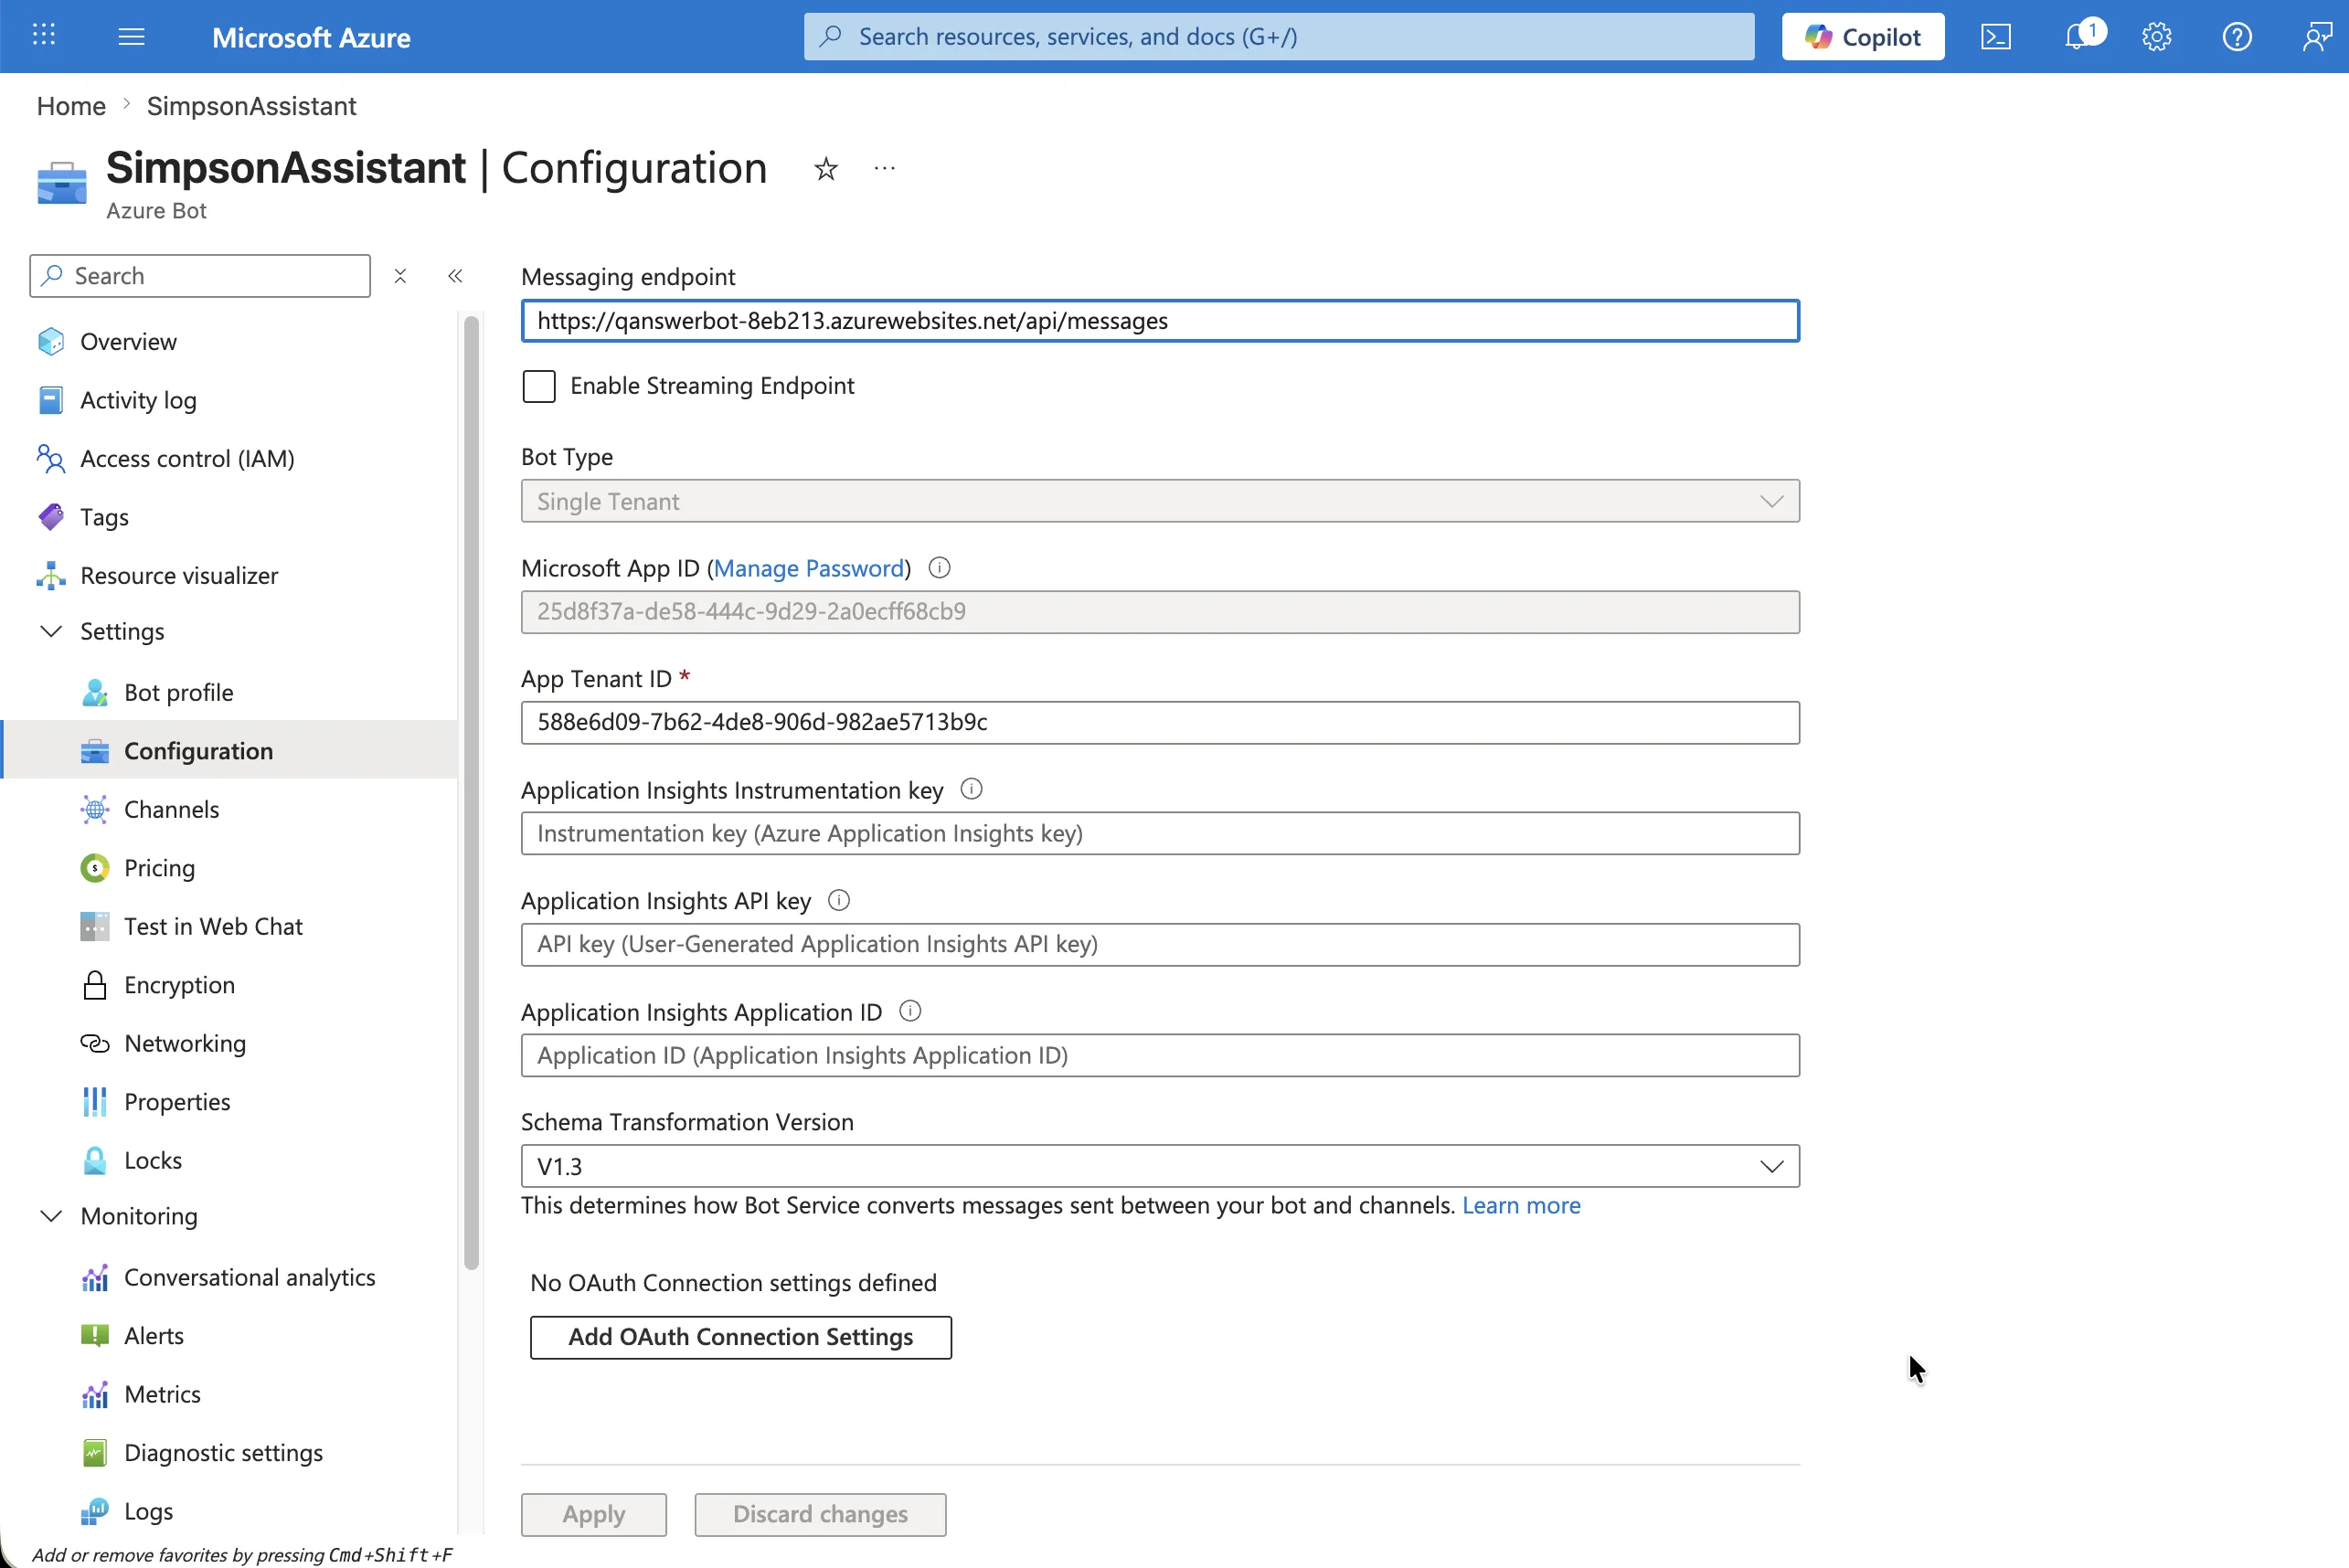
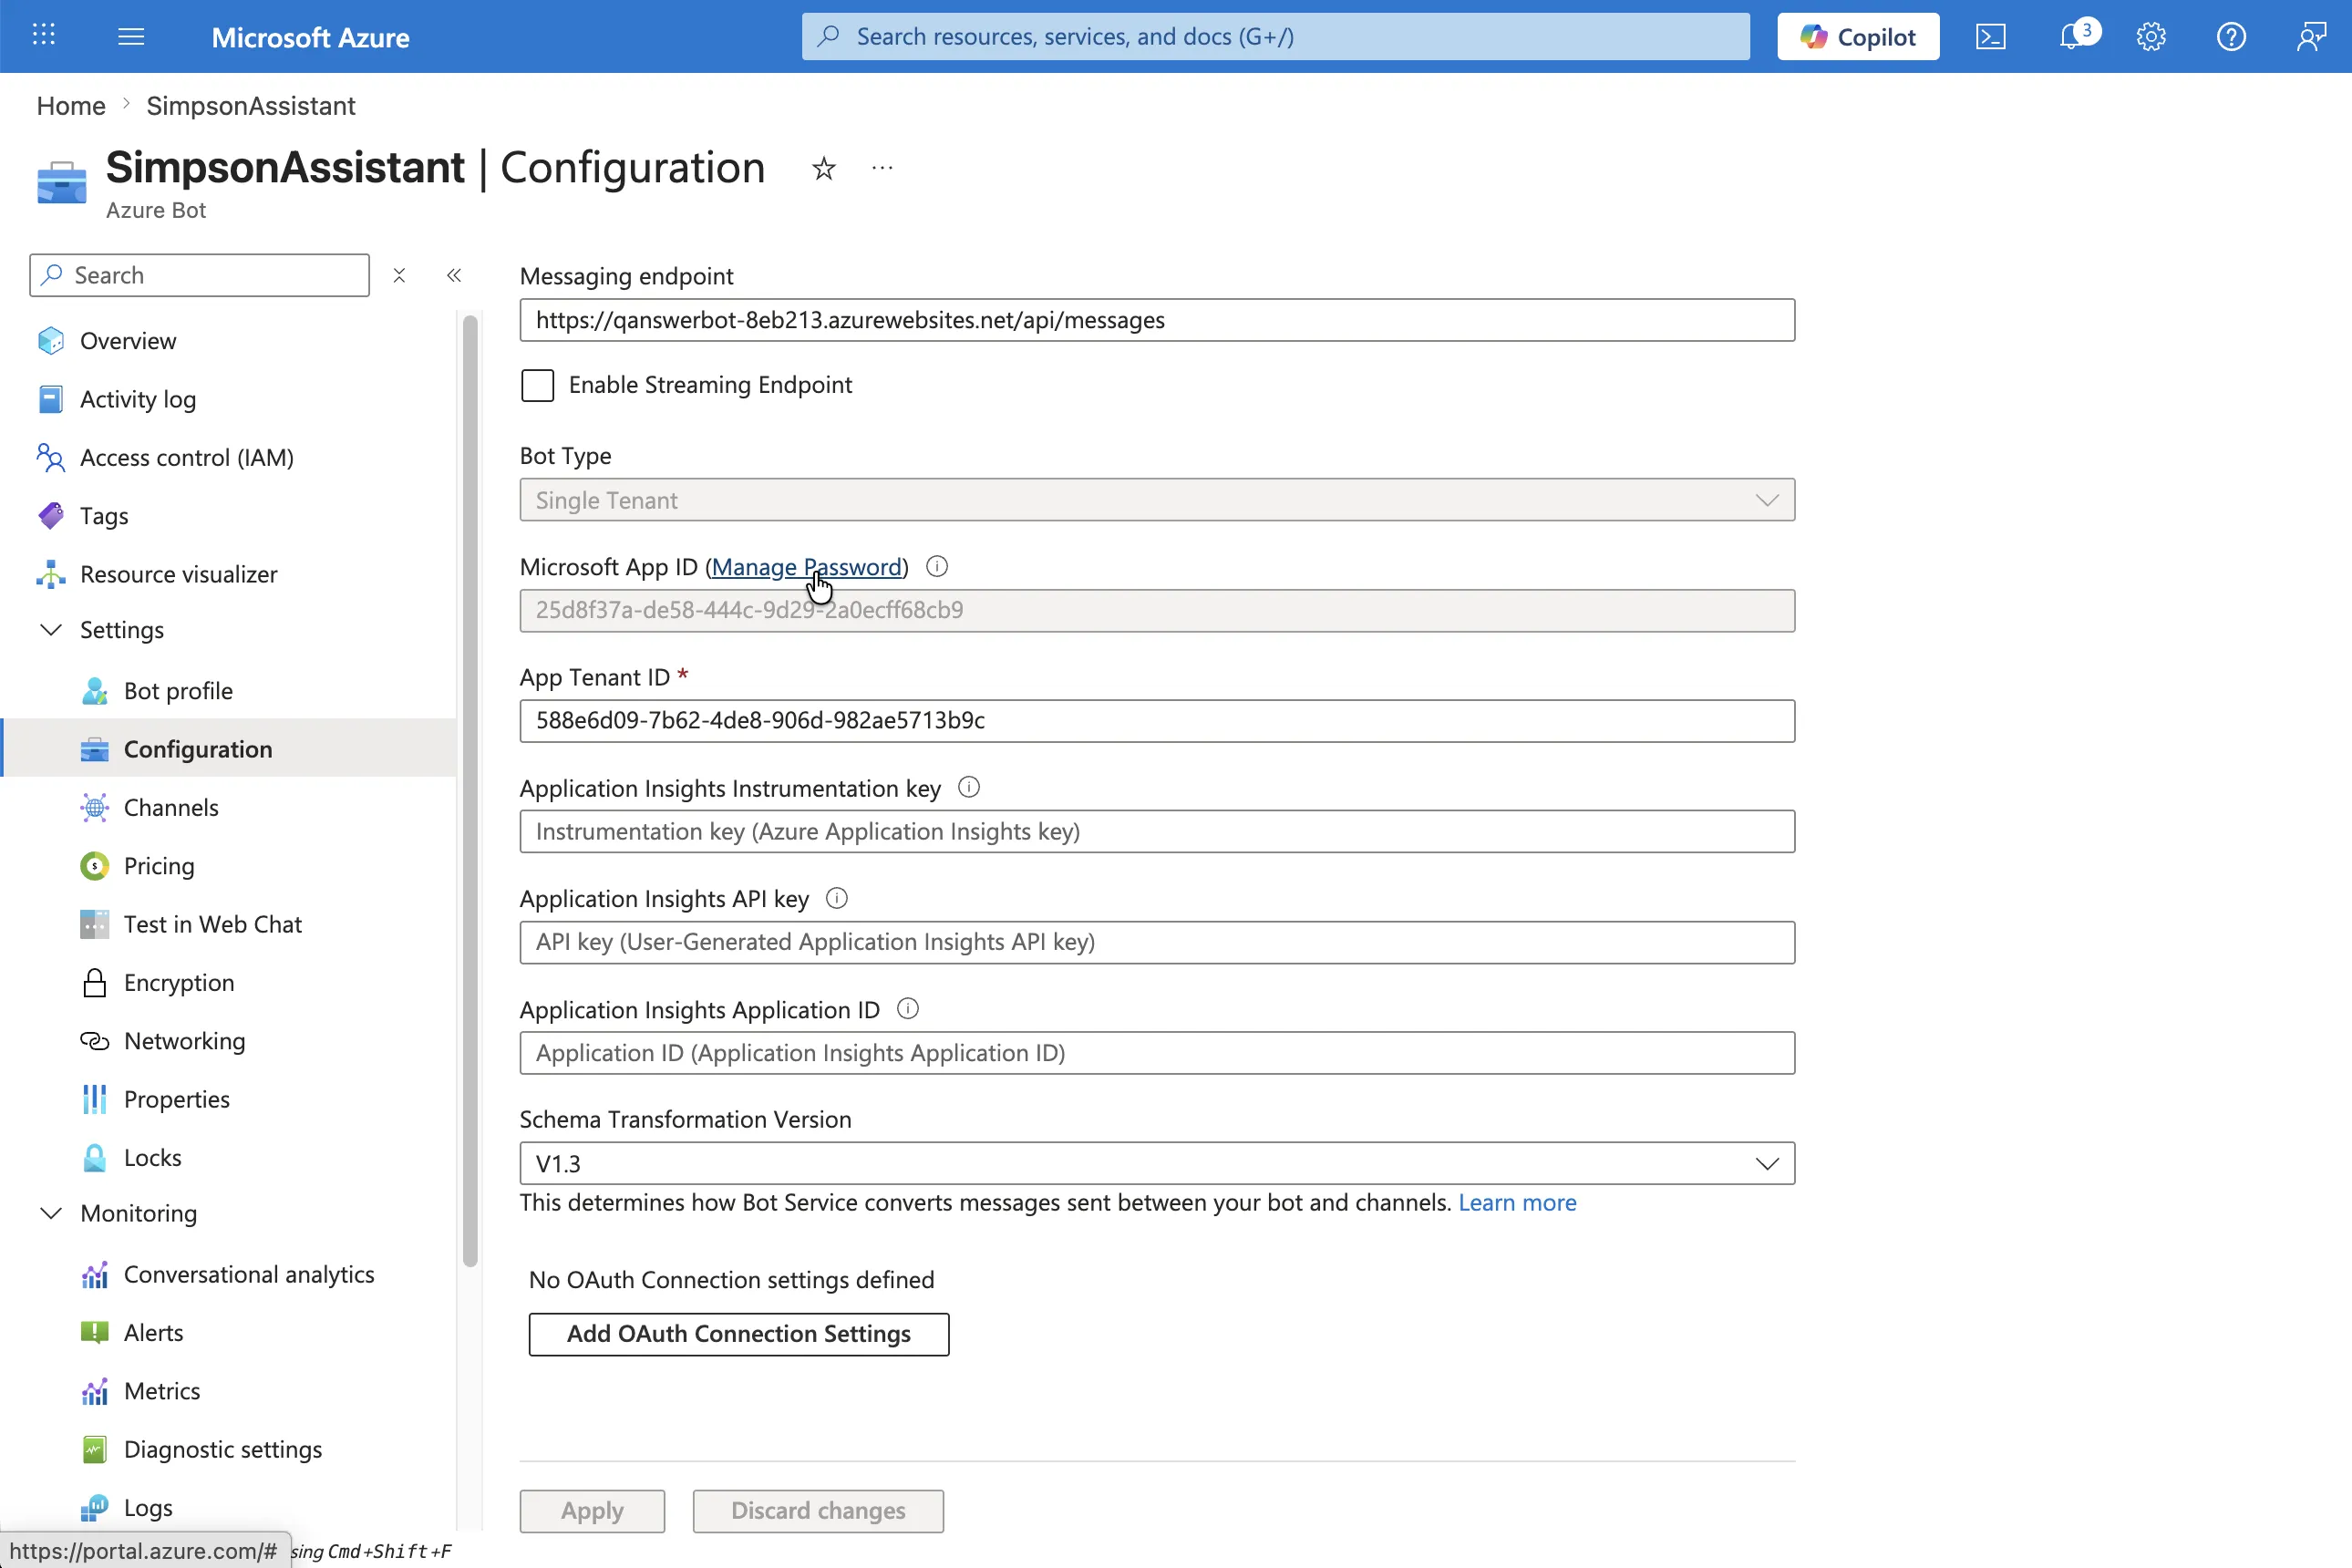
Step 2 — Set the messaging endpoint
Open the bot's Configuration page and set its Messaging endpoint to the URL shown in the QAnswer Teams integration page, then click Apply.
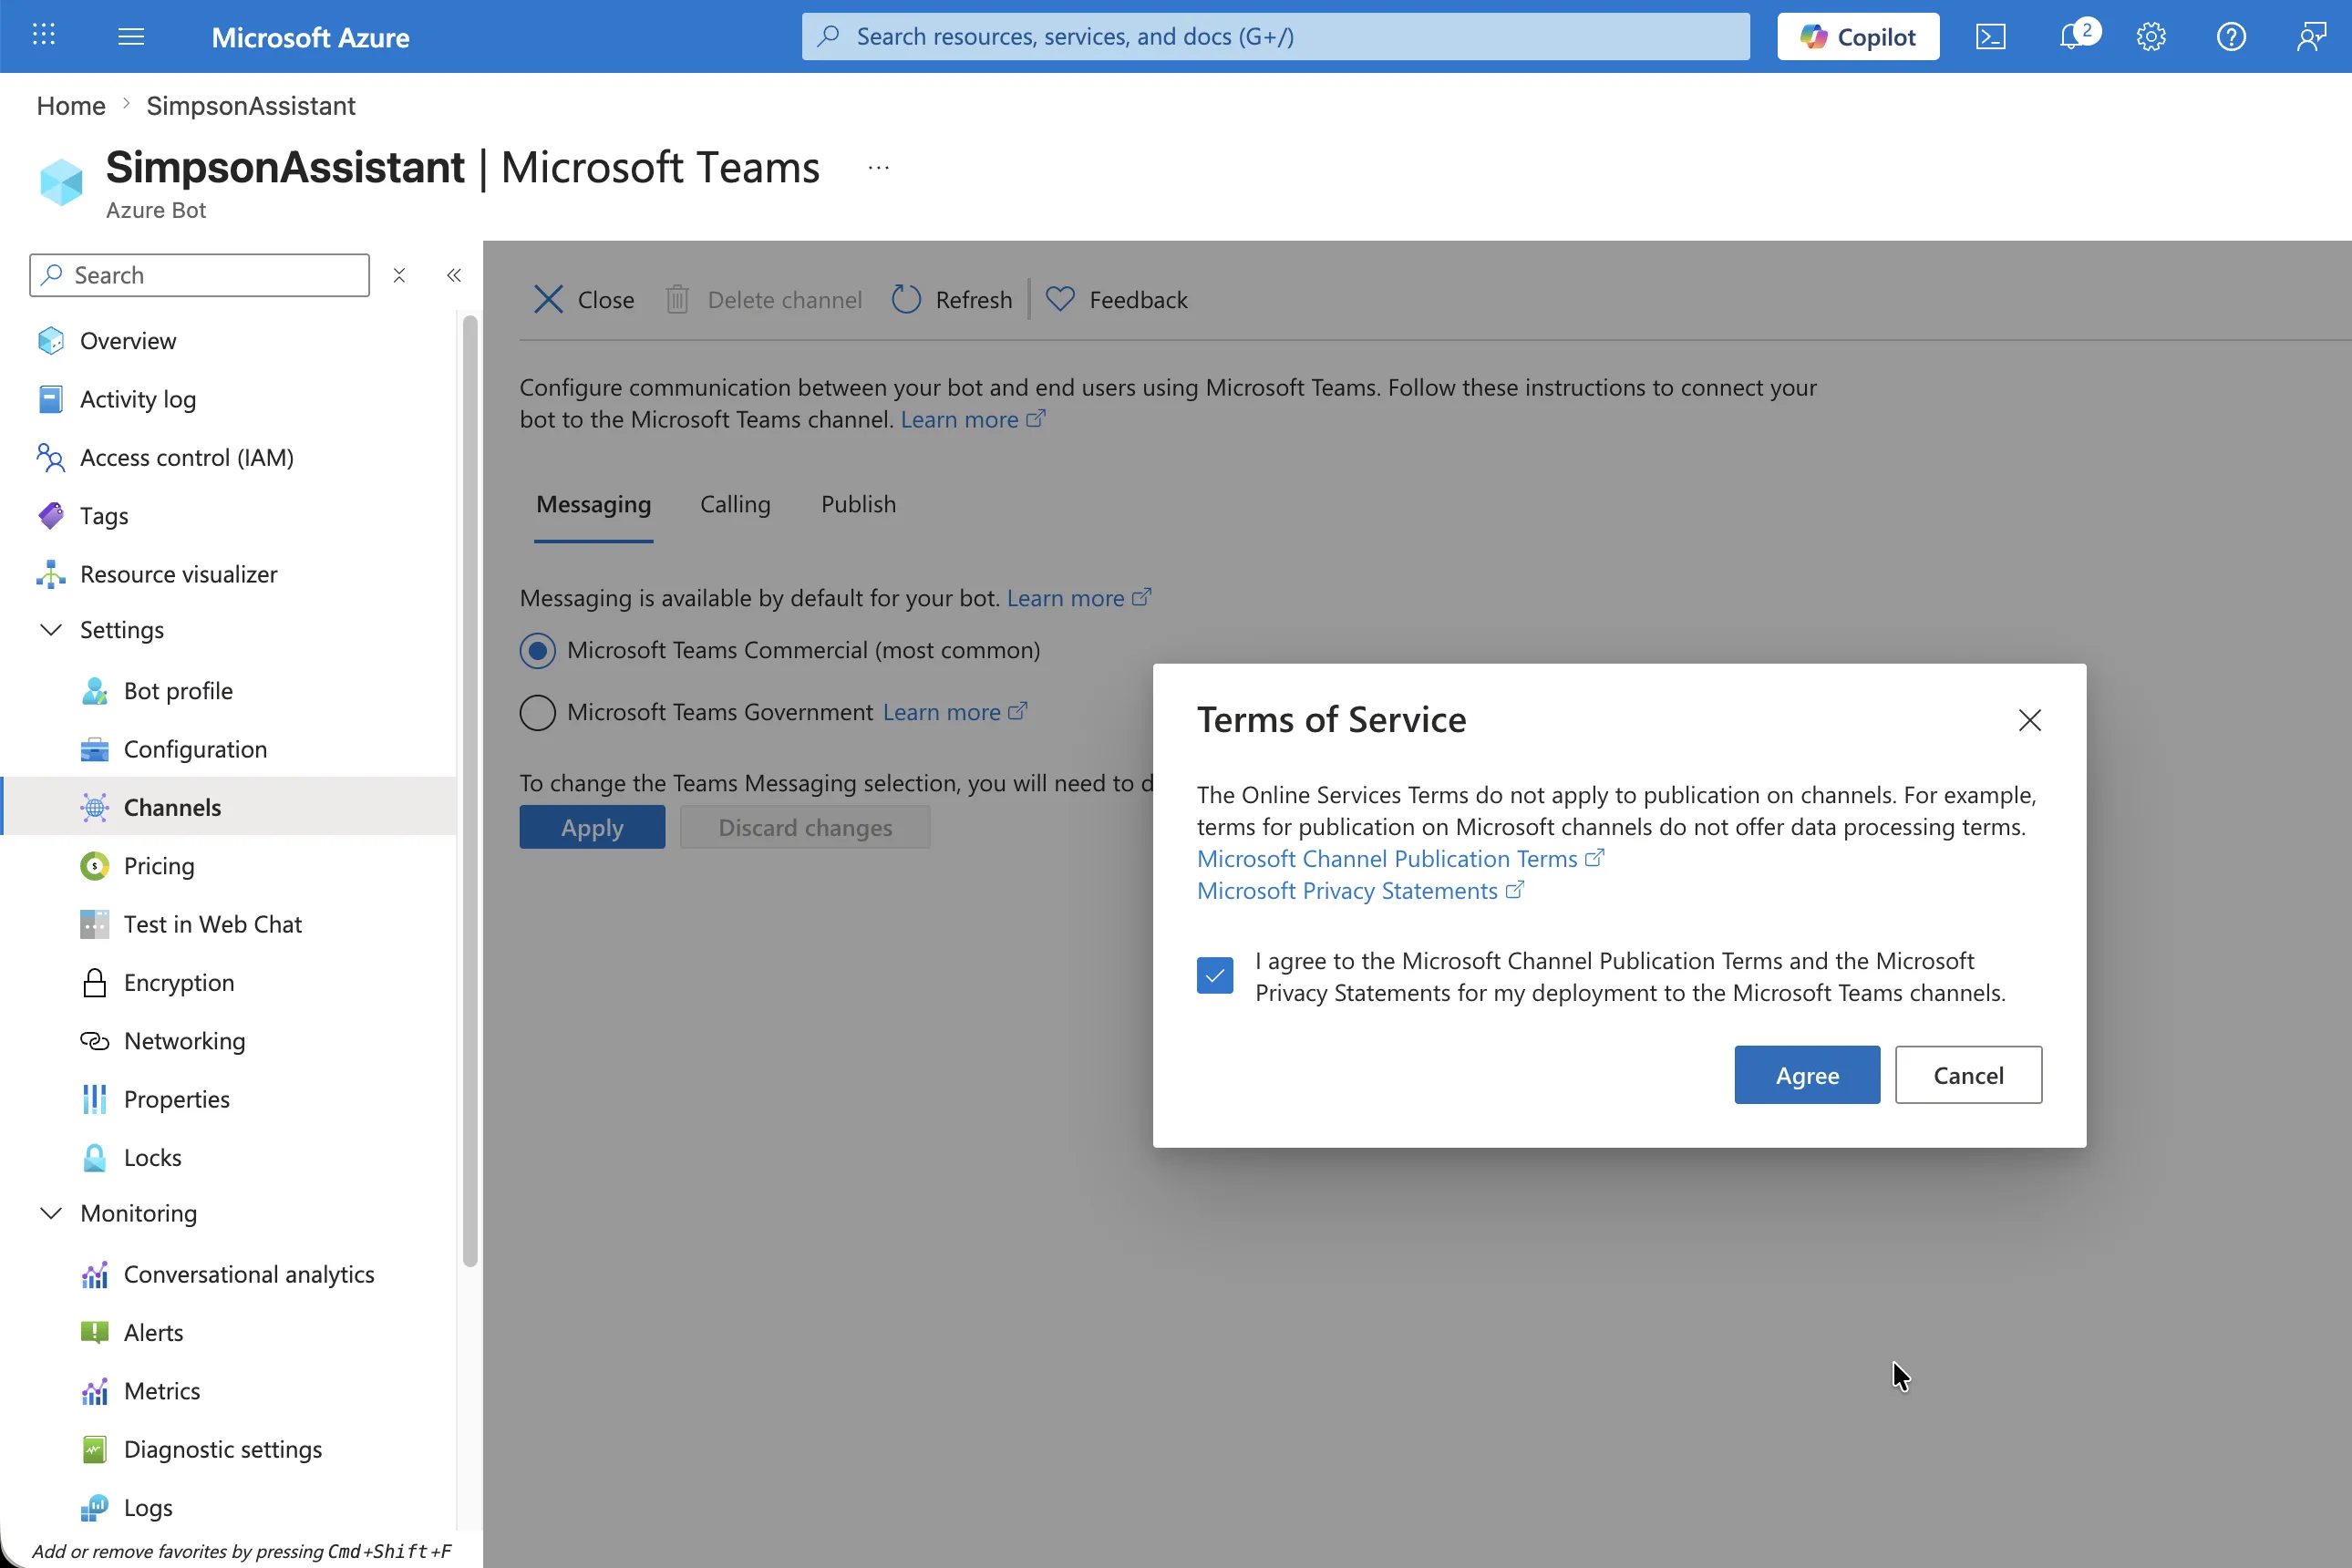
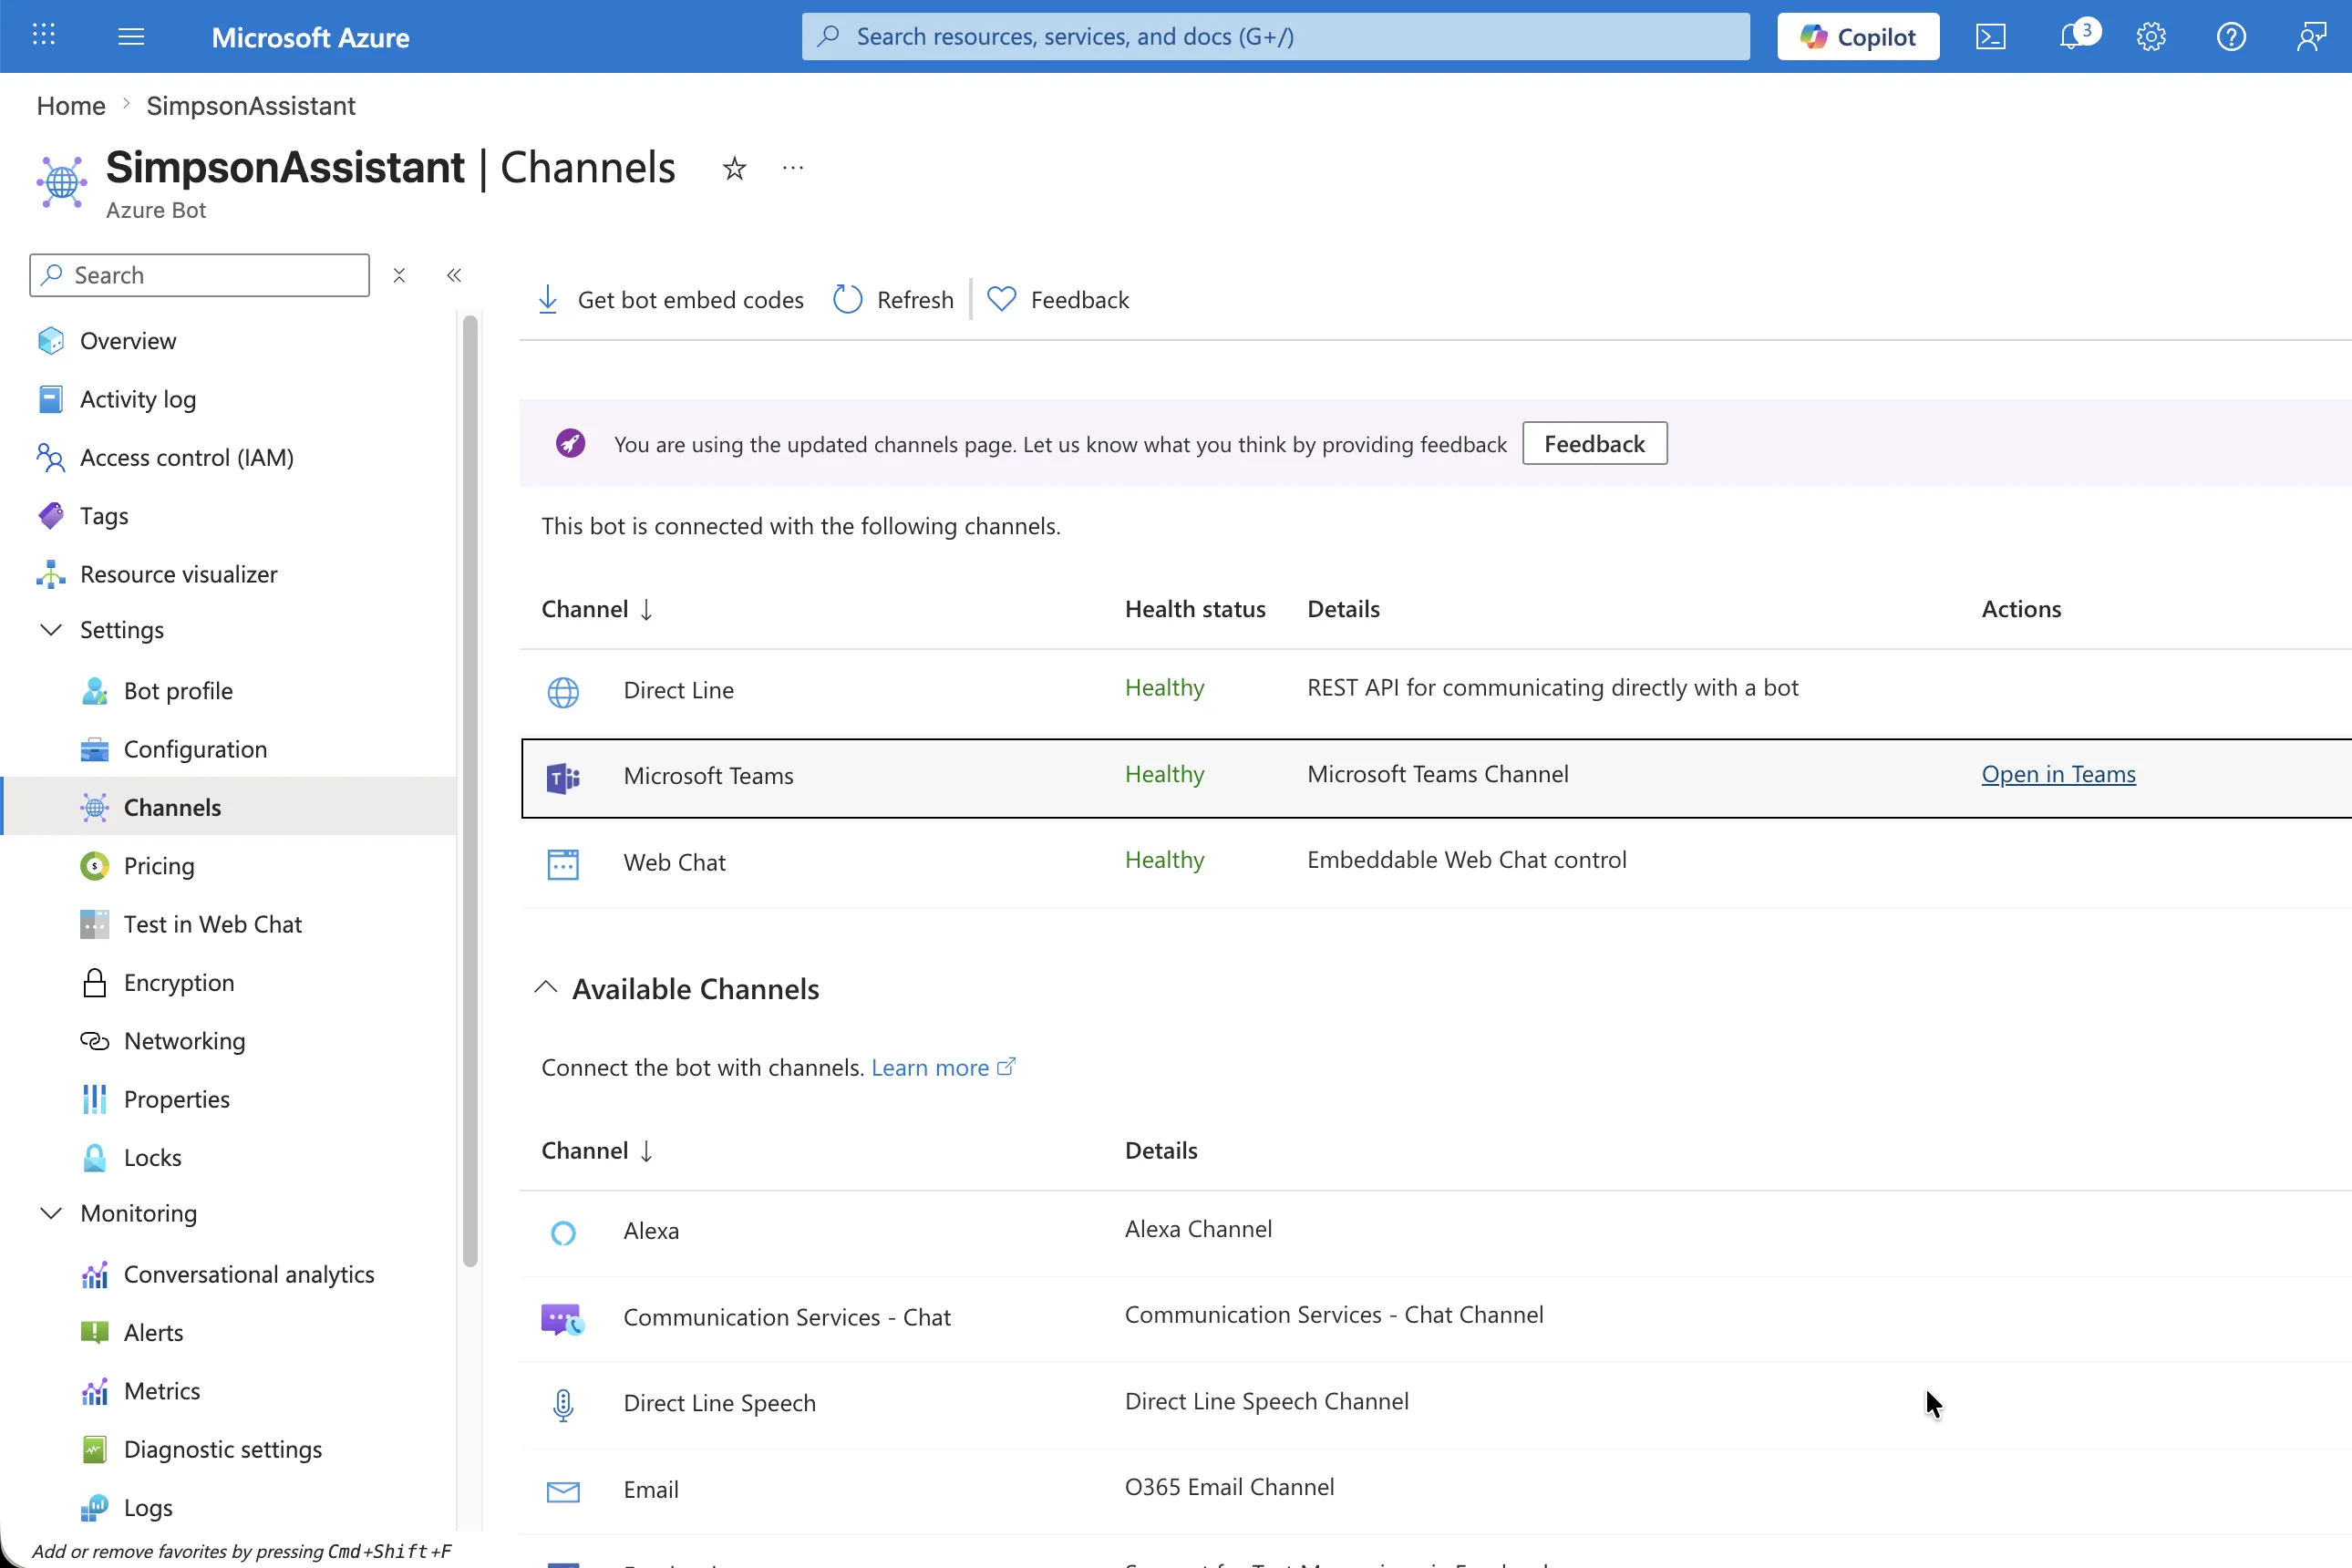
Step 3 — Enable the Microsoft Teams channel
In the Azure Bot, go to Channels, select Microsoft Teams, accept the Terms of Service, and confirm the channel shows as Healthy.

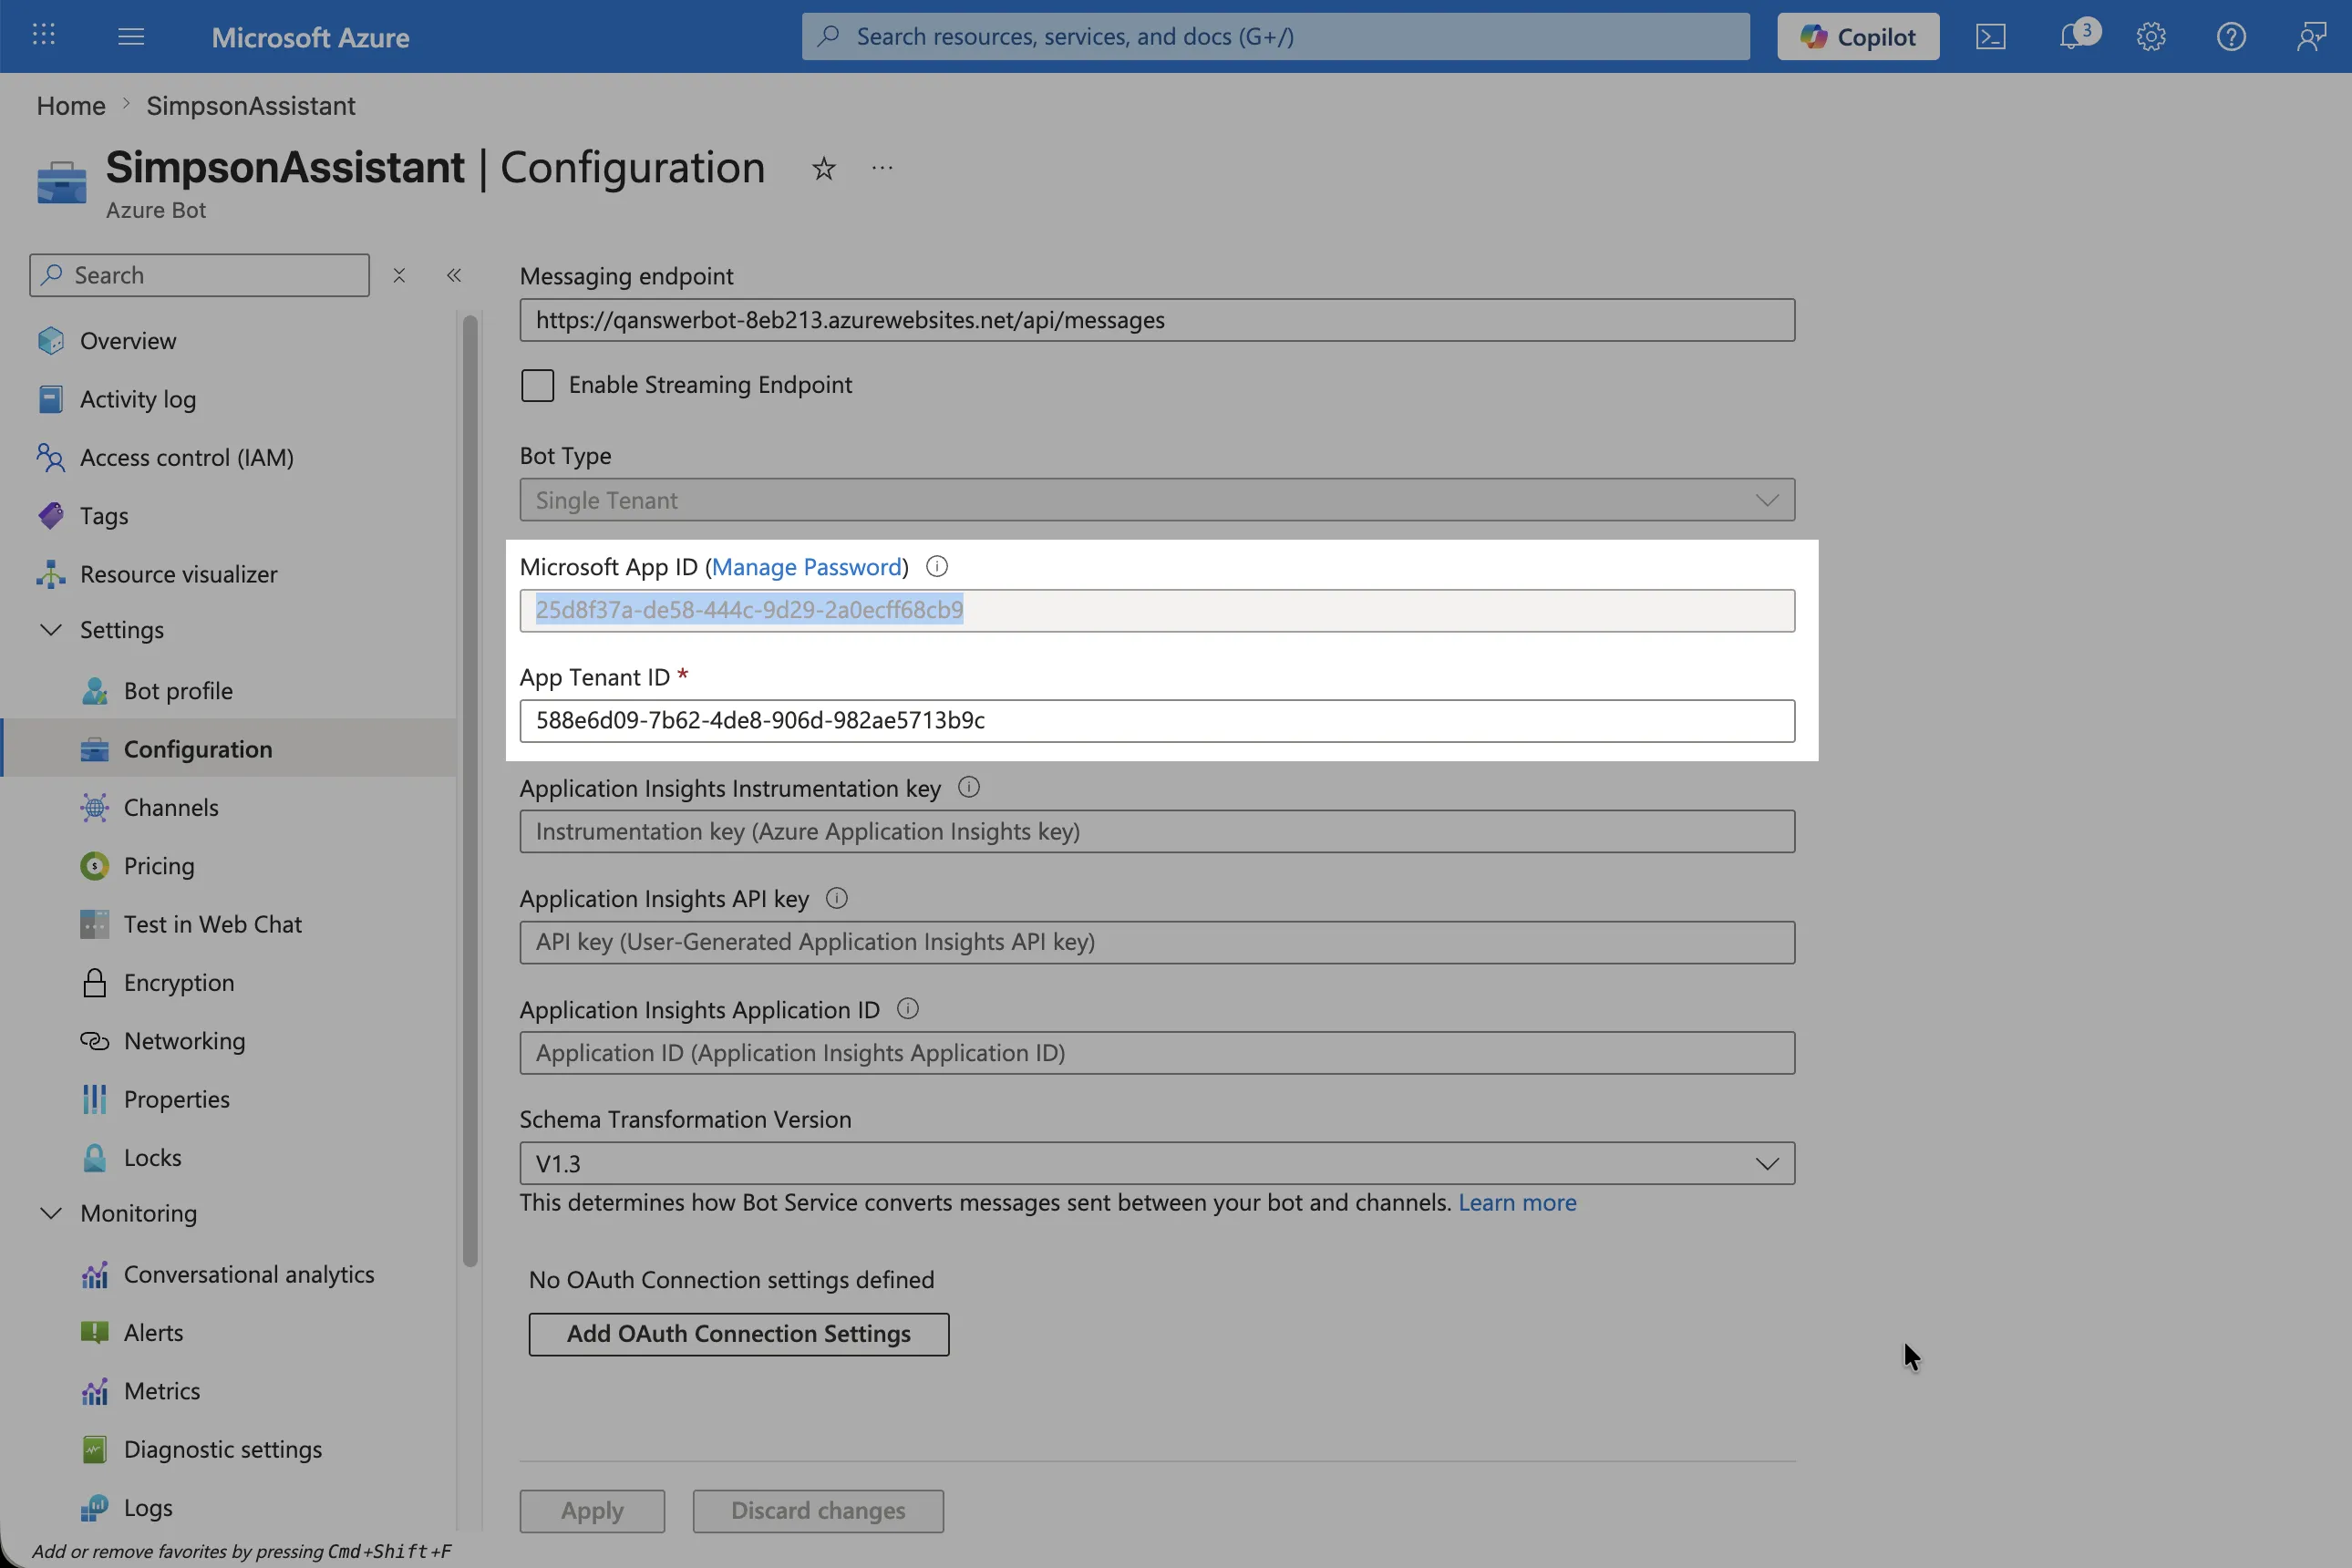
Step 4 — Copy the bot ID and create a client secret
QAnswer signs in to Microsoft as your bot using two values from Azure — the bot ID and a client secret. Copy both:
- Bot ID: on the Azure Bot's Configuration page, copy the Microsoft App ID. QAnswer uses this same value as both the bot ID and the client ID.
- Open the app registration: click Manage Password next to the Microsoft App ID to open the bot's Microsoft Entra app registration.
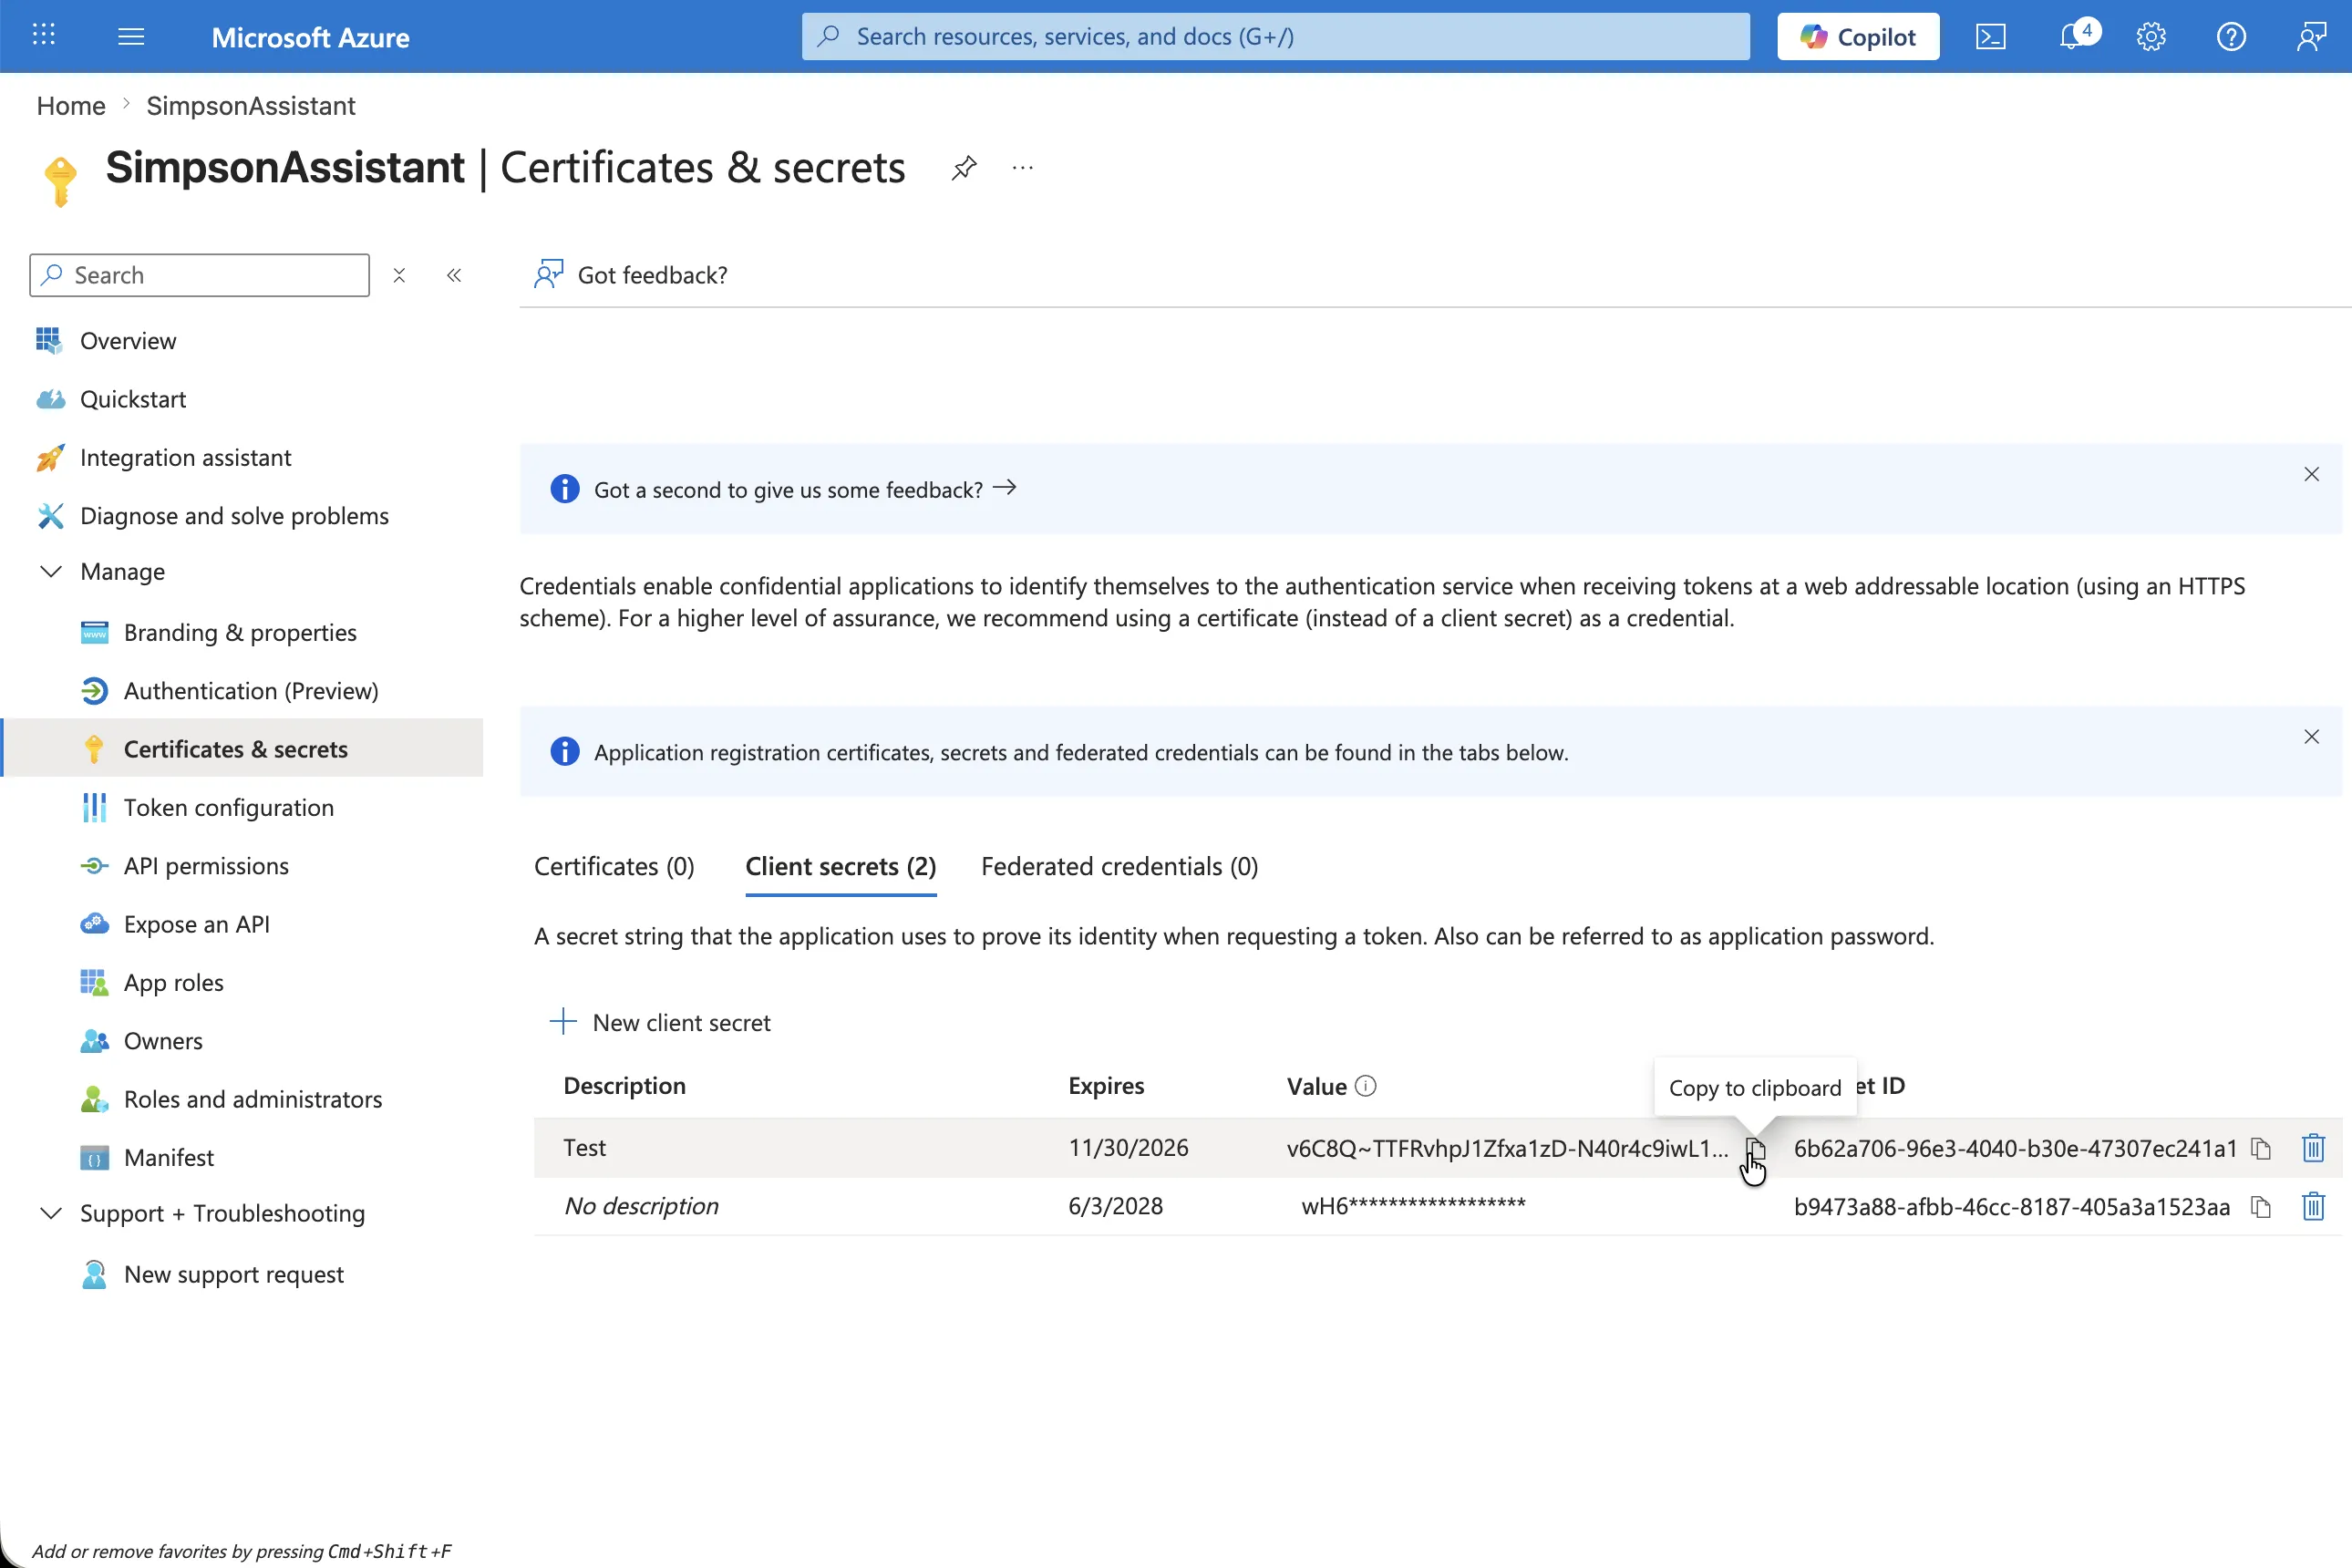
- Create a client secret: under Certificates & secrets → Client secrets, click New client secret, add a description and an expiry, then click Add.
- Copy the secret value: copy the secret's Value (not the Secret ID) immediately — Azure only shows it once. You'll paste it into QAnswer in the next step.
Step 5 — Register the bot in QAnswer
In the QAnswer Teams integration page, fill in the registration form and click Save Teams app. Here is what each field means:
- App name — App name — the display name of your Teams app (e.g. "Simpsons Assistant"). This is what users see in the Teams app catalog.
- Microsoft tenant ID — Microsoft tenant ID — your organization's Azure Active Directory tenant ID. Found in the Azure portal under Microsoft Entra ID > Overview.
- Azure bot ID — Azure bot ID — the Microsoft App ID you copied from the Azure Bot Configuration page in Step 4.
- Client secret — Client secret — paste the secret value you copied in Step 4. QAnswer uses the Azure bot ID as the client ID automatically.
- Package version — (Optional) Package version — the version number embedded in the Teams app package (default 1.0.0). Increment this when you re-download and re-publish an updated package.
- Active — Active — toggle this off to temporarily disable the bot without deleting the registration.
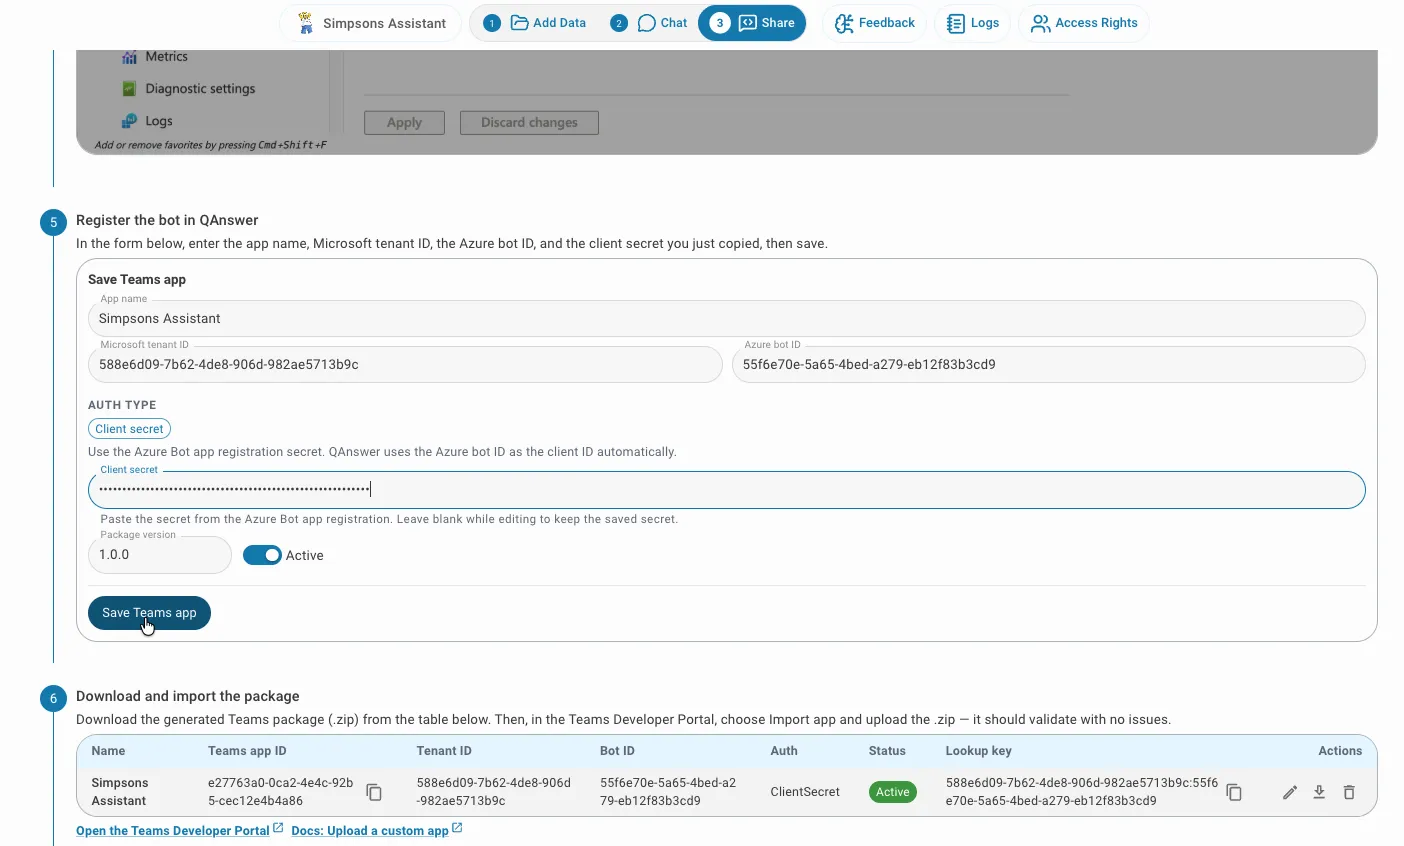
After saving, the bot appears in the table below the form with its generated Teams app ID and lookup key. Use the download button to get the .zip package you will upload in Step 6.
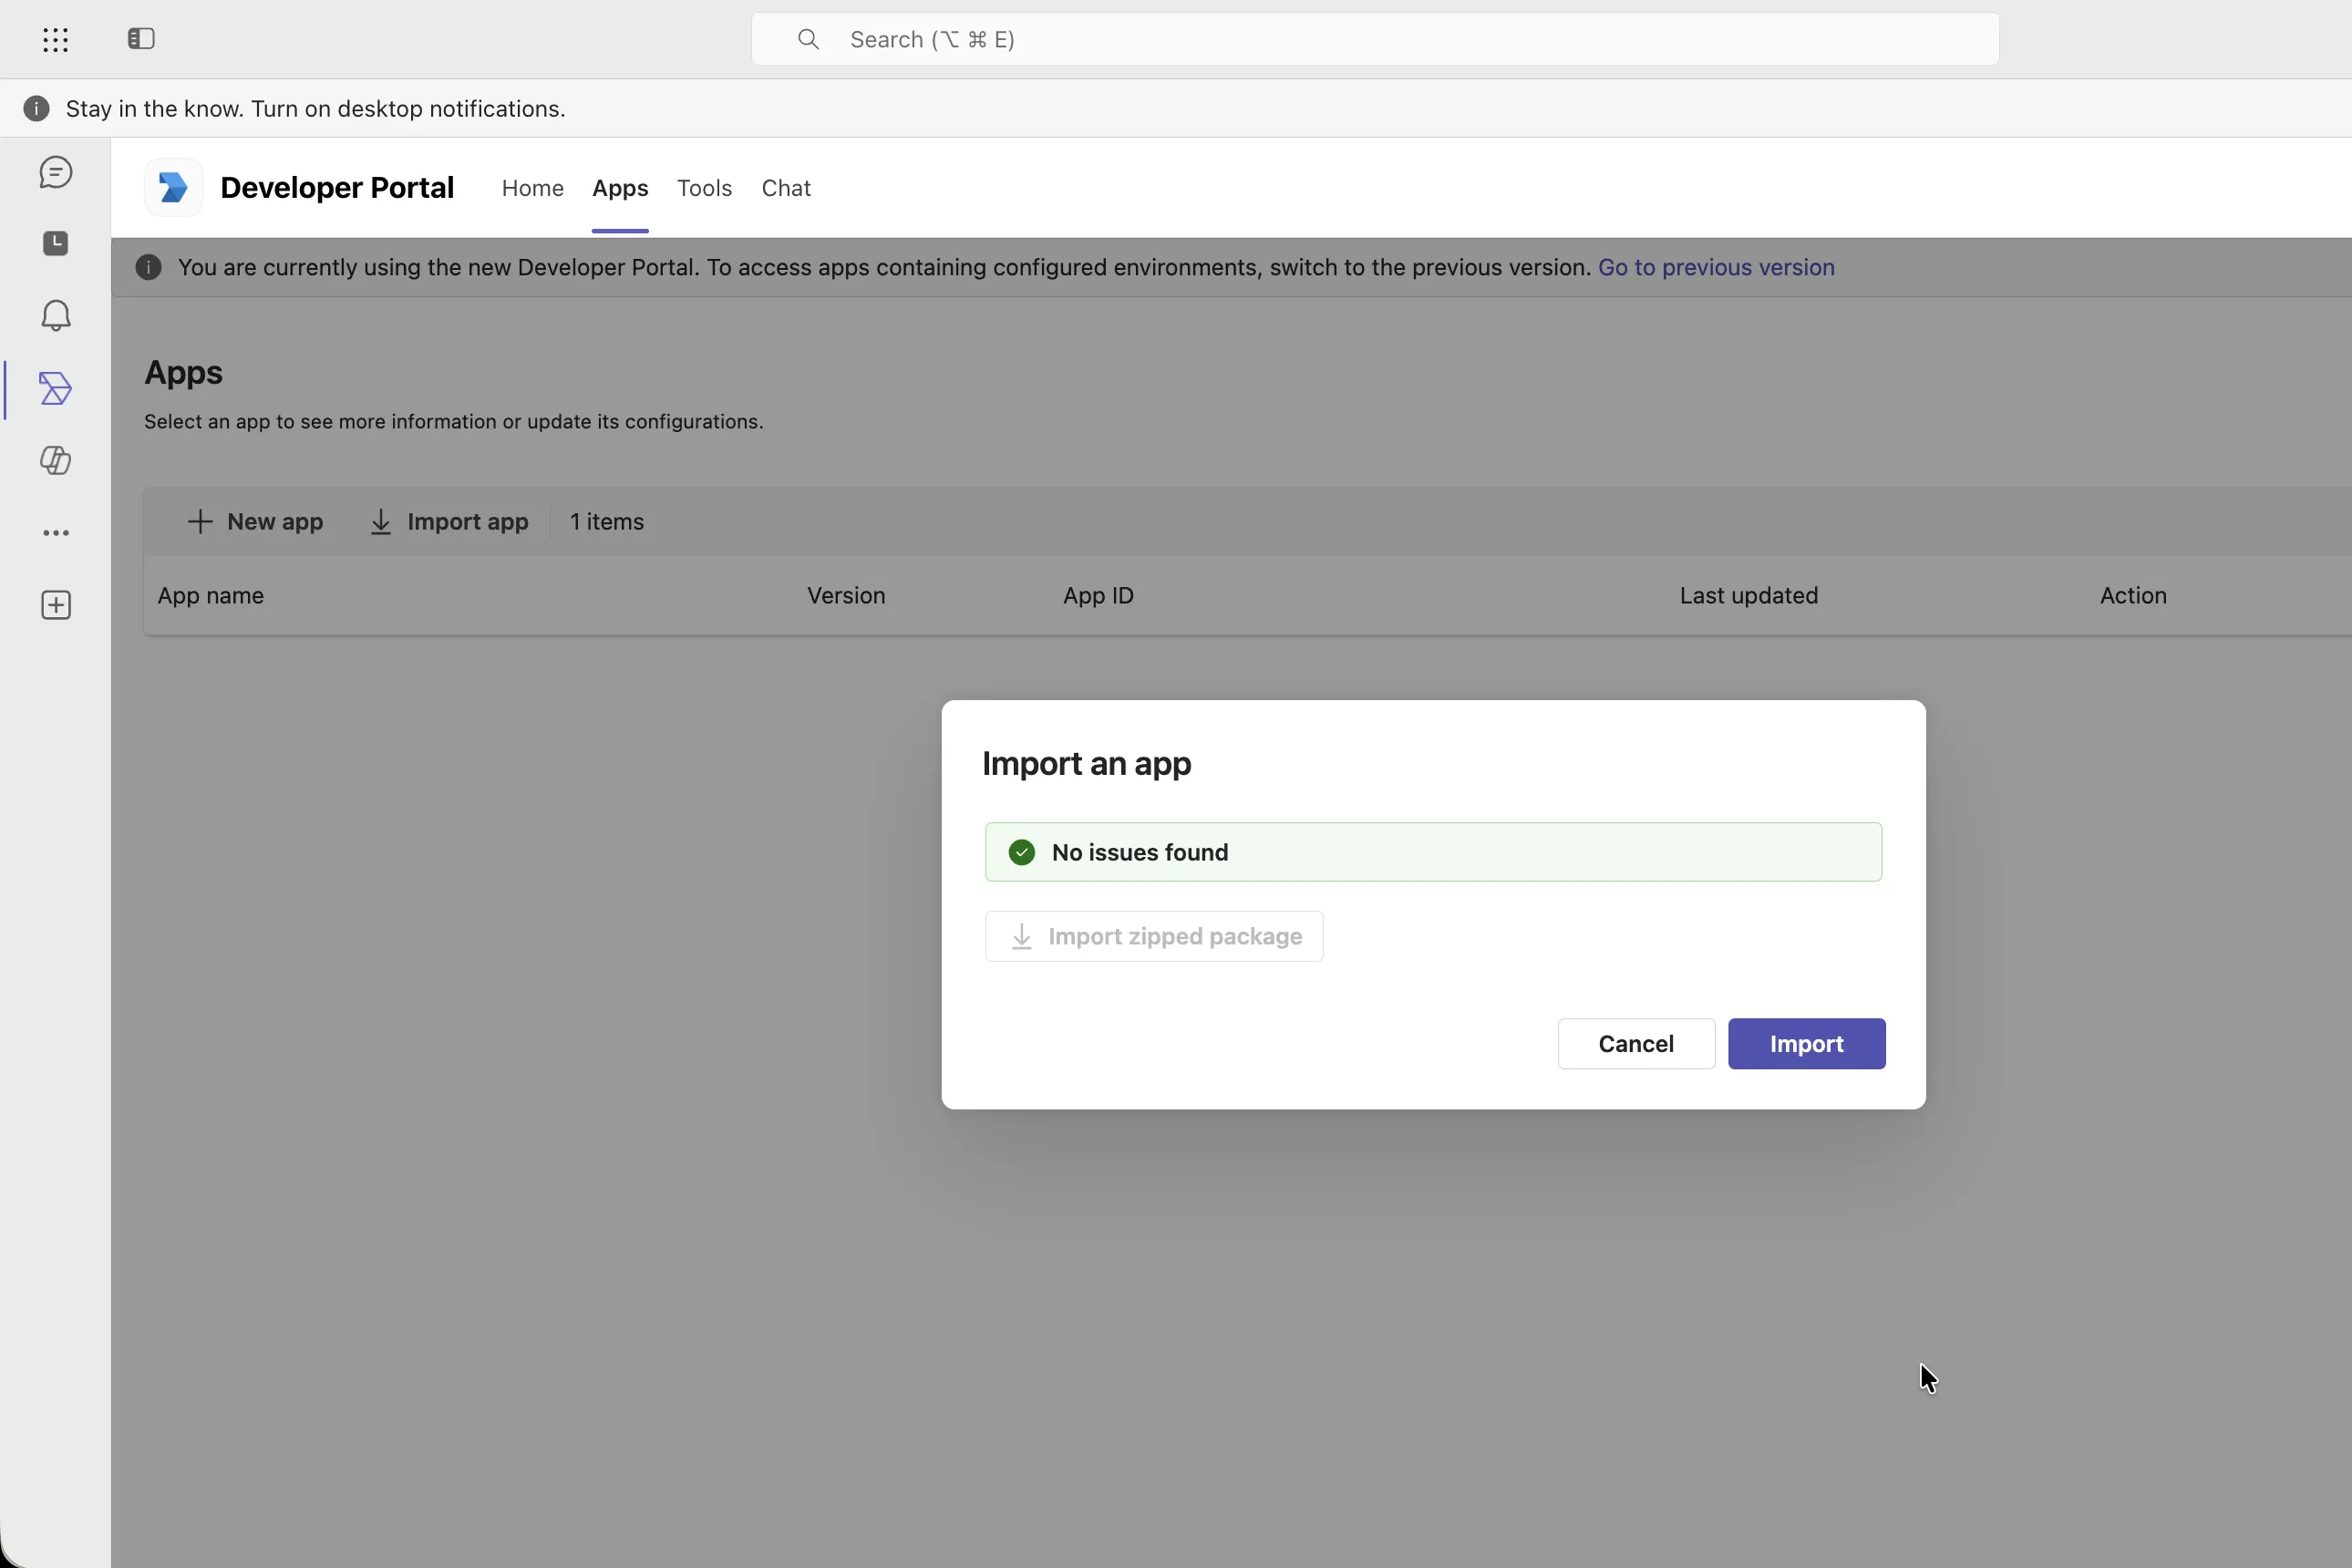
Step 6 — Download and import the package
Download the generated Teams package (.zip) from the QAnswer Teams integration page. Then, in the Teams Developer Portal, choose Import app and upload the .zip — it should validate with no issues.
Open the Teams Developer Portal · Docs: Upload a custom app
Step 7 — Publish to your organization
In the Teams Developer Portal, open Publish → Publish to your org and submit the app. Your Teams admin approves it, after which it appears in your organization's app catalog.
Open the Teams Developer Portal · Docs: Publish to your org

Step 8 — Start using it
Once installed from your organization's catalog, open the app in Teams and start chatting. It is already linked to this assistant — no setup link to share.
Features
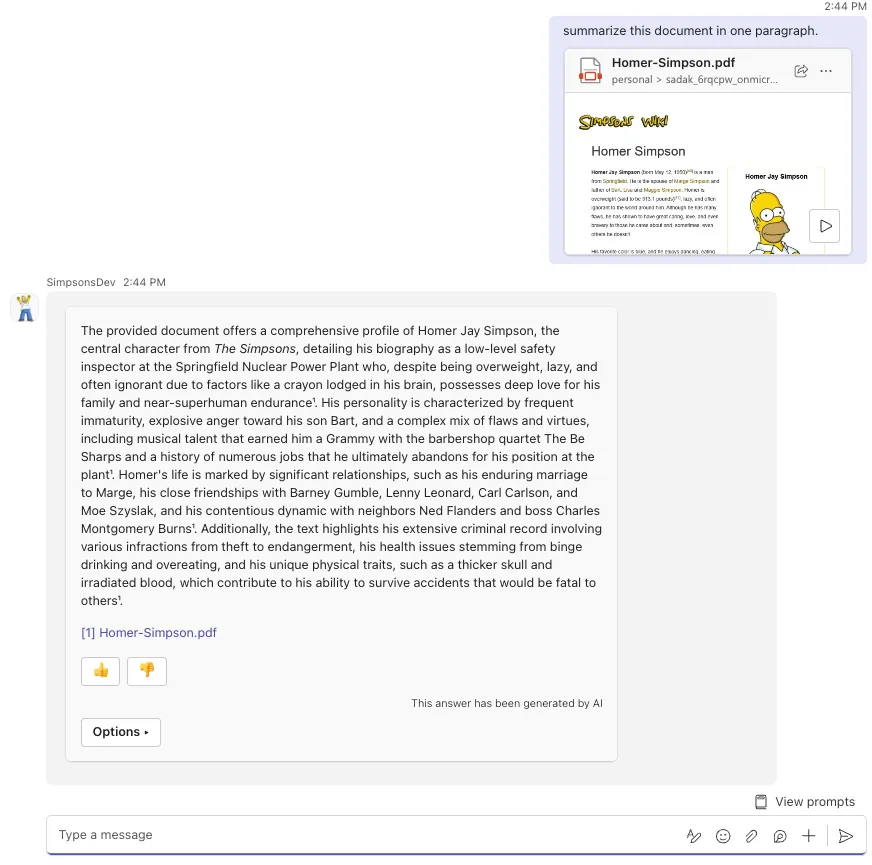
Upload documents
Users can attach files directly in the Teams chat. The bot processes the document and answers questions about it.
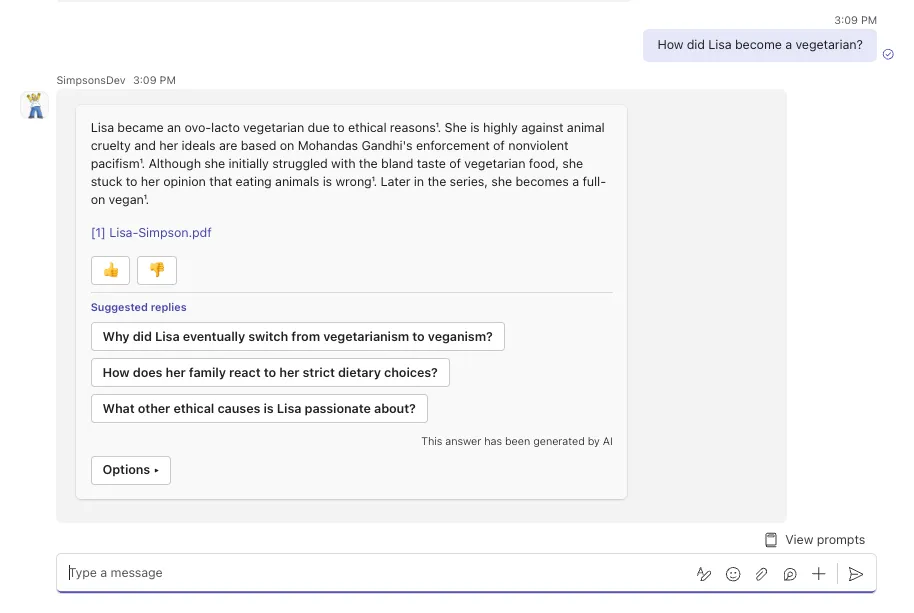
Suggested replies
If Suggested Replies are enabled in your AI Assistant's Chat task settings, they will also appear in Teams after each answer, helping users continue the conversation with one click. How to enable Suggested Replies.
For setup issues, contact info@the-qa-company.com.