MCP
To access this section click on Tool on the left navigation bar.
What is MCP?
MCP (Model Context Protocol) extends QAnswer by connecting external tools and services. Connected tools allow the AI assistant to check calendars, access files, query databases, and more.
Accessing MCP Tools in the Playground
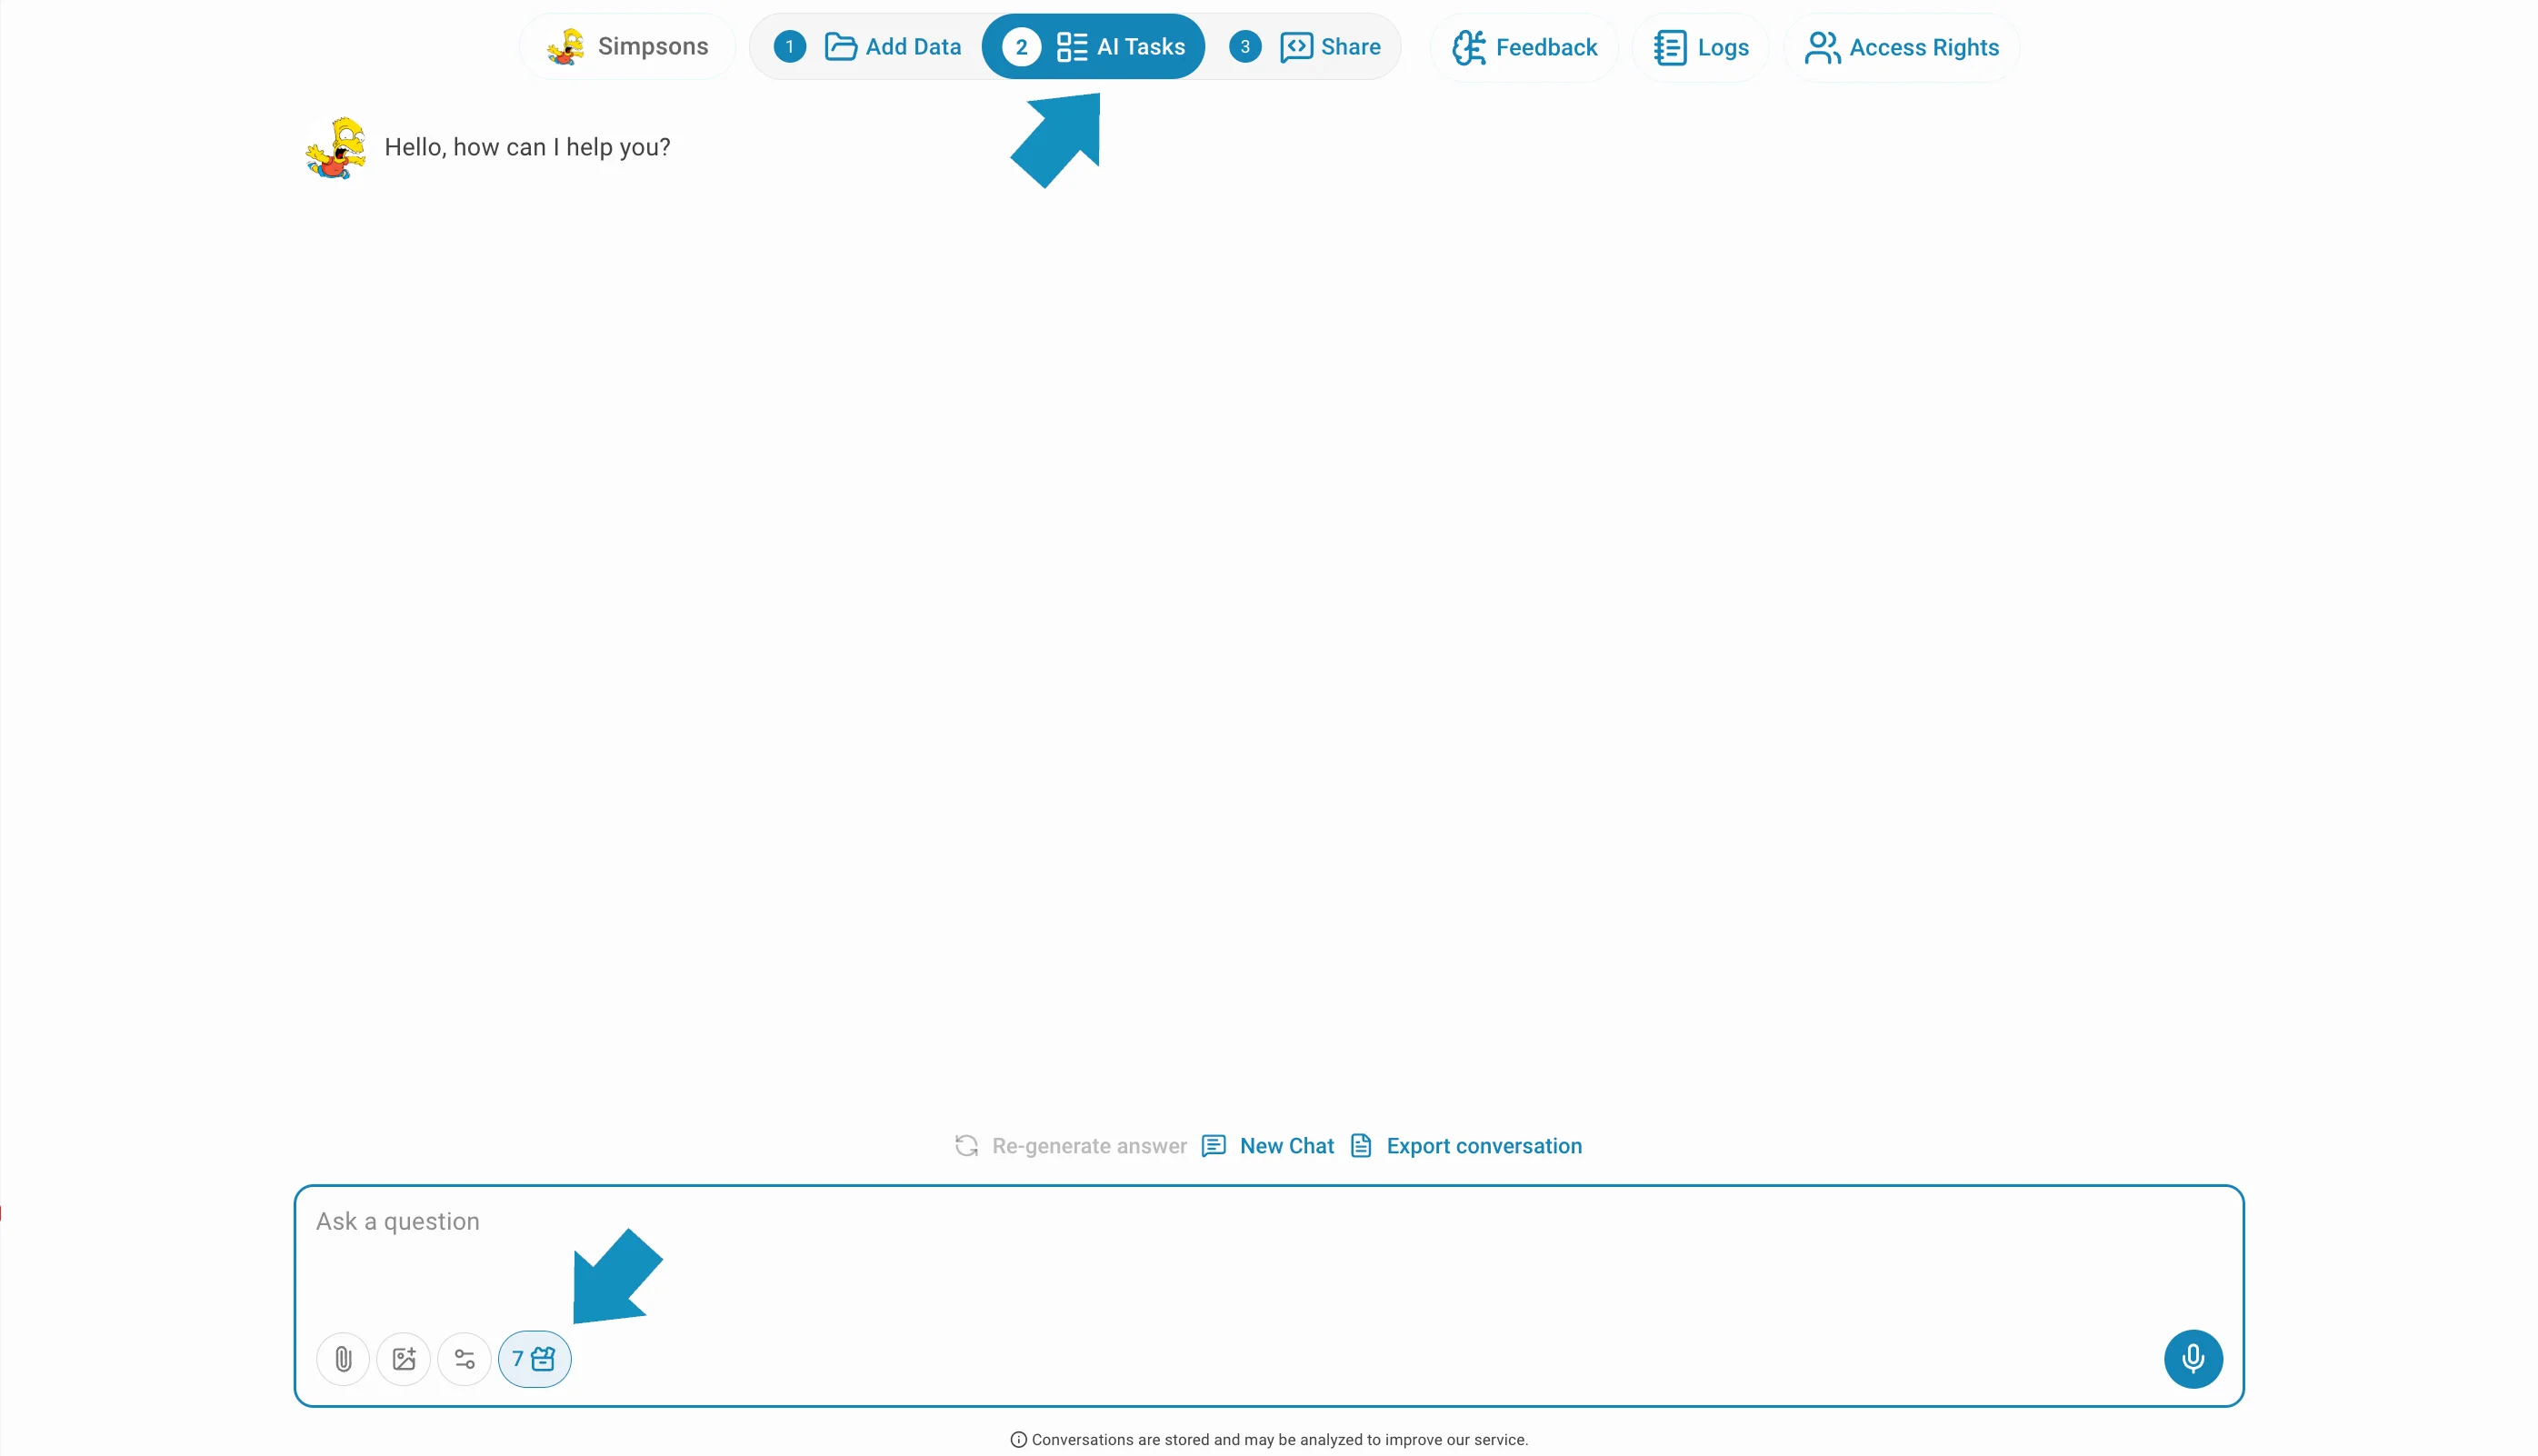
- Navigate to the Playground or AI Assistant Chat Task: Open the Playground or an AI Assistant chat task. A chat box is displayed.
- Open the Actions Menu: Click the Actions icon button in the chat box. A modal opens listing all available tools.
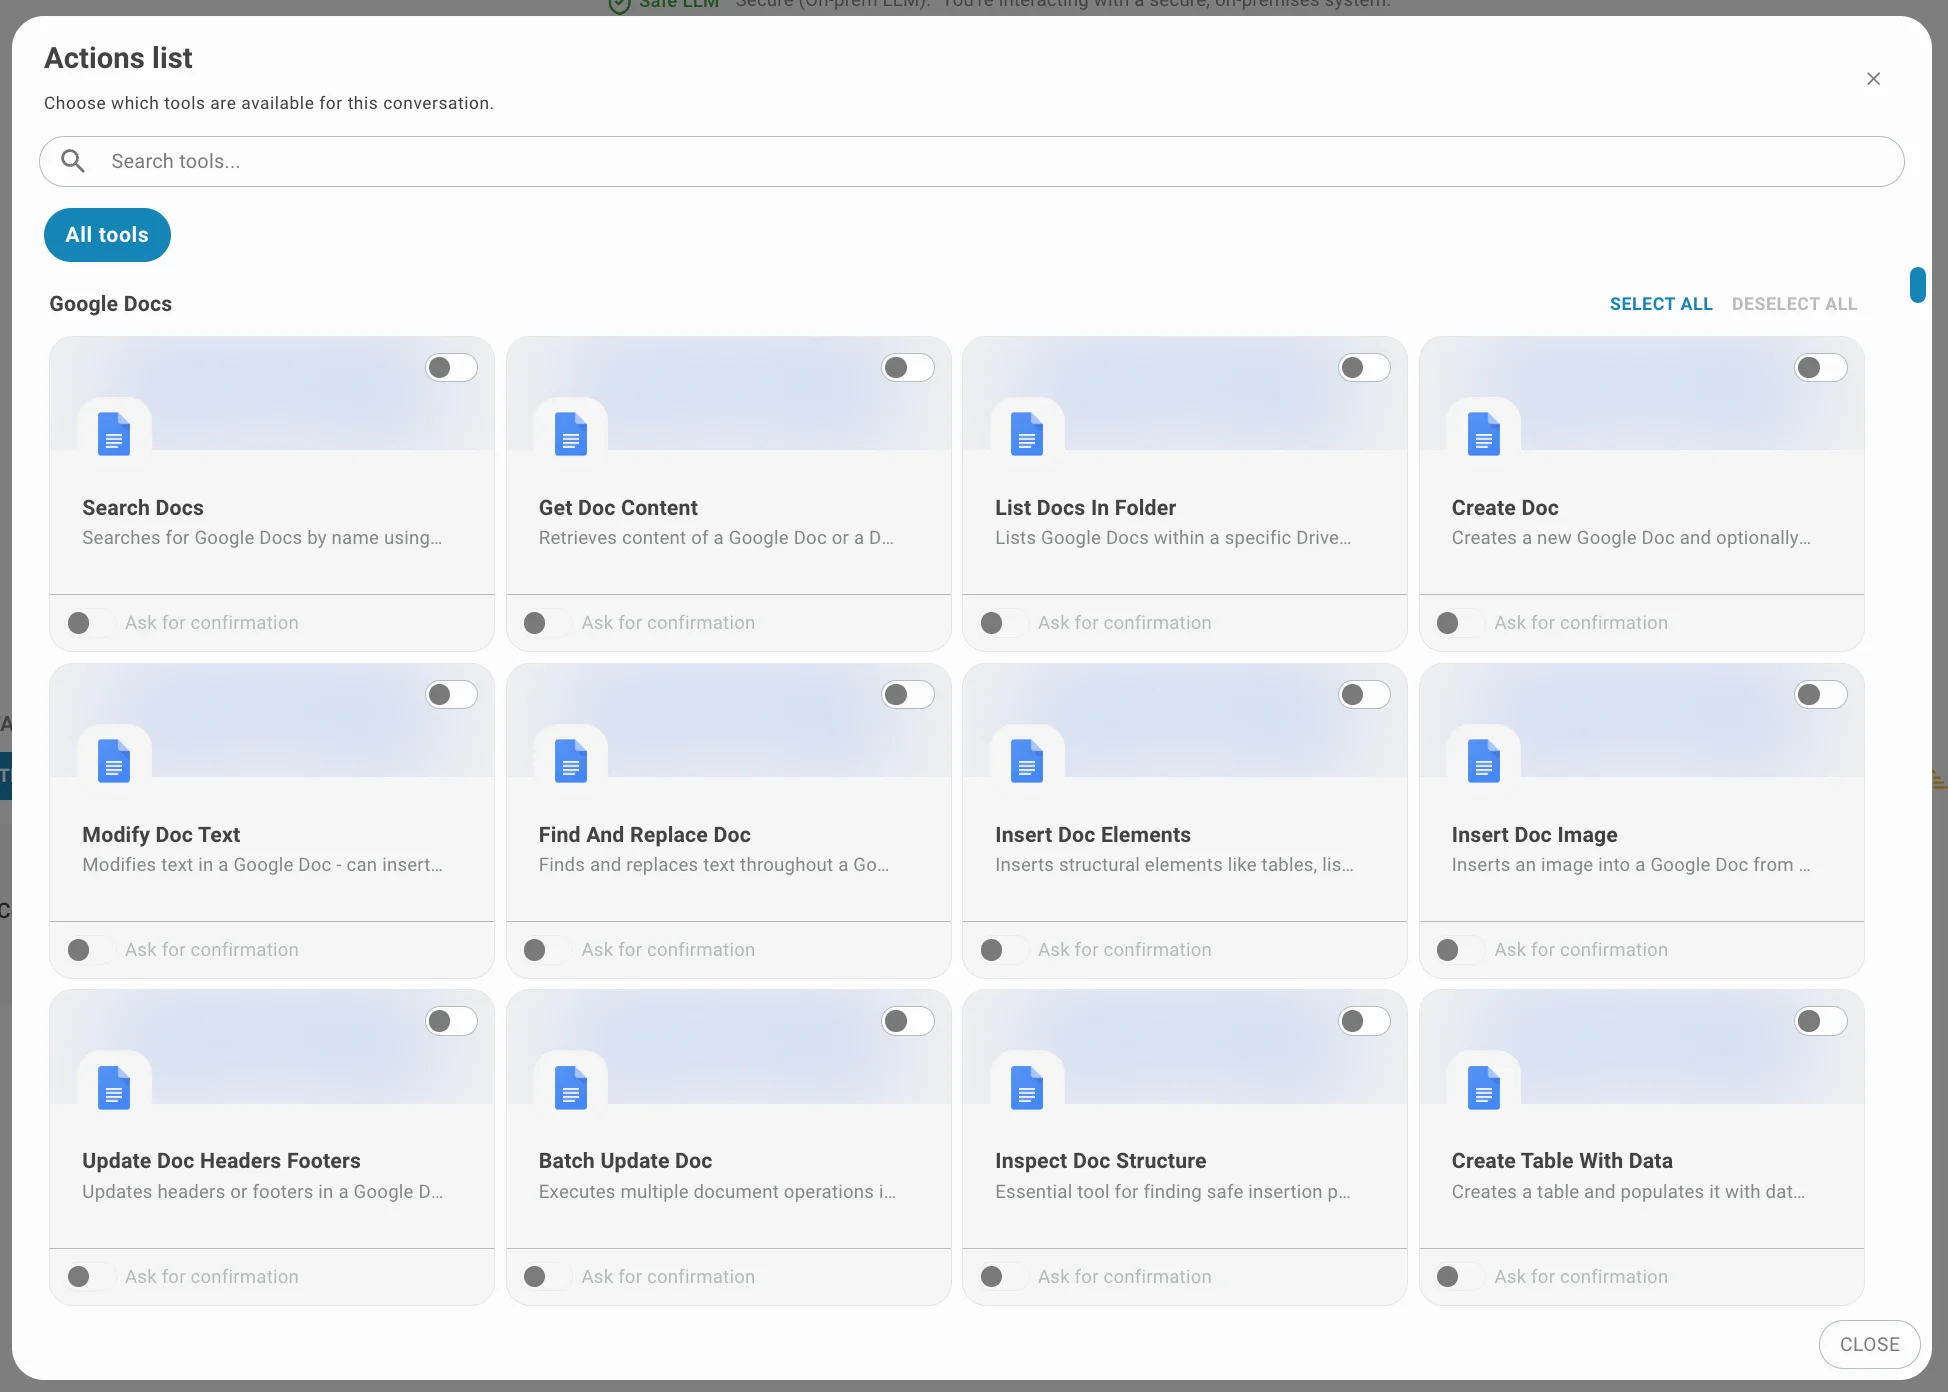
- Enable/Disable Tools:
- Multiple tools can be enabled simultaneously
- Toggle individual tools on or off as needed according to your needs by clicking the switch
- Set Confirmation Mode (Optional)
- Activate "Ask for confirmation" when enabling a tool
- Before execution, approve:
- The tool being called
- The parameters being used
- Modify parameters before accepting the request
Using MCP Tools in Chat
Basic Usage
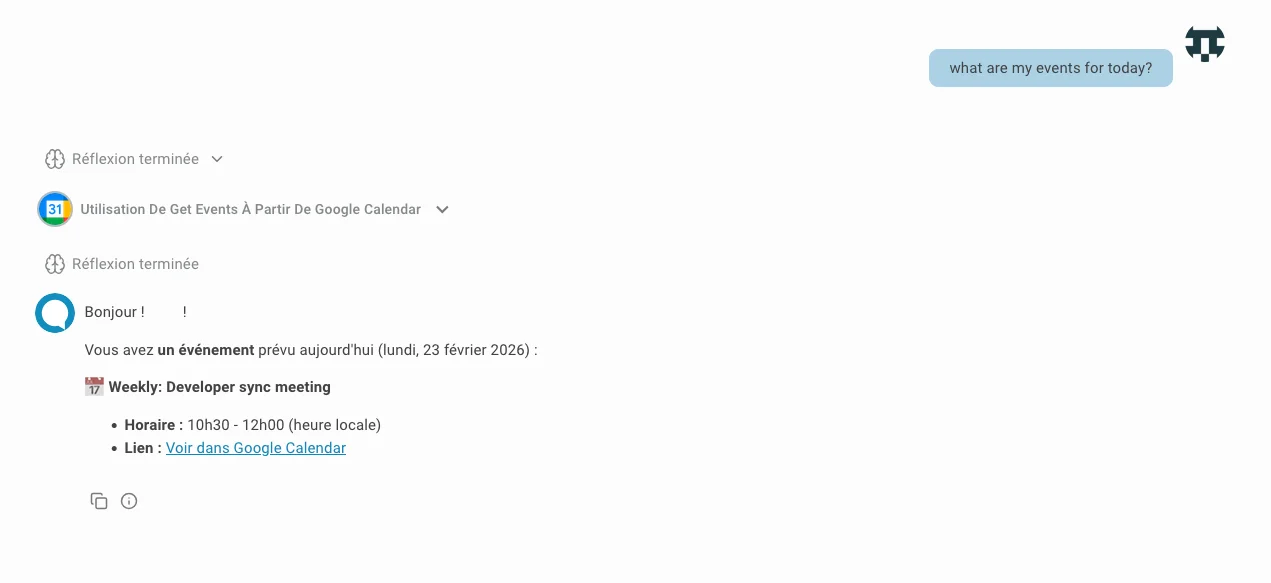
With tools enabled, chat with the AI assistant naturally:
Example:
You: "What are the events in my calendar today?"
Two Scenarios:
Scenario 1: Connection Already Exists
- The LLM automatically calls the appropriate tool
- If confirmation mode is enabled, approve the action before it runs
- The response is returned immediately
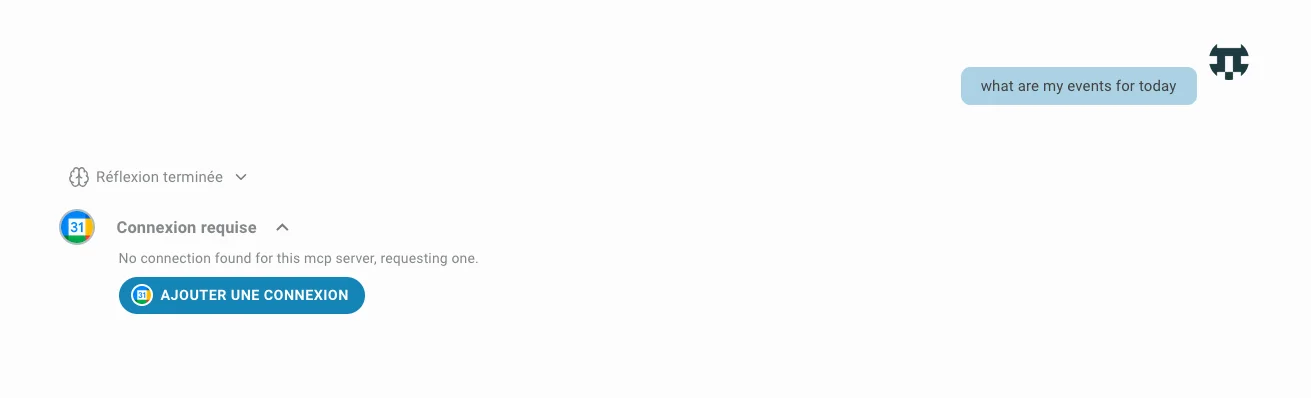
Scenario 2: No Connection
- Add a connection when prompted
- Complete the connection setup process
- Return to the chat
- The tool is called automatically and returns an answer
Document Generator
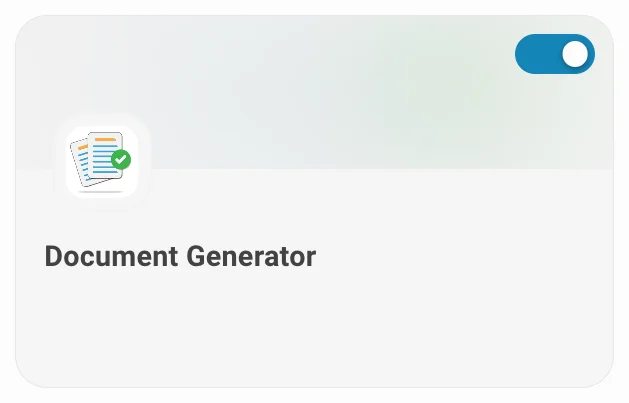
You can ask the chatbot to generate documents such as pdfs, word files, excel or powerpoint presentations using tools connected through MCP. For example, "Generate a sales report for last quarter in Excel format".
Example Prompt Used:
Fetch the content of example.pdf file in my sharepoint and create a summary and generate a pdf file out of itLLM Answer Extract with document


To download the generated document, click the provided link in the chat response.
Managing MCP Servers
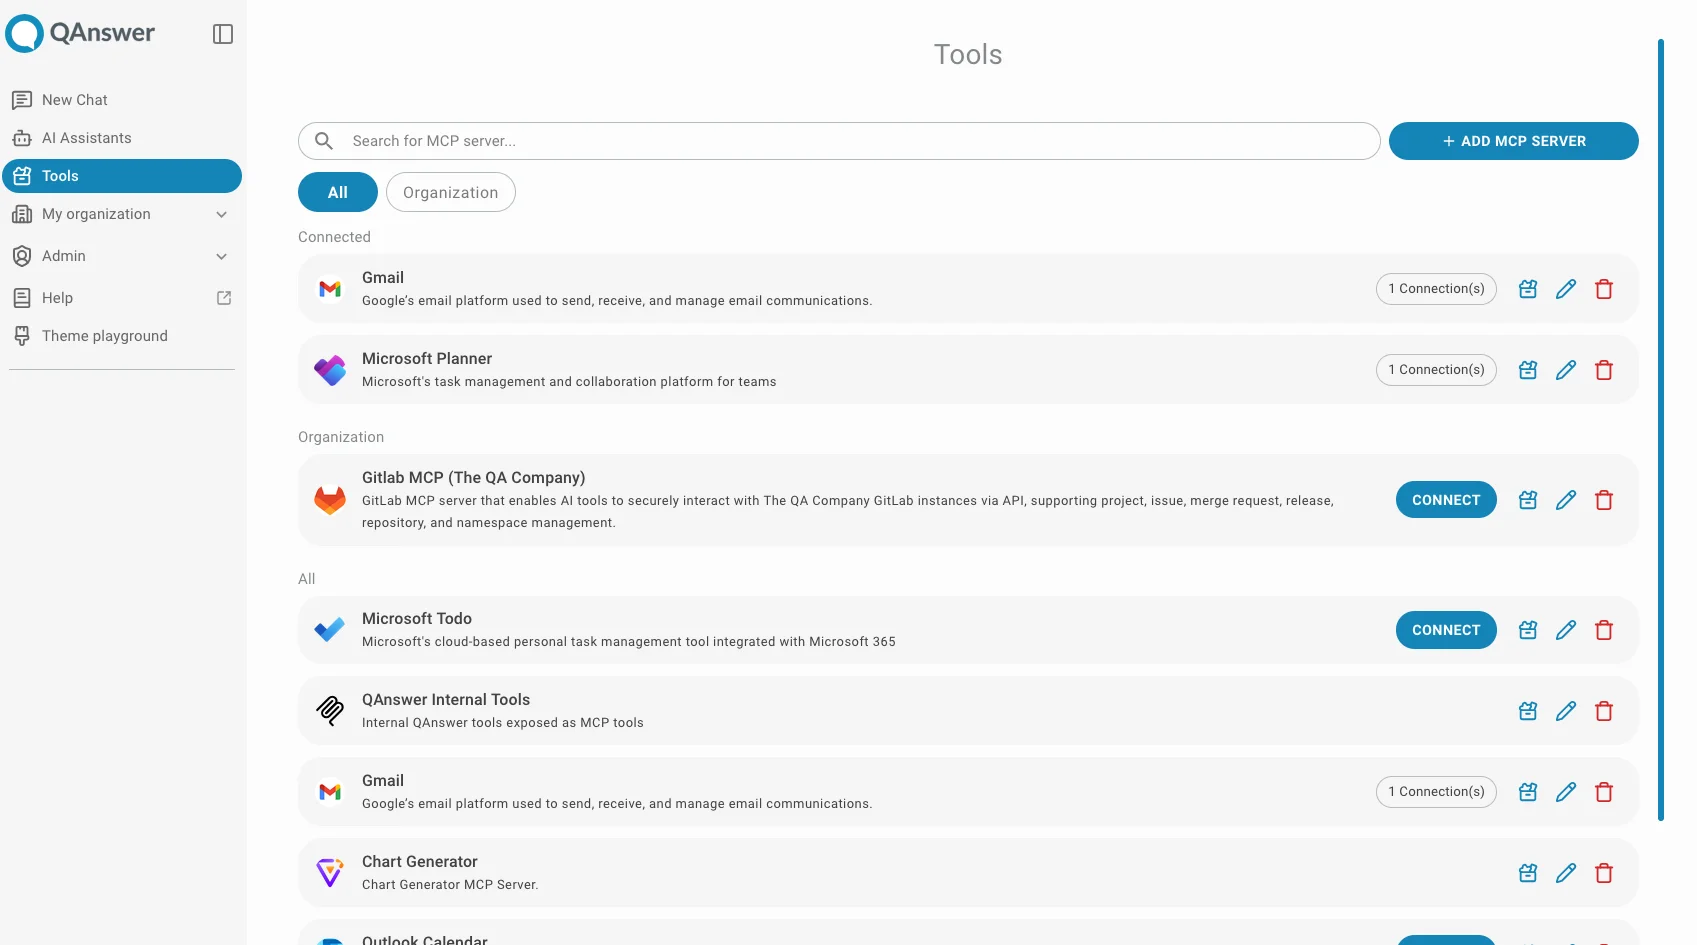
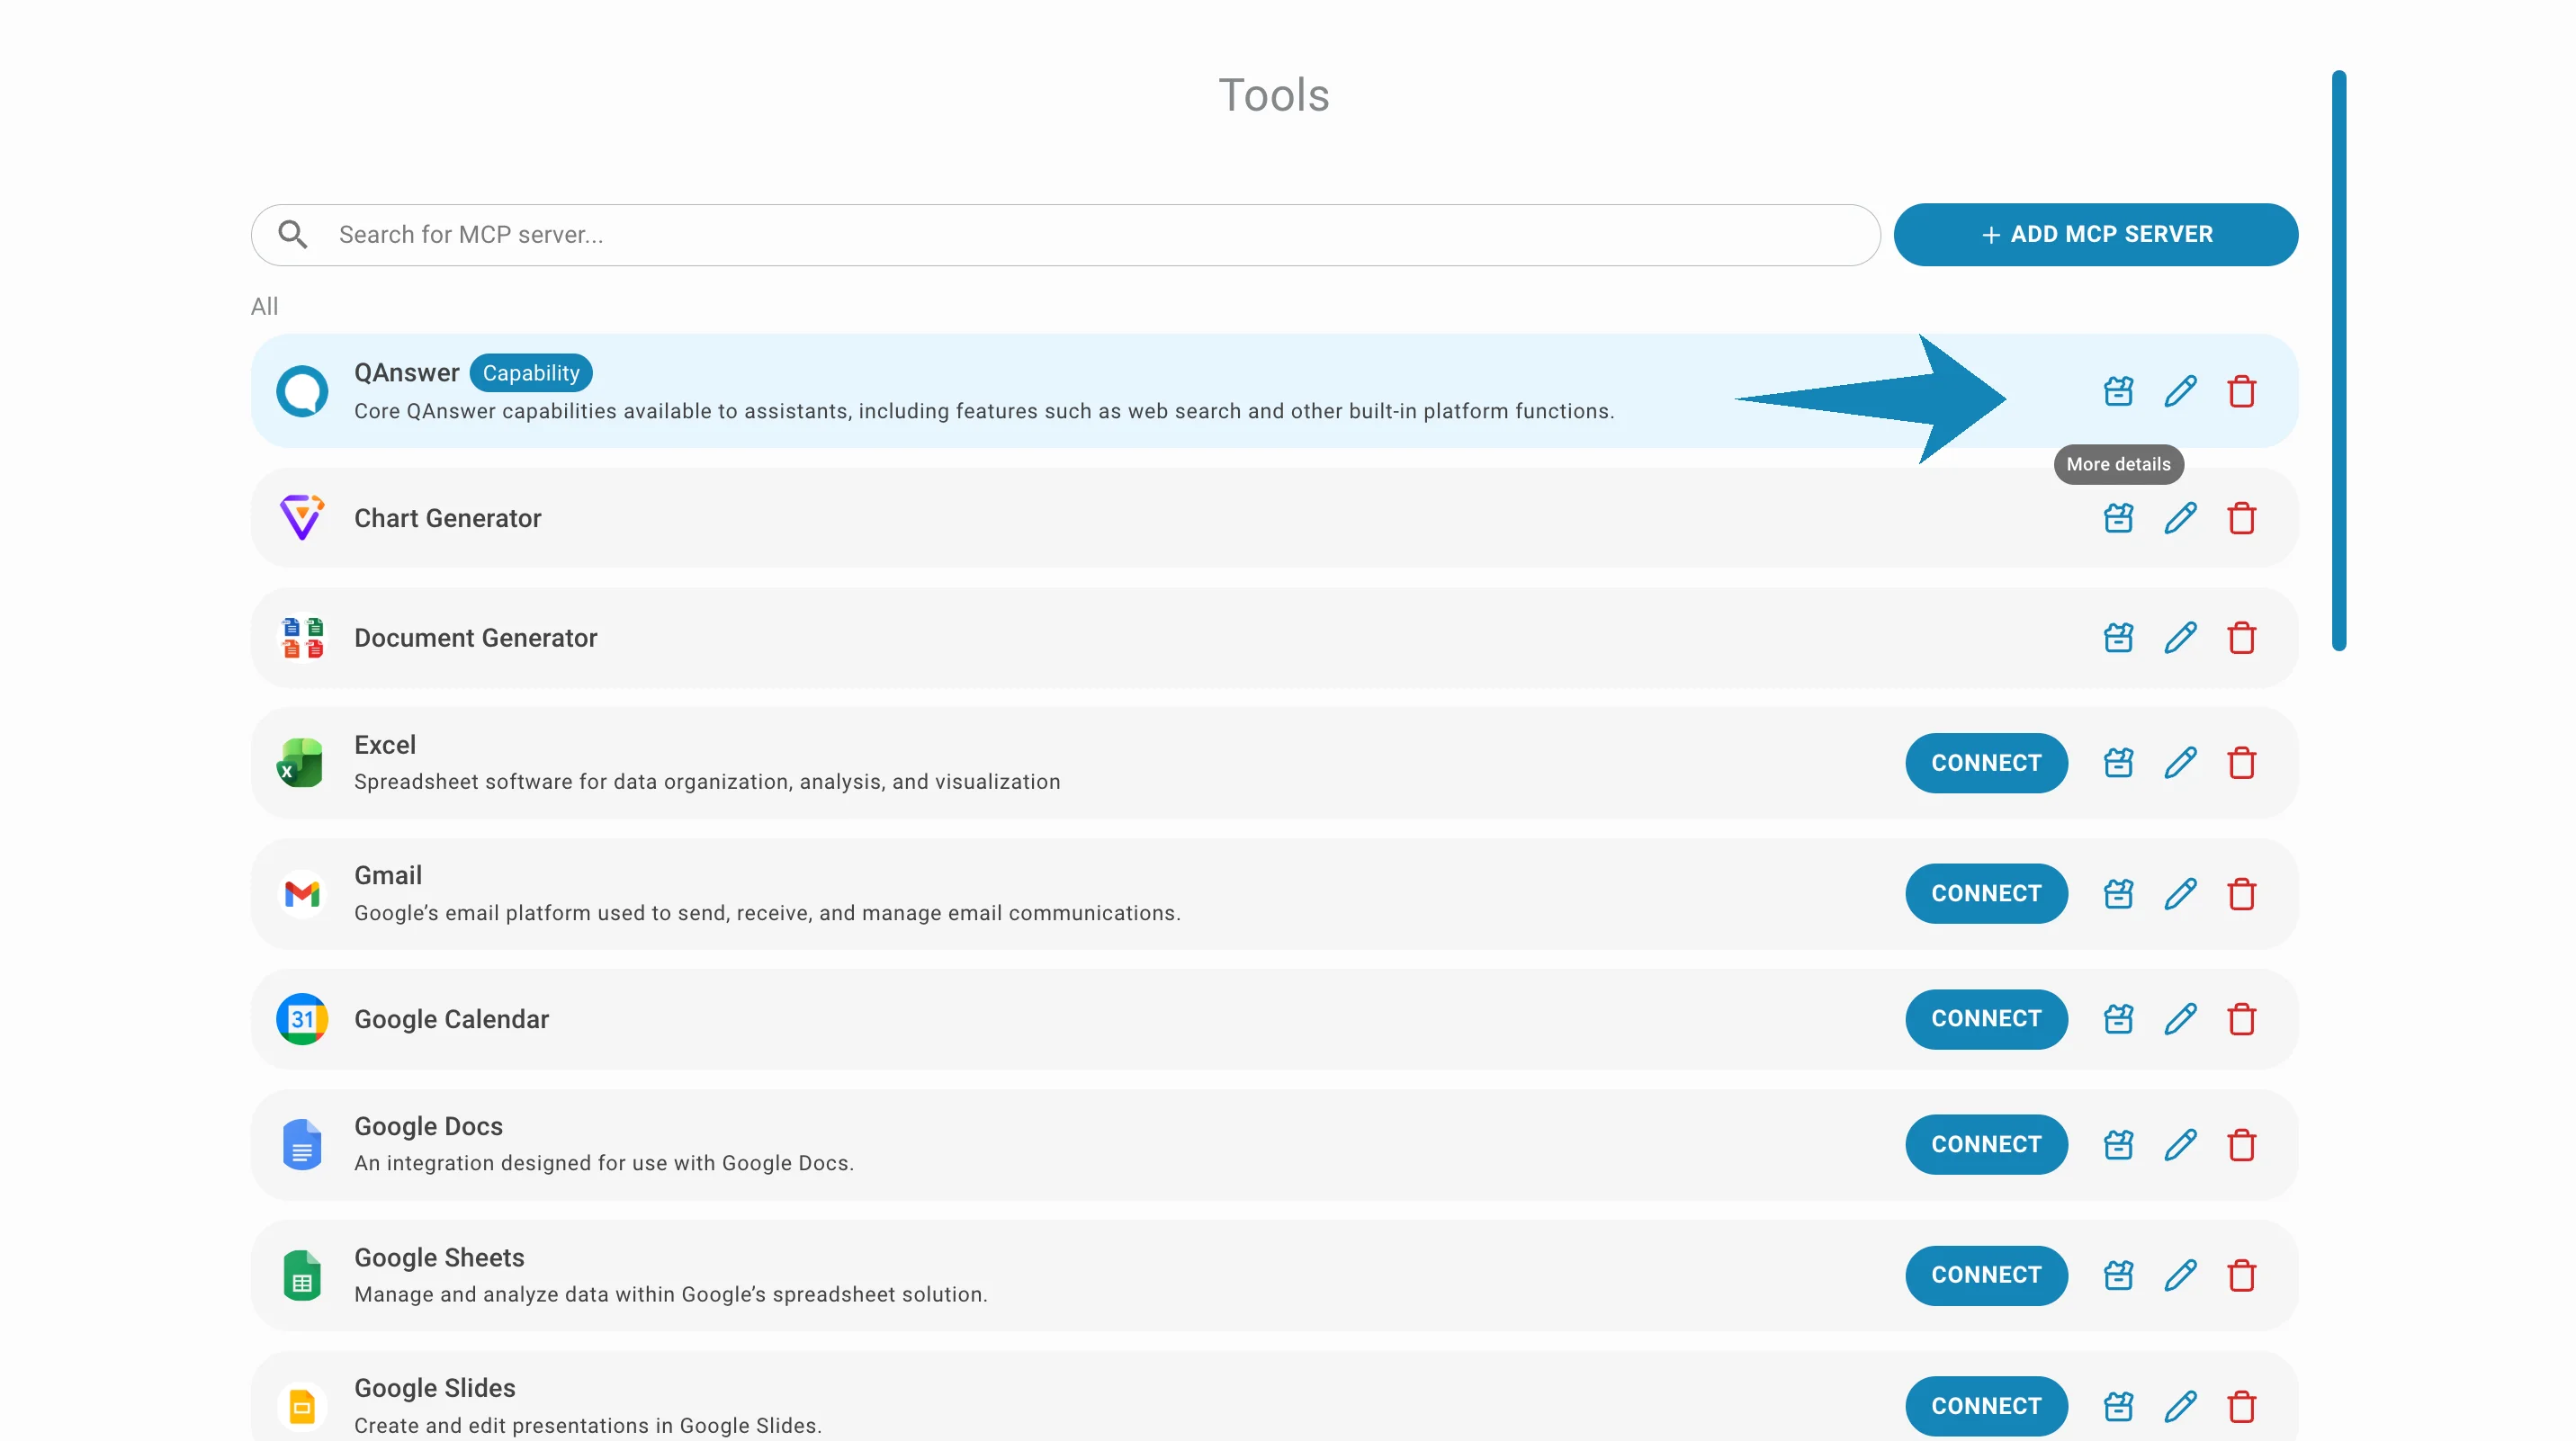
Accessing the Tools Page
- Navigate to the Tools tab in the navigation bar
- A list of all available MCP servers is displayed
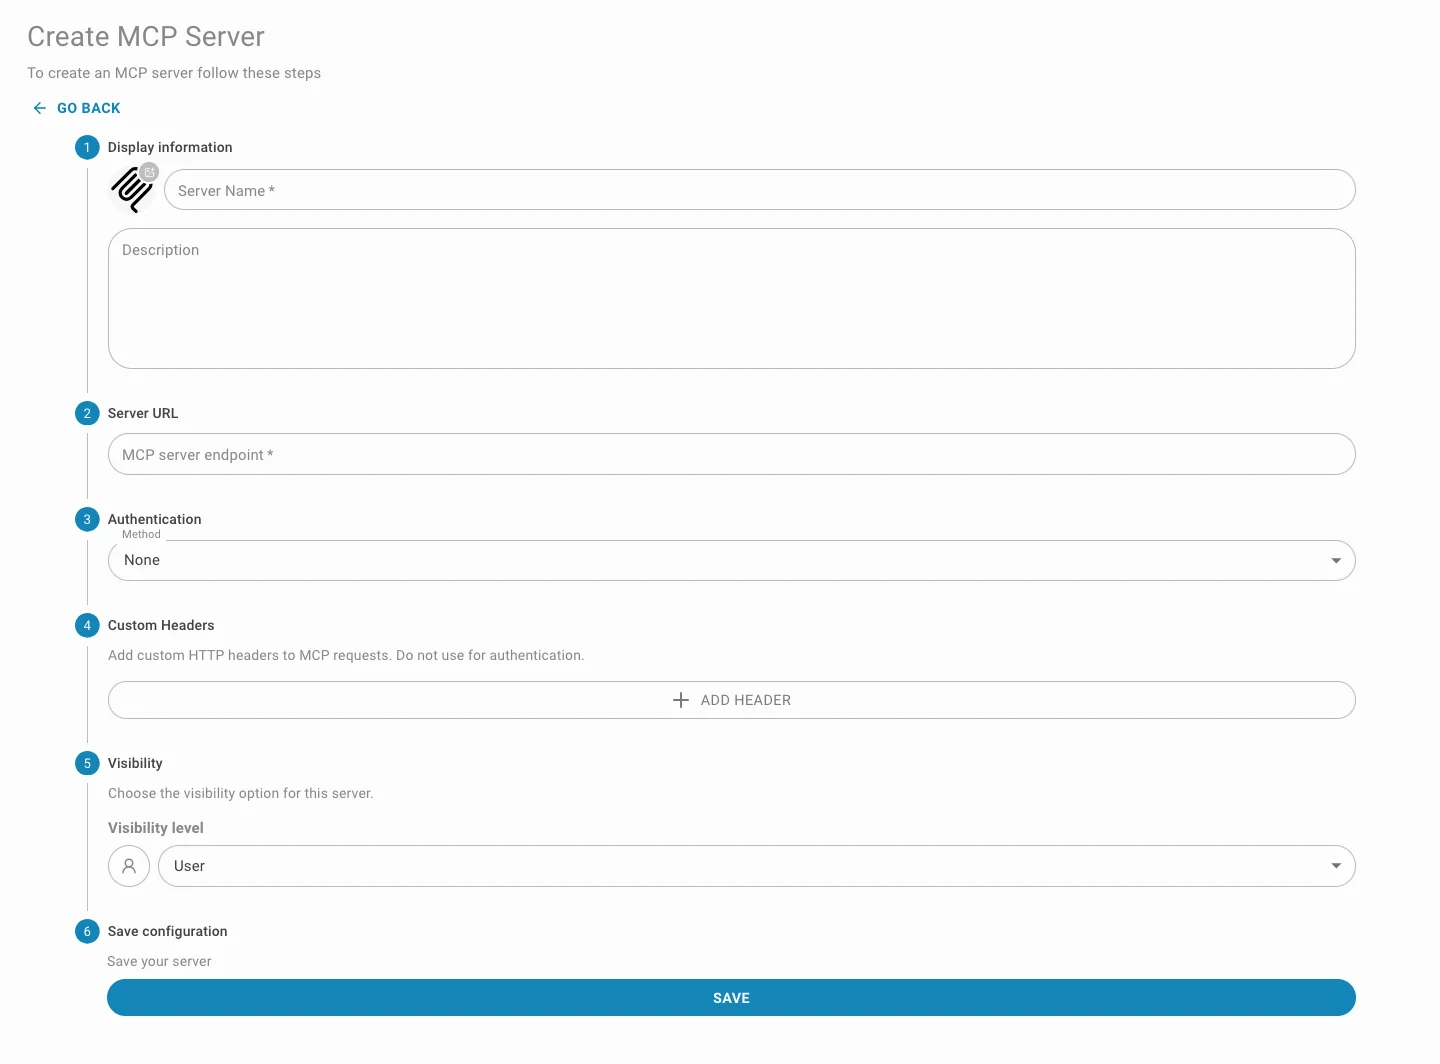
Adding Your Own MCP Server
- Click the Add MCP Server button
- Fill in the required information:
- Server name
- Server URL/endpoint
- Authentication details (if required)
- Other configuration parameters
- Click Save
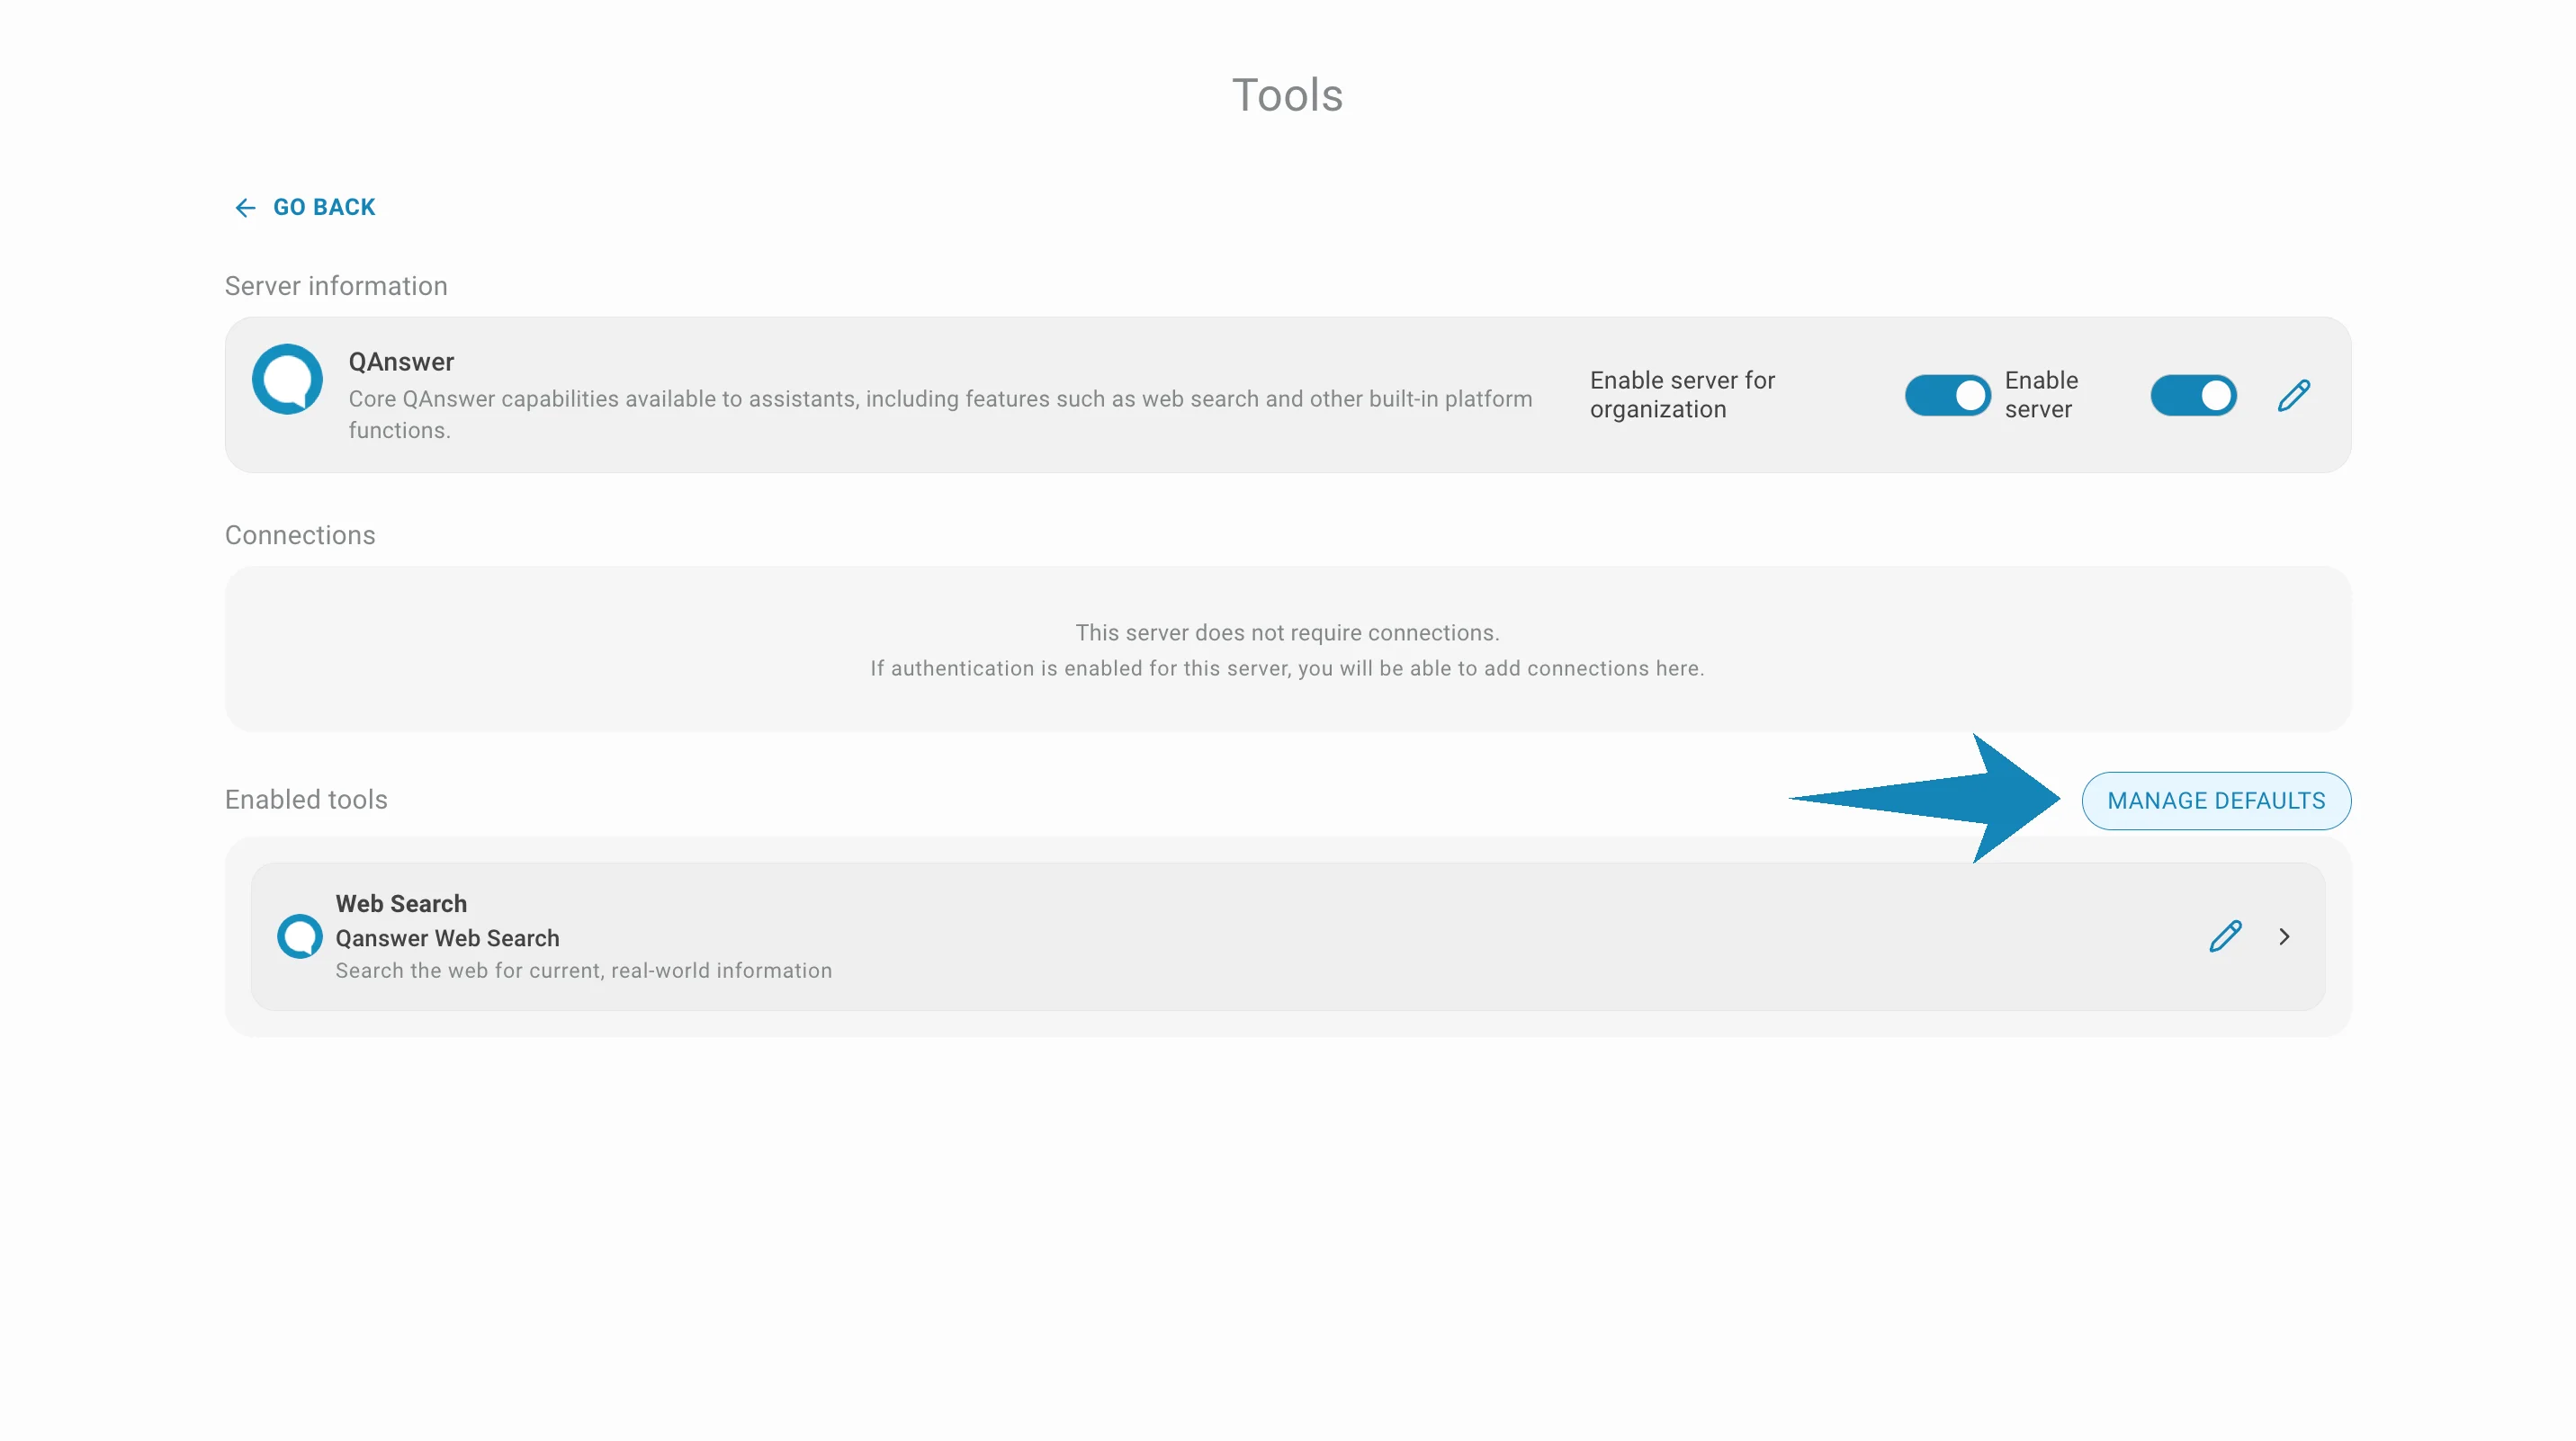
Configuring Your MCP Server
After adding a server:
Add a Connection
- Set up the connection credentials
- Provide any necessary API keys or authentication tokens
Test the Connection
- Use the built-in test feature to verify everything works
- Check for any connection errors
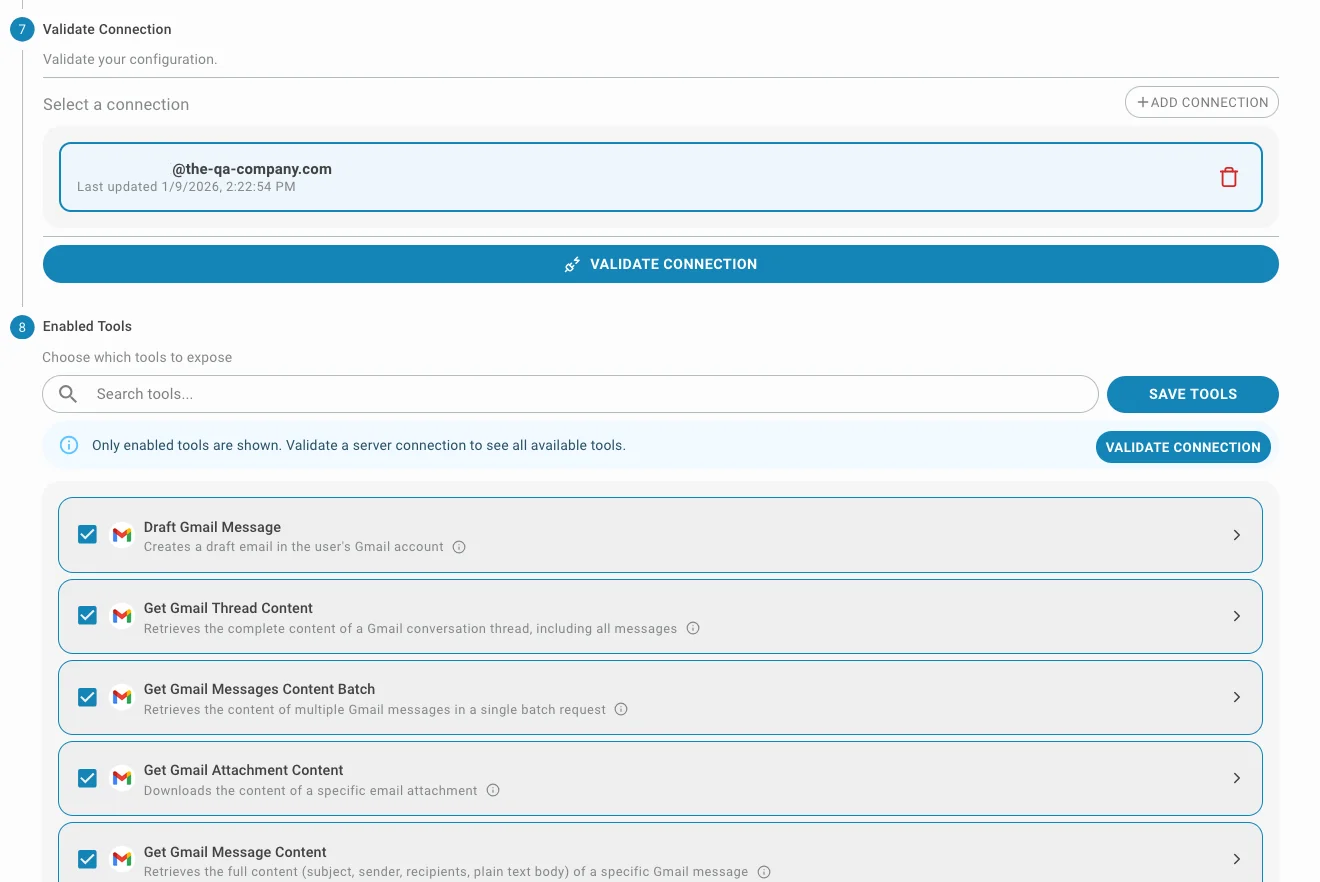
View Available Tools
- Browse all tools that this MCP server provides
- Read descriptions of what each tool does
Enable Tools
- Select which tools you want to make available in the app
- You can enable or disable tools individually
Return to Playground
- Return to the Playground or AI Assistant
- Select which enabled tools the AI should use
- The tools are now available in chat
Authentication & Custom Headers
When adding or editing an MCP server, the Authentication step controls how QAnswer authenticates against the server, and the Custom Headers step lets you attach extra HTTP headers — either shared by everyone or supplied individually by each user.
Authentication Methods
Pick an authentication method from the Method dropdown:
- None — No authentication is sent. Use this for open servers or when authentication is handled entirely through custom headers.
- API Key — Authenticate with an API key sent in an HTTP header. You choose how the key is presented (see below).
- OAuth 2.0 (Advanced) — Delegate authentication through an OAuth 2.0 flow for servers that support it.
Custom API Key Header
When the method is API Key, a Header Name selector lets you choose how the key is sent. The first three options are ready-made presets; the last lets you define your own:
- Bearer token — Sends the key as an Authorization: Bearer header.
- X Api key — Sends the key in the X-Api-Key header.
- X Litellm Api key — Sends the key in the x-litellm-api-key header, for LiteLLM-style gateways.
- Custom — Define an arbitrary header name and value format yourself.
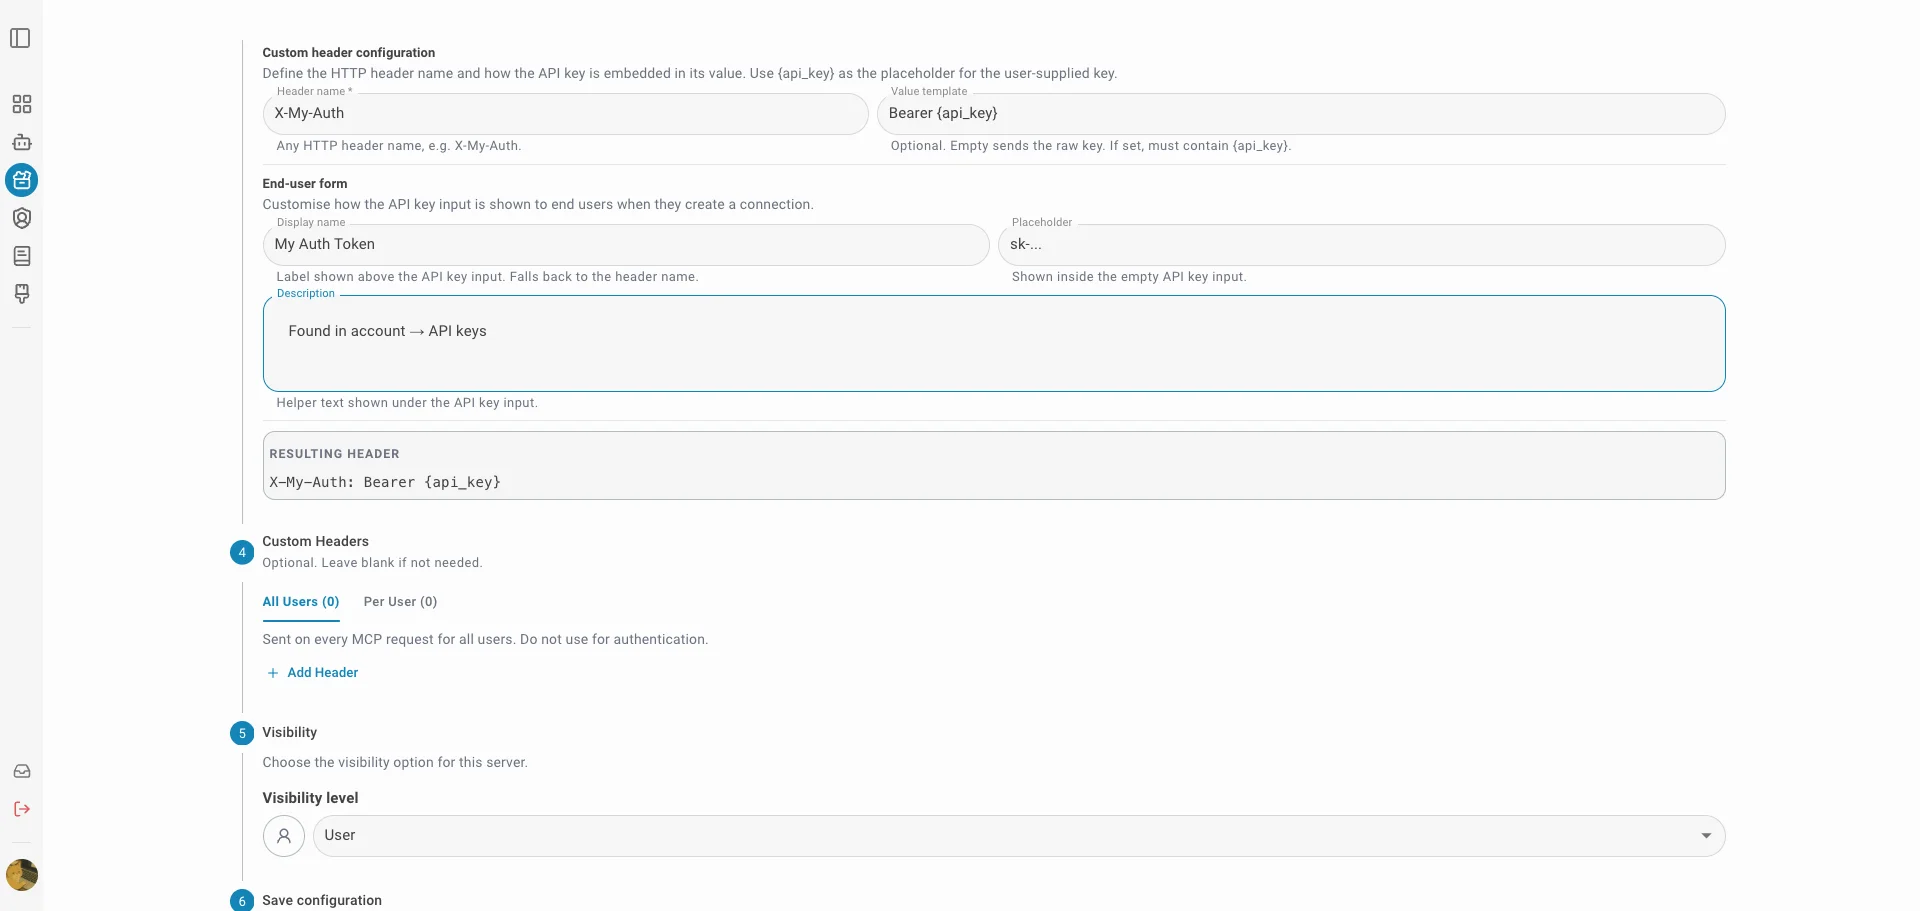
Choosing Custom reveals a Custom header configuration block where you describe exactly how the key should be sent:
- Header name — any HTTP header name, e.g. X-My-Auth.
- Value template — optional. Leave it empty to send the raw key, or define a format such as Bearer {api_key} where the placeholder is replaced by the user-supplied key.
End-user form
You can also customise how the API key input looks to end users when they create a connection:
- Display name — the label shown above the key input (falls back to the header name).
- Placeholder — the hint shown inside the empty input, e.g. sk-…
- Description — helper text shown under the input, e.g. where to find the key.
Custom Headers
The Custom Headers step lets you attach additional HTTP headers to every request. It has two tabs: All Users for shared static headers, and Per User for values each user fills in themselves.
All Users (shared headers)
Static name/value headers sent on every MCP request for all users. Use these for non-secret routing or versioning headers. Do not use them for authentication, since the same value is shared across everyone.
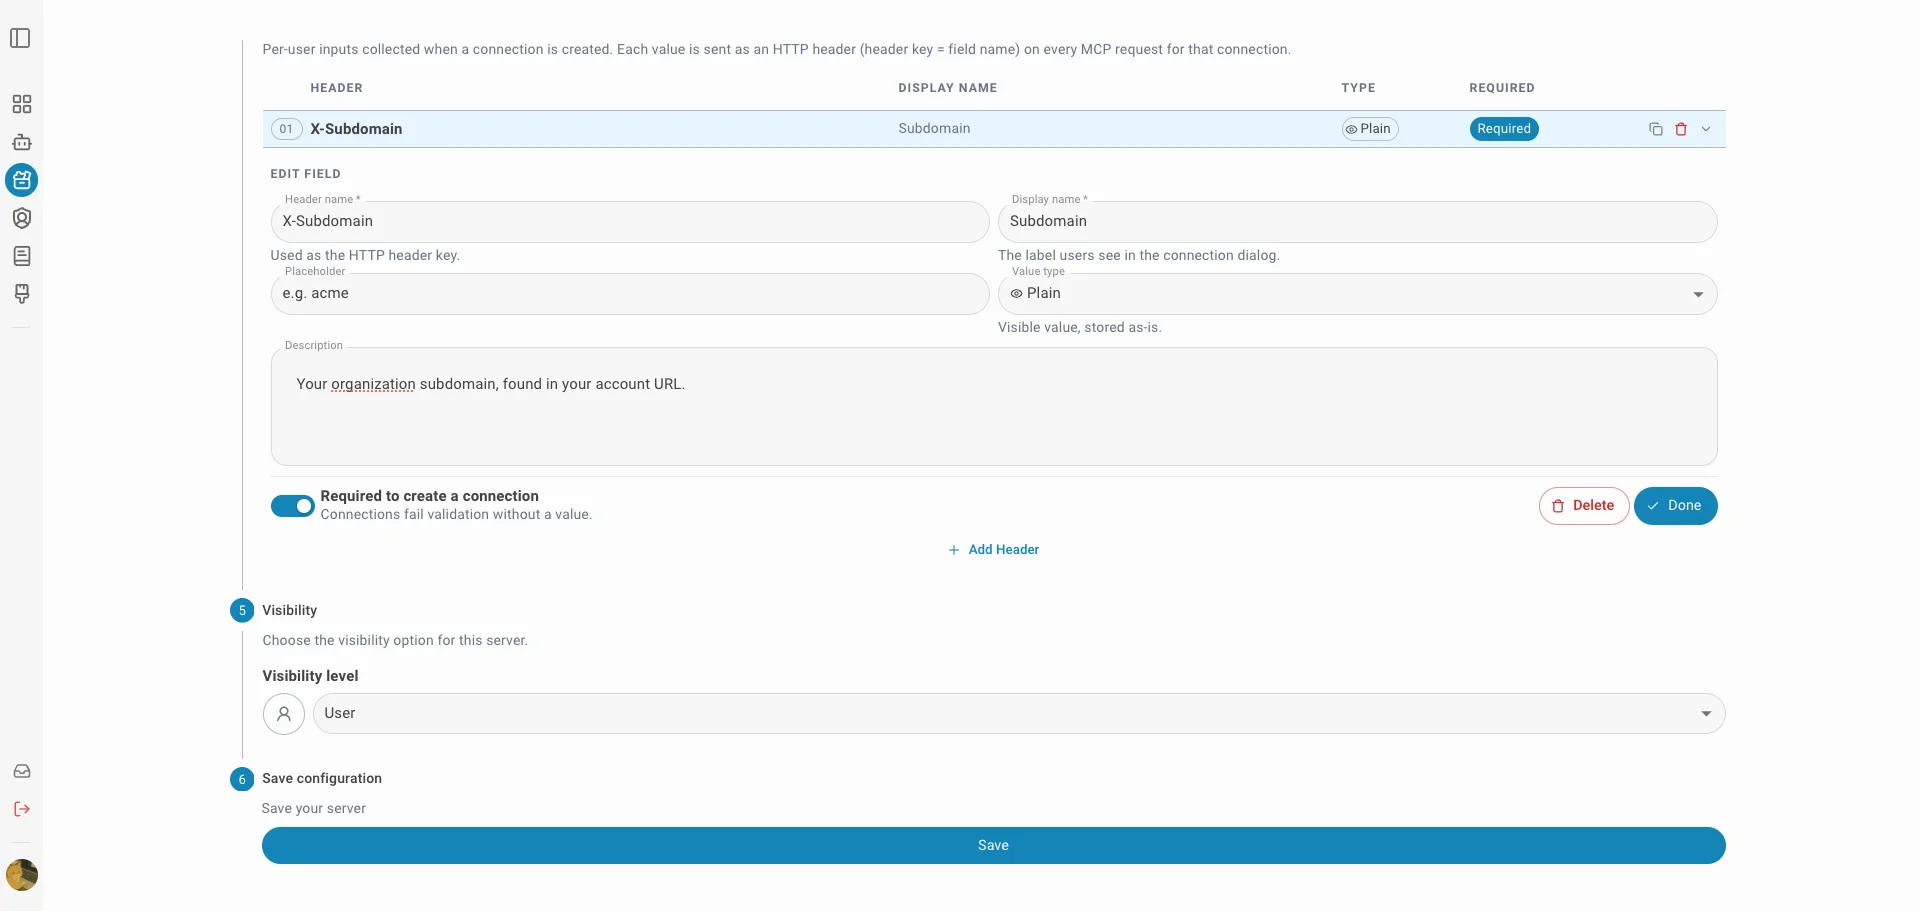
Per User (per-user custom headers)
Define fields that each user fills in when they create their own connection. Each field's value is sent as an HTTP header (the header key is the field name) on every MCP request made for that user's connection. Each field has:
- Header name — the HTTP header key sent on requests, e.g. X-Subdomain.
- Display name — the label the user sees in the connection dialog.
- Value type — how the value is stored and displayed:
- Plain — visible value, stored as-is.
- Secret — masked value, stored securely — use for tokens and other sensitive data.
- Required — when on, a connection cannot be created without a value.
- Placeholder & description — optional hint and helper text shown to the user.
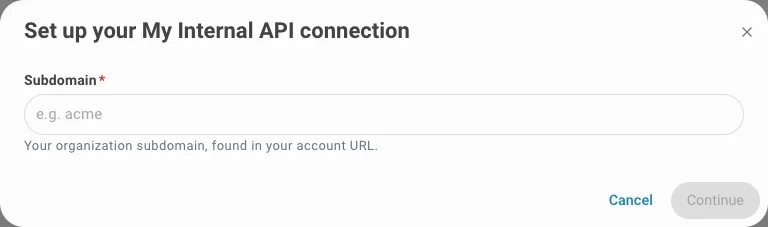
What end users see
When a user connects to the server, they are prompted to fill in the per-user fields you defined. Required fields must be completed before the connection can be created, and Secret fields are masked as they are typed.
Exploring Pre-configured MCP Servers
Browsing Available Servers
- Click any server on the Tools page to:
- Read detailed descriptions
- View the list of tools they offer
- Understand their capabilities
- See usage examples
Available Integrations
The following integrations are available as MCP servers:
- Atlassian (Jira & Confluence) — manage issues and pages directly from QAnswer
- GitLab — interact with repositories, issues, and merge requests
- Google Workspace — access Drive, Calendar, Gmail, and more
Permission Levels
Actions available by role:
Regular Users
- Modify your own MCP servers
- Update configurations and settings
- Manage connections
- Enable/disable tools for personal use
- Add personal MCP server connections
- Use enabled tools in the Playground and AI Assistants
Organization Admin
- Enable or disable any MCP server for your organization
- Manage which tools your team can access
Admin (Platform)
- Enable or disable any MCP server platform-wide
- Full access to all server configurations
Setting Confirmation Defaults
You can define a default ask-for-confirmation behaviour per MCP tool. When a default is set, the tool always uses that behaviour without requiring per-session configuration.
Best Practices
- Start with Confirmation Mode
- Enable "Ask for confirmation" when testing new tools for the first time
- Review parameters before execution
- Disable confirmation mode once the tool behaves as expected
- Test Connections
- Always test connections after adding a new MCP server
- Verify tools are working before relying on them
- Enable Only What You Need
- Avoid enabling all tools at once
- Keep the Actions menu focused on relevant tools
- Fewer active tools improves AI performance and reduces ambiguity
- Read Tool Descriptions
- Understand what each tool does before enabling
- Check required parameters
- Note any limitations or requirements
Troubleshooting
Tool Not Working?
- Verify the connection is active
- Test the connection from the Tools page
- Check if the tool is enabled
- Ensure you have proper permissions
Can't See a Tool?
- Check if the MCP server is enabled for your organization
- Verify the tool is enabled in the server settings
- Confirm you've selected it in the Actions dialogue
Connection Issues?
- Re-test the connection
- Verify credentials and API keys
- Check server status
- Contact your organization admin