
AI Spreadsheet
The AI Spreadsheet task puts a spreadsheet in front of your assistant. You write prompts directly in cells with the =AI() formula, and each cell is filled by the assistant — over your own data, with citations, exactly as in the chat.
Open the spreadsheet
- Open the assistant editor and, on the General tab, select the AI Spreadsheet tile under Task Type.
- Add your data on the Add data tab, if the assistant has none yet.
- Click Use to open the assistant's page, whose first tab is the spreadsheet.
Interface overview
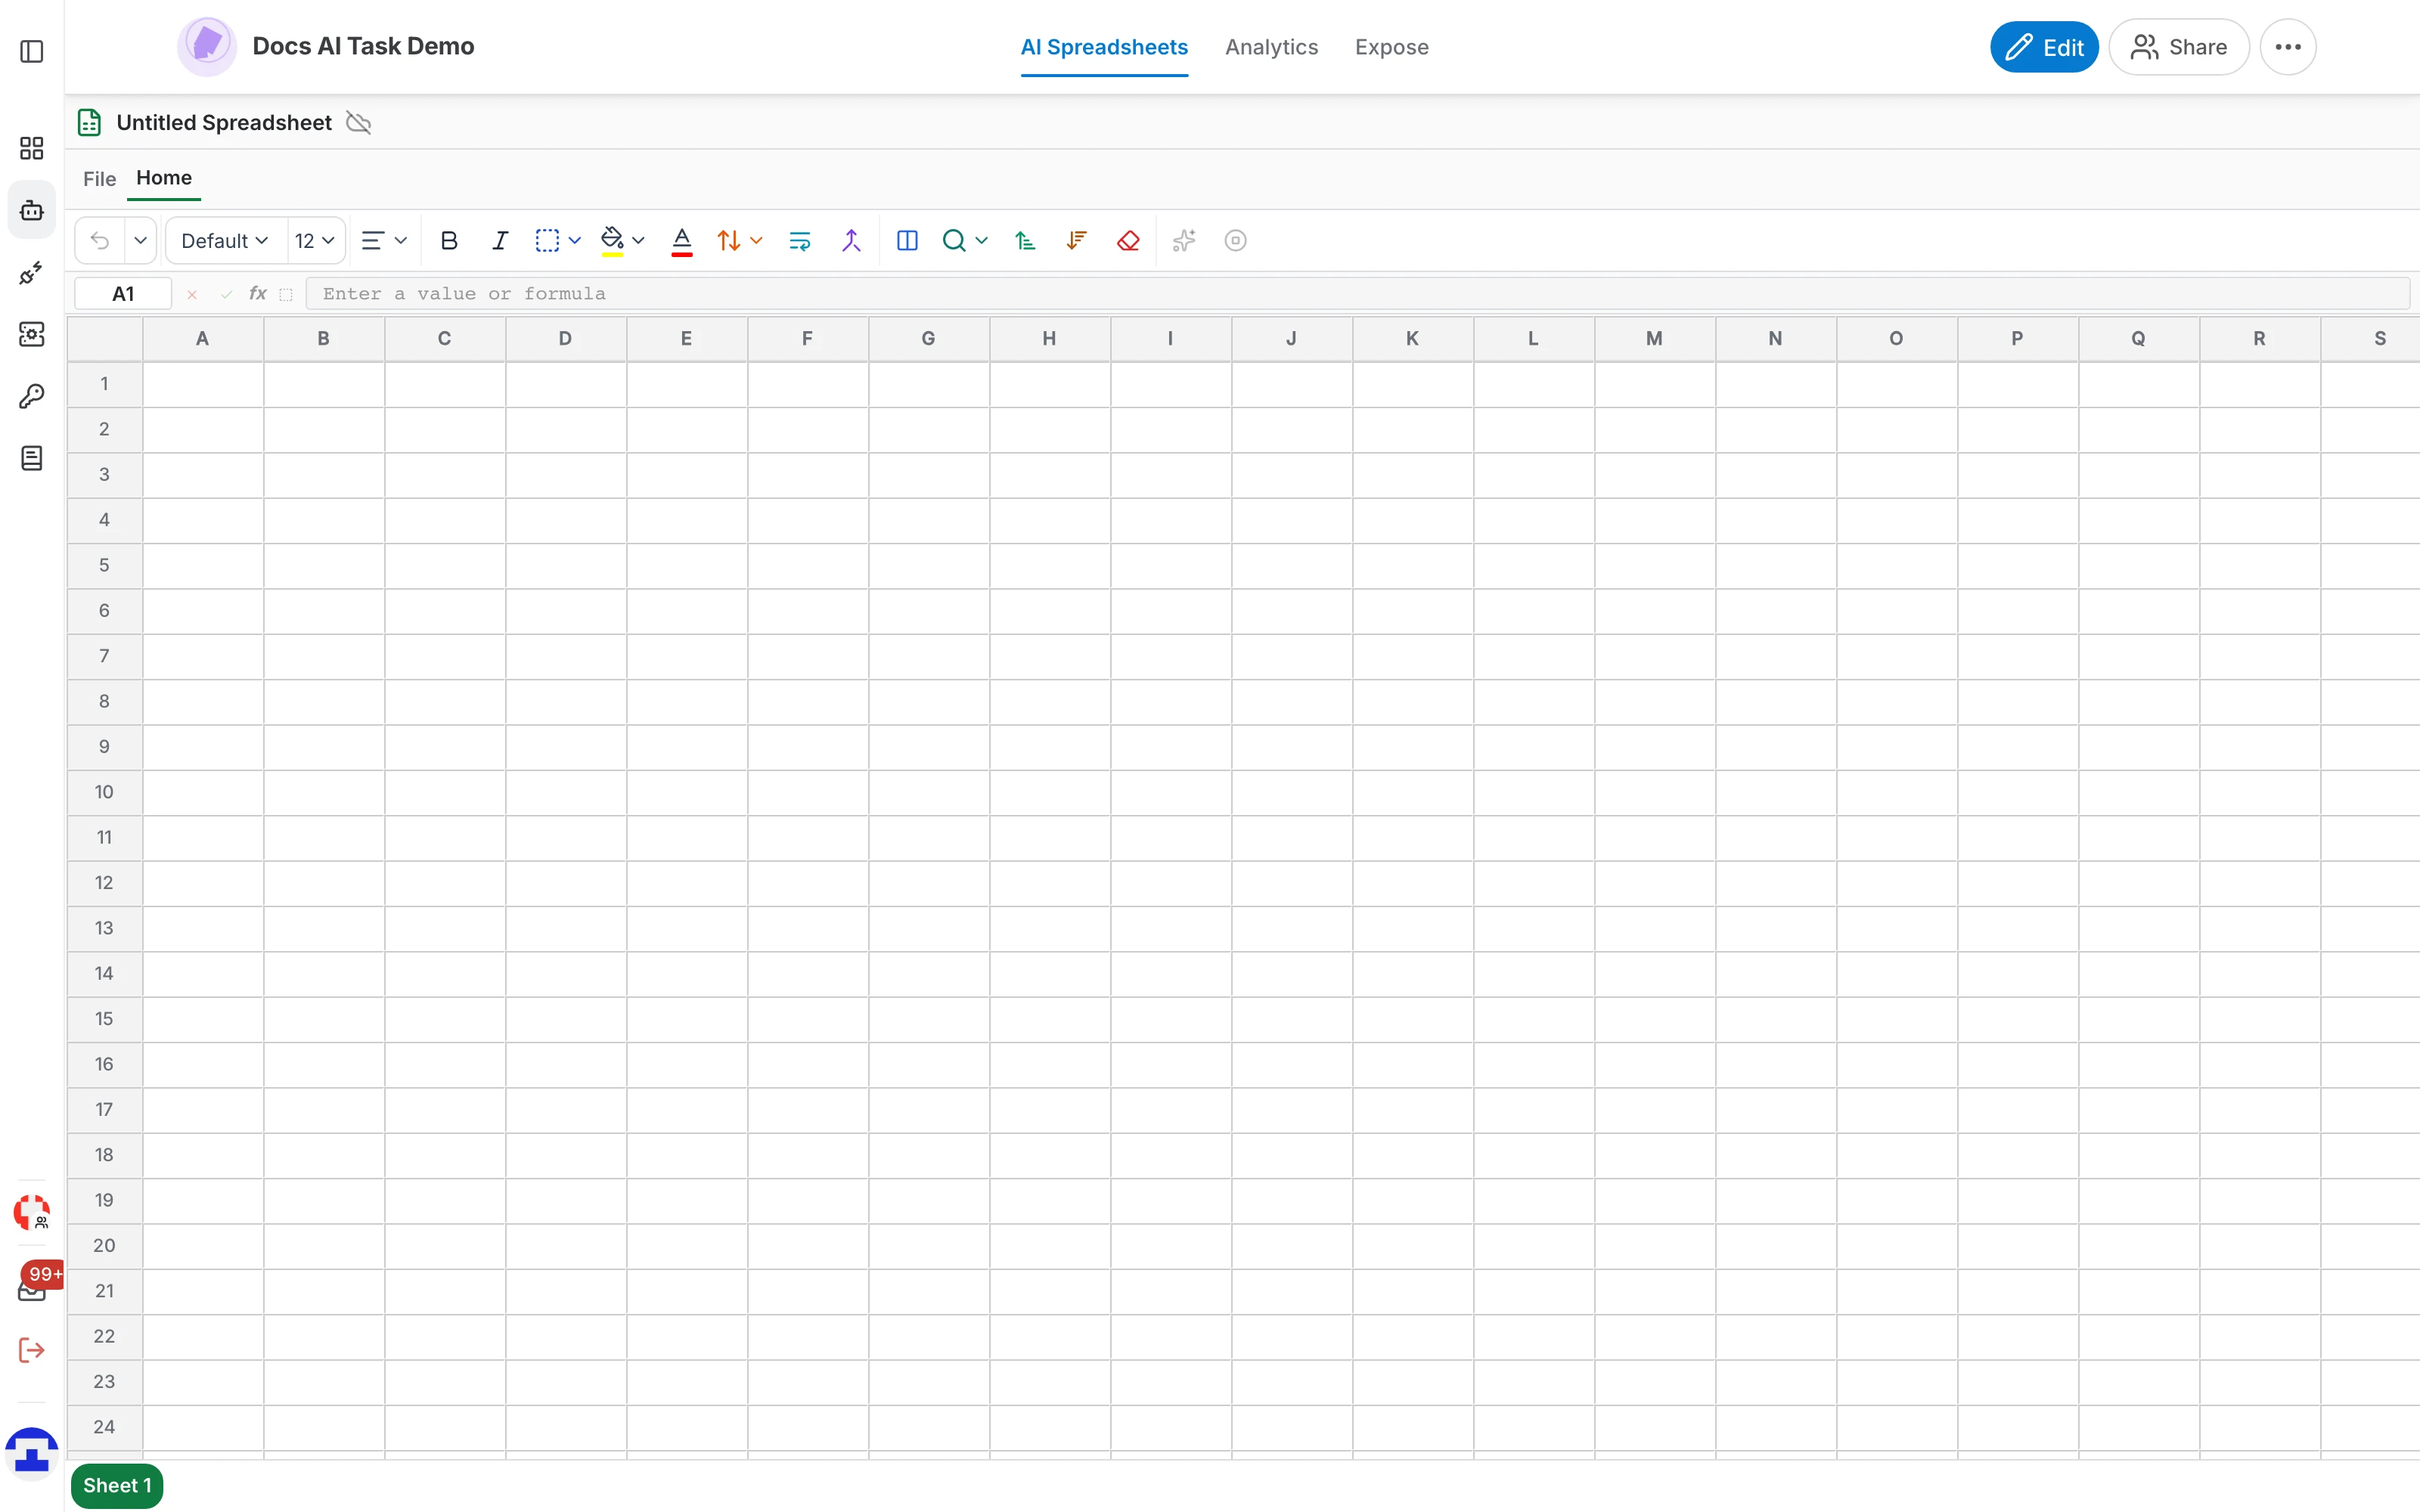
The spreadsheet is built from six areas, top to bottom:
- Title bar — the name of the spreadsheet ("Untitled Spreadsheet" until you save it) with its save state next to it: all changes saved, saving, or unsaved changes. Click the name to rename it.
- Ribbon — the File, Home, Insert and Settings tabs. File is a menu; the others switch the toolbar below.
- Toolbar — formatting, cell operations, find and replace, sorting, and the AI controls.
- Formula bar — the active cell's reference and its raw value or formula.
- Grid — the editing area where you type data and AI formulas.
- Sheet tabs — the sheets of this spreadsheet. Double-click a tab to rename it, and use Add sheet for a new one.
The File menu
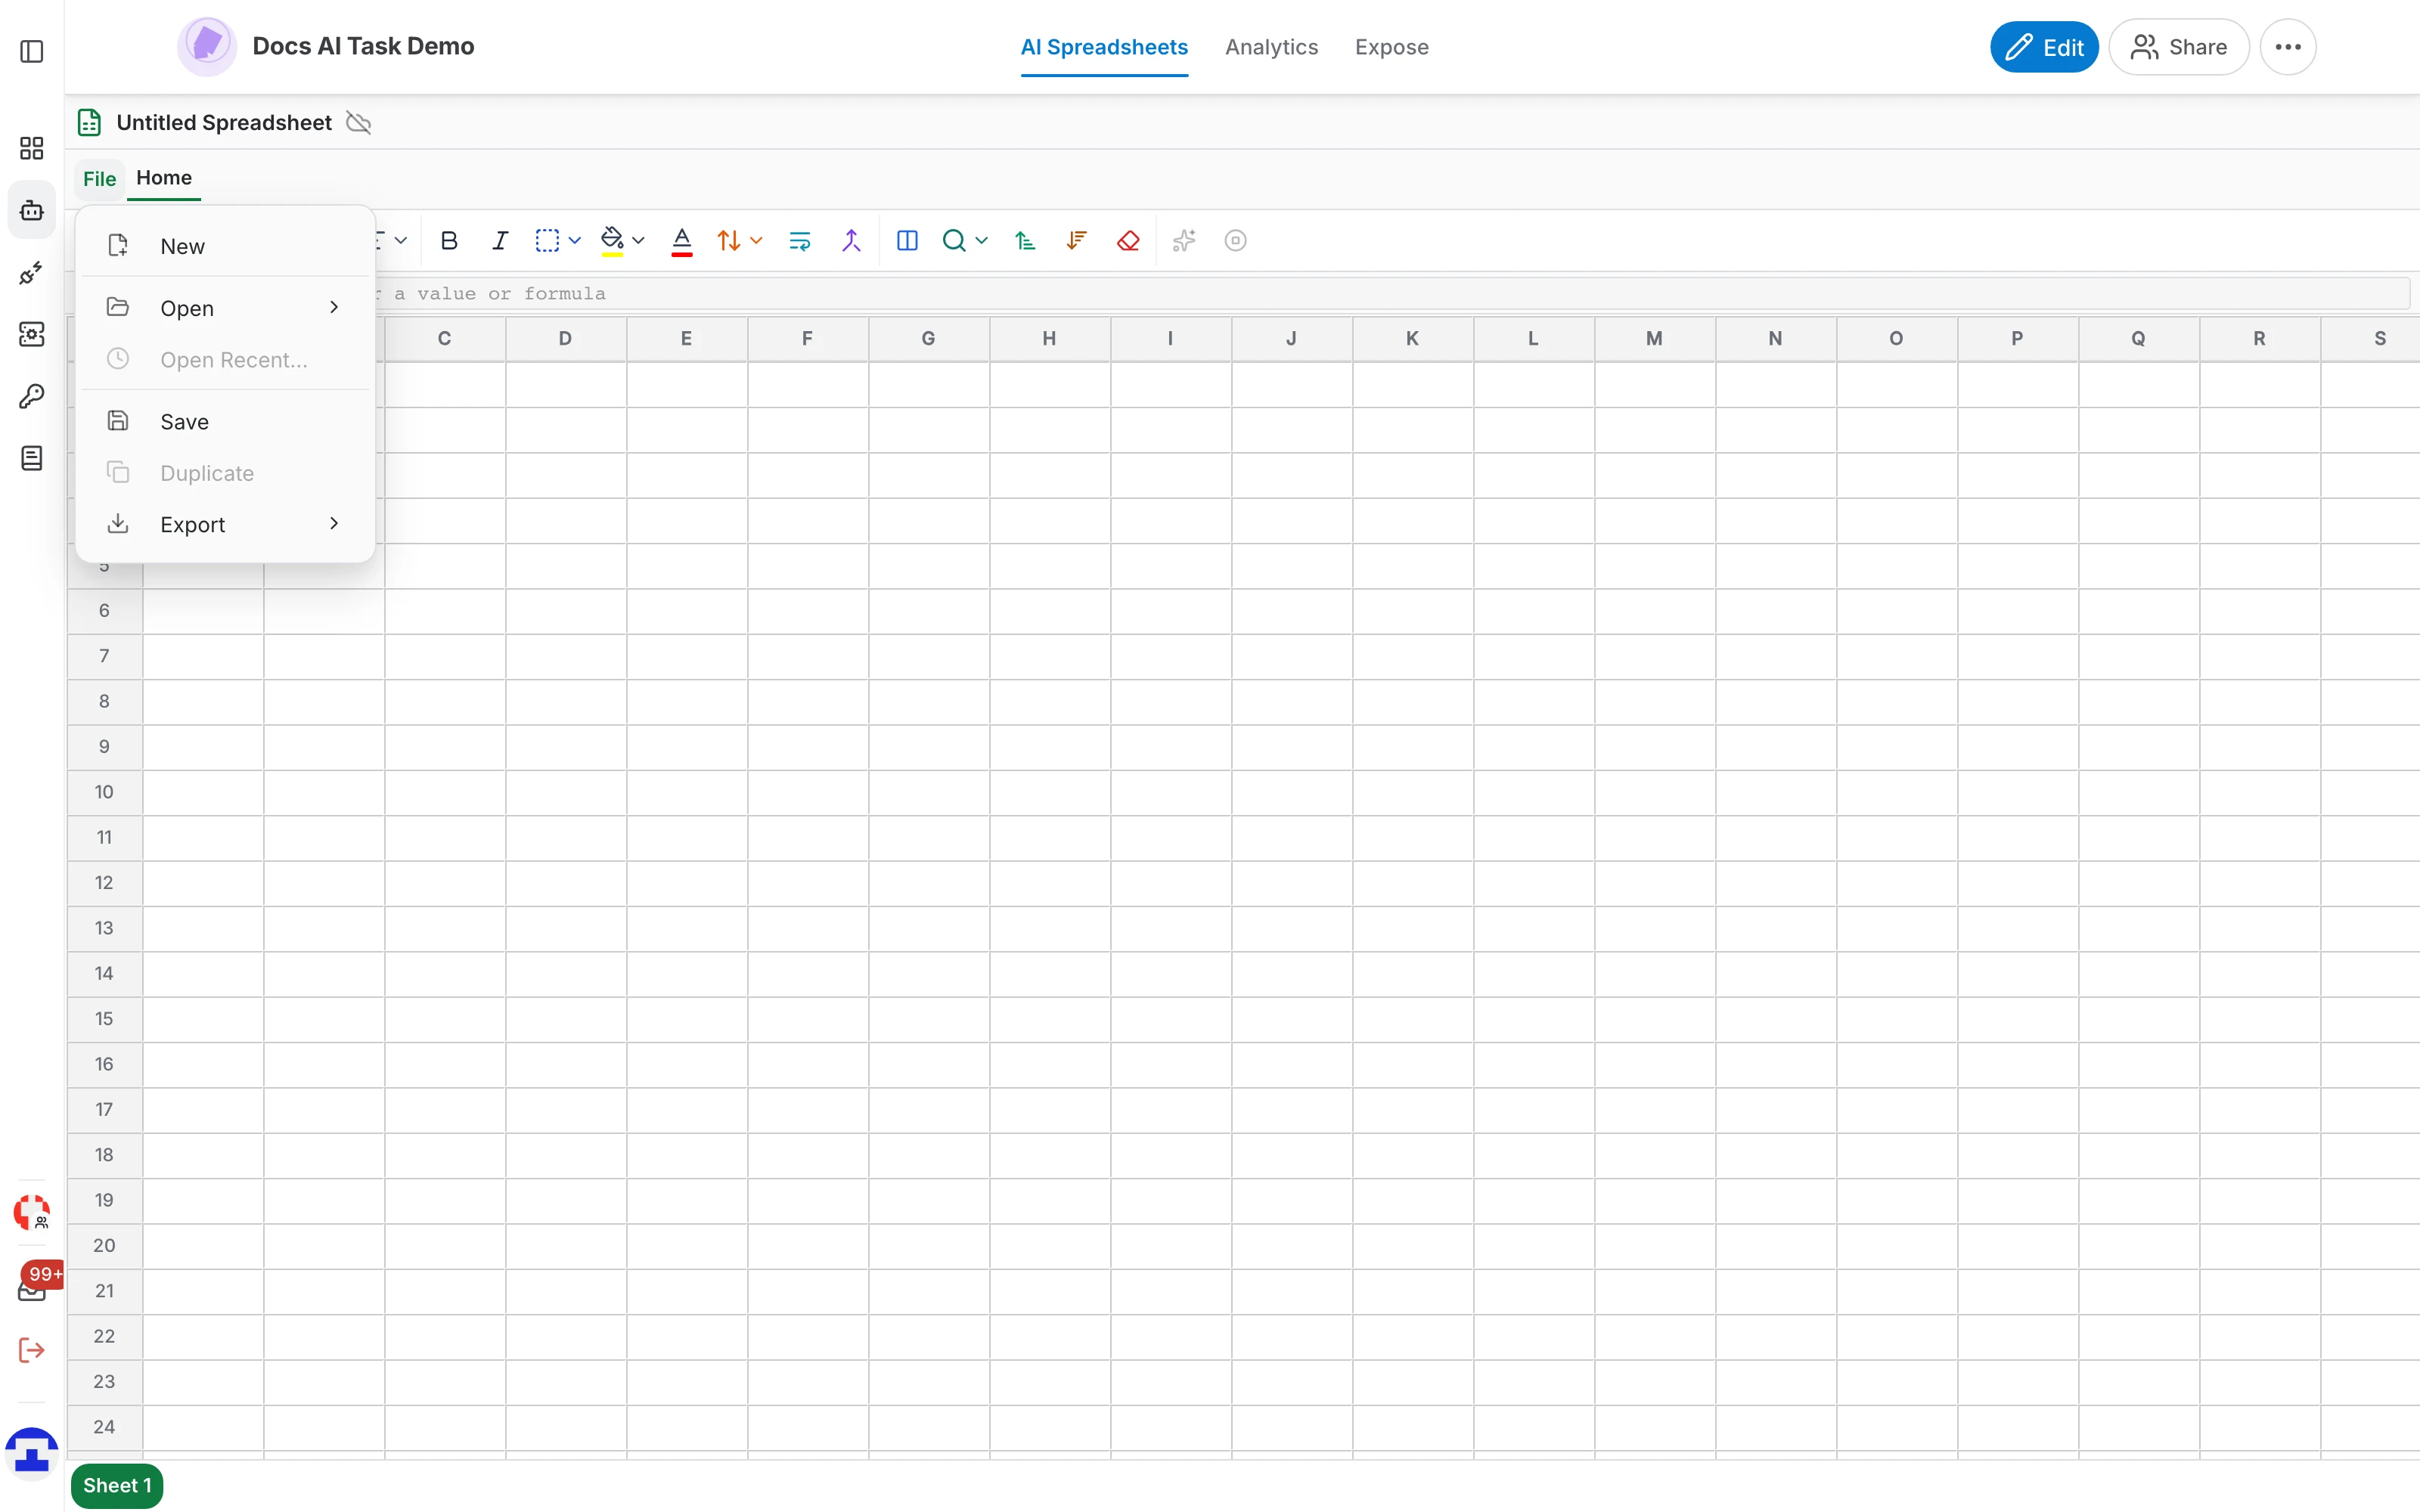
File holds everything about the document as a whole:
- New — reset the spreadsheet to a blank one.
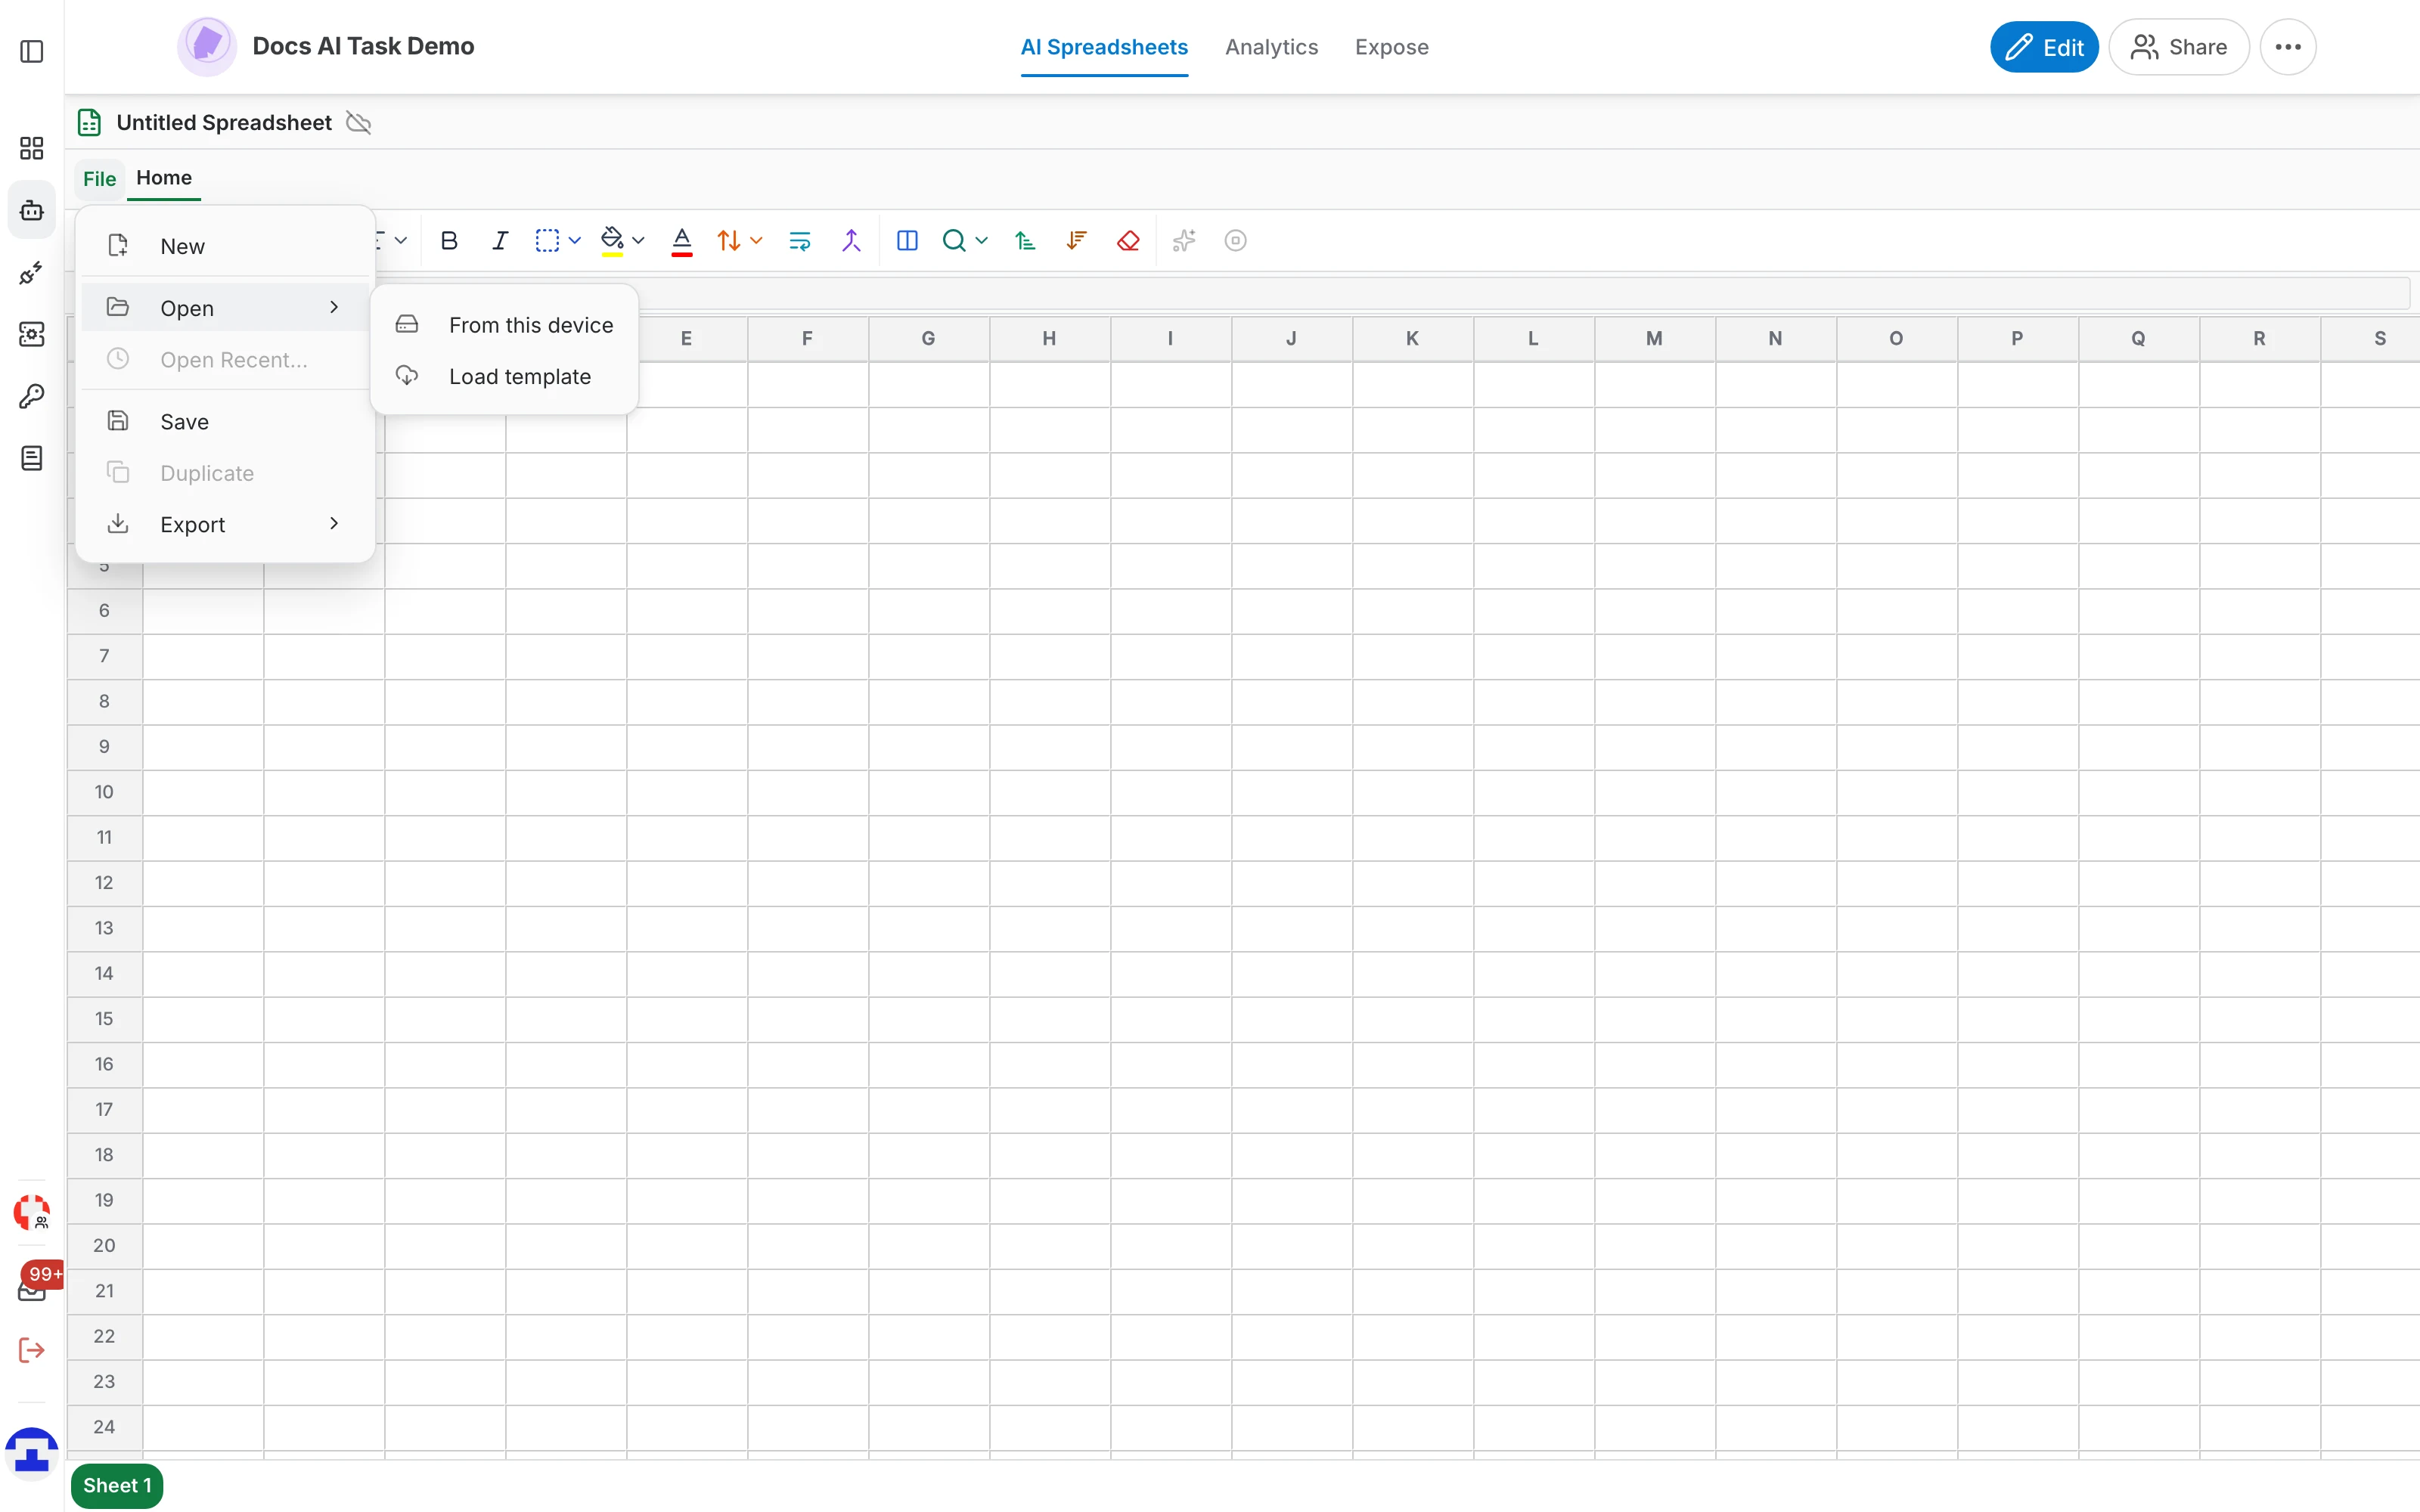
- Open — either From this device, to import a file from your computer, or Load template, to open a spreadsheet saved on the server.
- Open Recent… — jump back to a spreadsheet you used lately. It stays greyed out until you have opened one.
- Save — store the spreadsheet on the server, under the name in the title bar.
- Duplicate — copy the saved spreadsheet into a new one. It only works once the spreadsheet has been saved at least once.
- Export — download the spreadsheet as CSV, XLSX or PDF.
The toolbar
The Home toolbar groups, from left to right:
- History — undo and redo.
- Formatting — font family and size, bold, italic, strikethrough, font and fill colour, horizontal and vertical alignment, text wrapping, borders, and clear formatting.
- Cell operations — merge and unmerge cells, and freeze columns so the first ones stay visible while you scroll.
- Find, filter and sort — find and replace text, filter rows, and sort a column from A to Z or Z to A.
- AI context (the sparkle) — toggle the context slots of the selected cell. It is only enabled while the active cell holds an AI formula, since there is nothing to inject otherwise.
- Generation progress — a bar showing how many cells are done, generating or queued, with a button that stops all AI generation at once.
The formula bar
- Cell reference — shows the active cell, for example A1. Type a reference and press Enter to jump there.
- Value / formula input — the raw content of the cell. This is where you see the =AI() call behind a generated answer, and where you can edit it.
- Insert selected range — drop the range you have selected in the grid into the formula you are typing, instead of typing the references by hand.
AI formulas
The =AI() formula is what makes this a spreadsheet with an assistant behind it: the prompt goes to the language model with your data as context, and the answer lands in the cell.
Basic syntax
Type an AI formula in any cell:
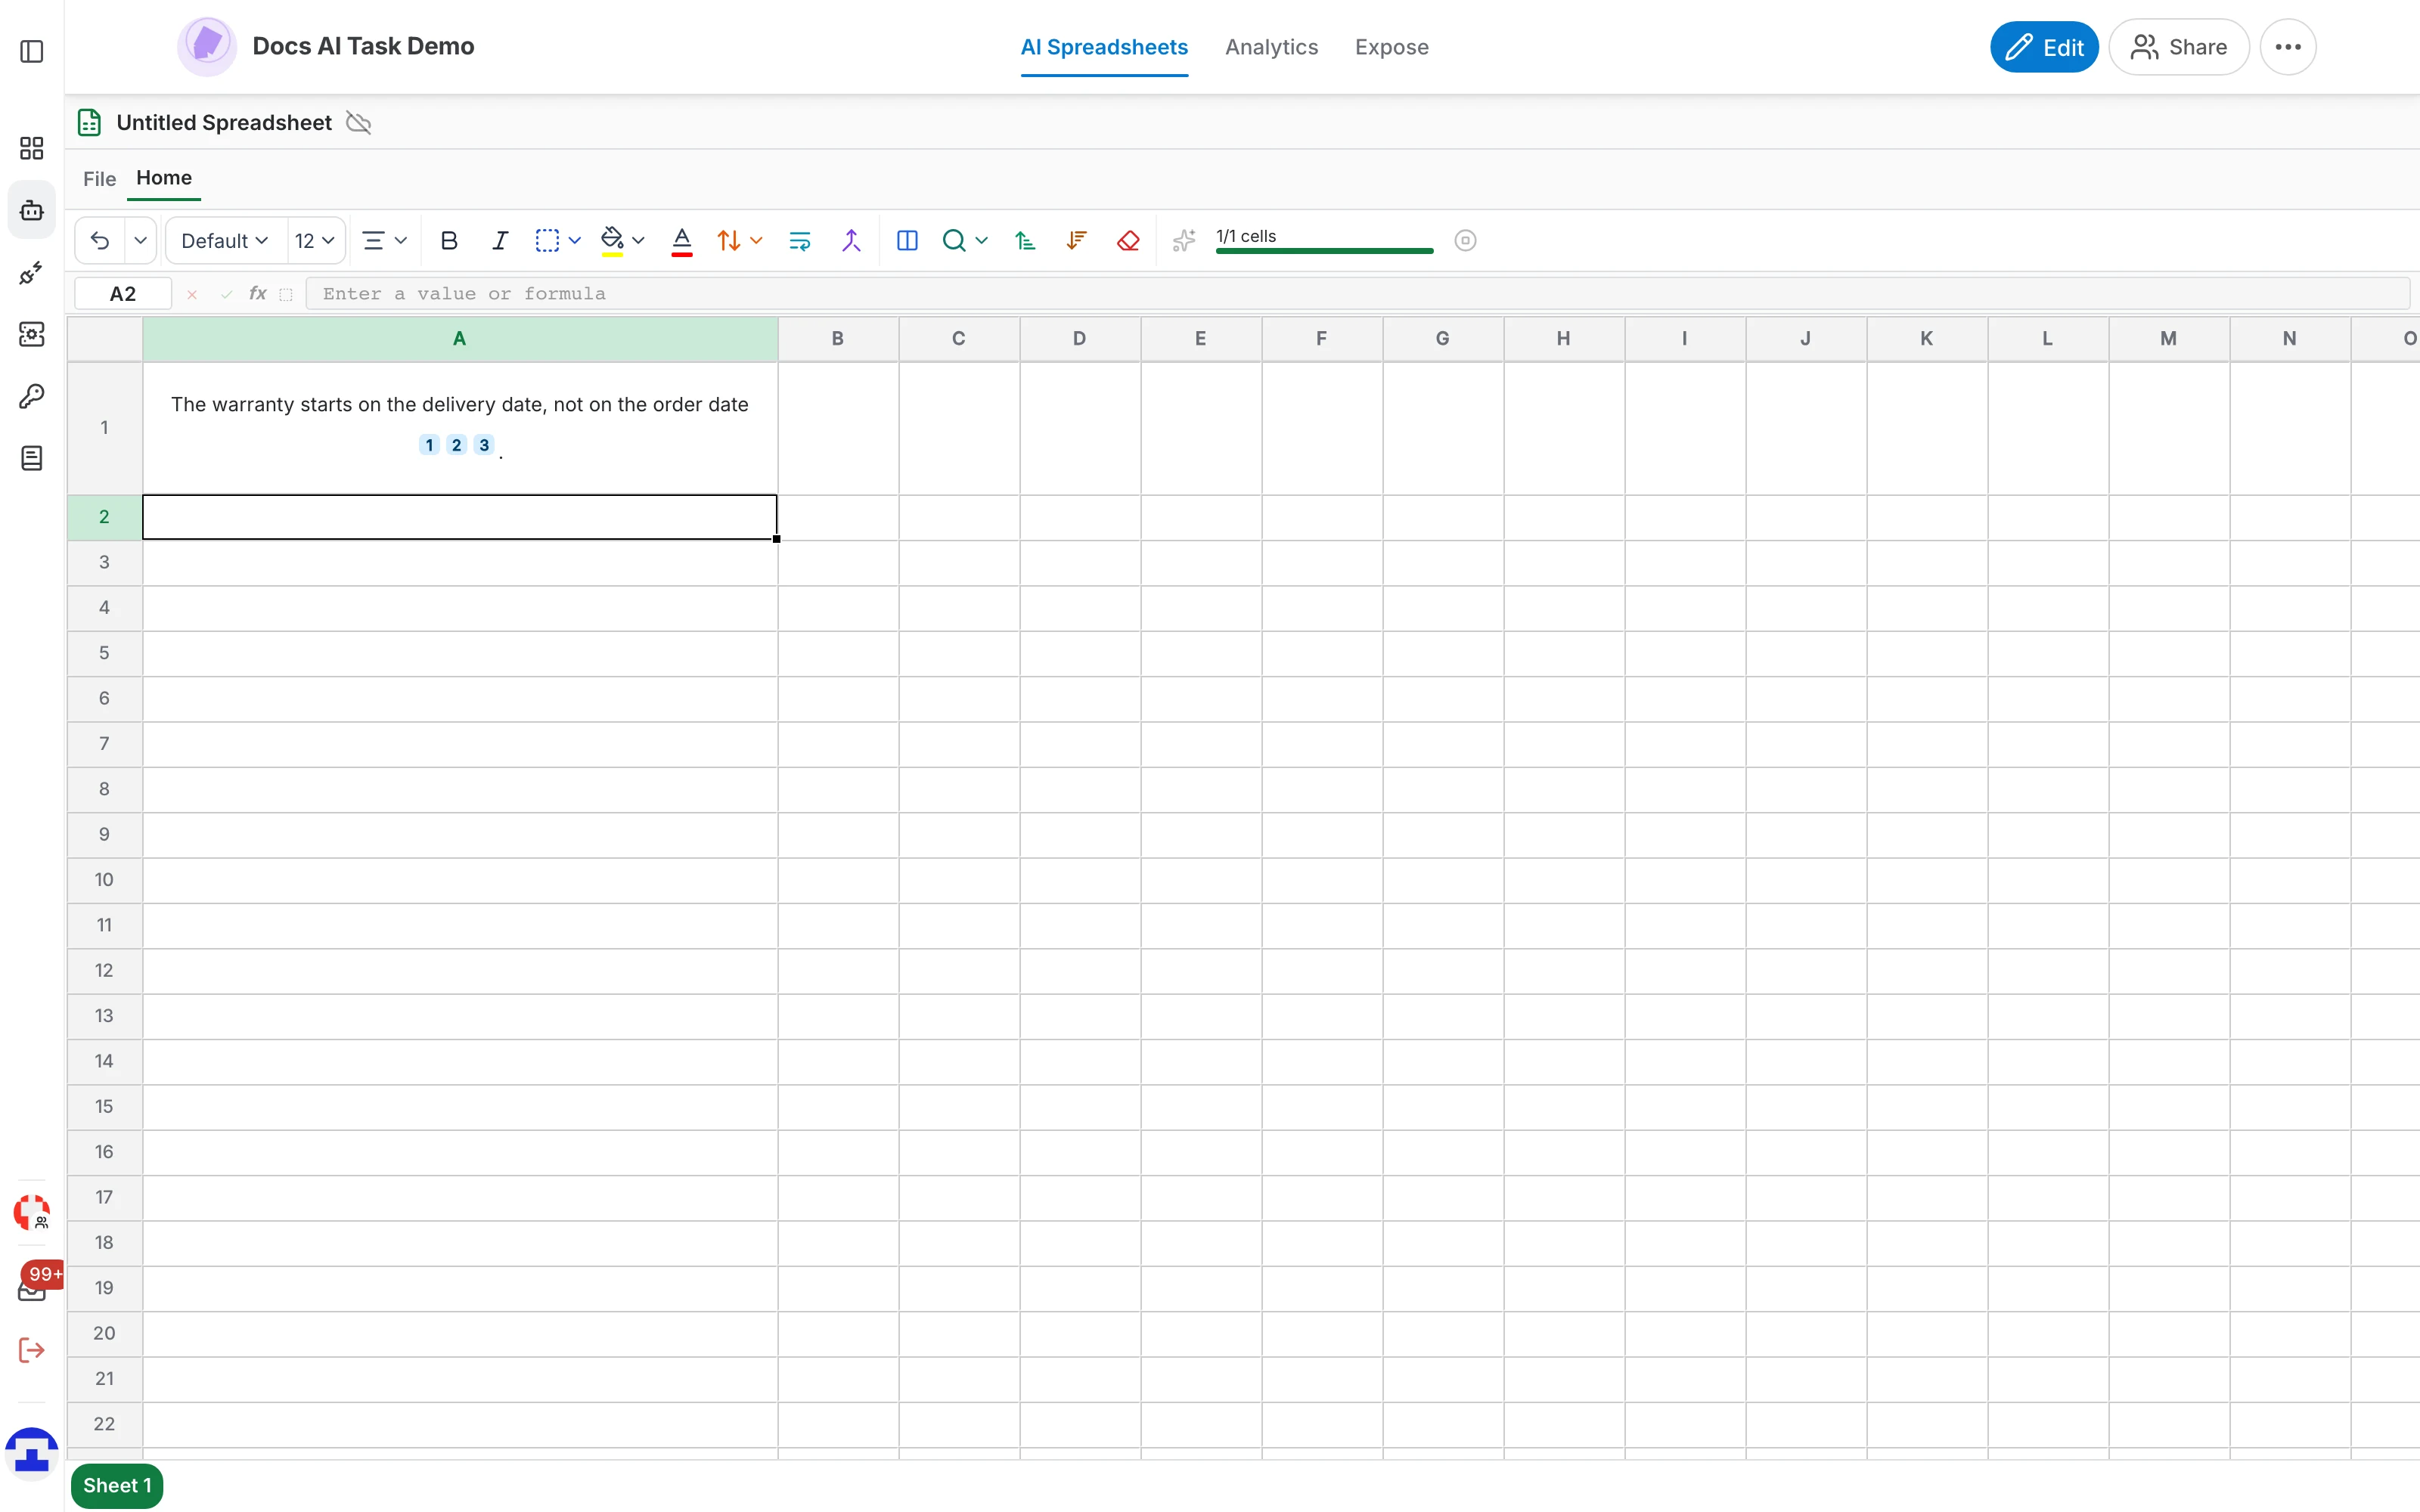
=AI("your prompt")For example, over a support handbook:
=AI("In one short sentence, when does the warranty start?")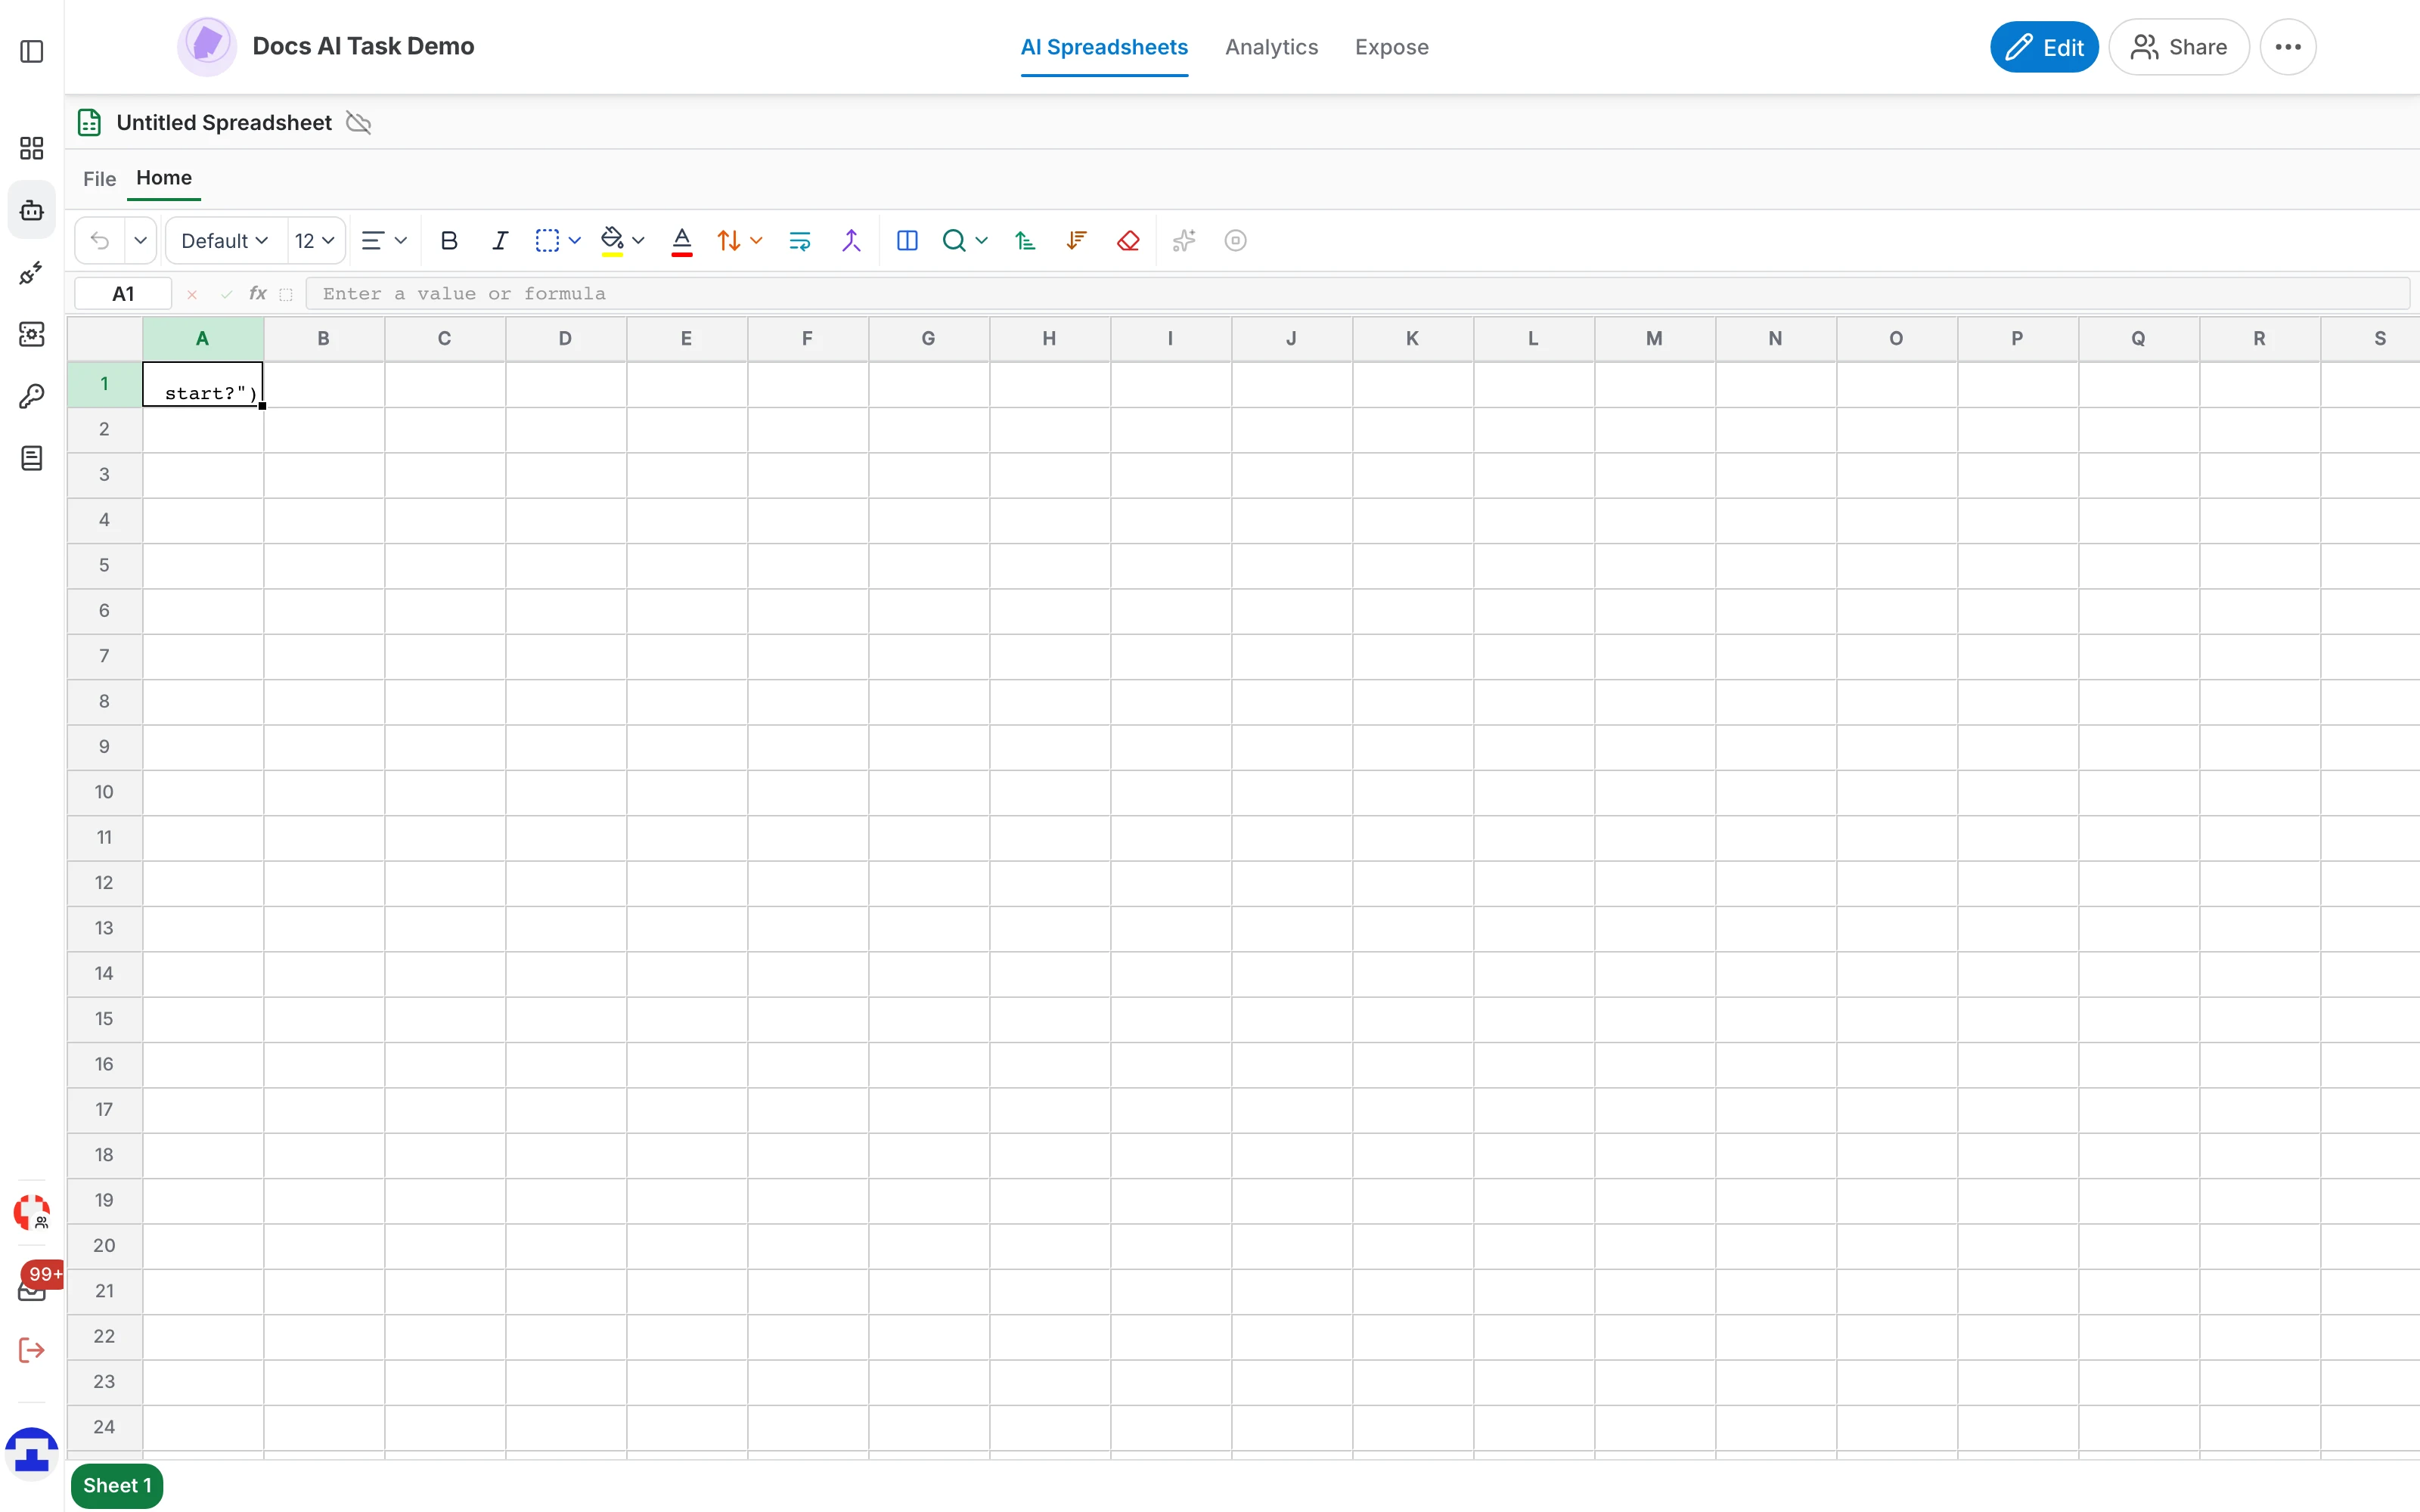
Referencing other cells
Pass cell values as extra context by listing them after the prompt:
=AI("Summarize this product", A2)
=AI("Compare these two products", A2, B2)
Or embed a reference inside the prompt itself with double braces, which puts the value exactly where you want it:
=AI("Write a short description of {{A2}} for the {{B2}} market")Context slots
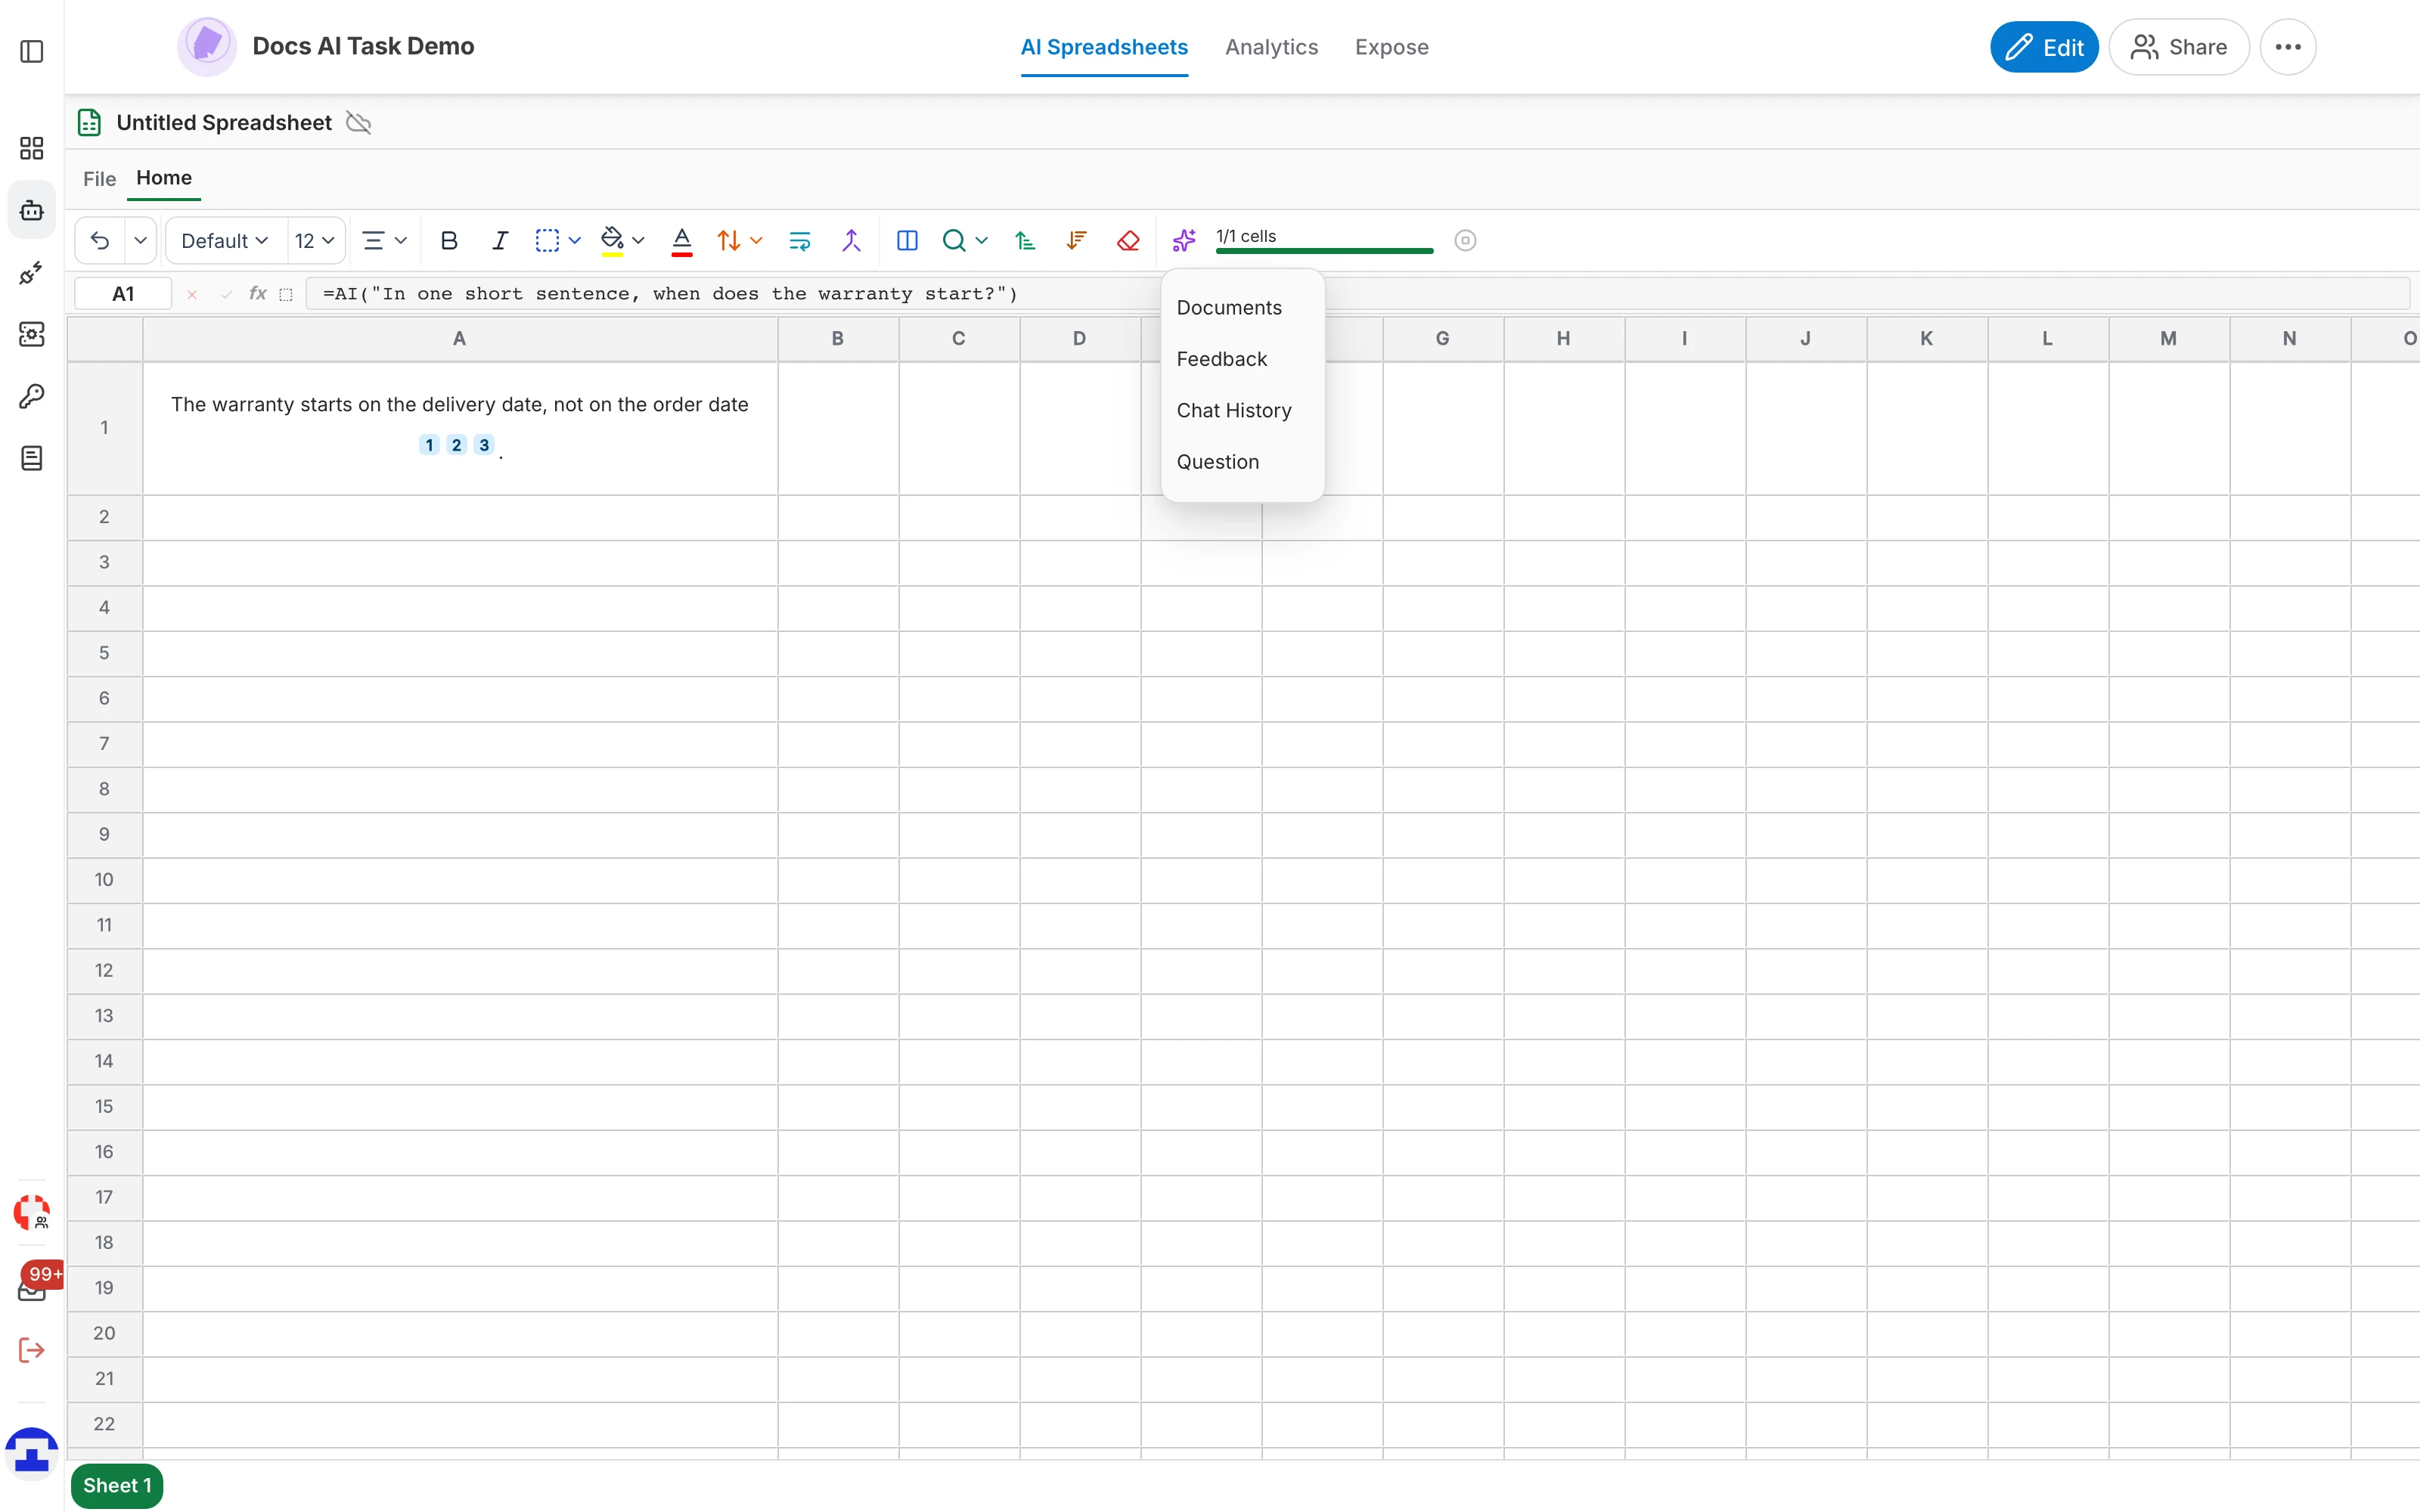
Context slots inject the assistant's own knowledge into the prompt, so a formula can use the same material the chat would:
{{documents}}— the relevant documents retrieved for the prompt.{{feedback}}— answer examples and feedback data.{{chat_history}}— the conversation history.{{question}}— the original user question.
Select a cell holding an AI formula and click the sparkle in the toolbar to switch slots on and off. A check marks an active slot, and the slot is added to or removed from the prompt for you.
How evaluation works
- The cell shows a generating state while the model works on the prompt.
- When the response arrives, the cell is replaced by the generated result, with its citations.
- Results are cached: if you edit a formula back to a prompt that has already run, the cached result comes back instantly instead of costing another call.
Cell settings
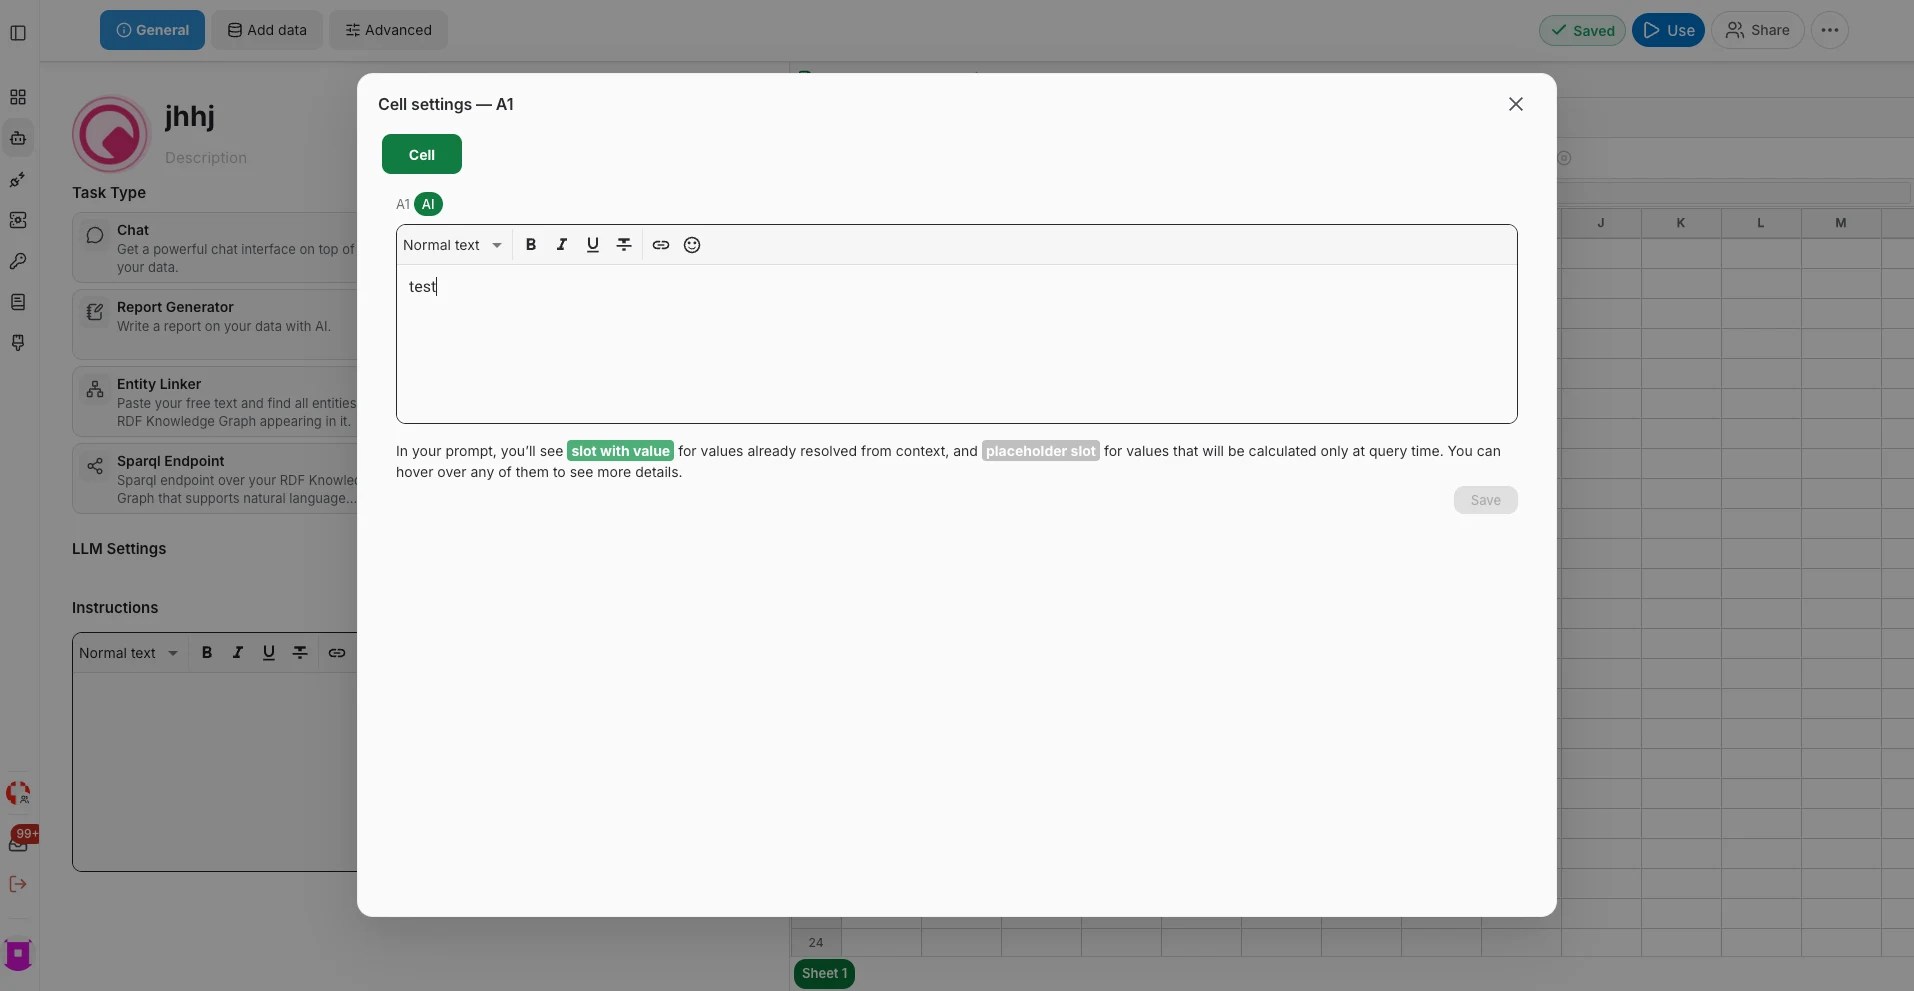
Right-click an AI cell and choose Advanced to open its settings dialog, titled after the cell itself — Cell settings — A1. It shows the cell's prompt in a rich-text editor and marks the slots inside it: a filled label for a value already resolved from context, a plain one for a placeholder that will only be computed at query time. Hover a label to see what it will become, edit the prompt, then Save.
The context menu
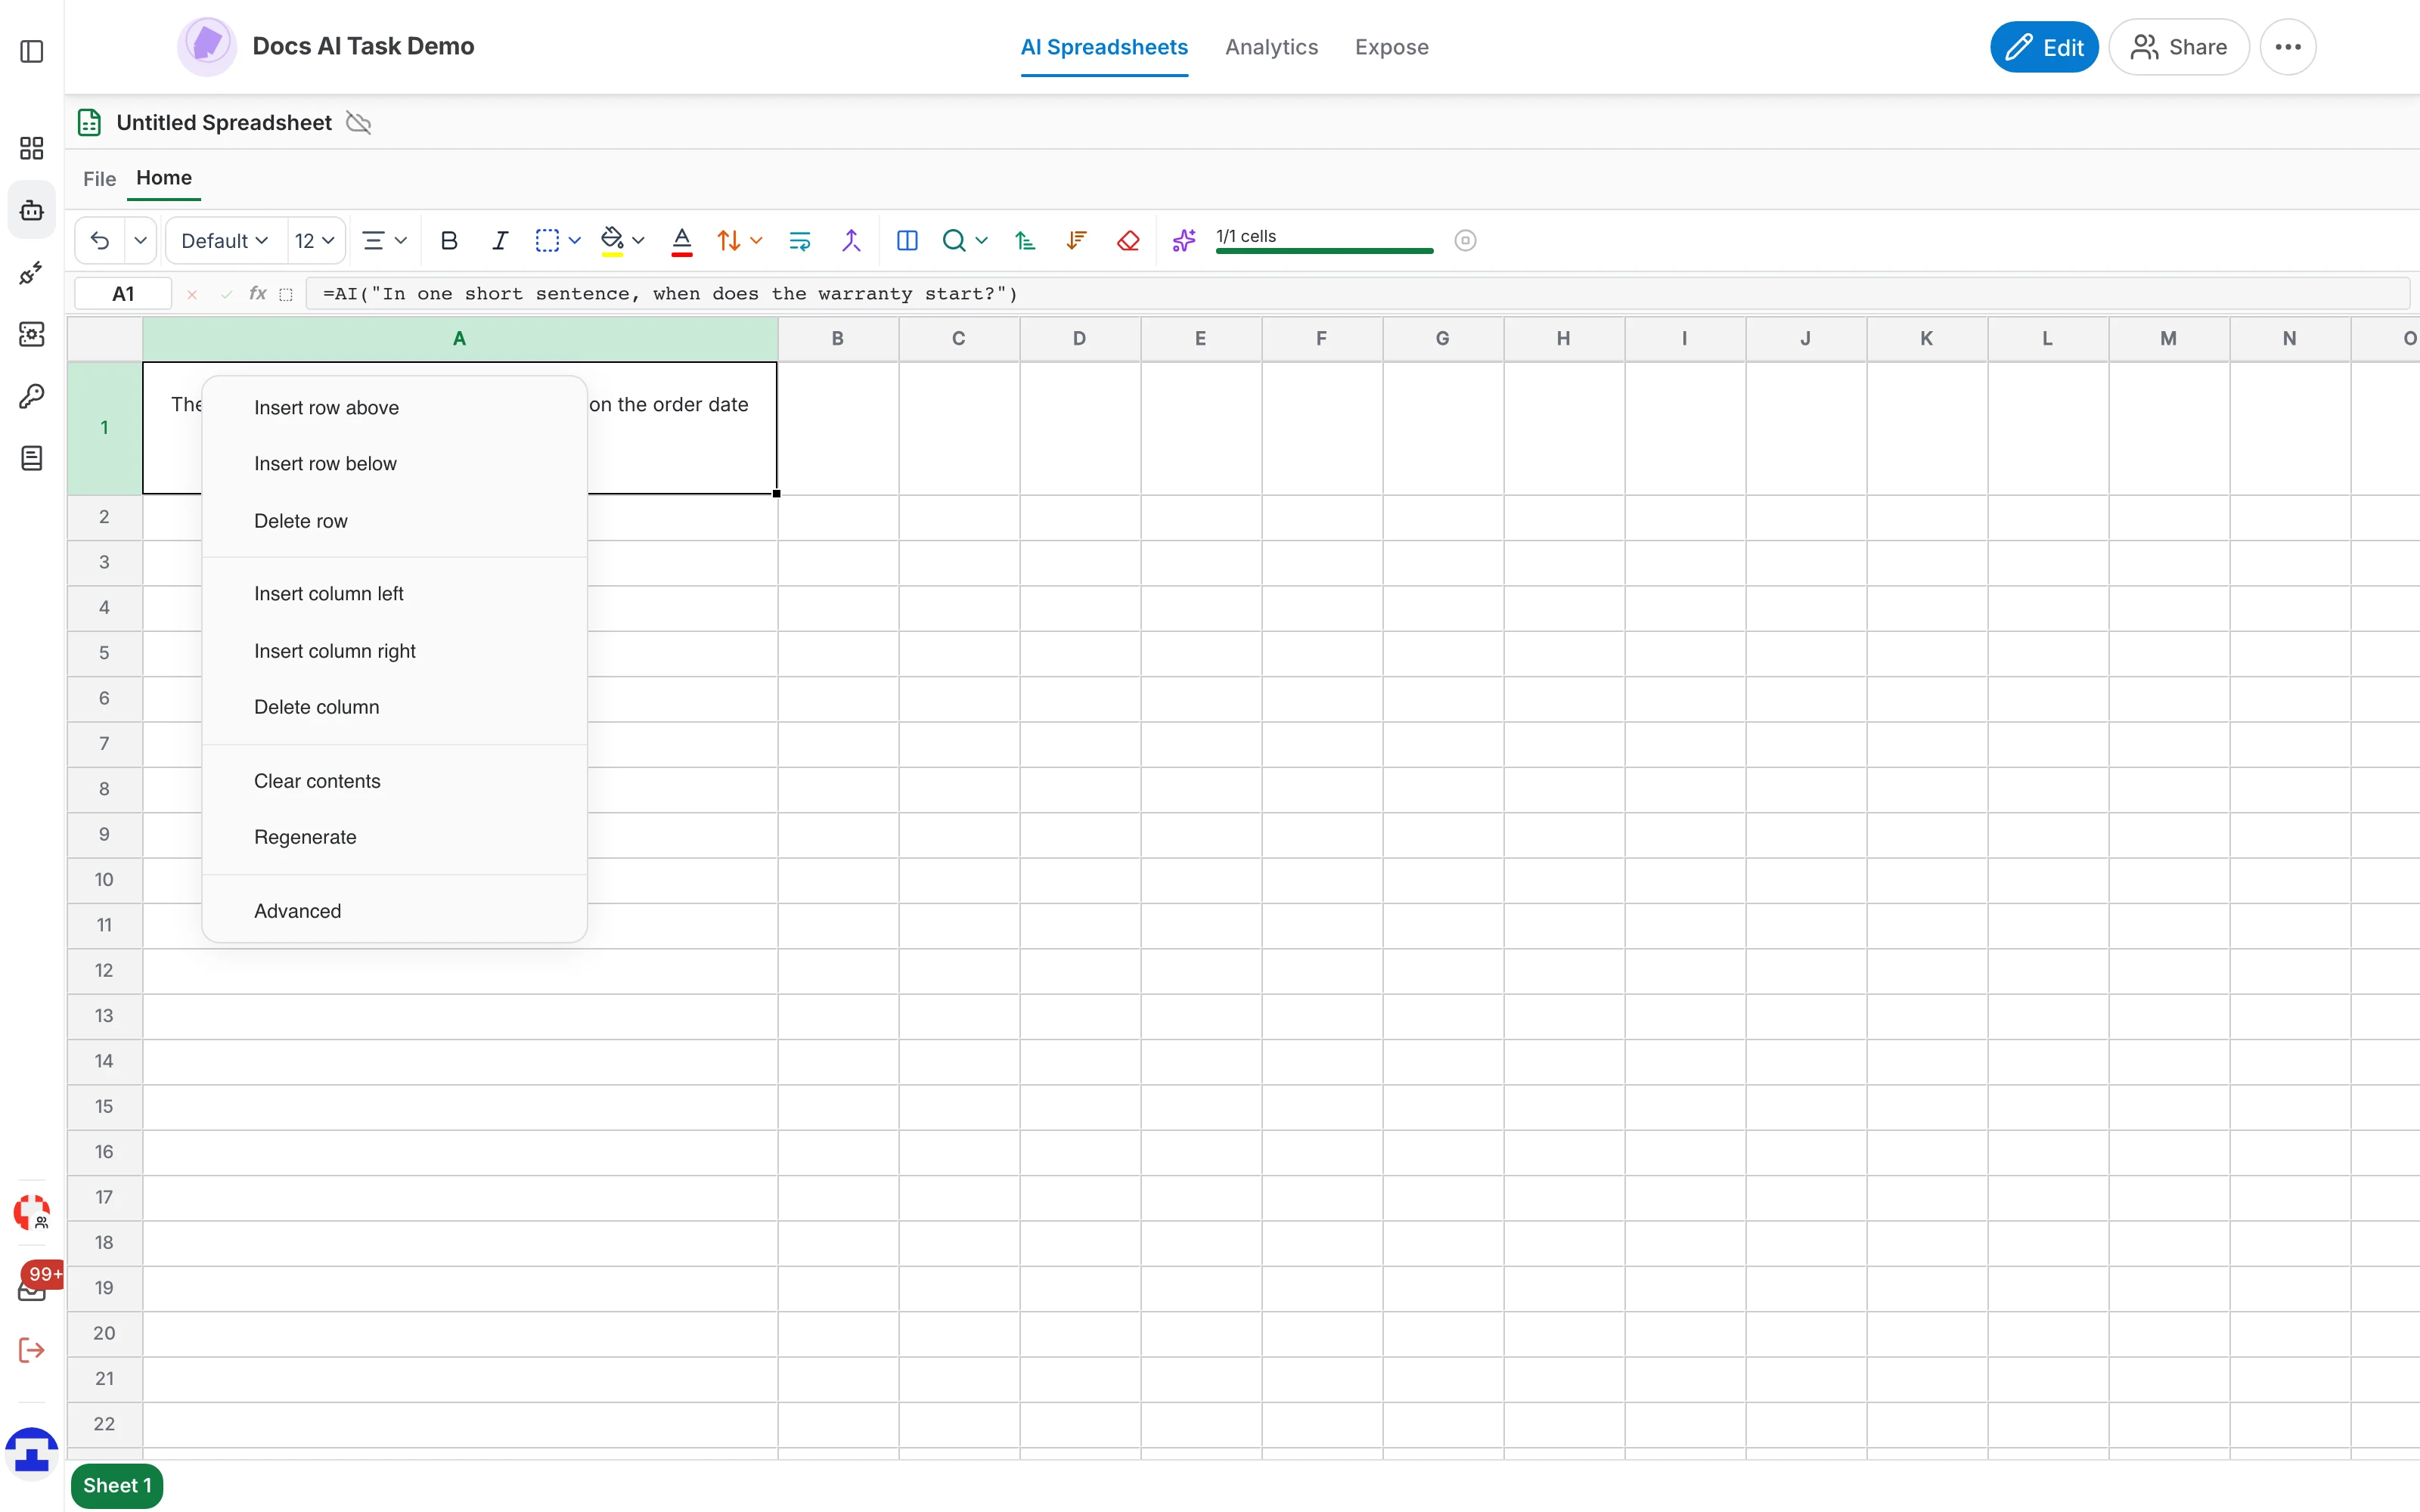
Right-click a cell or a column header for the structural operations:
Rows
- Insert row above
- Insert row below
- Delete row
Columns
- Insert column left
- Insert column right
- Delete column — right-click a column header to rename it as well
Cells
- Clear contents — empty the selected cells.
- Regenerate — AI cells only: drop the cached result and send the prompt again. This is what you want after changing the assistant's data or its model.
- Advanced — AI cells only: open the cell settings panel described above.
Which model answers
The spreadsheet uses the assistant's own configuration. To change the model, the prompt or the retrieving options, go back to the editor with Edit — see where the settings live. The Settings tab of the ribbon additionally carries a default prompt used by cells that call DEFAULT_PROMPT, plus the model and streaming speed for this spreadsheet.