
Chat
The Chat task gives your AI assistant a conversational interface. The user writes a message, the assistant answers from the data it holds, and the conversation continues — each answer can build on what was said before.
Turn an assistant into a chat assistant
- Open the assistant editor from the gear icon on its row, or with the Edit button on its page.
- On the General tab, select the Chat tile under Task Type — it is the first tile and is always visible.
- Click Use to open the assistant's page, whose first tab is now the chat.
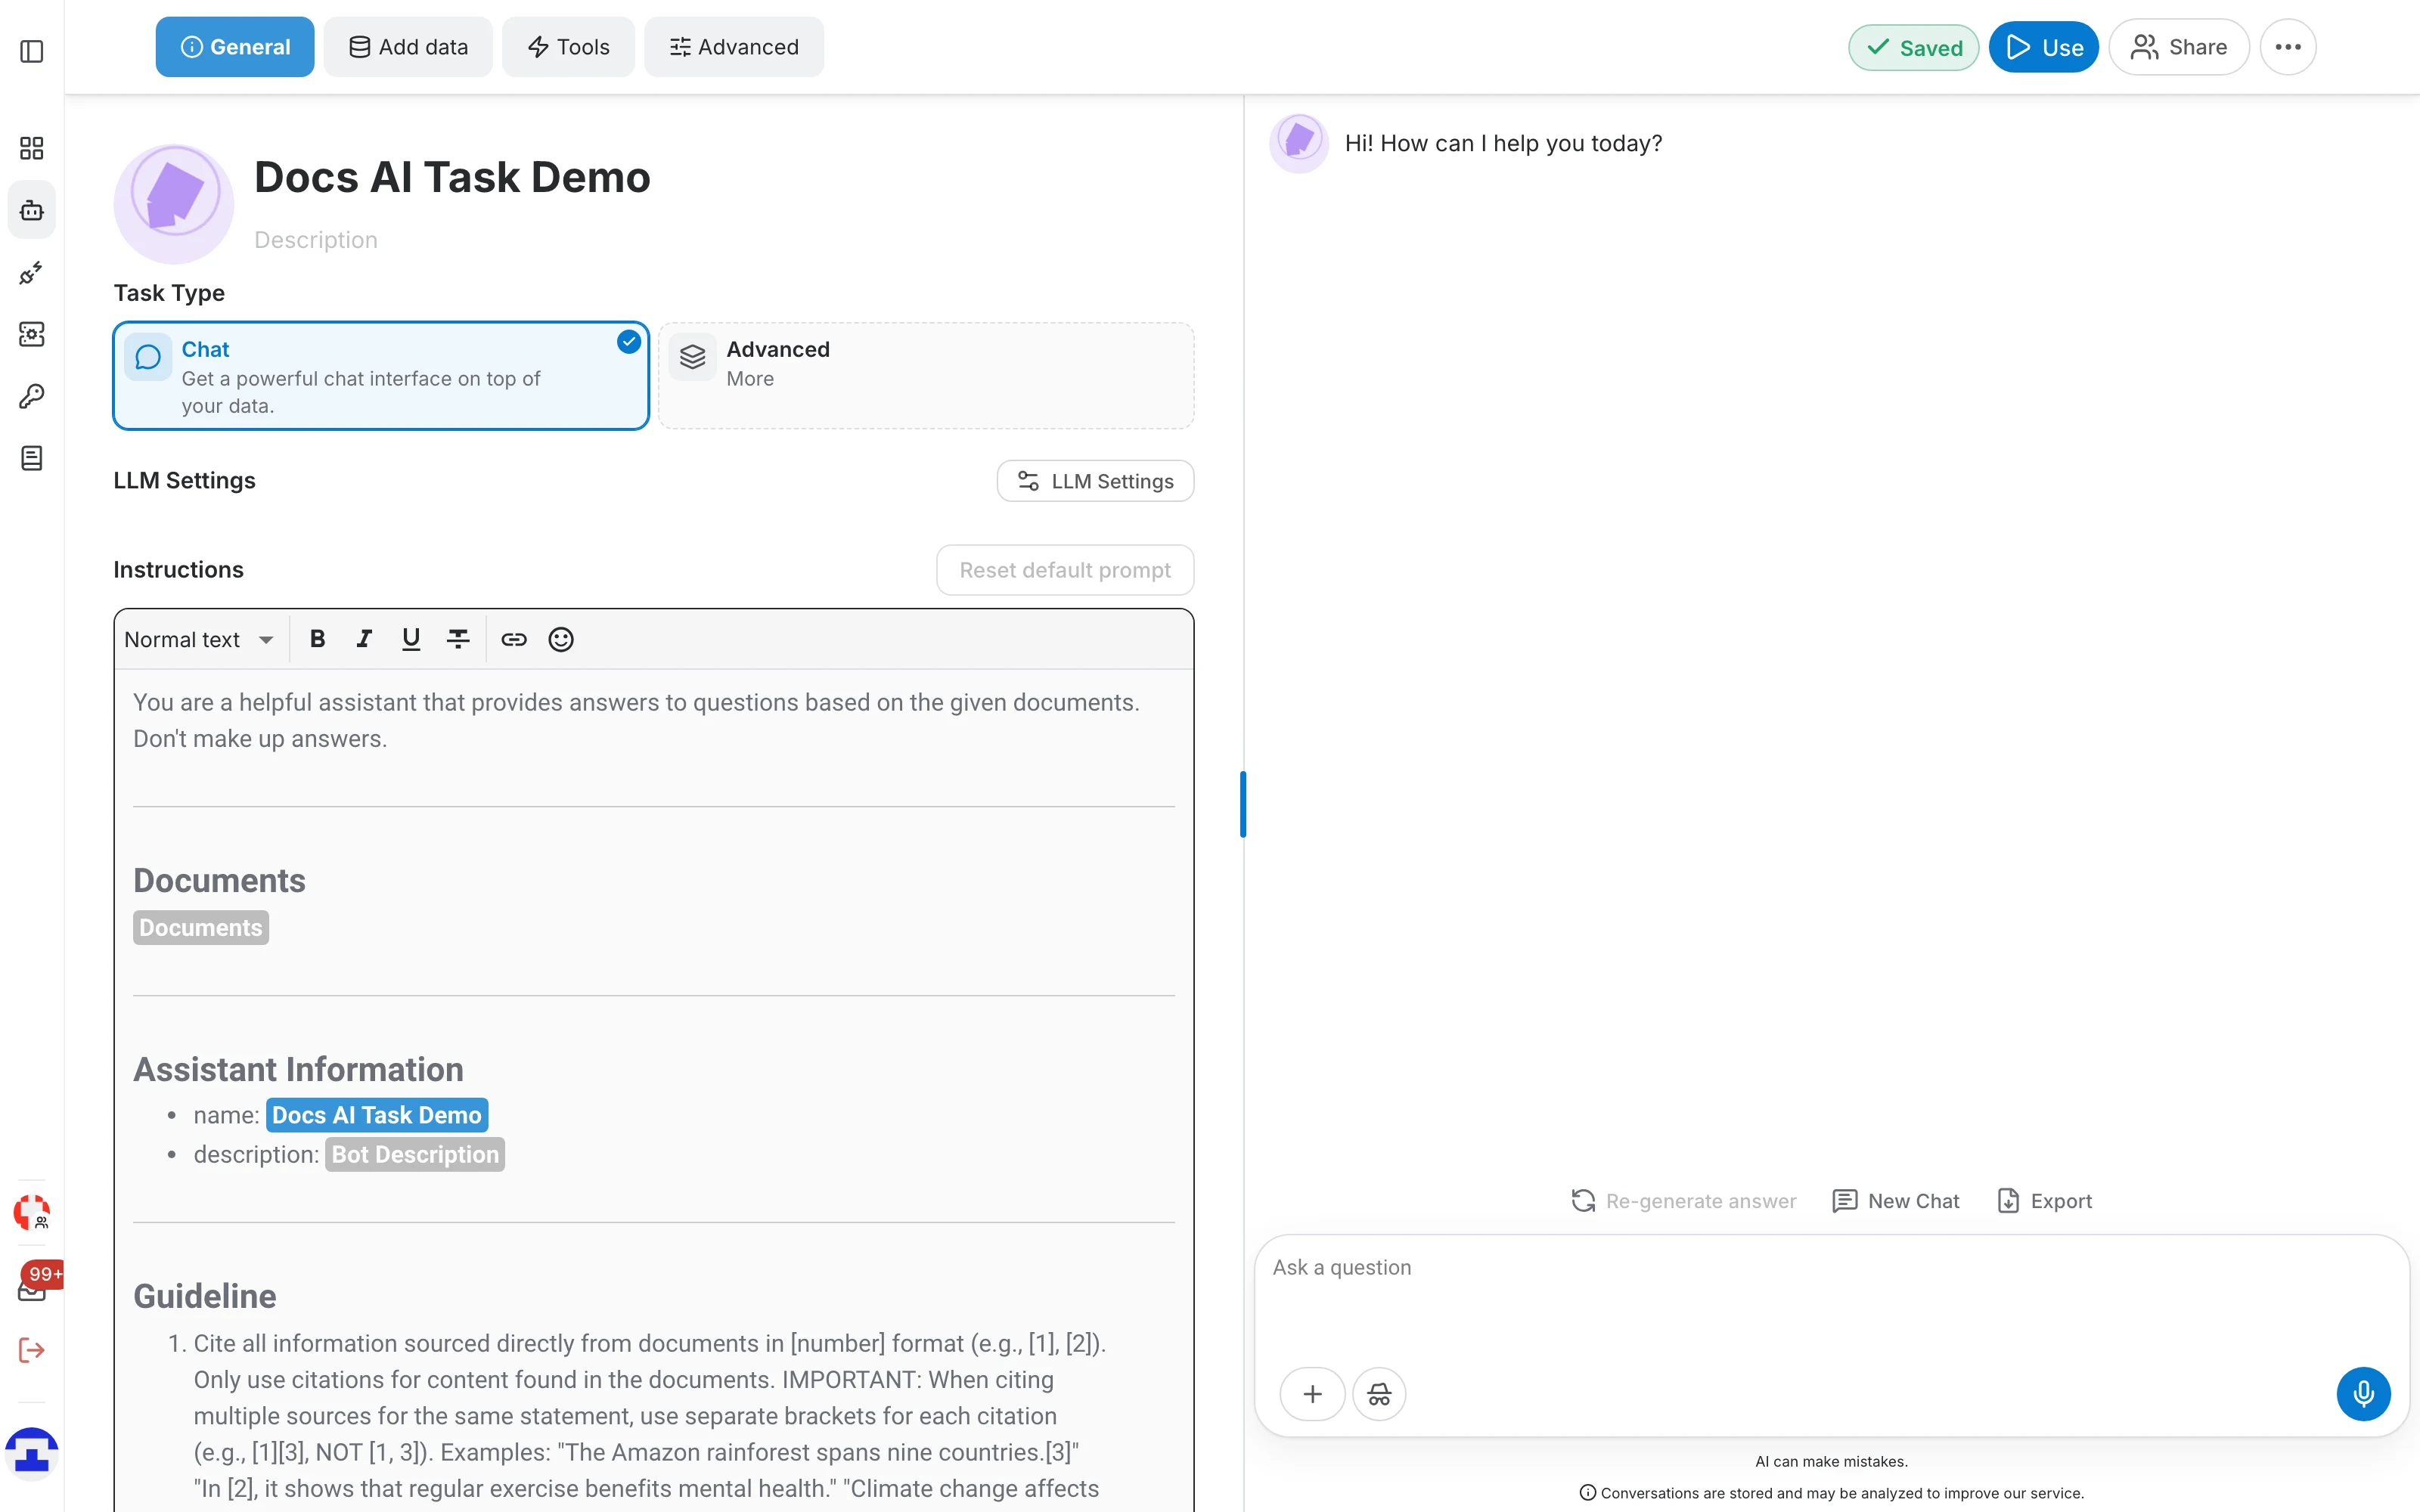
The chat interface
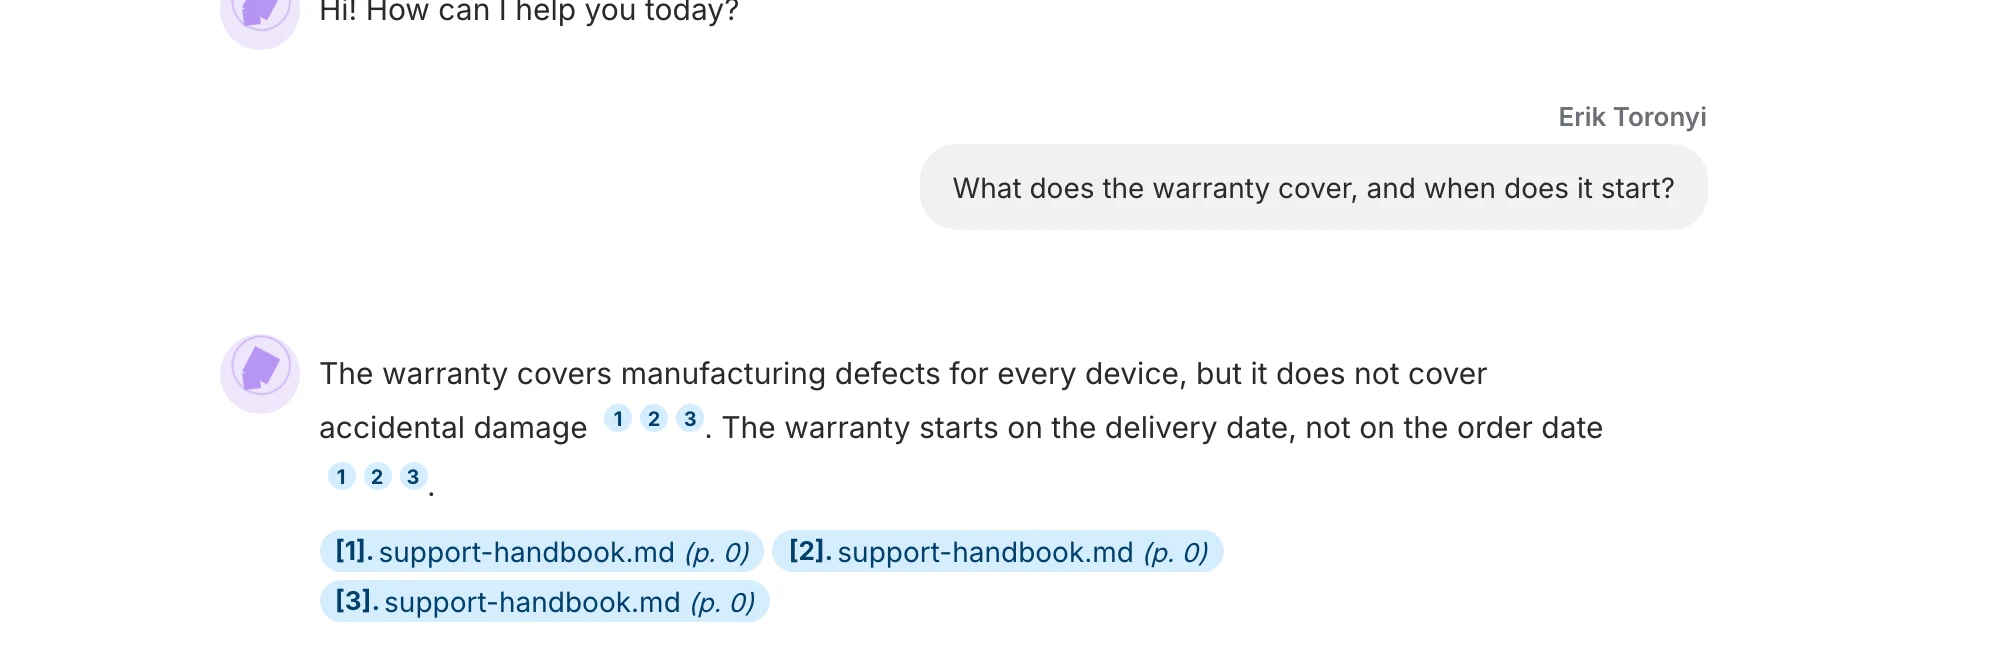
The conversation opens with the assistant's initial message. Your own messages appear on the right under your name, the assistant's on the left with its avatar. Answers that used your data carry numbered citations, and the chips underneath name the file and page behind each one.
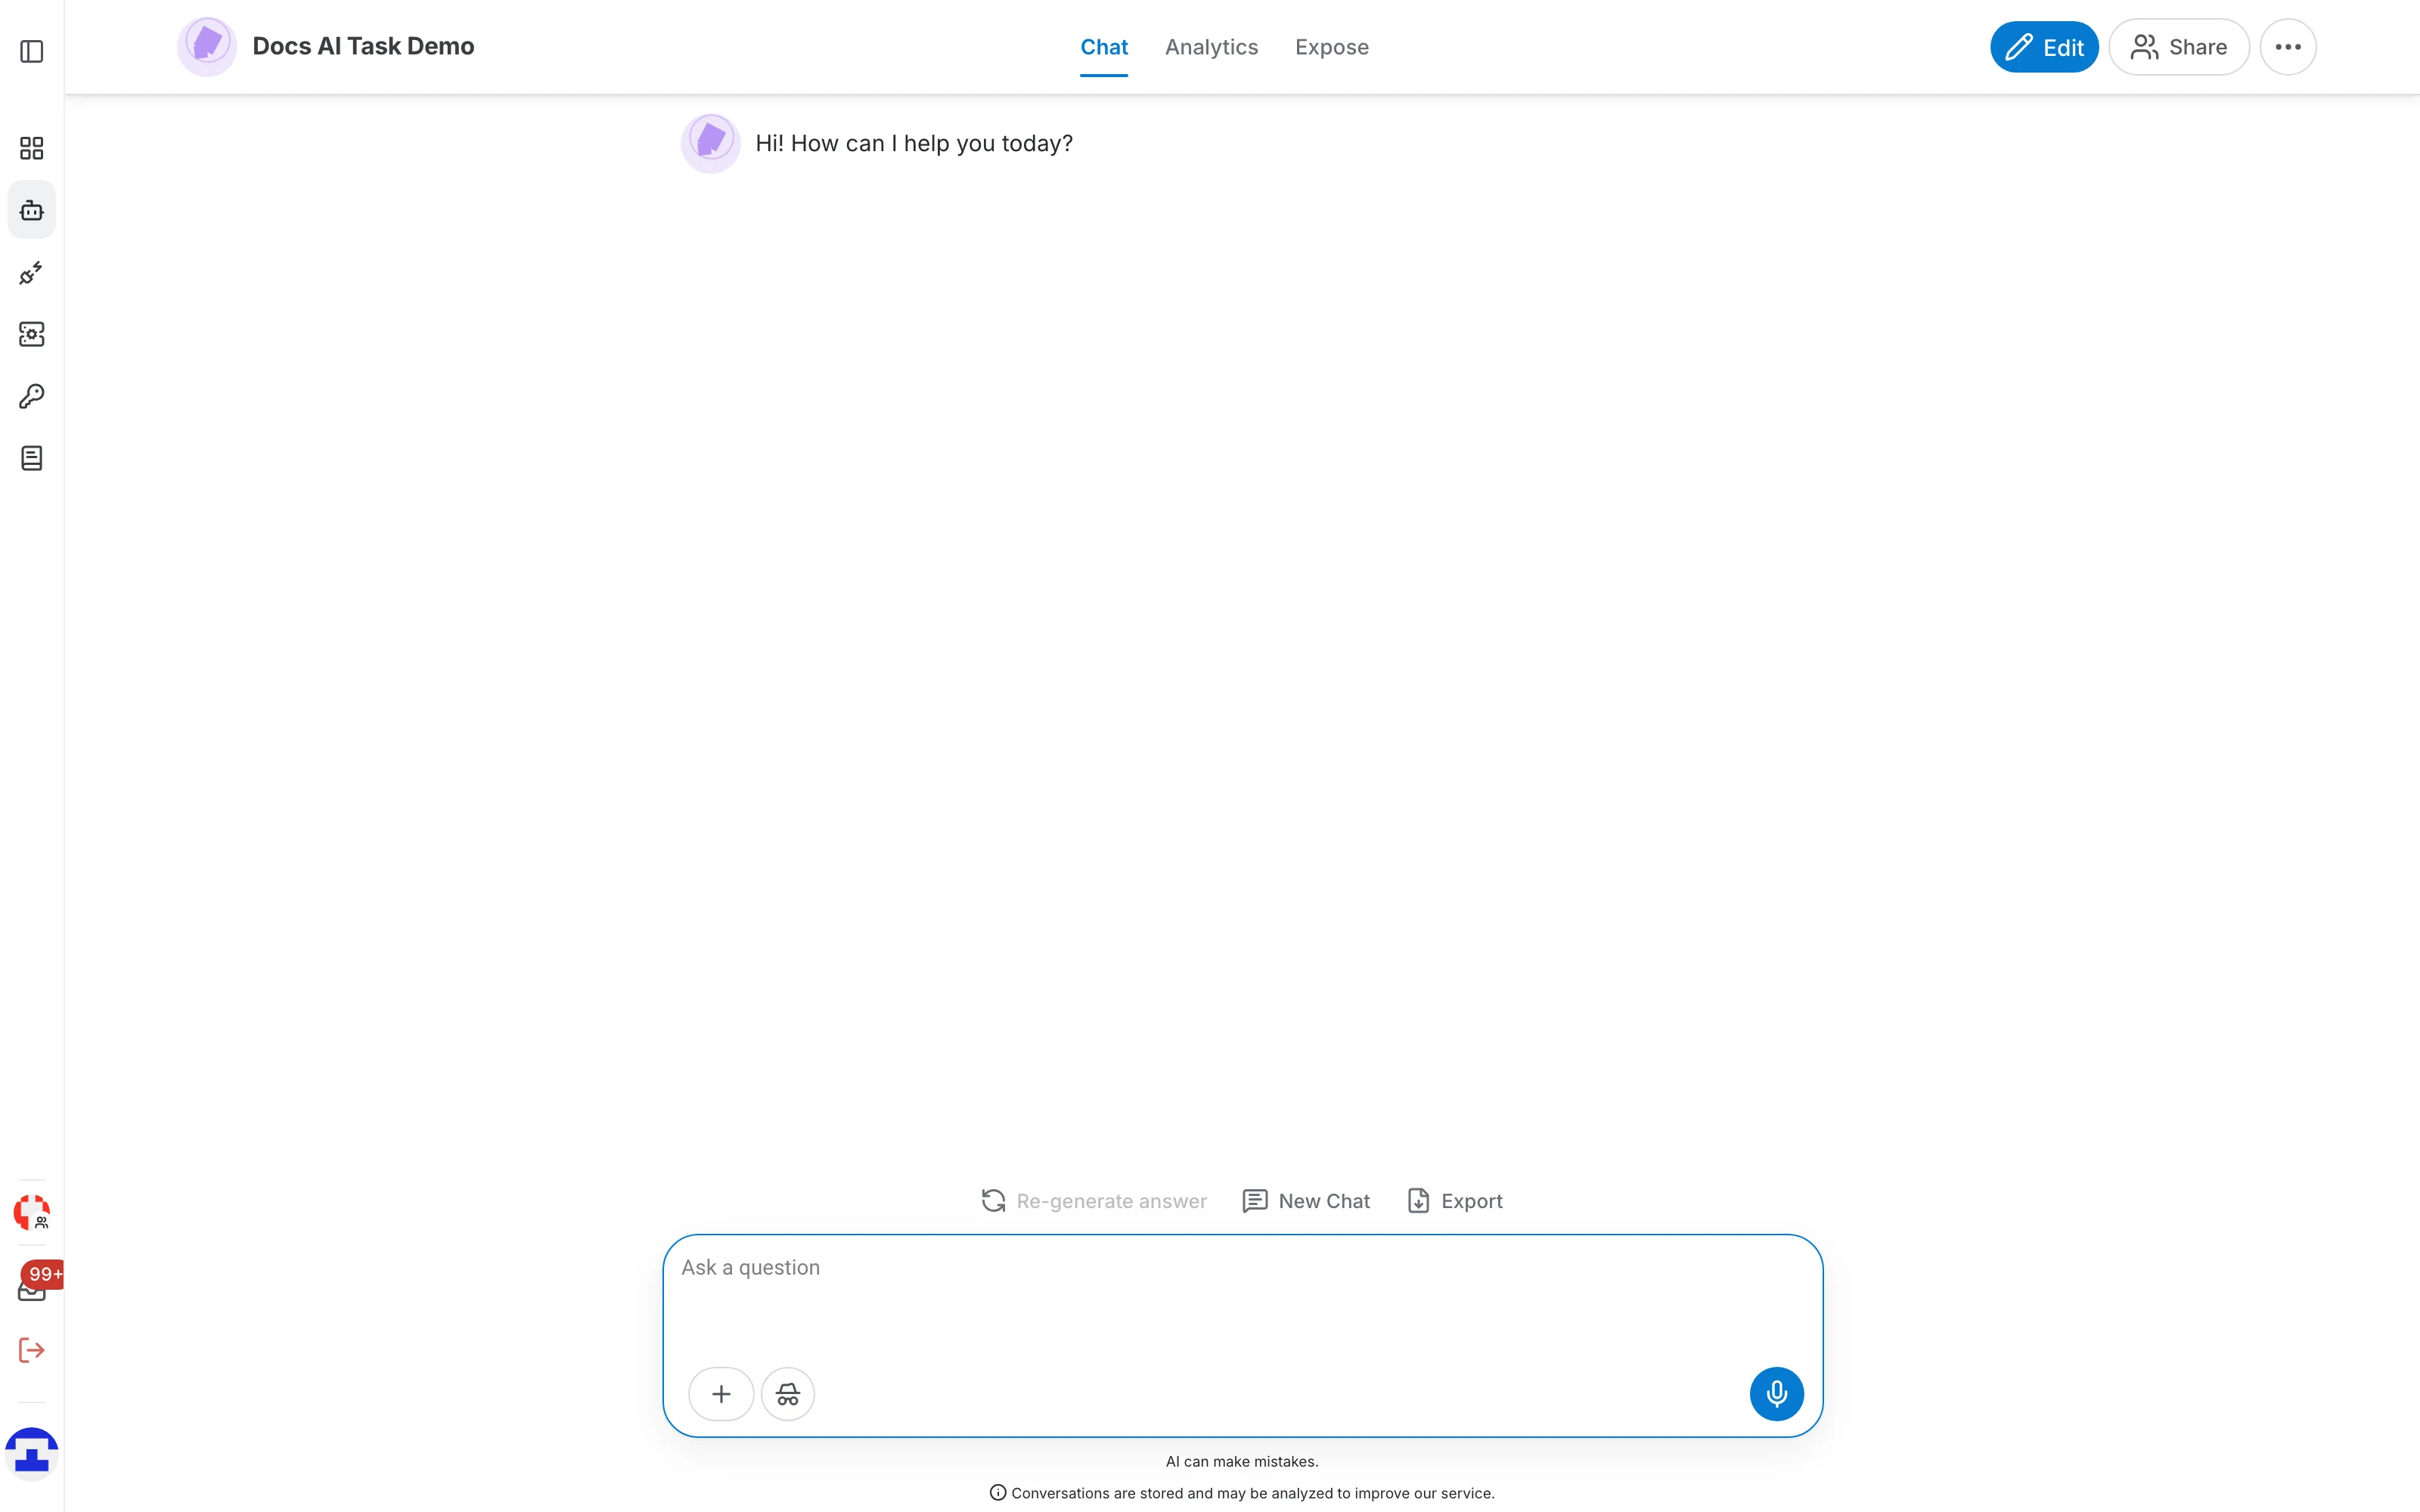
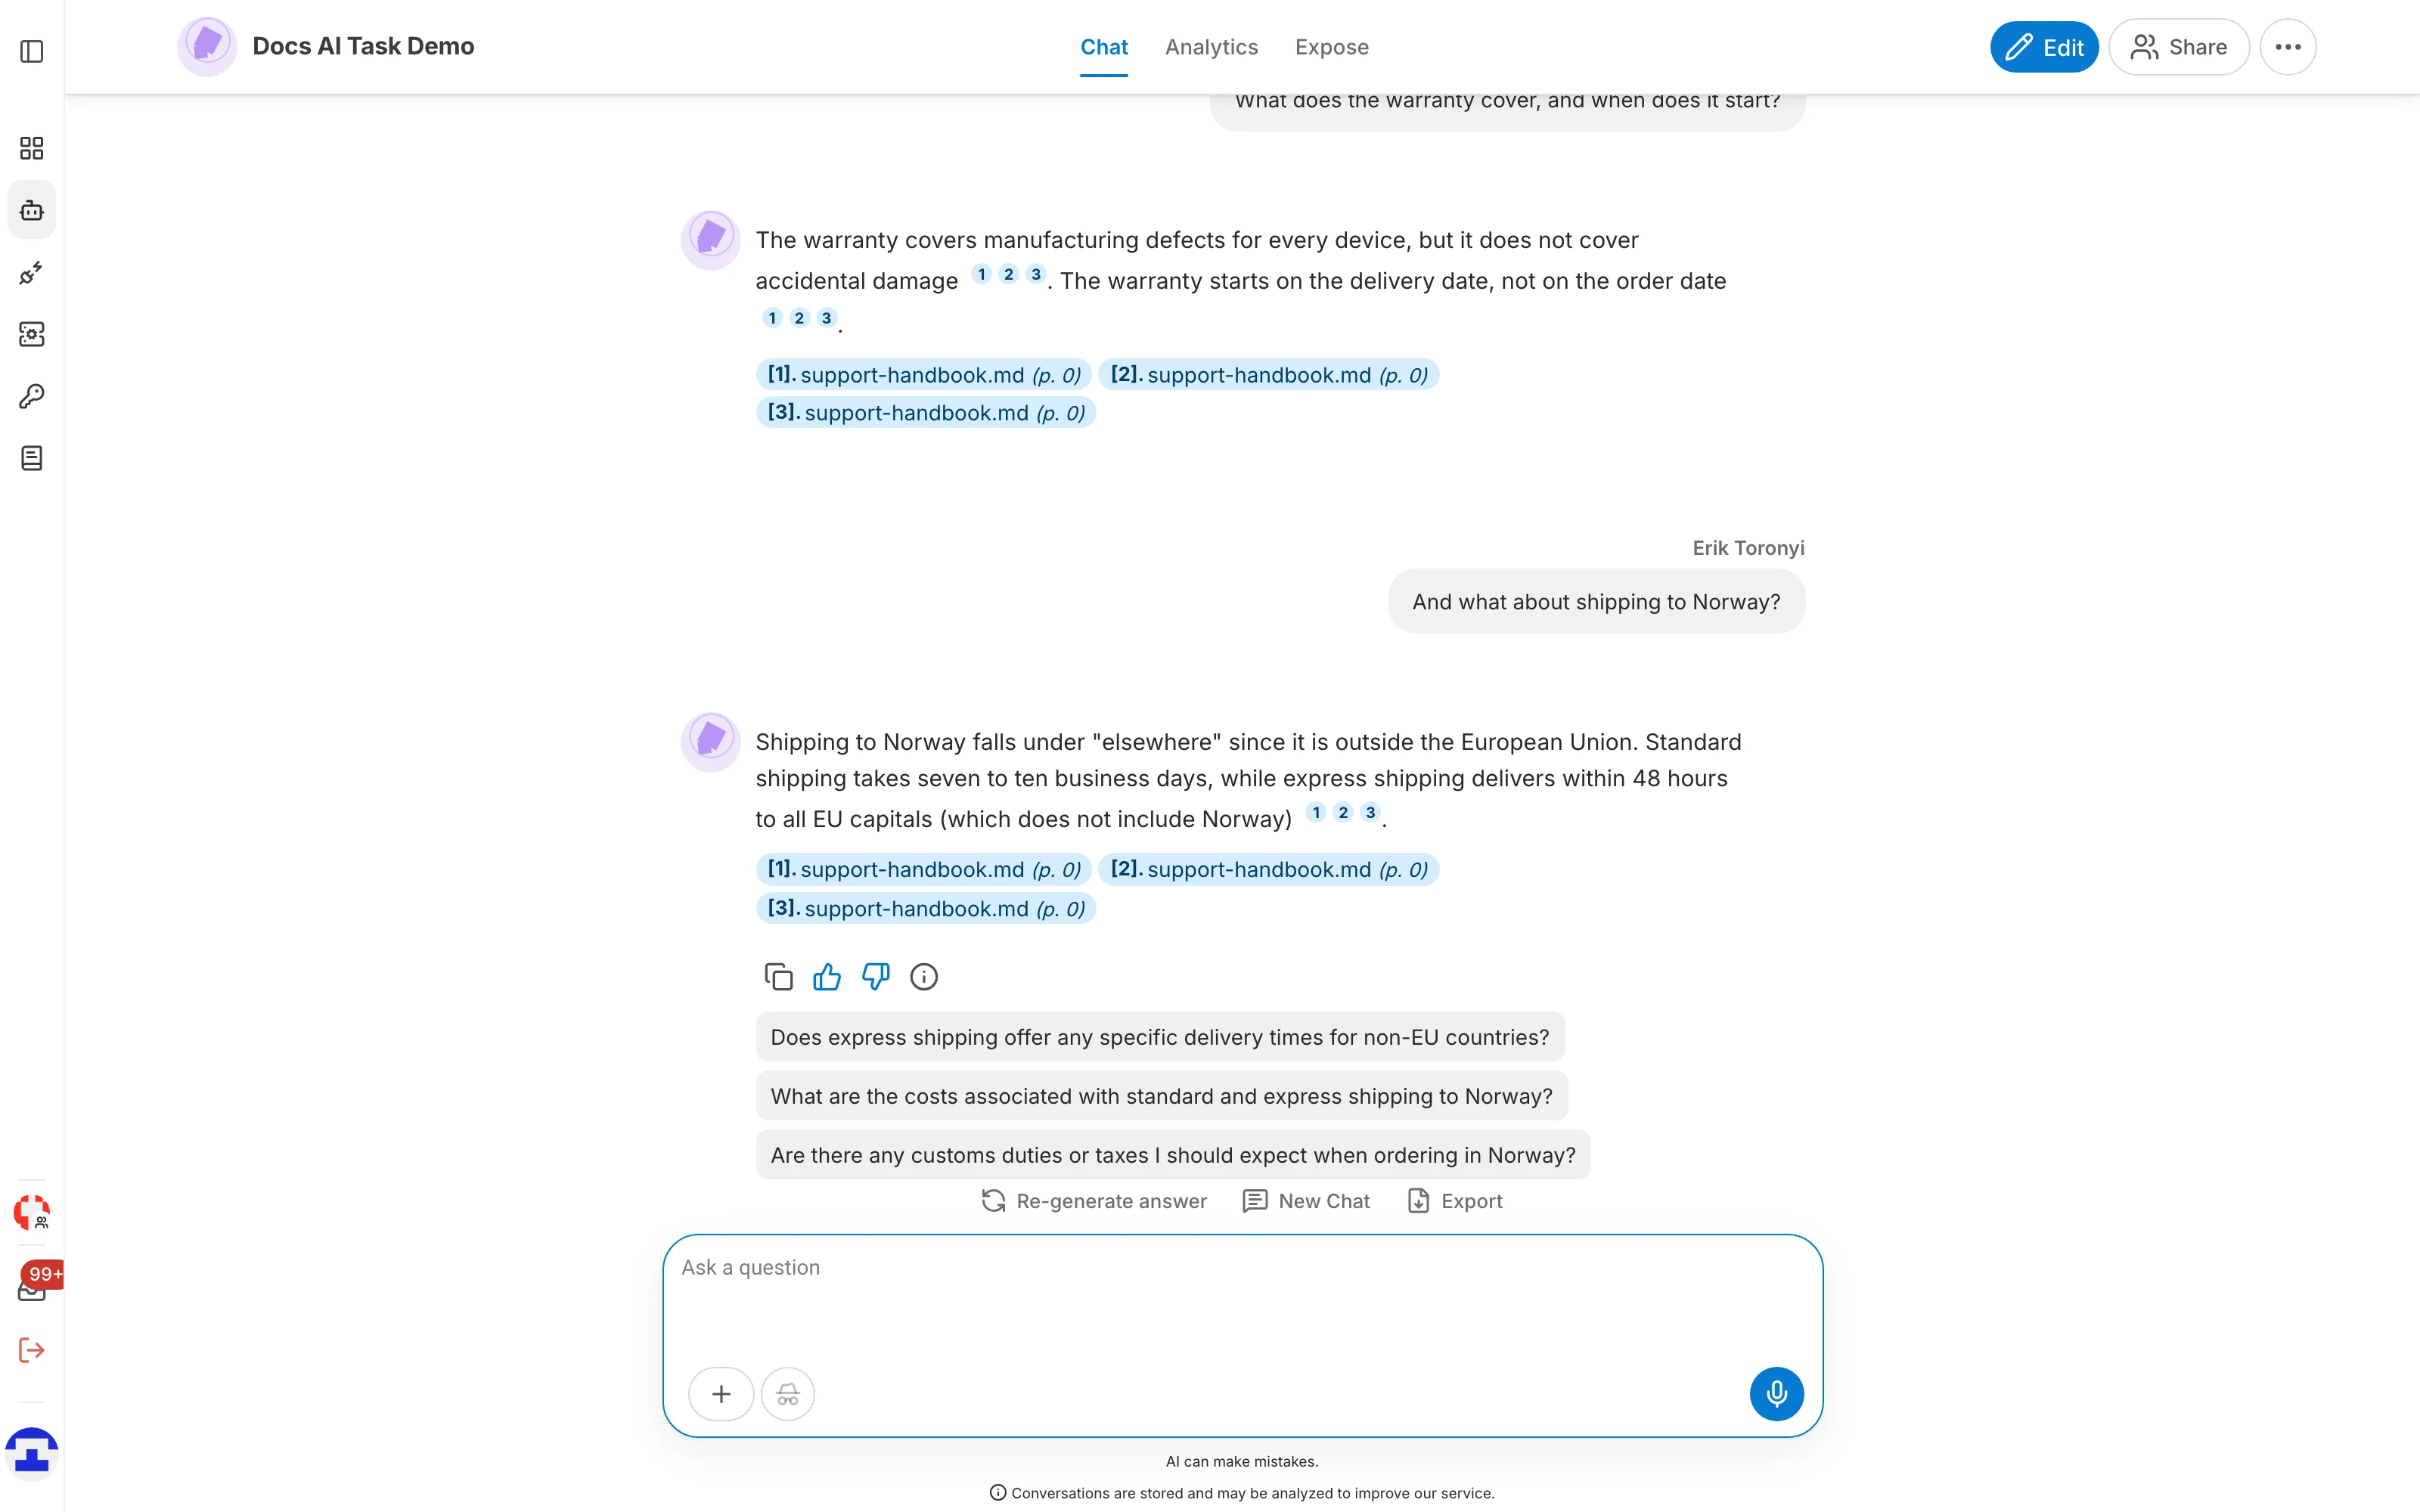
The answer
Each answer is synthesized from the documents the assistant found for your last message, taking the earlier turns into account. Answers are generative, so wording varies between runs while the information stays the same. Hovering an answer reveals its action icons:
- Copy — put the answer text on the clipboard.
- Thumbs up / thumbs down — rate the answer; ratings are collected in the assistant's feedback view so you can see which answers disappoint users.
- Information — open a Message information dialog showing the LLM that answered, the context mode used and the full prompt that was sent, documents included.
Above the input box, three actions apply to the conversation as a whole:
- Re-generate answer — answer the last message again.
- New Chat — start a fresh conversation; the assistant forgets the previous turns.
- Export — download the conversation.
The input box
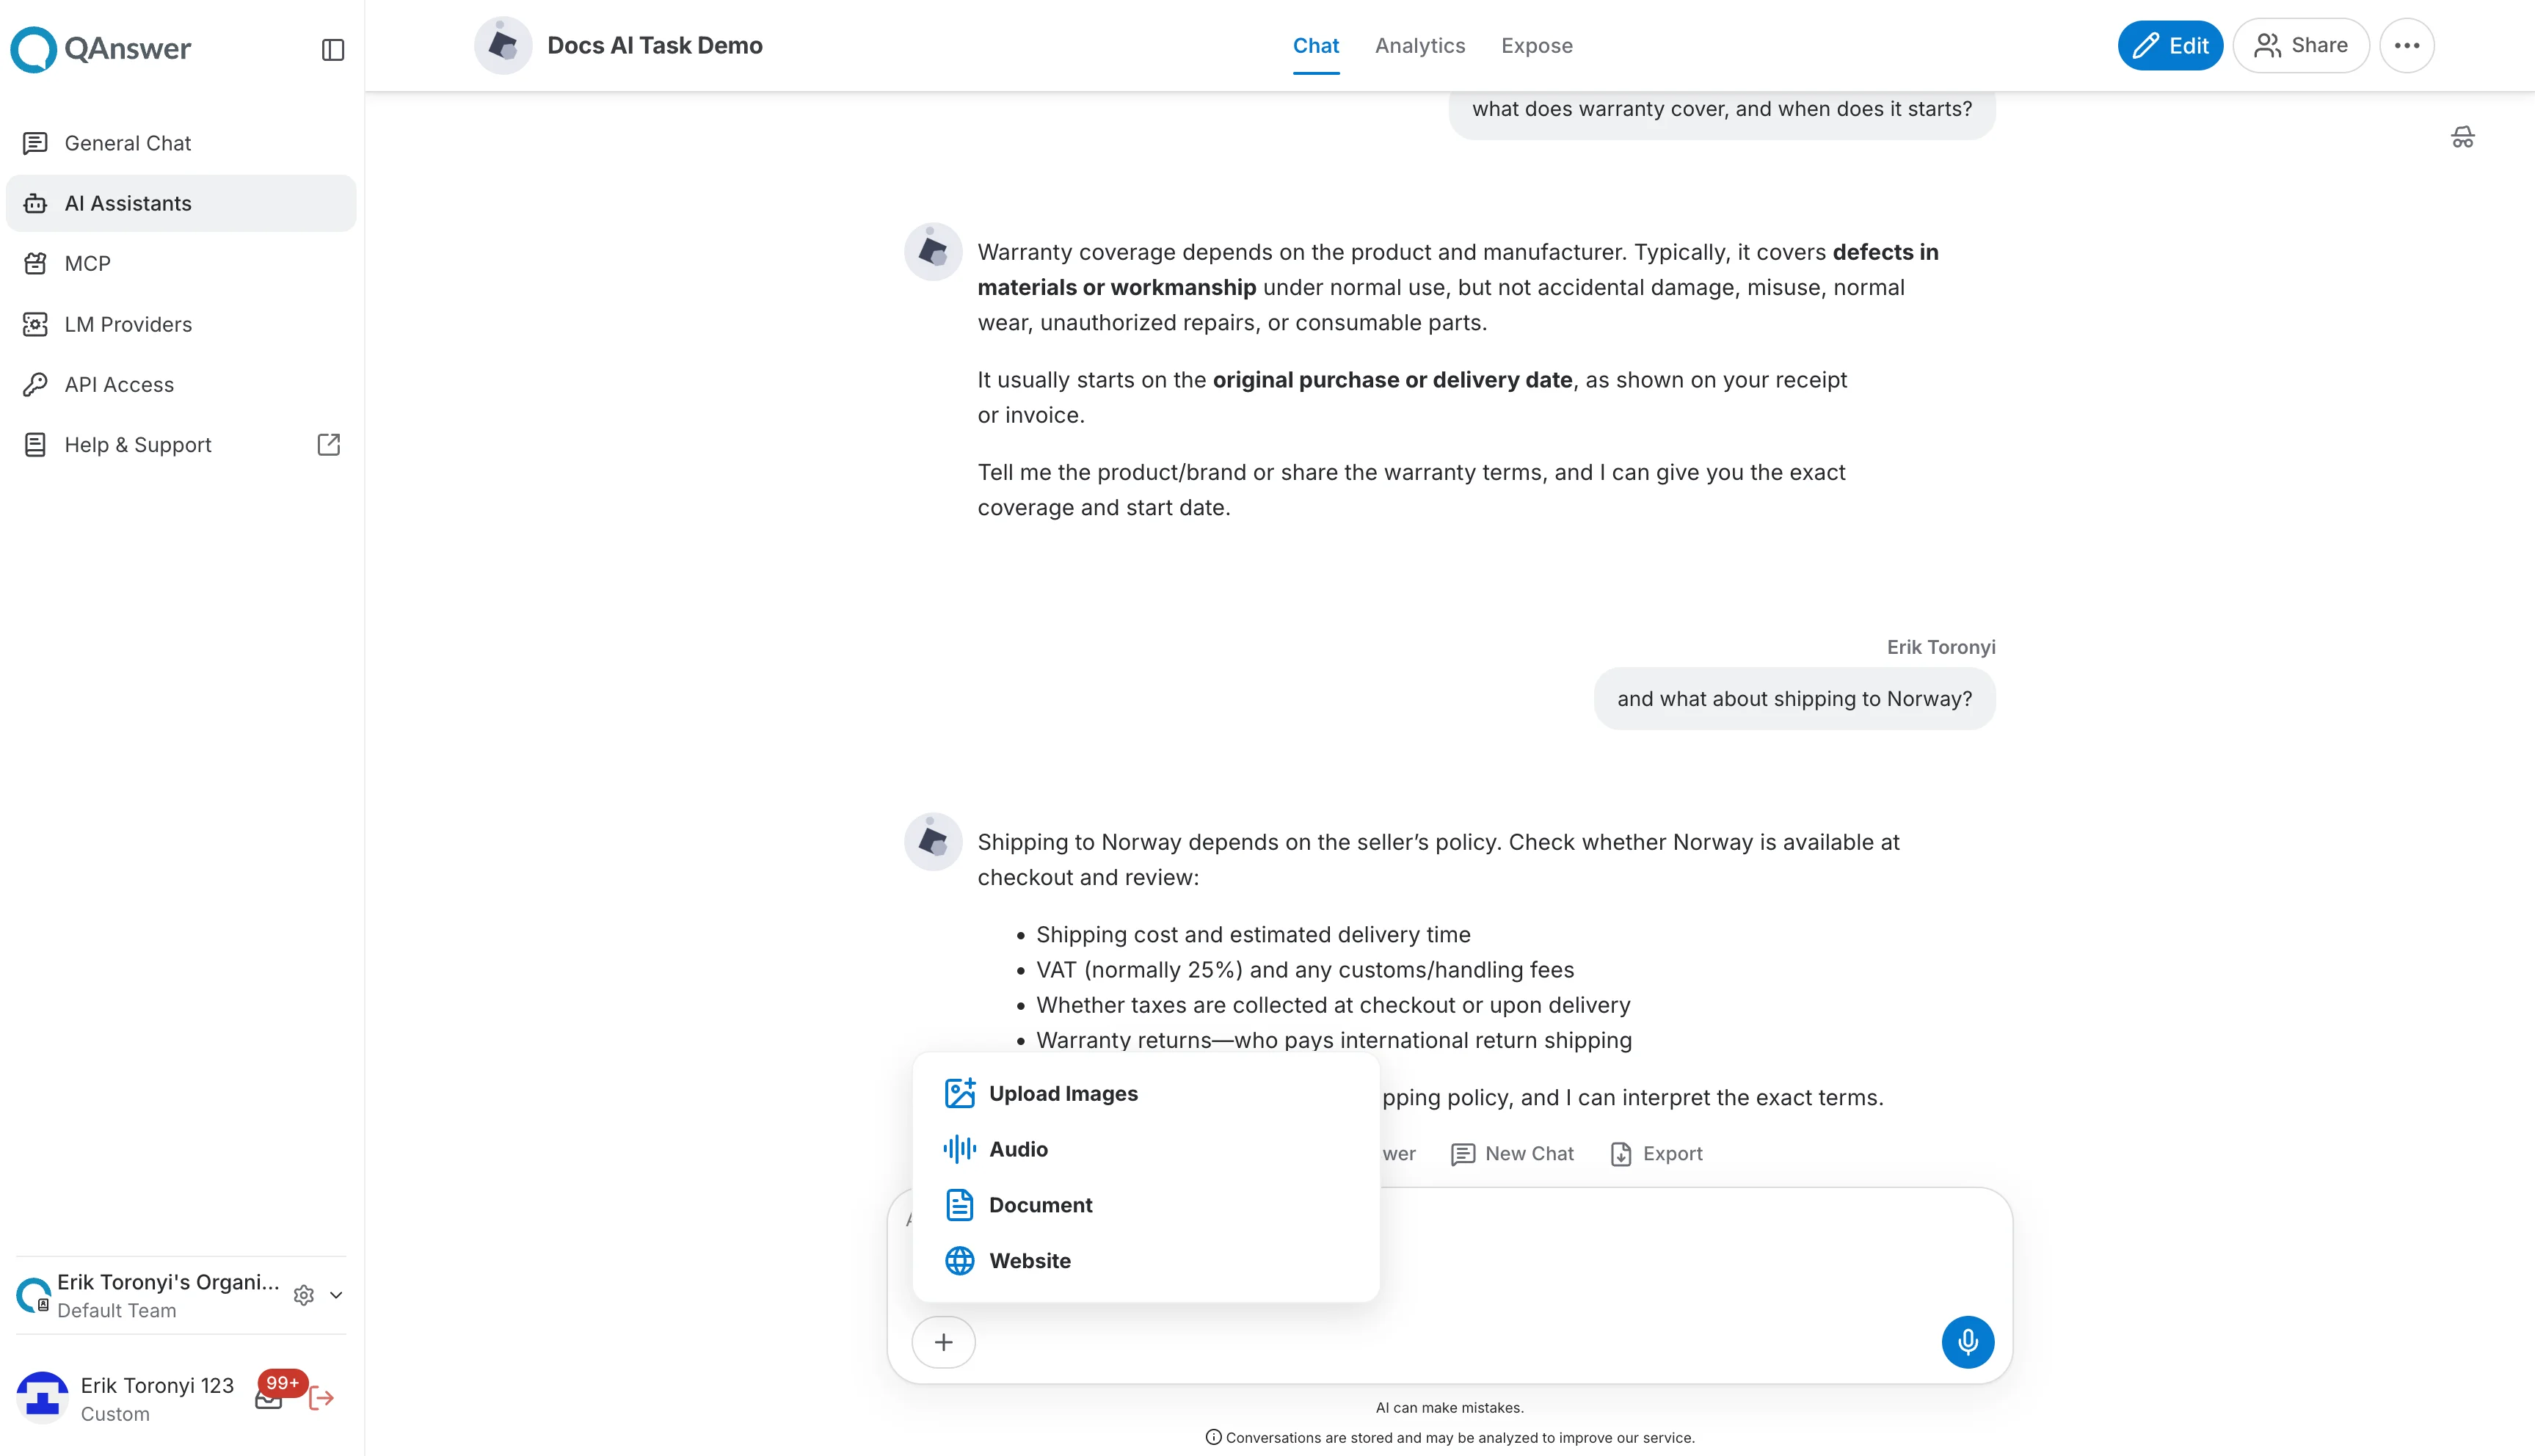
Besides typing a message, the input box offers:
- + — add a data source right from the conversation: upload images, a document or audio, add a website, or connect one of the available connectors. Anything you add here becomes part of the assistant's data.
- Incognito — hold a conversation that is not stored for later analysis.
- Microphone — dictate the message instead of typing it.
Suggested replies
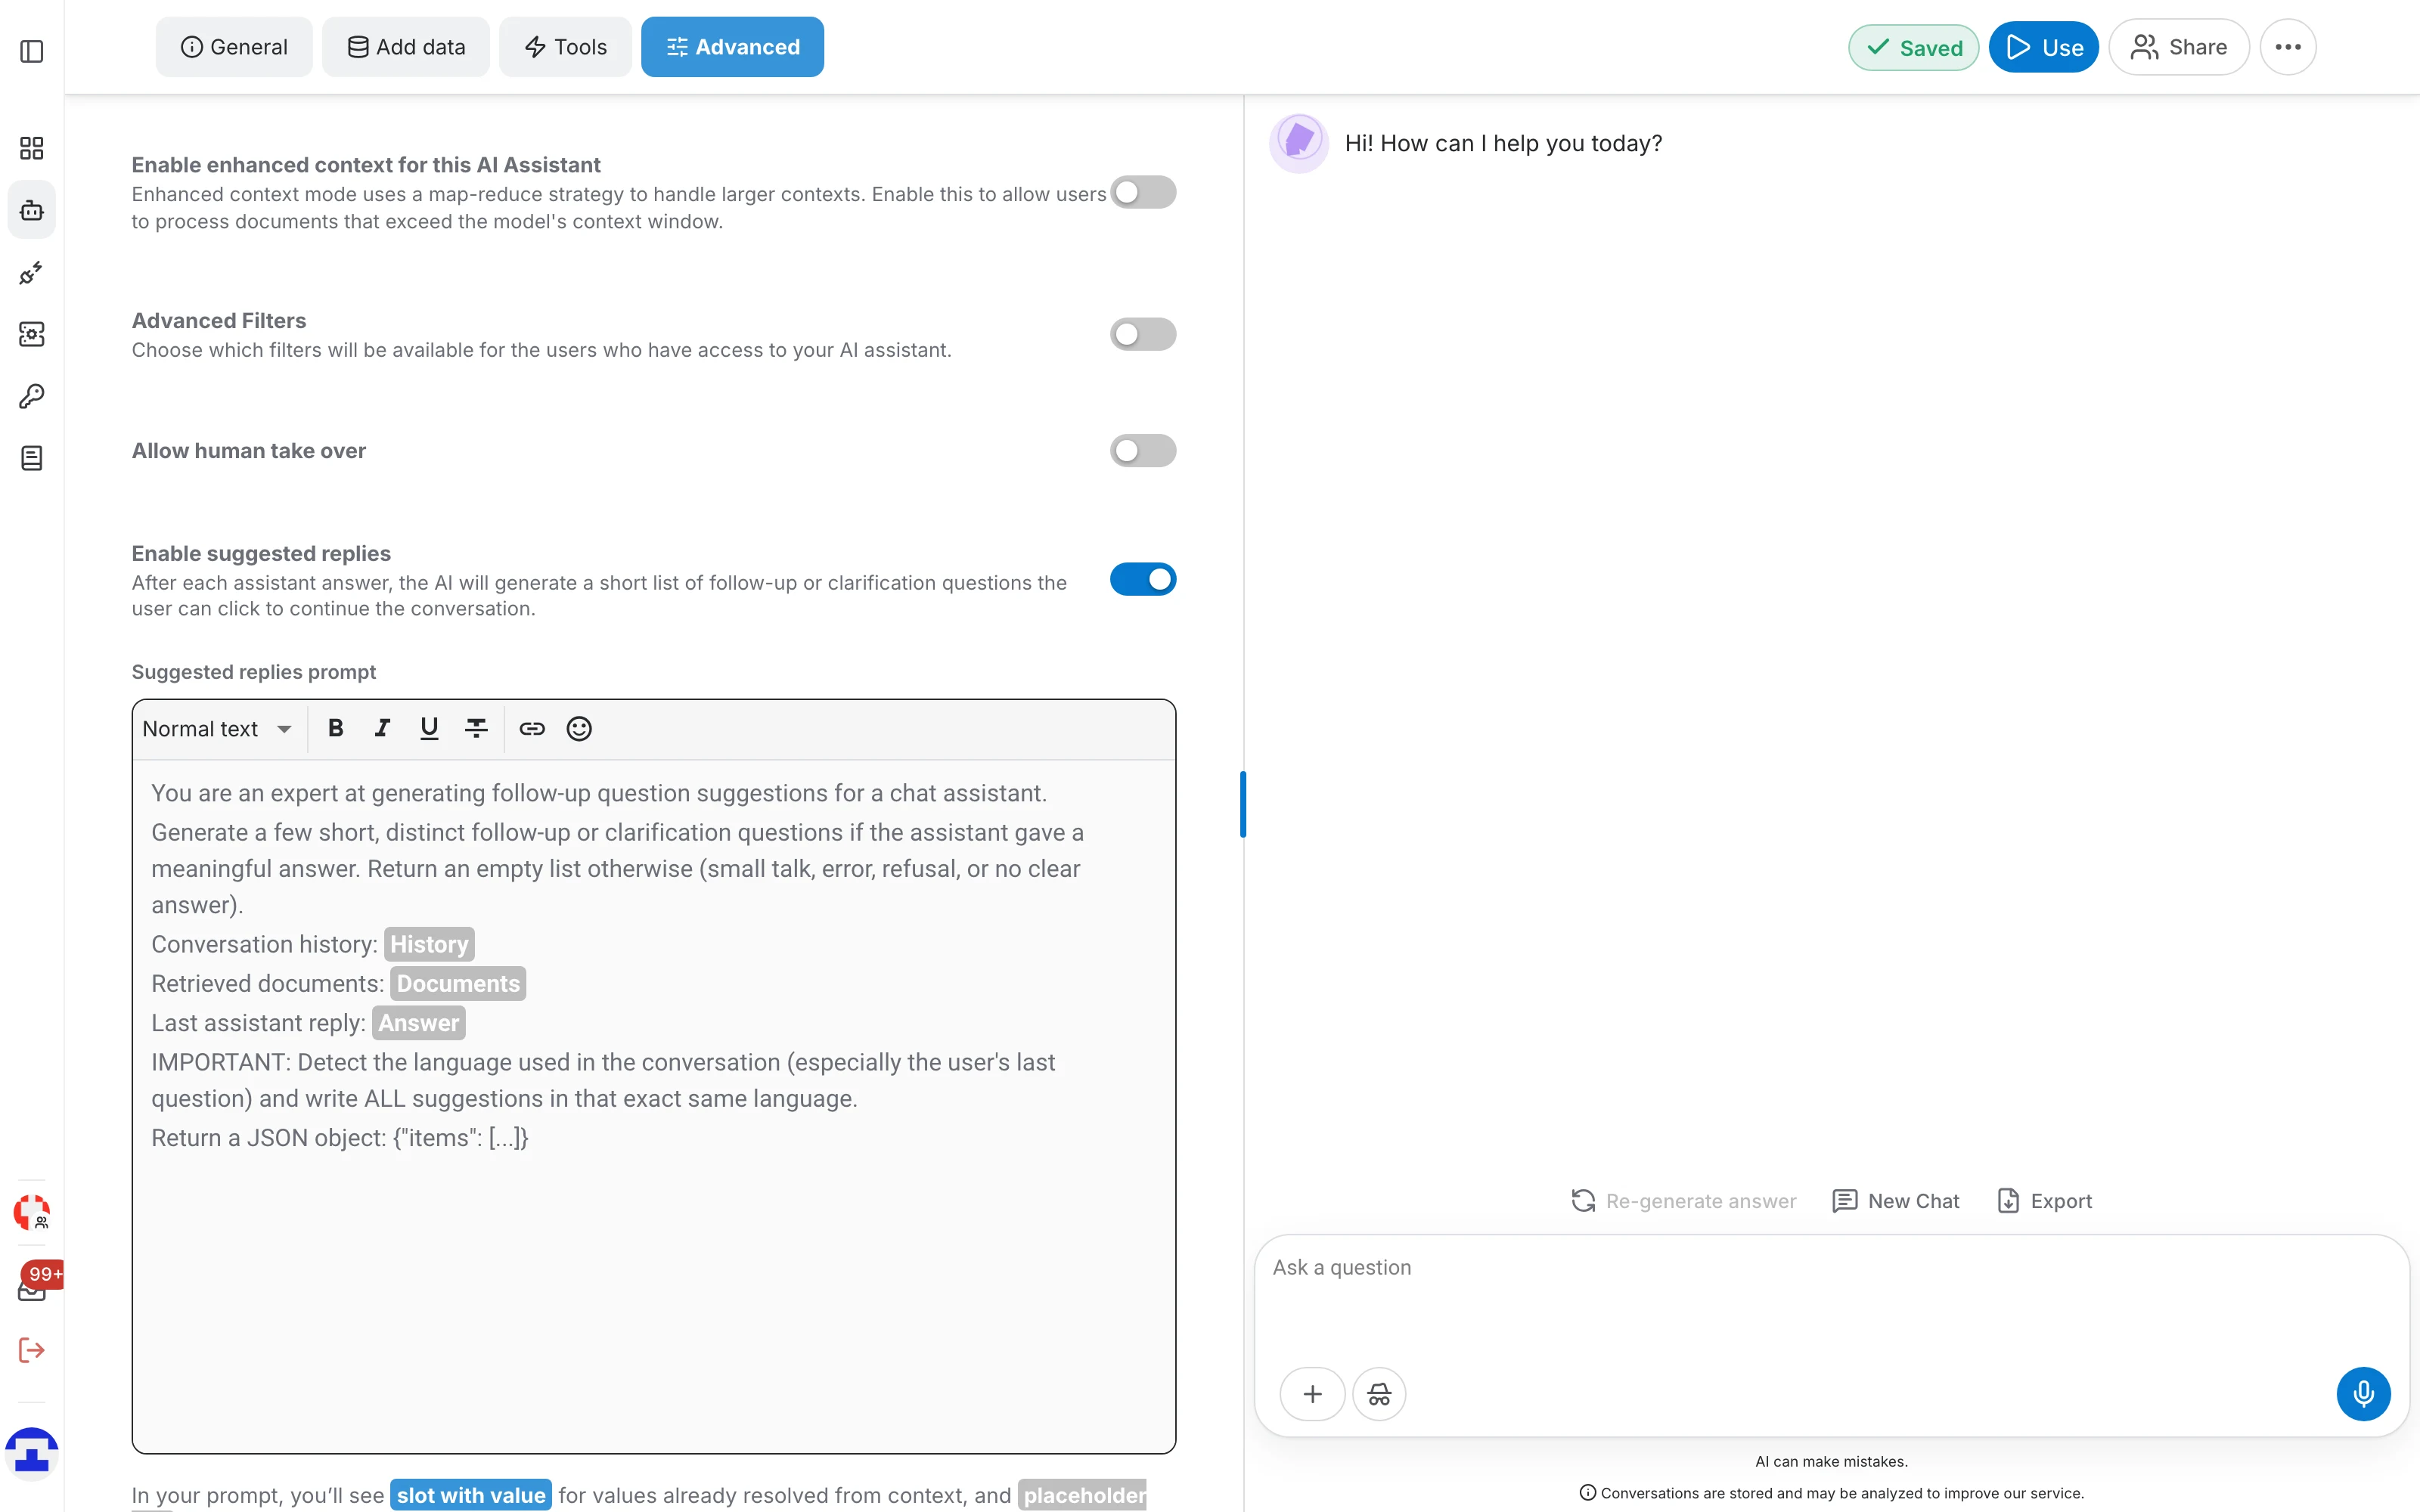
With suggested replies switched on, a short list of clickable follow-up questions appears under each answer. Clicking a bubble sends that question immediately, which lets users explore a topic without having to phrase the next question themselves.
- Switch on Enable suggested replies on the Advanced tab of the editor.
- The suggestions are generated from the answer that was just given, so they follow the conversation rather than a fixed list.
Configure the Chat task
The chat has no settings drawer of its own. The prompt, the initial message and the model live on the General tab, the data on the Add data tab, the callable tools on the Tools tab, and everything that changes the conversation's behaviour on the Advanced tab.
Instructions and initial message
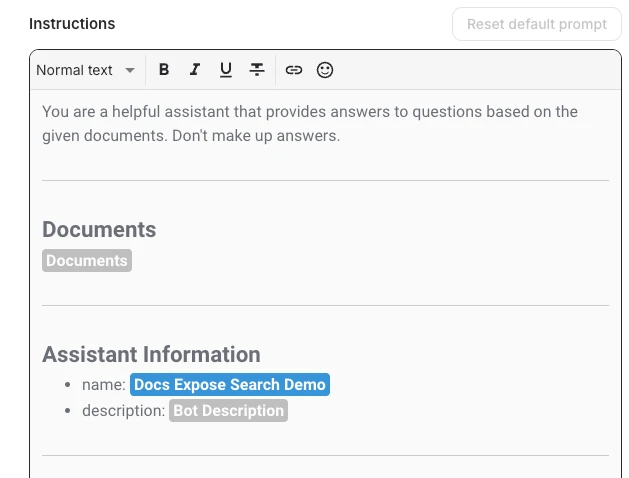
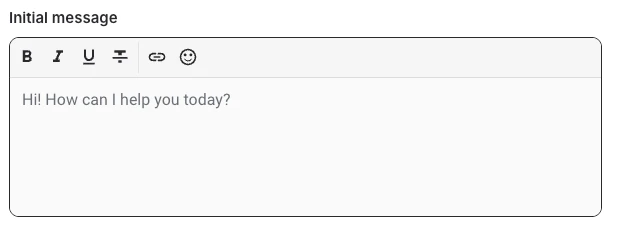
Two editors on the General tab shape how the conversation reads:
- Instructions — the system prompt: the assistant's personality, its tone and the rules it must follow. A badge shows whether it is still the default, and Reset default prompt puts the shipped prompt back.
- Initial message — the greeting shown before the user has written anything. It is a good place for a hint about what this assistant can answer.
- Type / in the Instructions editor to insert a placeholder such as the assistant's name; see Slots for the full list and what each one resolves to.
LLM settings
The LLM Settings button on the General tab opens the model configuration:
- the language model that answers, with its hosting label (for example EU on-premise)
- the context window in tokens
- the maximum response length in tokens
- the response temperature, from very conservative to very creative
- the answer speed
- whether sources show their last update date
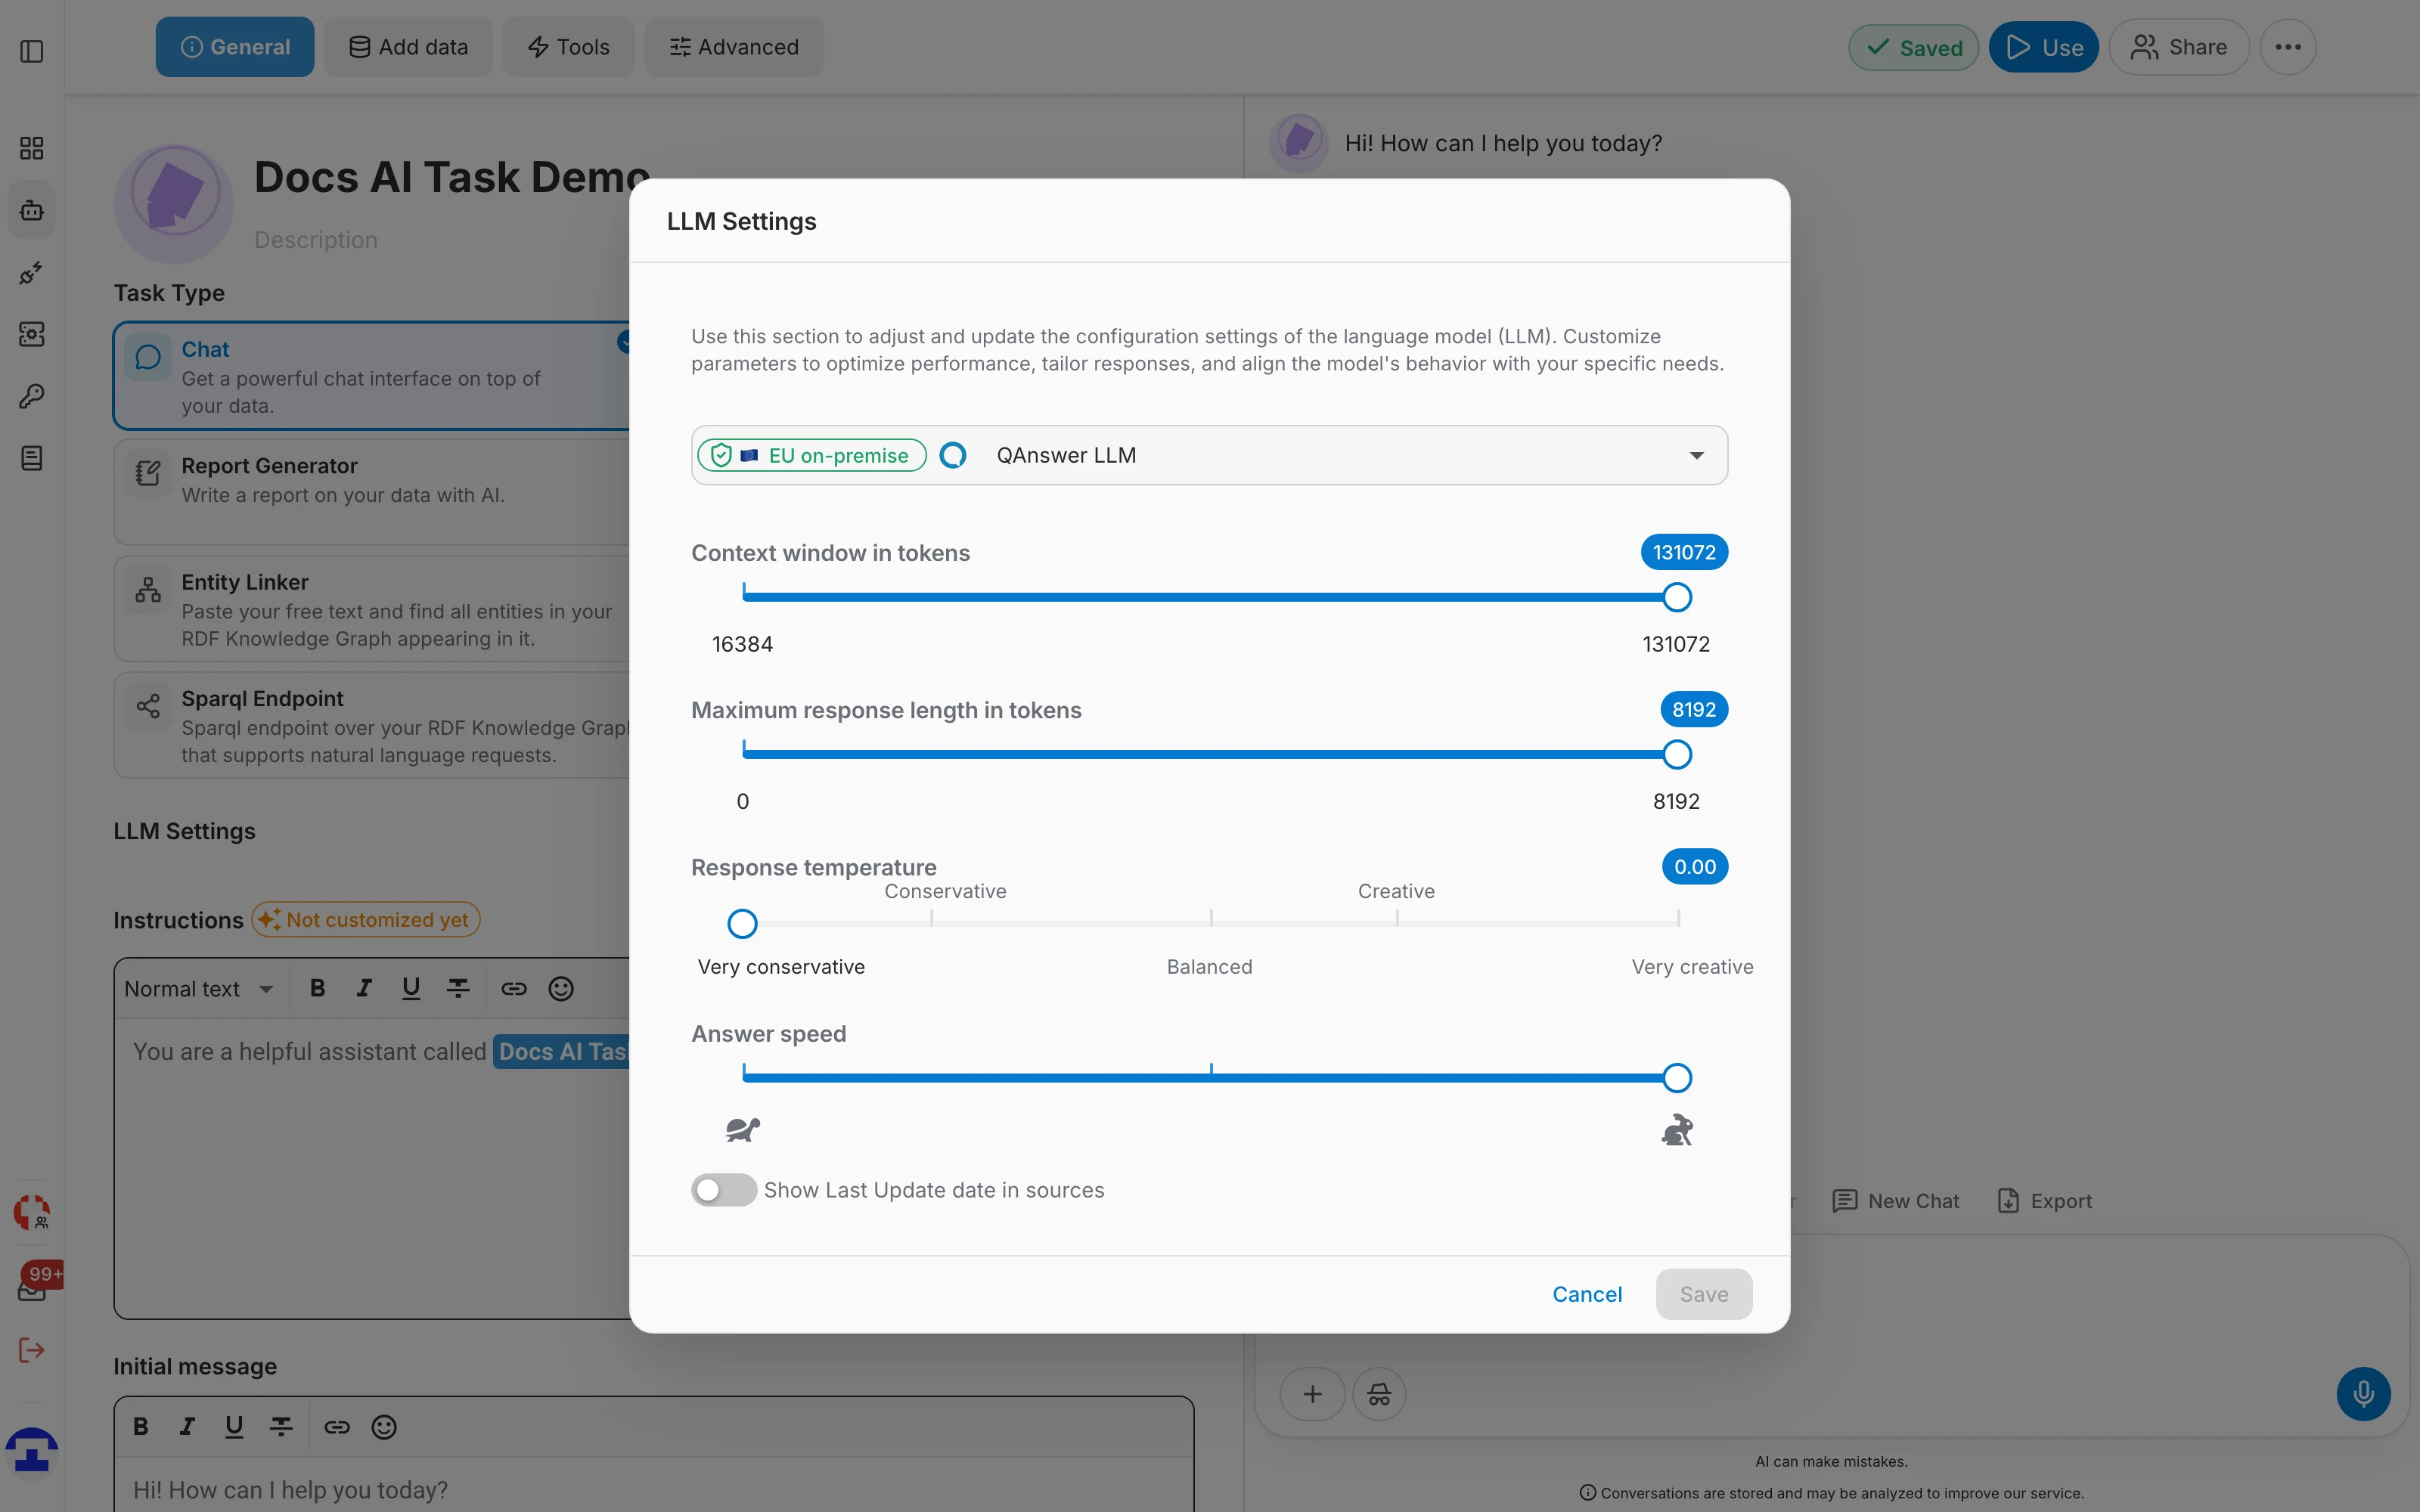
- Context window (tokens): how much text — the conversation so far plus the retrieved documents — the model can consider at once. Long conversations eventually push the earliest turns out of it.
- Maximum response length: a cap on the tokens each answer may use.
Practical tip: a low temperature keeps a support assistant factual; raise it only when you want the assistant to write more freely.
Tools
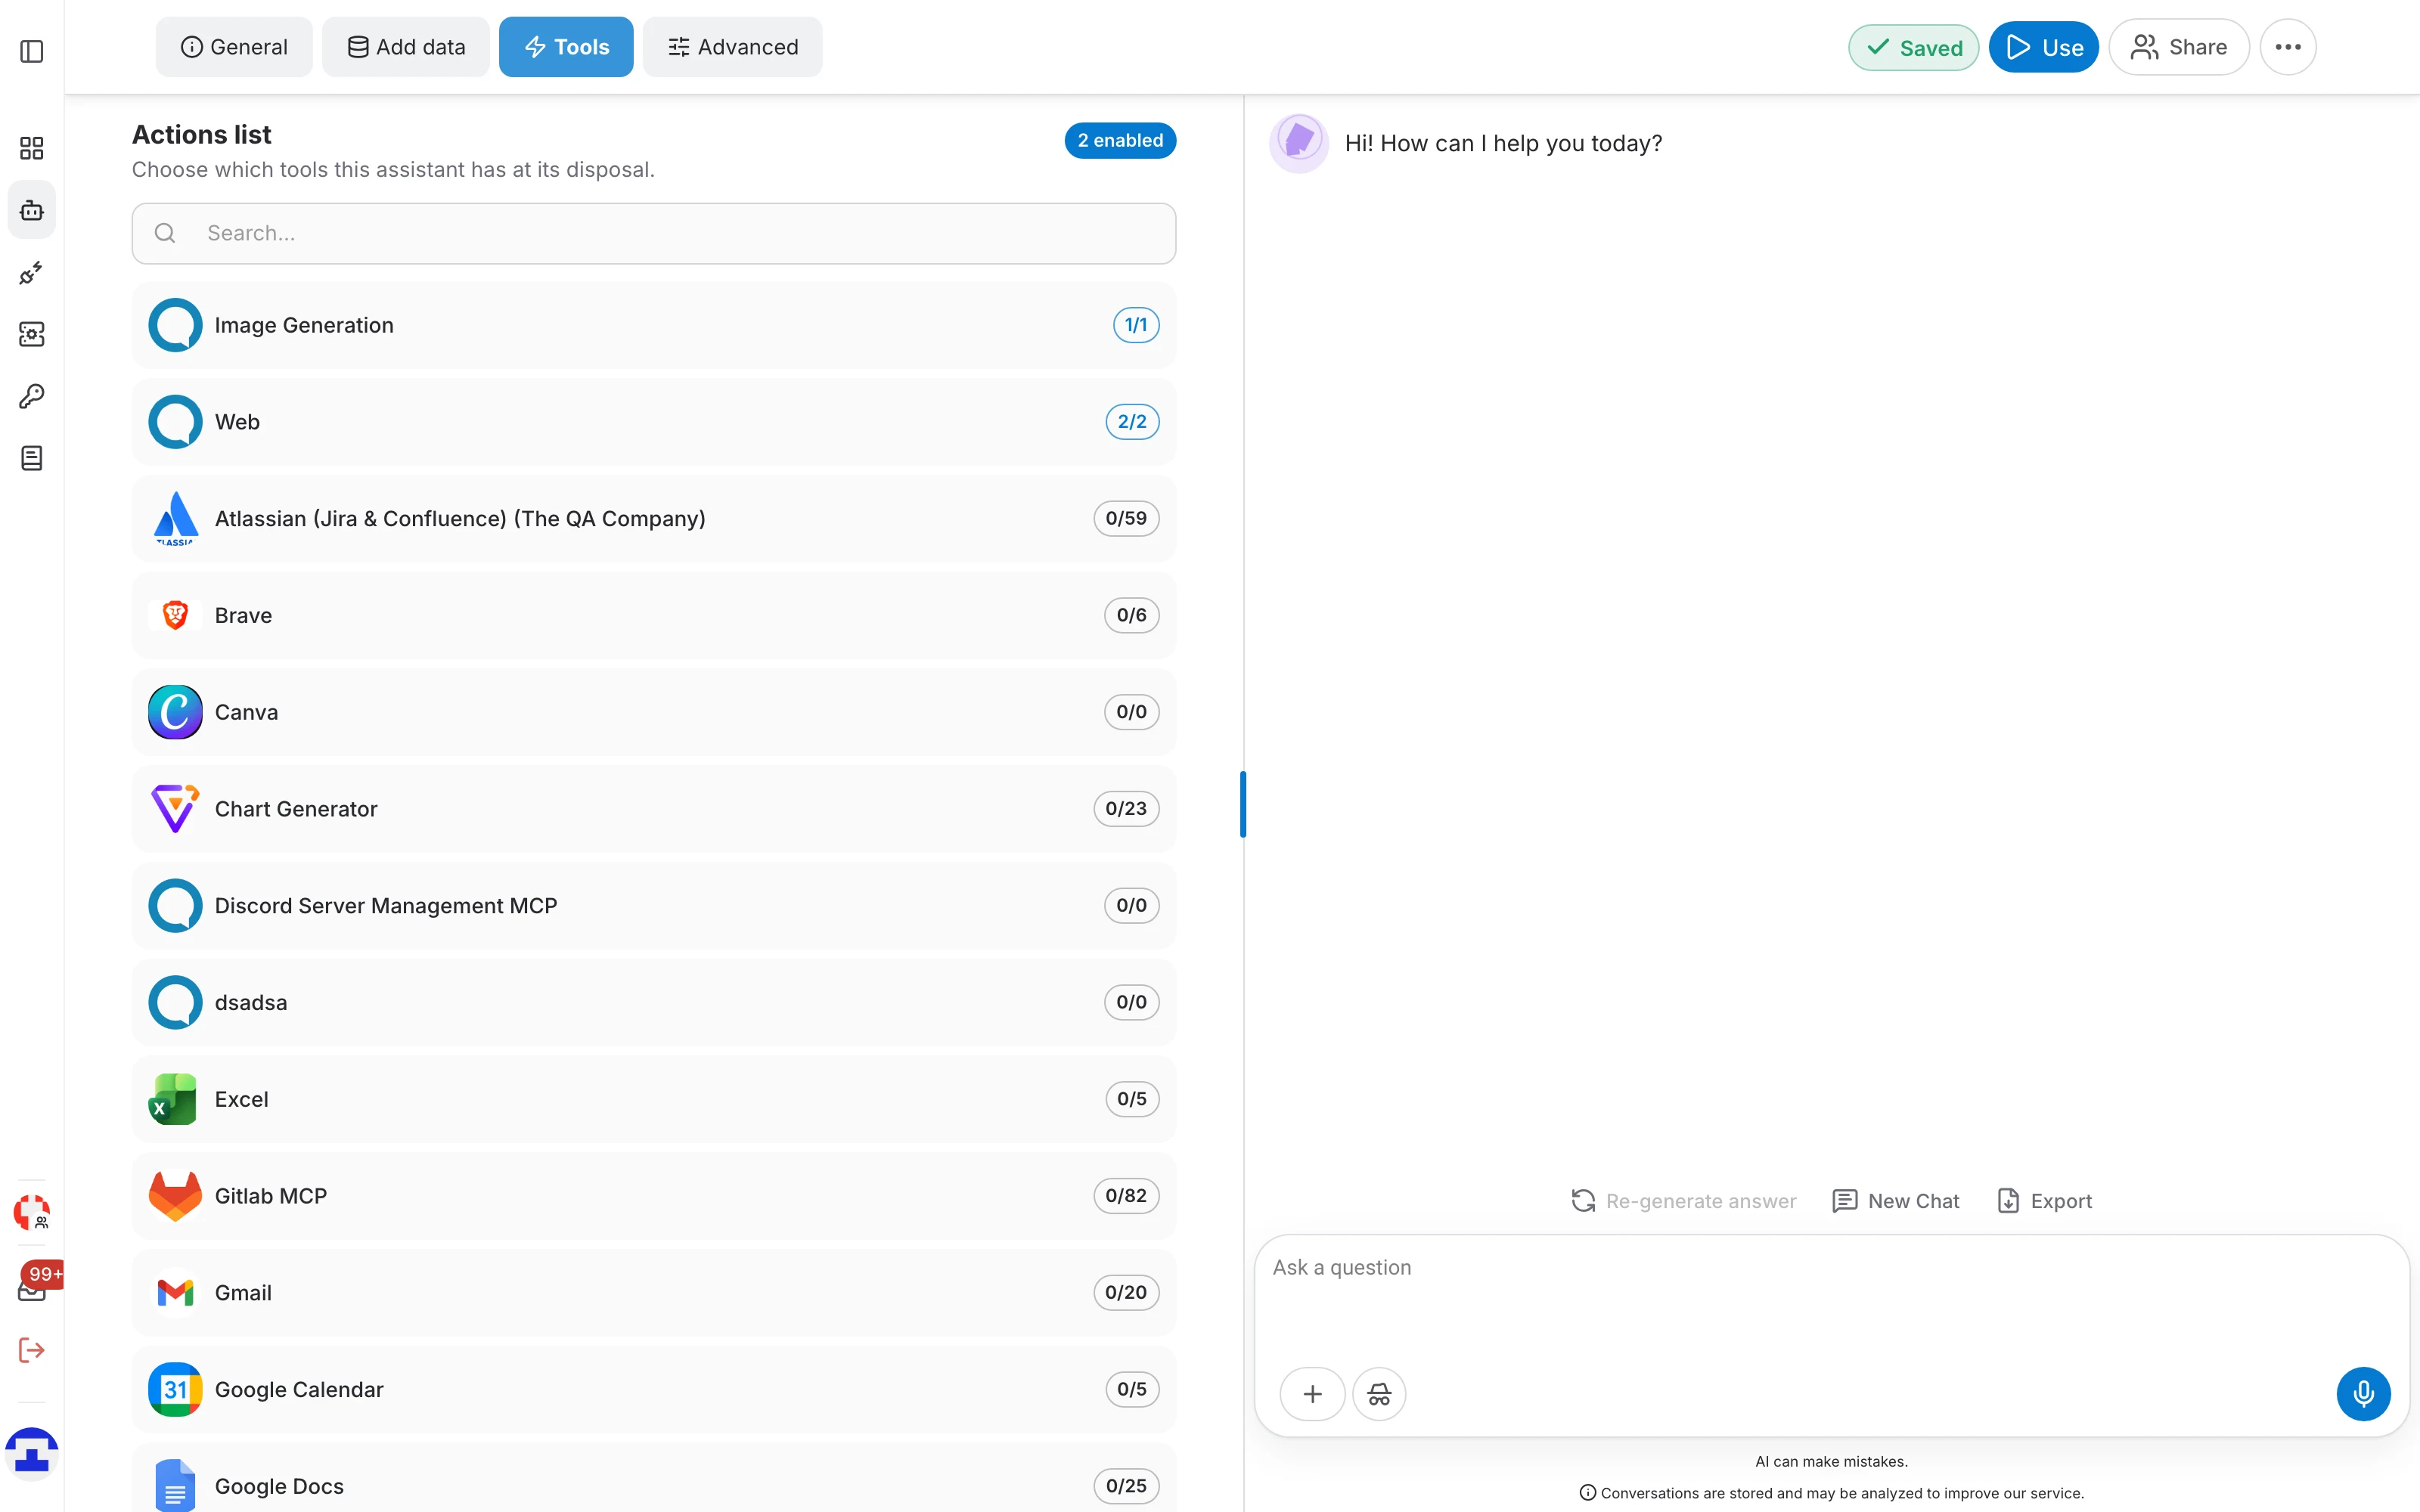
The Tools tab decides what the assistant may do besides reading your data. Each entry shows how many of its actions are enabled:
- Web — live web search, for questions your own data cannot answer. This is where the former Web Search data source went.
- Image Generation — let the assistant produce images in the conversation.
- MCP servers — the actions of every connected MCP server, such as Gmail, Google Drive, GitLab or Jira. Enable only the actions the assistant genuinely needs.
Retrieving and chunking
How documents are retrieved and cut up is configured per data source, exactly as for the Search task — see the Search page for the number of references, synonyms, query expansion and the split options.
Advanced settings
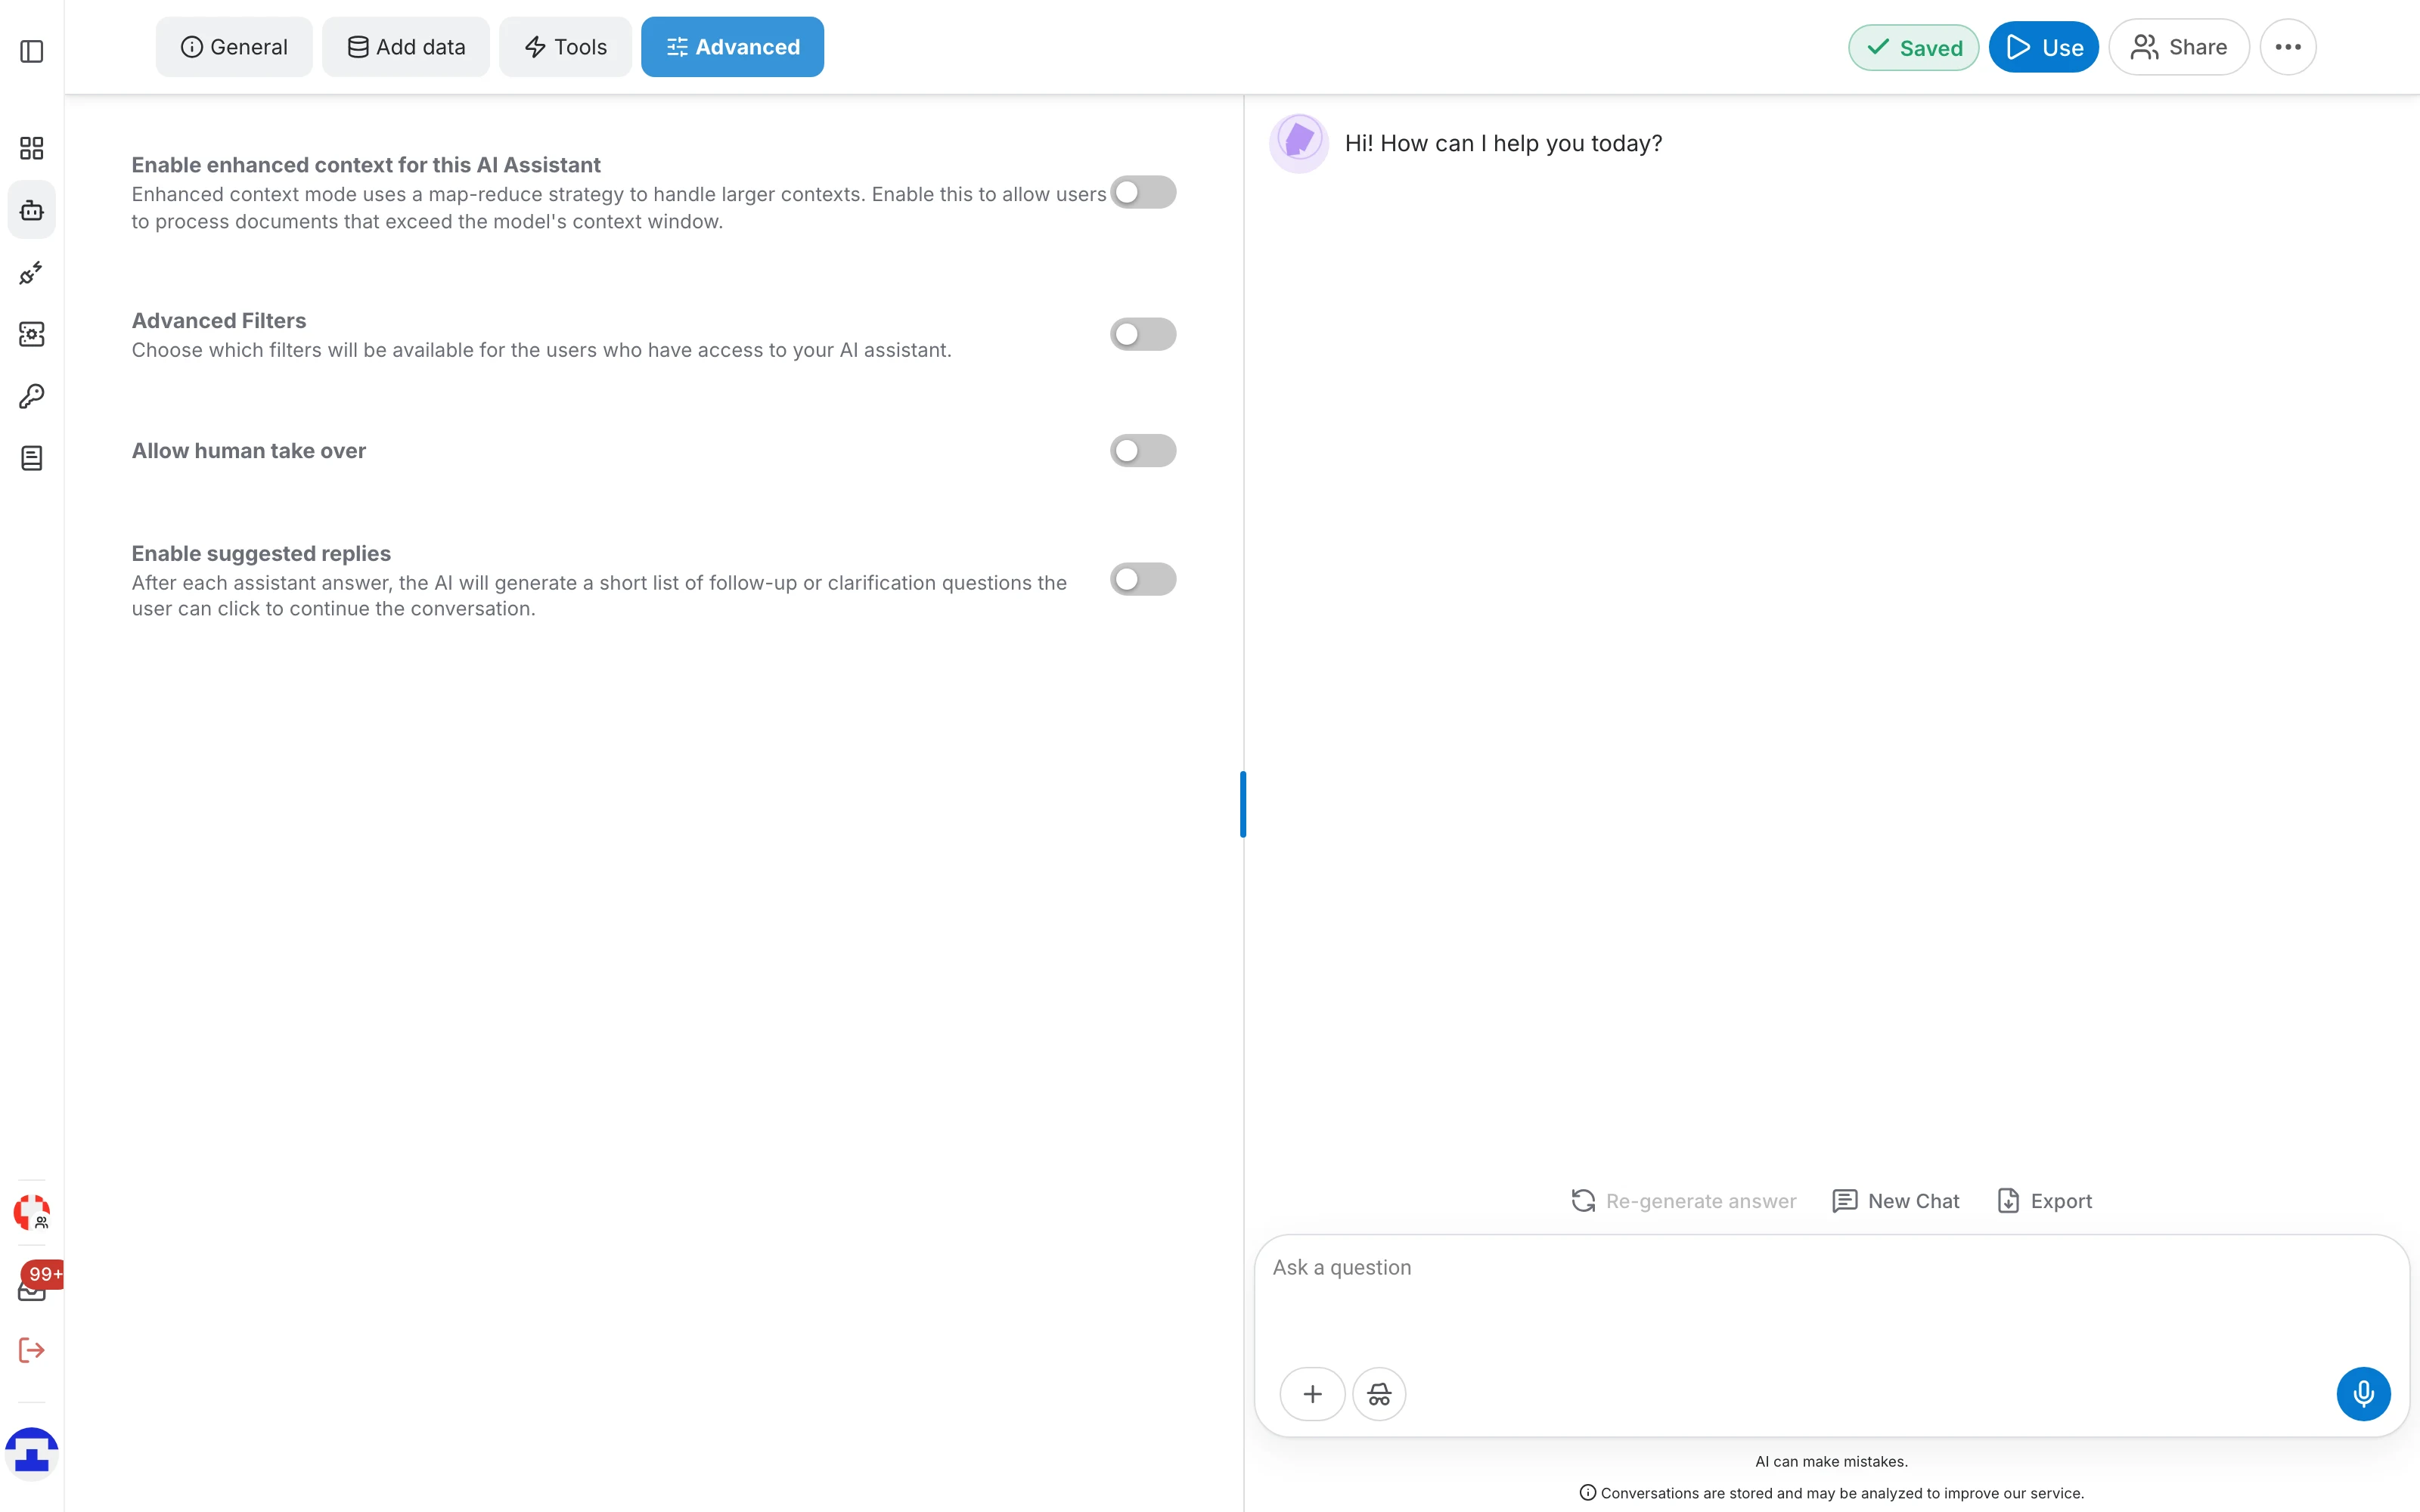
The Advanced tab holds the switches that change how the conversation behaves:
- Enhanced context — a map-reduce strategy for documents larger than the model's context window: each part is processed separately and the results are combined, so the whole document is considered. Off by default.
- Advanced Filters — choose which filters the users of this assistant may apply to the documents an answer is built from.
- Allow human take over — let a user ask for a person to continue the conversation.
- Enable suggested replies — generate the clickable follow-up questions described above.
Human take-over
- With the option on, a user of the assistant can ask for a human to take over the chat. It only does something when the assistant is shared with other users.
- The owner of the assistant is notified by e-mail that someone asked for help.
- The owner can then open that conversation and answer in place of the assistant.
Faceted chat
With Advanced Filters on, the chat gains a filter panel. Some filters are always there, such as the data-source type and the file format; the rest come from the metadata you attached to your files, so they describe your own collection.
How much of your data the model sees
The Message information dialog names the context mode the answer was produced in, and the two modes behave quite differently:
- Full context — everything you uploaded fits inside the model's context window, so the model receives all of it, with no filtering or truncation.
- RAG — your data is larger than the context window, so the system retrieves the most relevant chunks for each question. The model sees those chunks rather than the whole collection, which is why a question that needs to compare far-apart parts of a large corpus can come back incomplete.
If RAG mode holds an assistant back, you have three levers:
- move to a model with a larger context window,
- reduce the collection by removing documents the assistant does not need,
- or raise the number of references so more chunks reach the model for each question.