Audio
Video Tutorial
Audio
Watch on Tutorials page →
Audio - Data Source
Use one or more audio files or recordings as a data source for your QAnswer AI assistant. The audio connector transcribes your spoken content into searchable text, letting you ask natural-language questions about meetings, interviews, lectures, podcasts, and any other audio material. Both file uploads and live browser recordings are supported, and multiple files can be combined in a single connector.
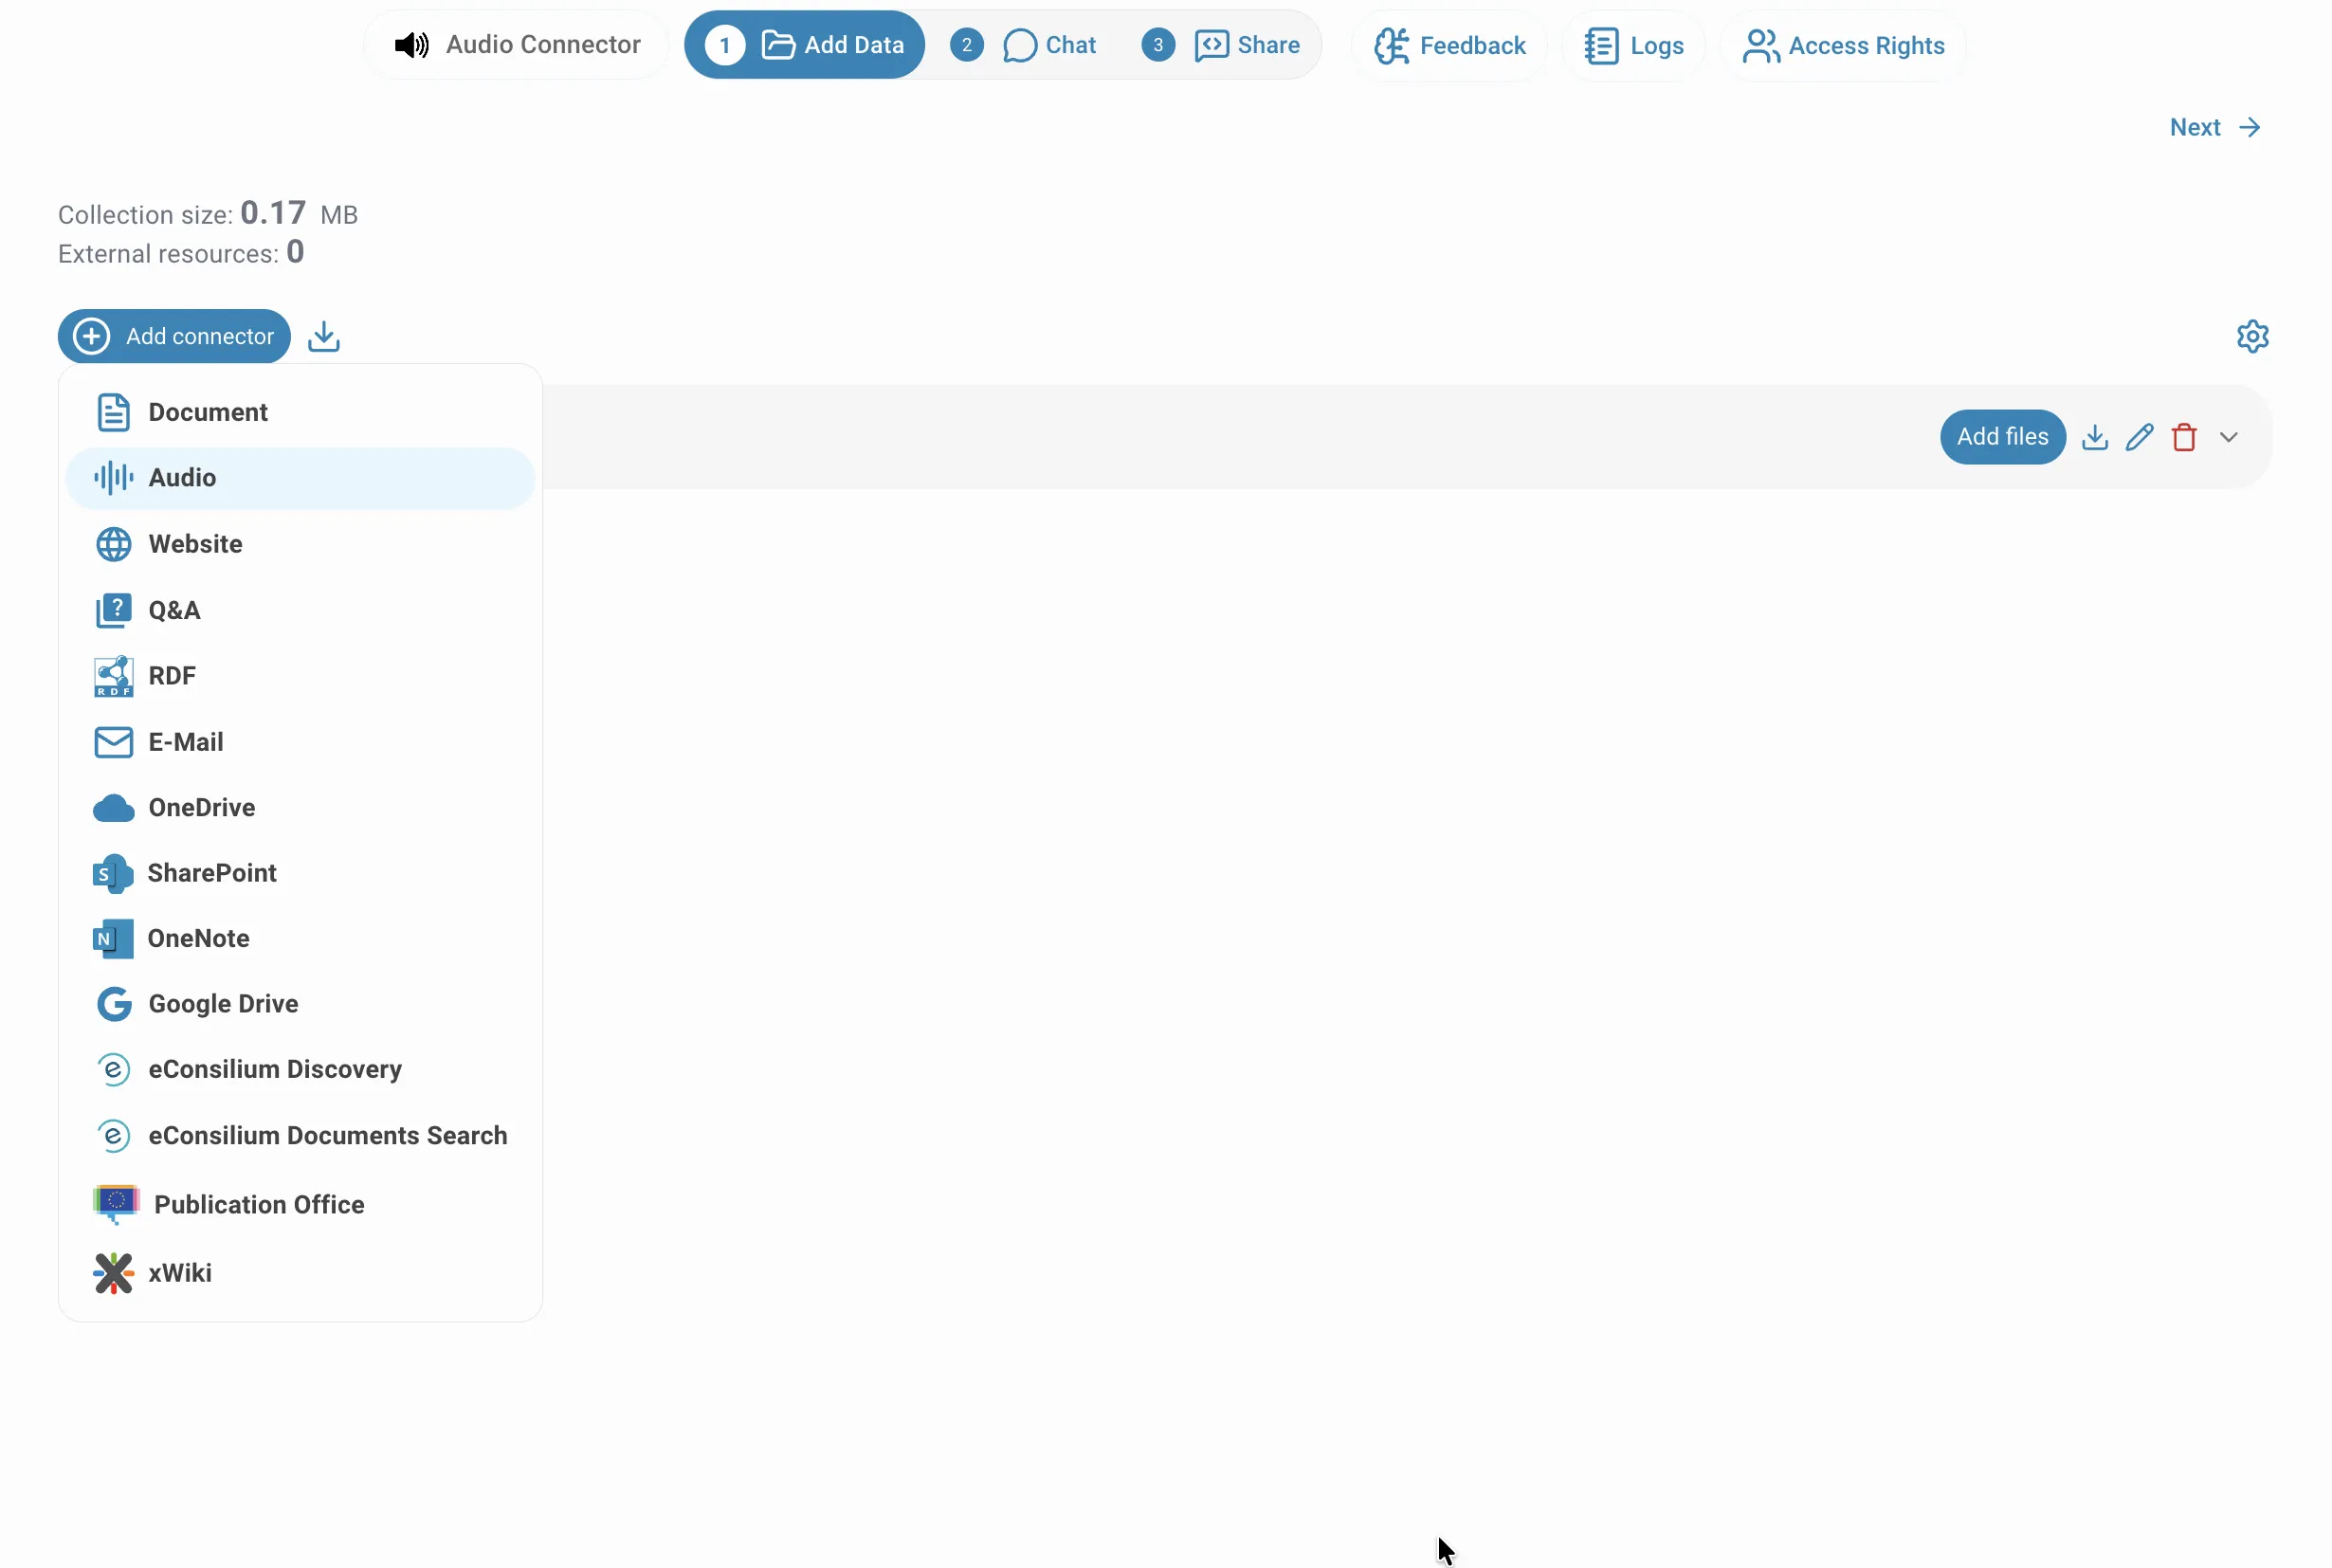
From the data source panel, click on Audio to create a new audio connector:
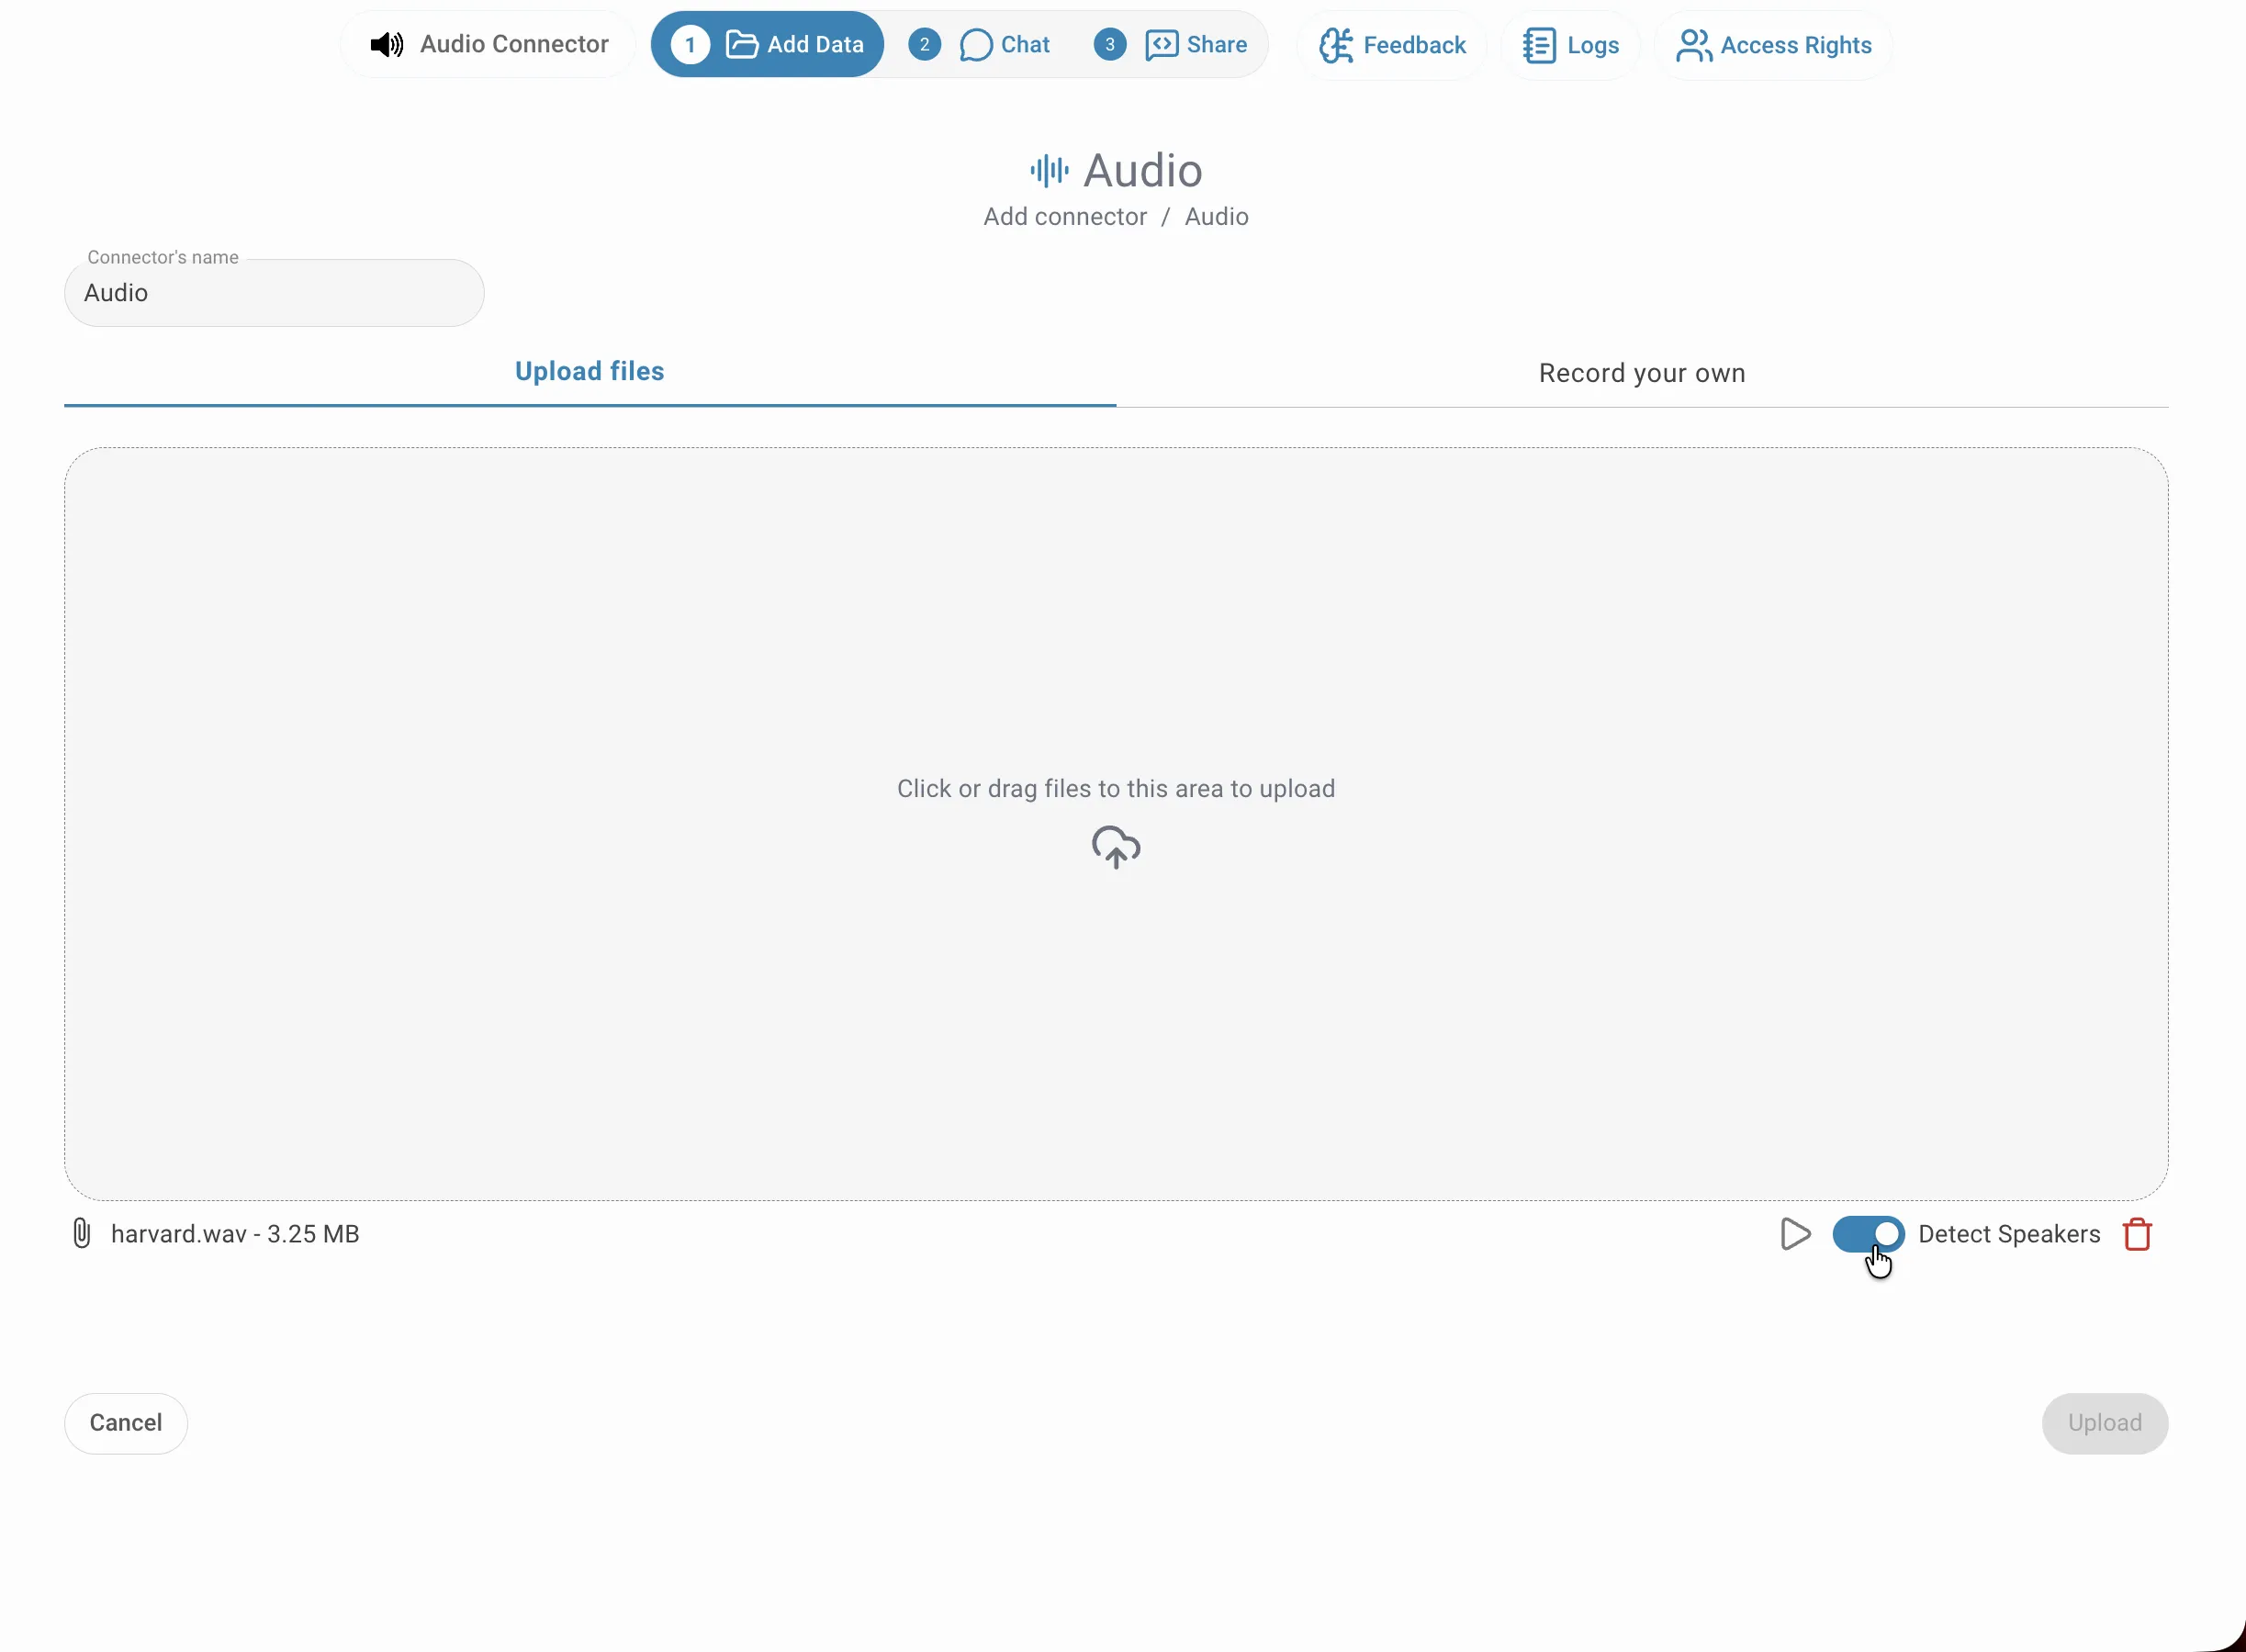
Upload files
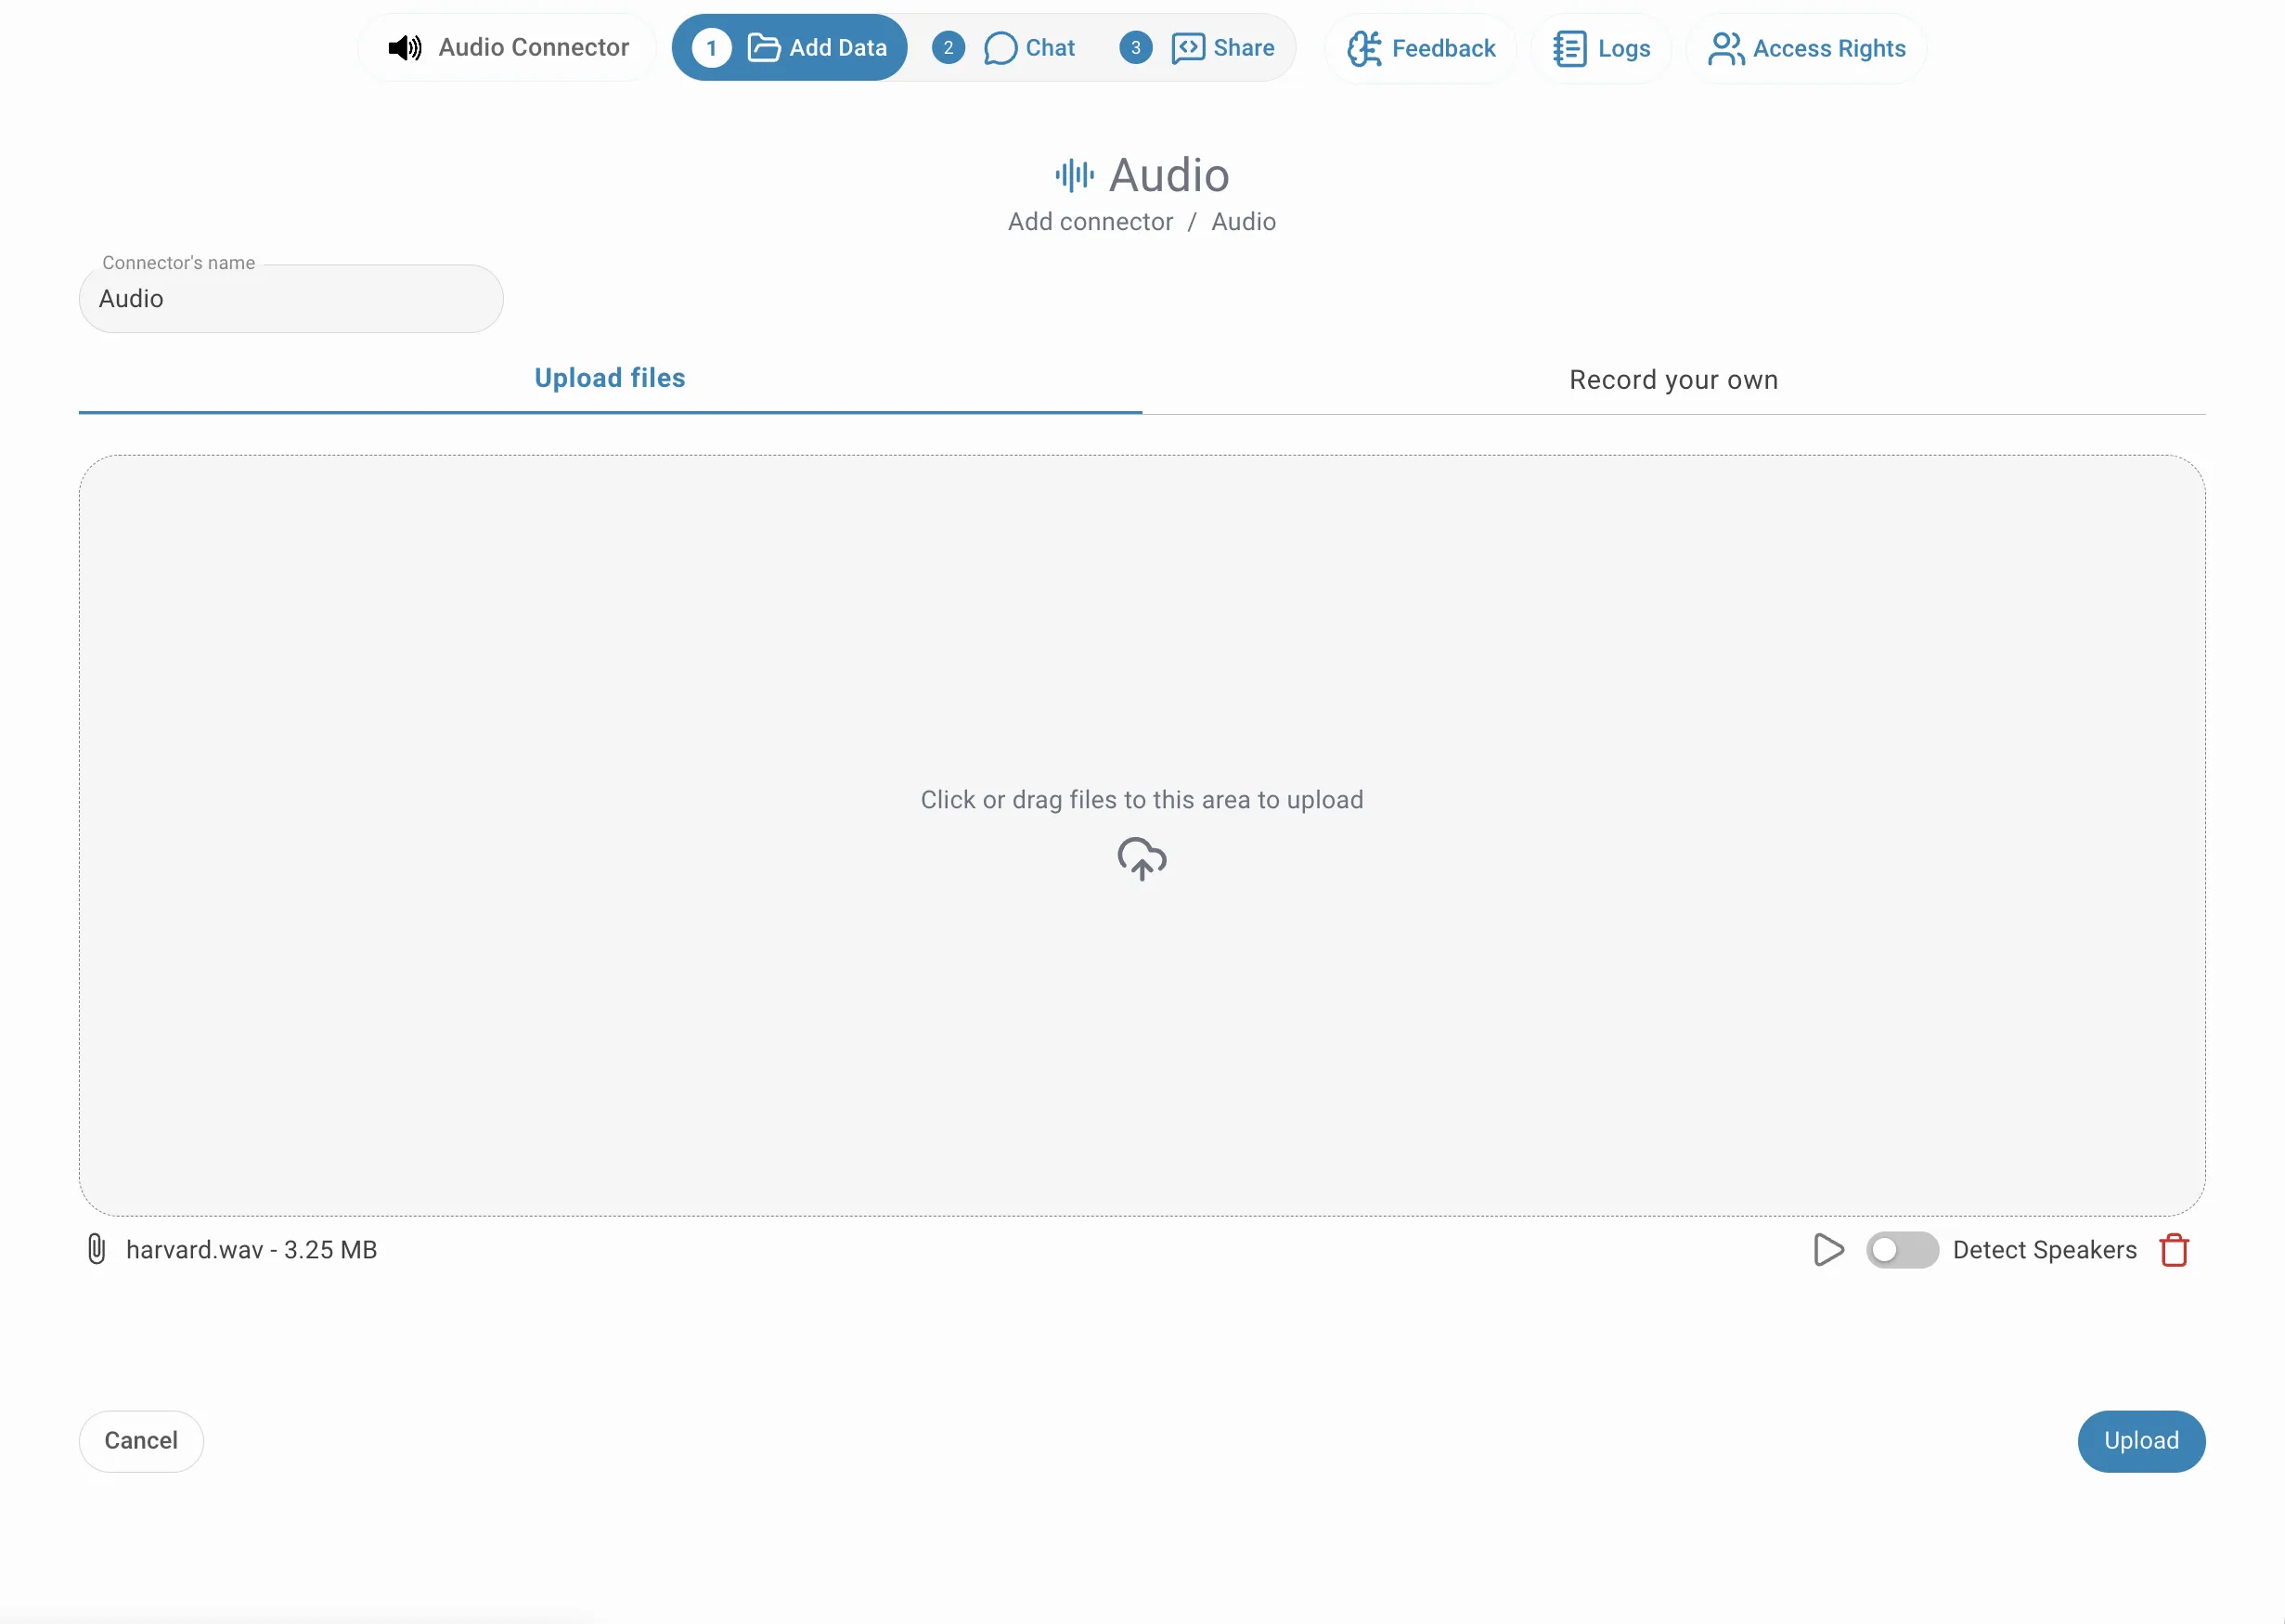
Give your connector a name, then drag and drop your audio files onto the upload area — or click inside it to open the file picker. You can add multiple files at once. Each file appears listed below the drop zone with its filename and size. Before clicking Upload, you can toggle diarization individually for any file that contains more than one speaker.
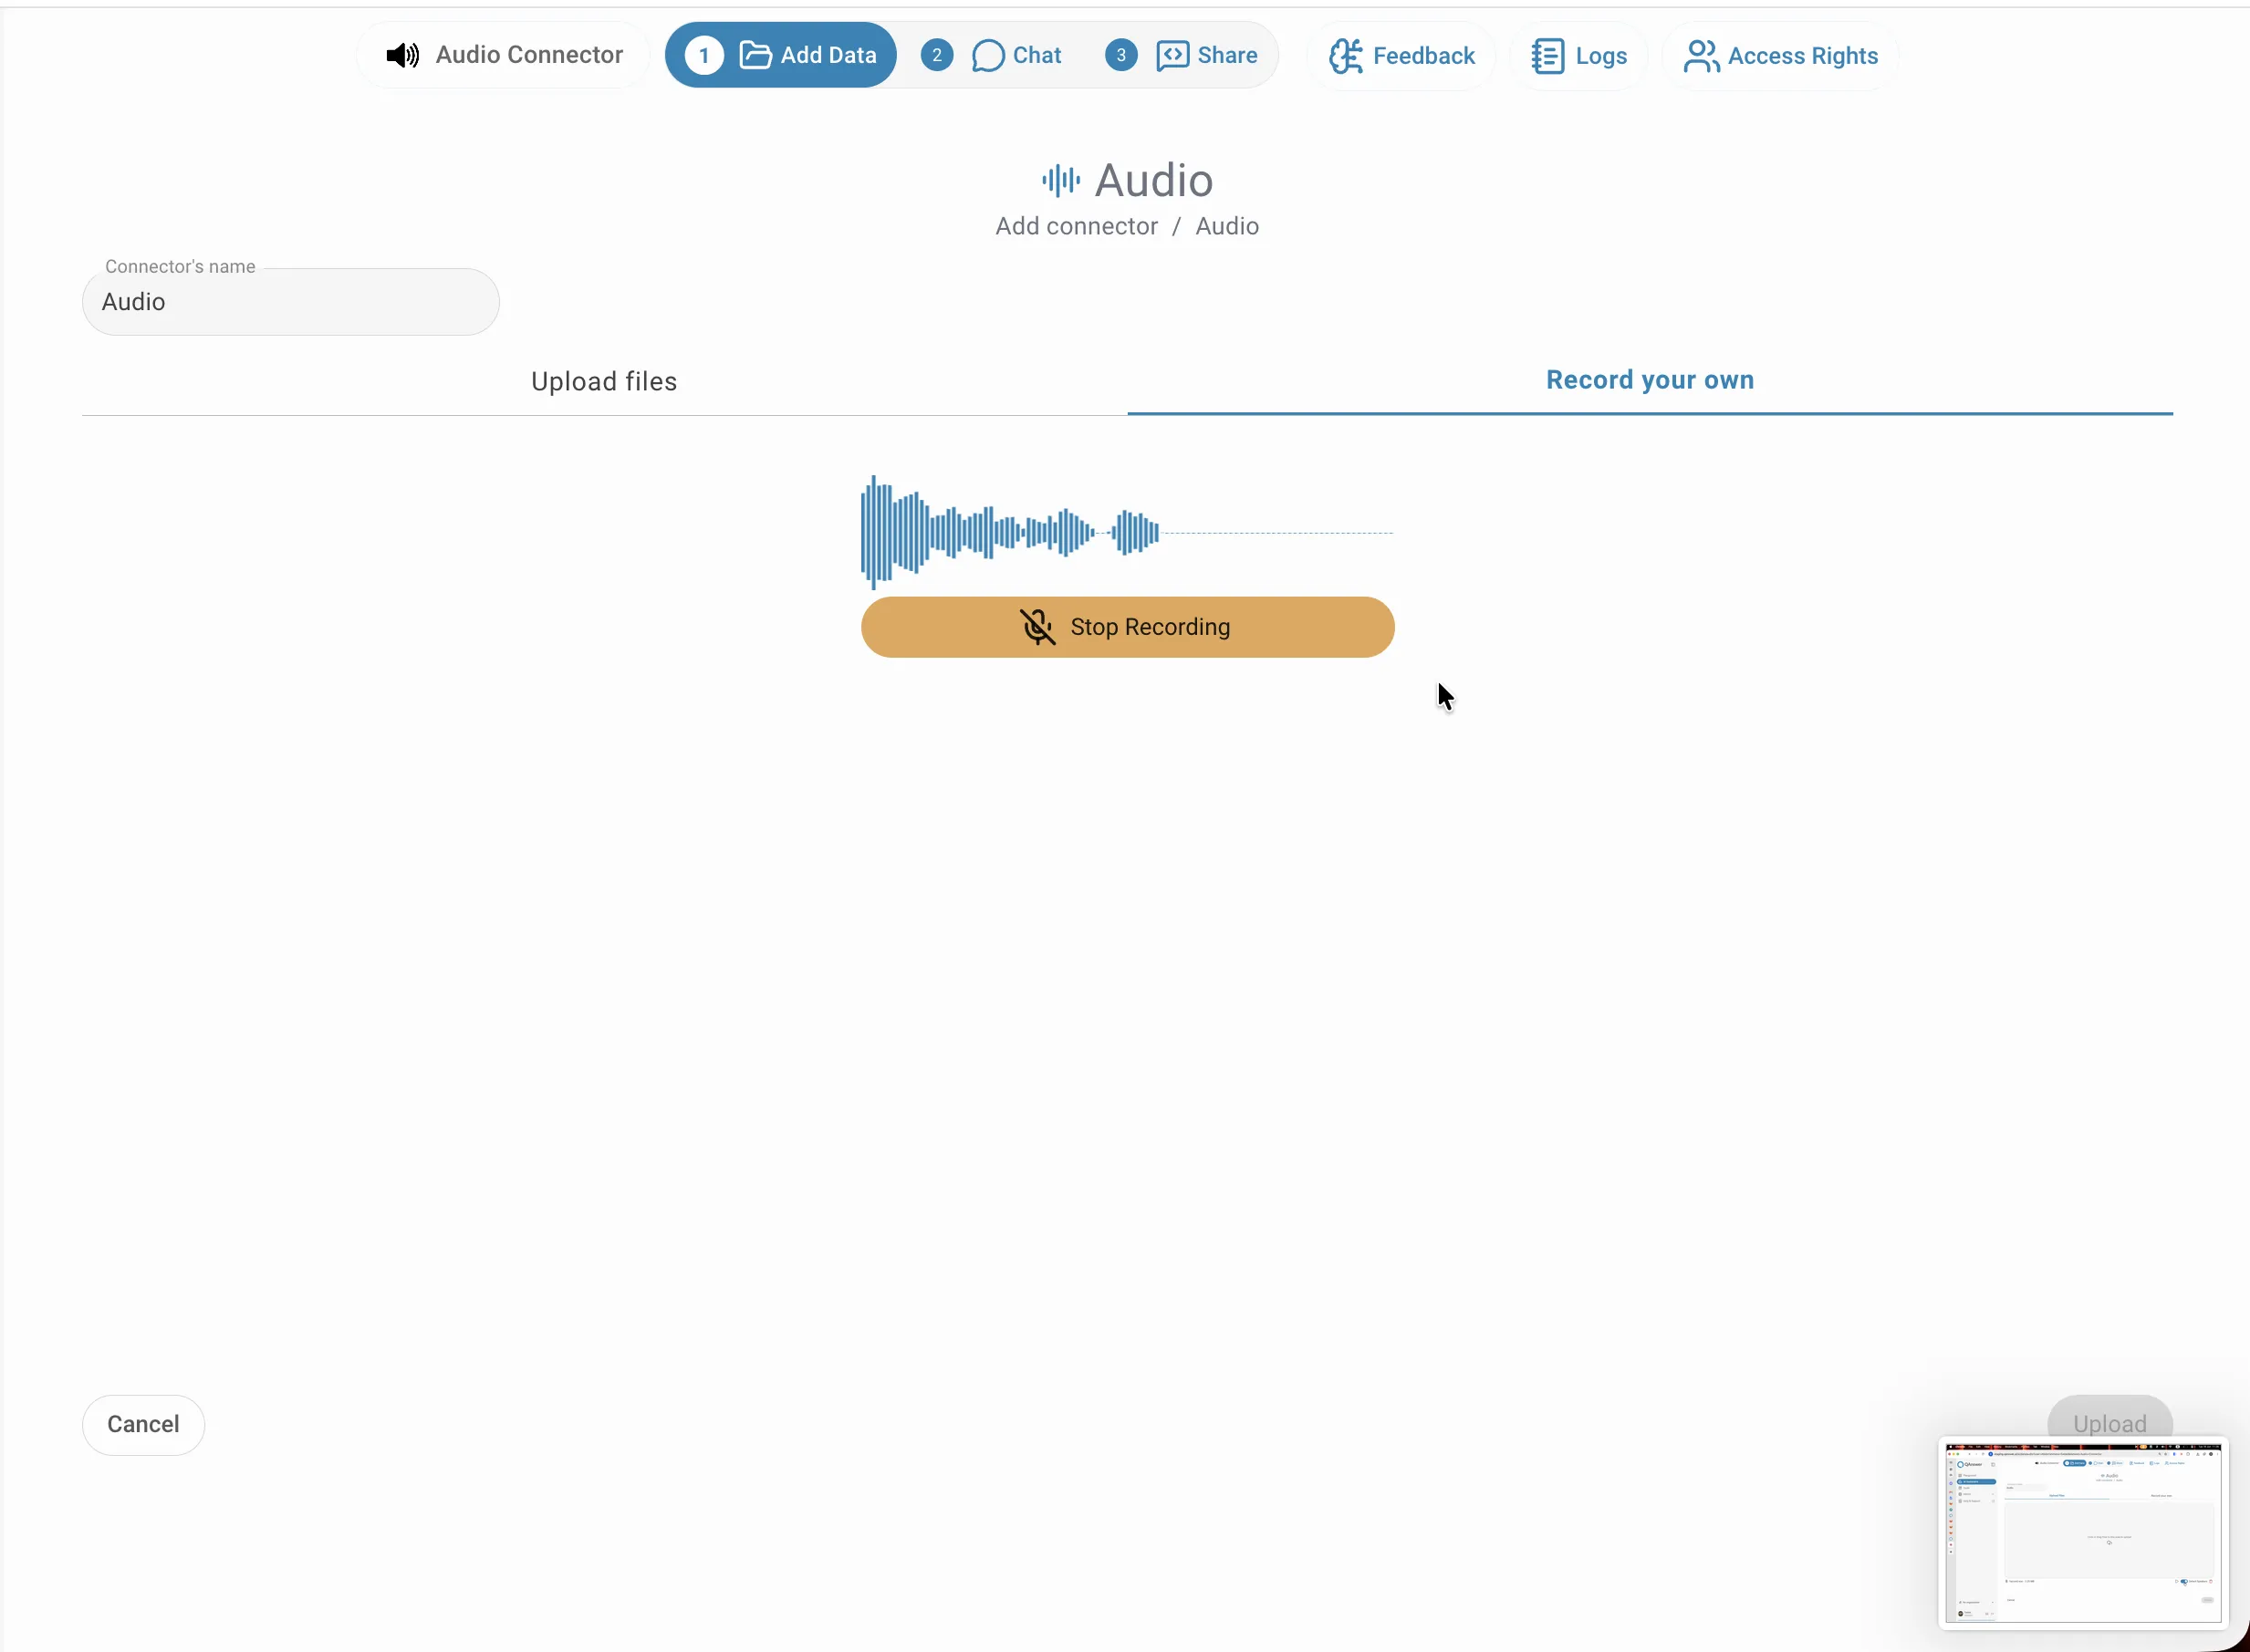
Recording
Switch to the Record your own tab and click Start Recording to capture audio directly in the browser using your microphone. A live waveform confirms that recording is active. When you are finished, click Stop Recording — the captured audio is saved and treated exactly like an uploaded file. This is useful for capturing live meetings, voice notes, or interviews without needing to save a file first.
Diarization (Detecting Speakers)
To enable diarization for a file, click the Detect Speakers toggle on the right side of that file's row. The toggle can be set independently per file, so you can mix plain transcription and diarization within the same connector depending on whether each recording contains one speaker or several.
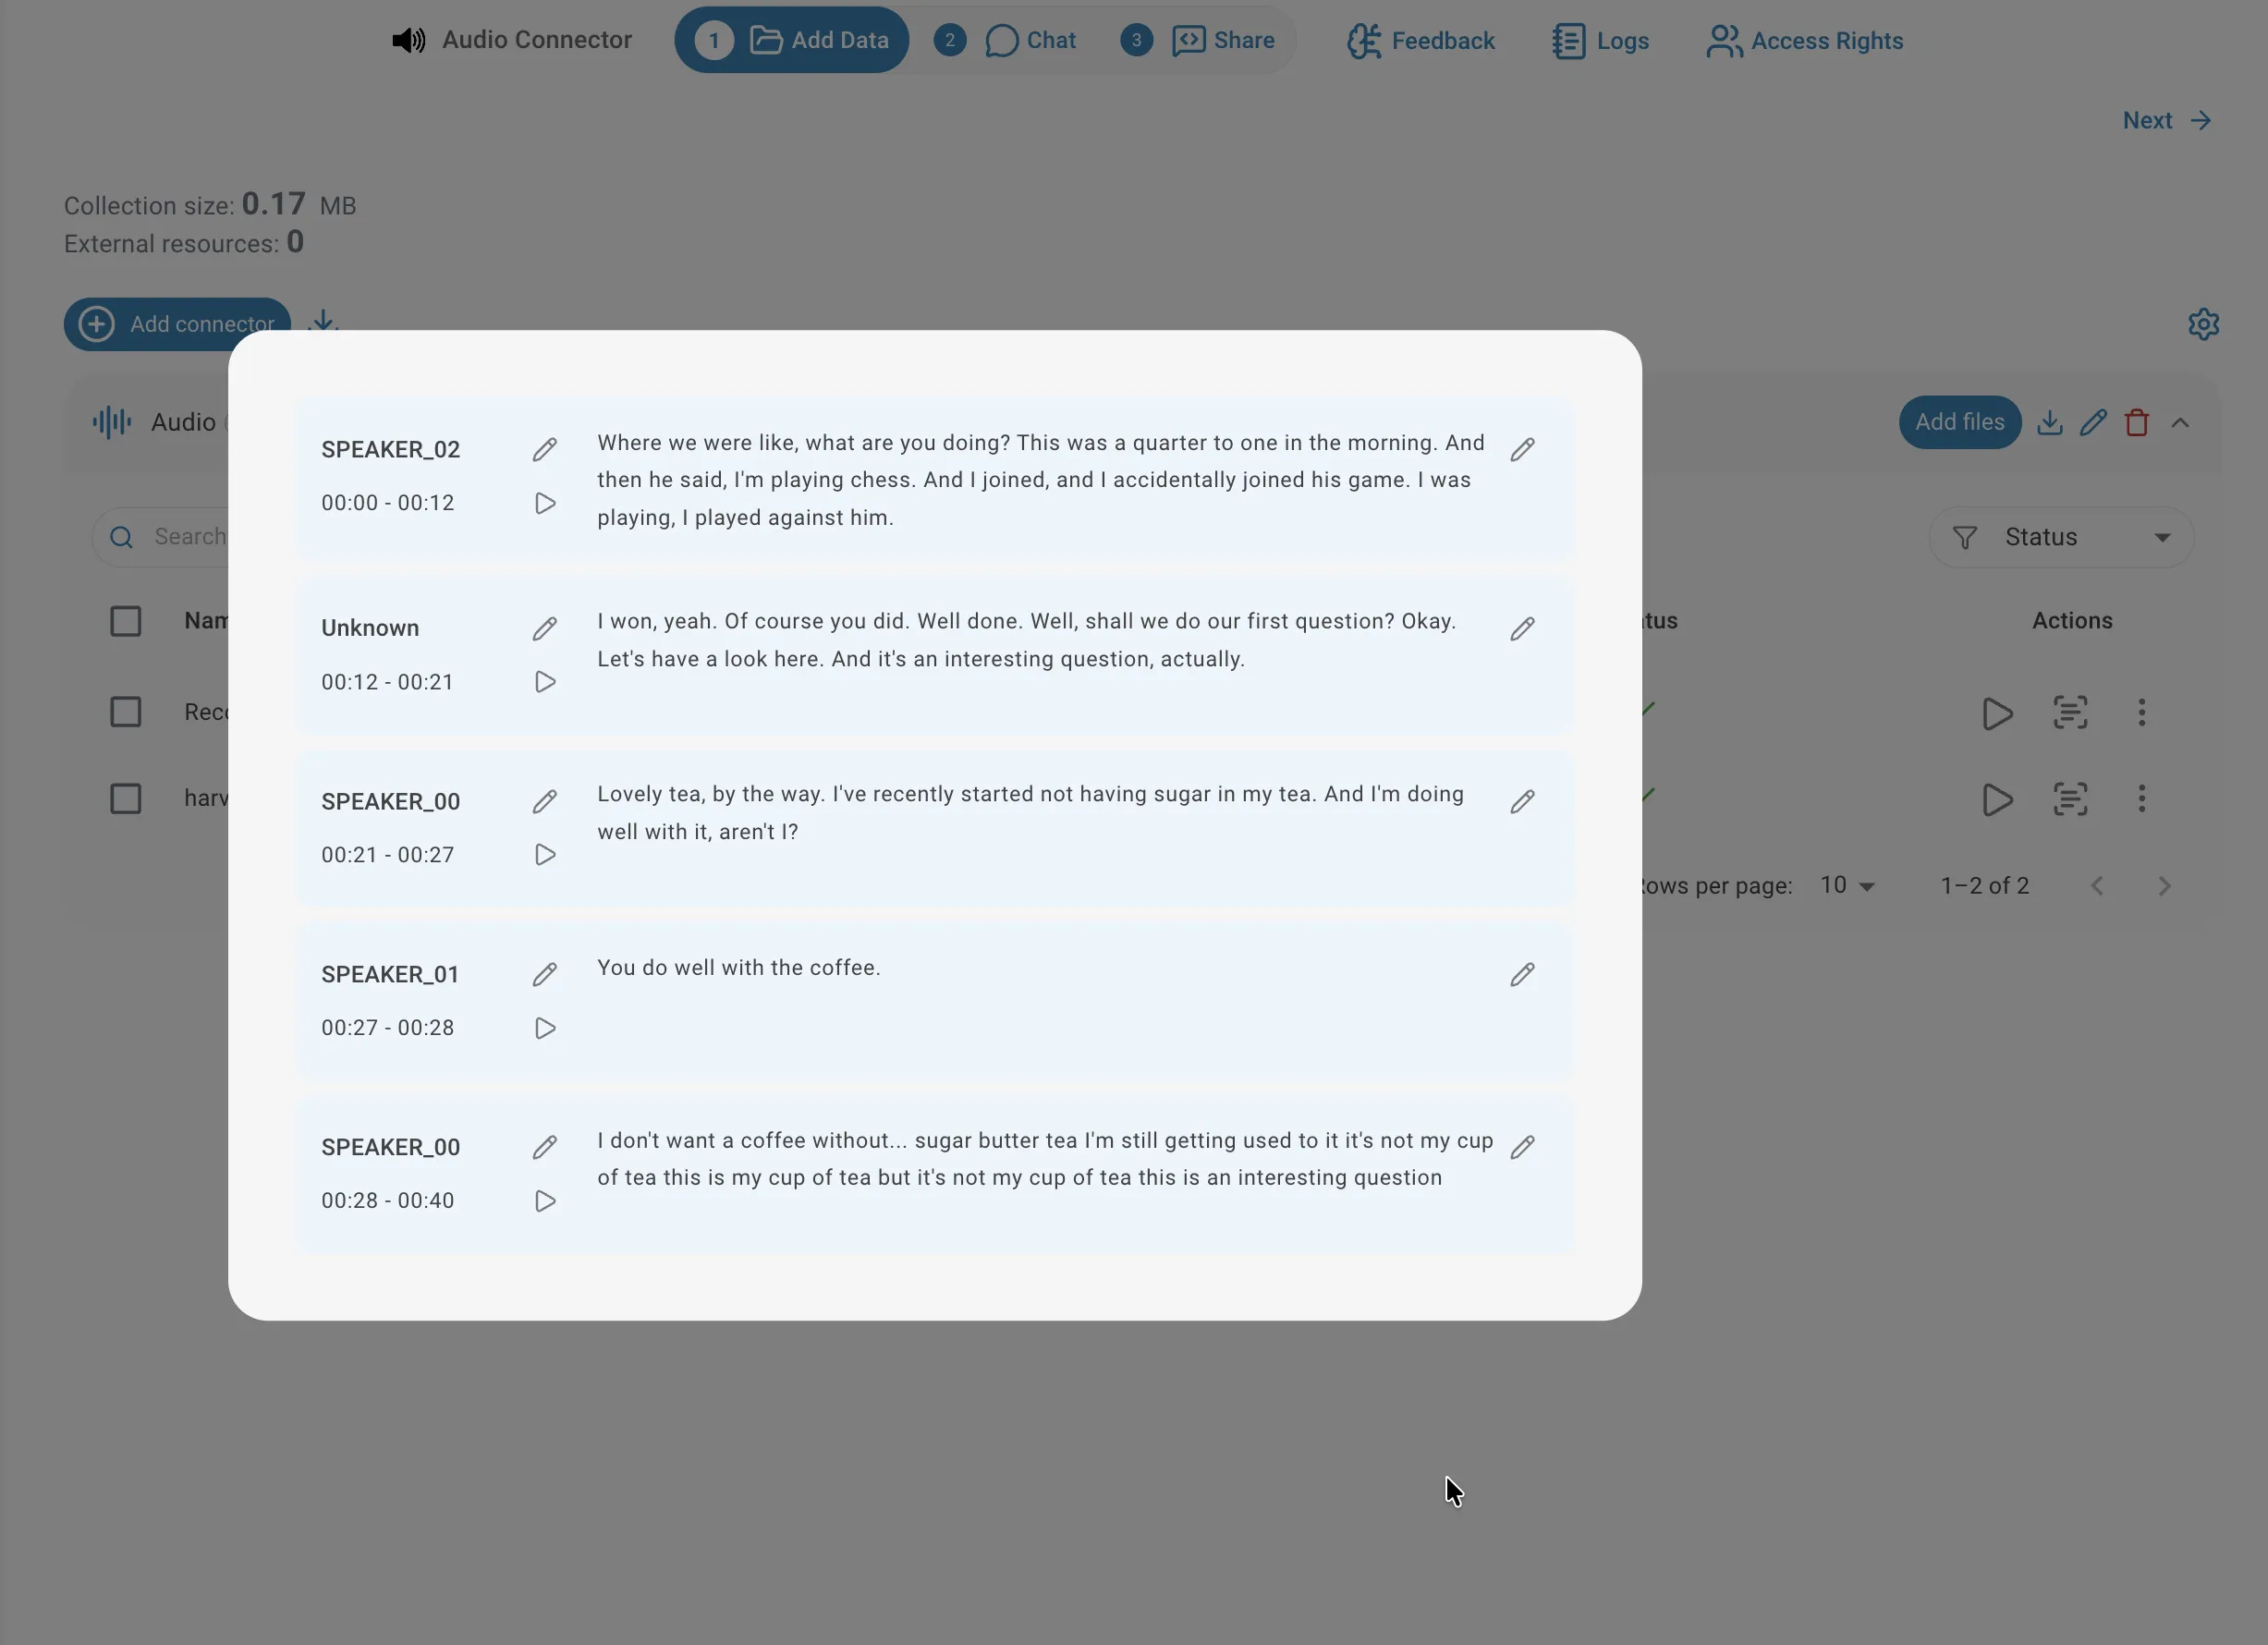
Diarization automatically identifies who is speaking at each moment and divides the audio into labelled segments. Speakers are initially assigned generic labels such as SPEAKER_00, SPEAKER_01, and so on — you can rename them to meaningful names after the file is indexed. Use diarization for interviews, panel discussions, or any recording where knowing who said what is important for your queries.
Once your files are staged and diarization preferences are set, click Upload in the bottom-right corner. The files are sent to the server immediately and transcription runs in the background — you can navigate away or continue working on other tasks without waiting. No progress is lost by leaving the page.
Waiting for indexing
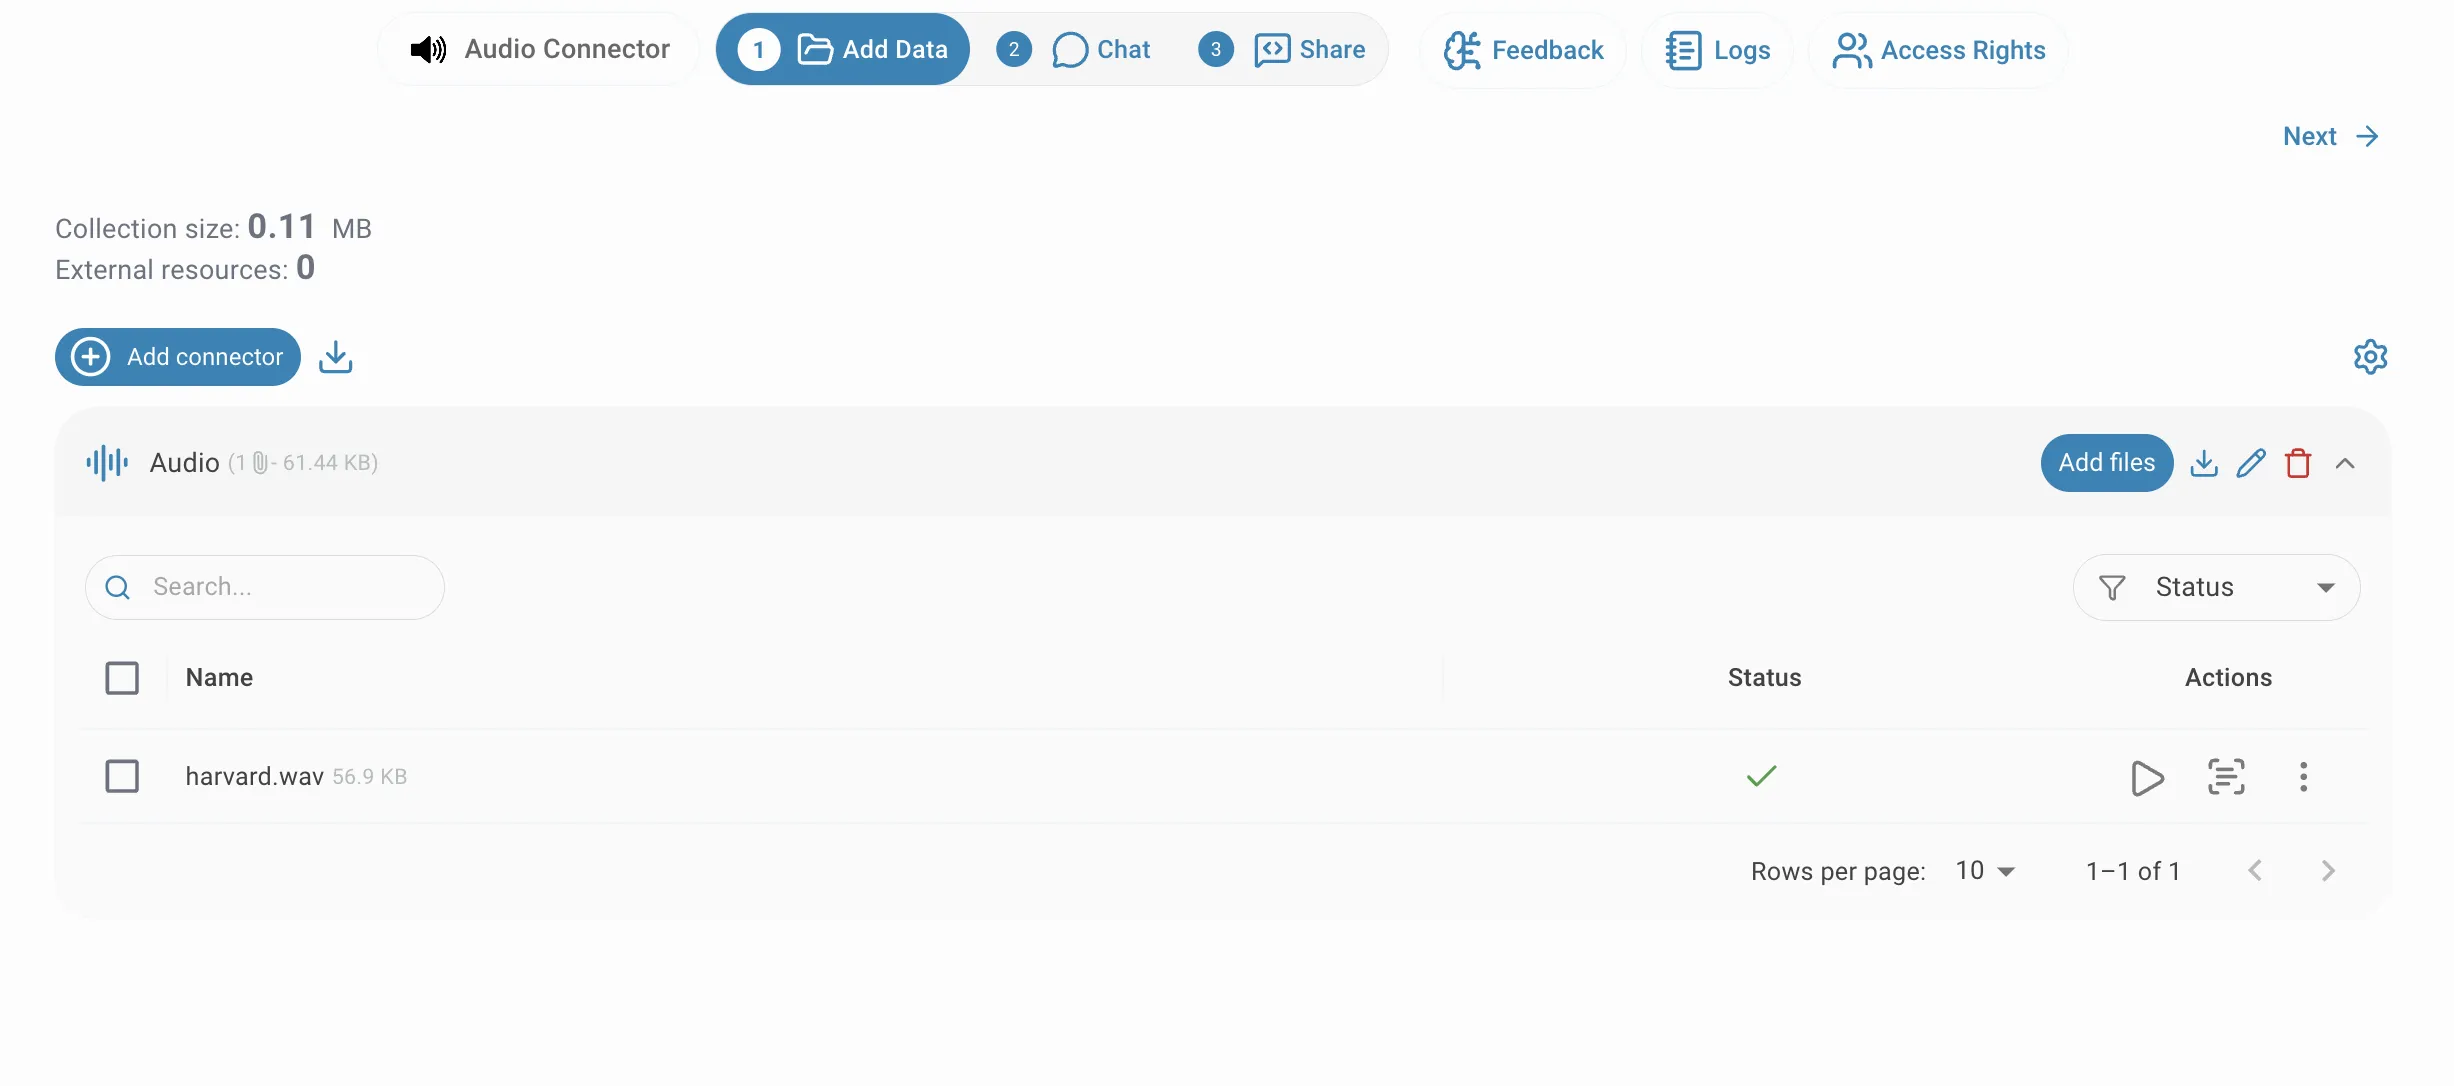
After uploading, files appear in the connector's file list and are processed asynchronously. The status column updates as each file moves through the transcription pipeline. A green checkmark means the file has been fully transcribed and indexed and is ready to be queried. If a file fails to process, an error indicator appears — hover over it to read the reason. You can add more files to an existing connector at any time by clicking Add files on the connector row.
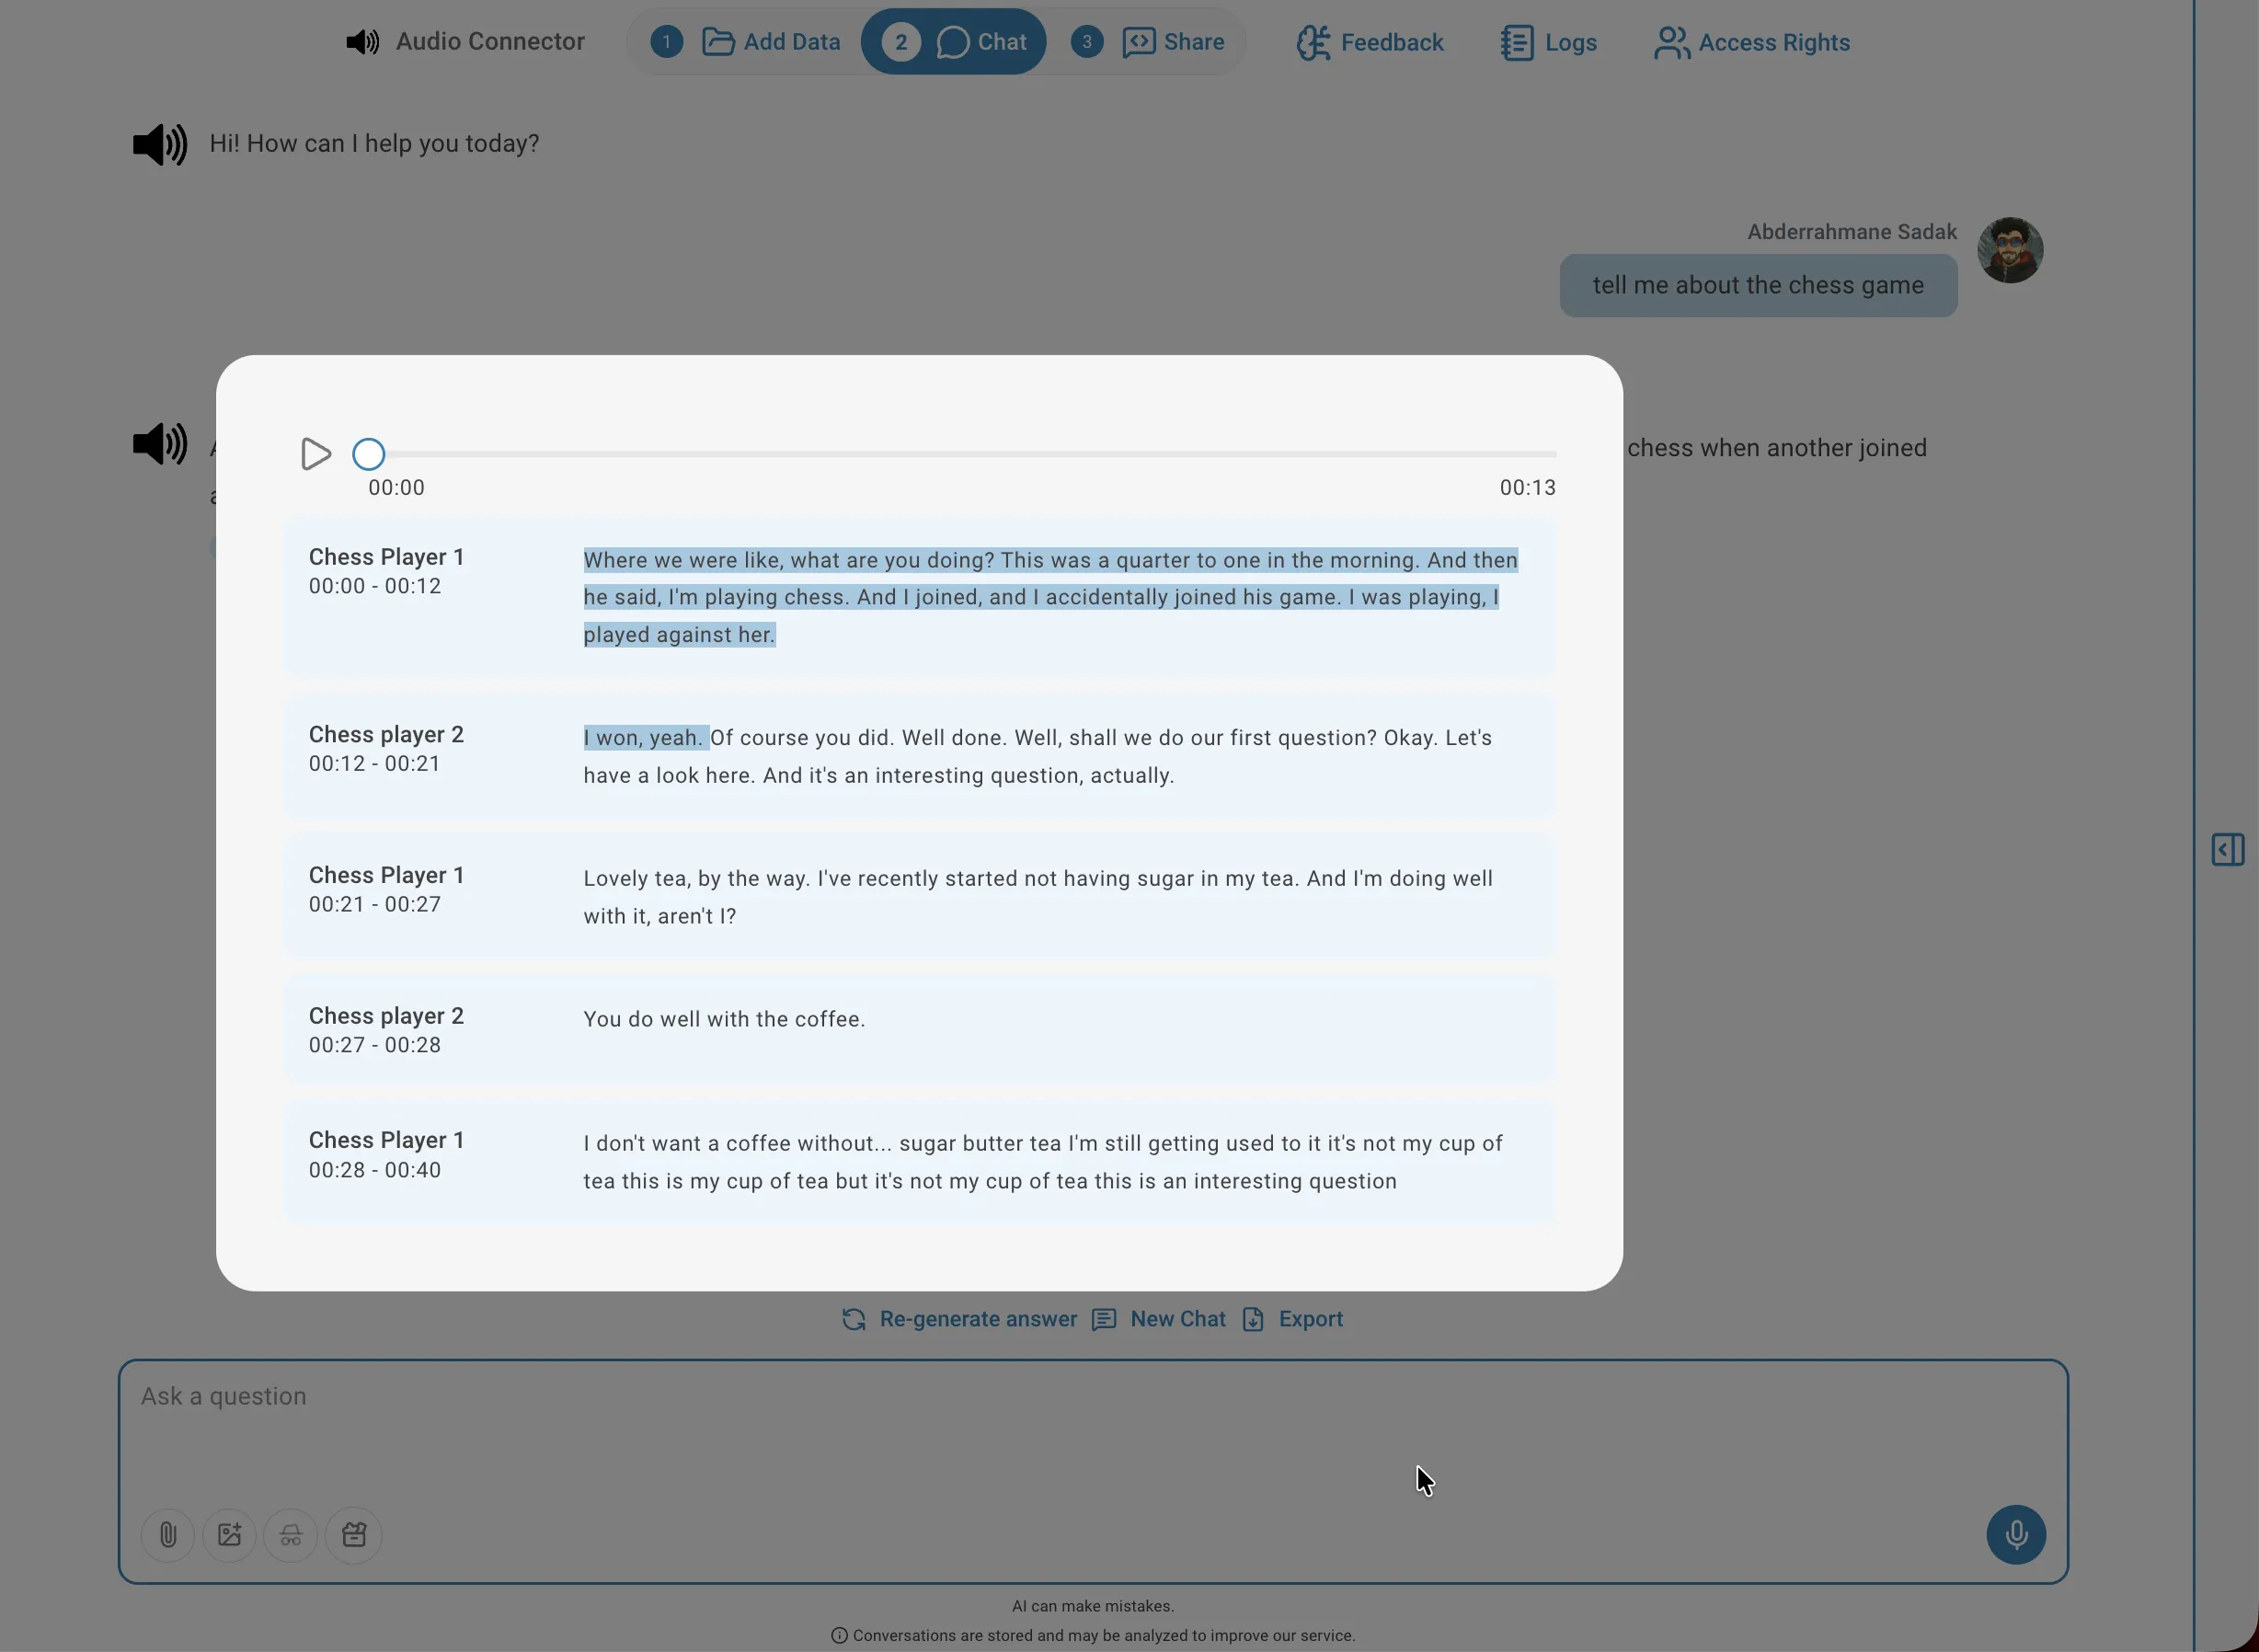
View transcription
To inspect the transcription result for a file, click the transcript icon on its row in the connector list. The viewer shows the full text organised into segments, each with a speaker label (for diarized audio), a timestamp range, and the transcribed text. You can play back the audio from any segment by clicking the play icon next to it, which is useful for verifying accuracy or checking context.
Listen to audio
To listen to the audio for a specific segment, click the play icon next to the segment:
Rename speakers
Auto-generated speaker labels (SPEAKER_00, SPEAKER_01, …) can be replaced with real names directly inside the transcription viewer. Click the edit icon next to a speaker label and type the new name. You will be asked whether to apply the change to all segments attributed to that speaker throughout the entire recording, or only to the current segment. Renaming speakers makes transcripts easier to read and improves the precision of answers when you ask speaker-specific questions.
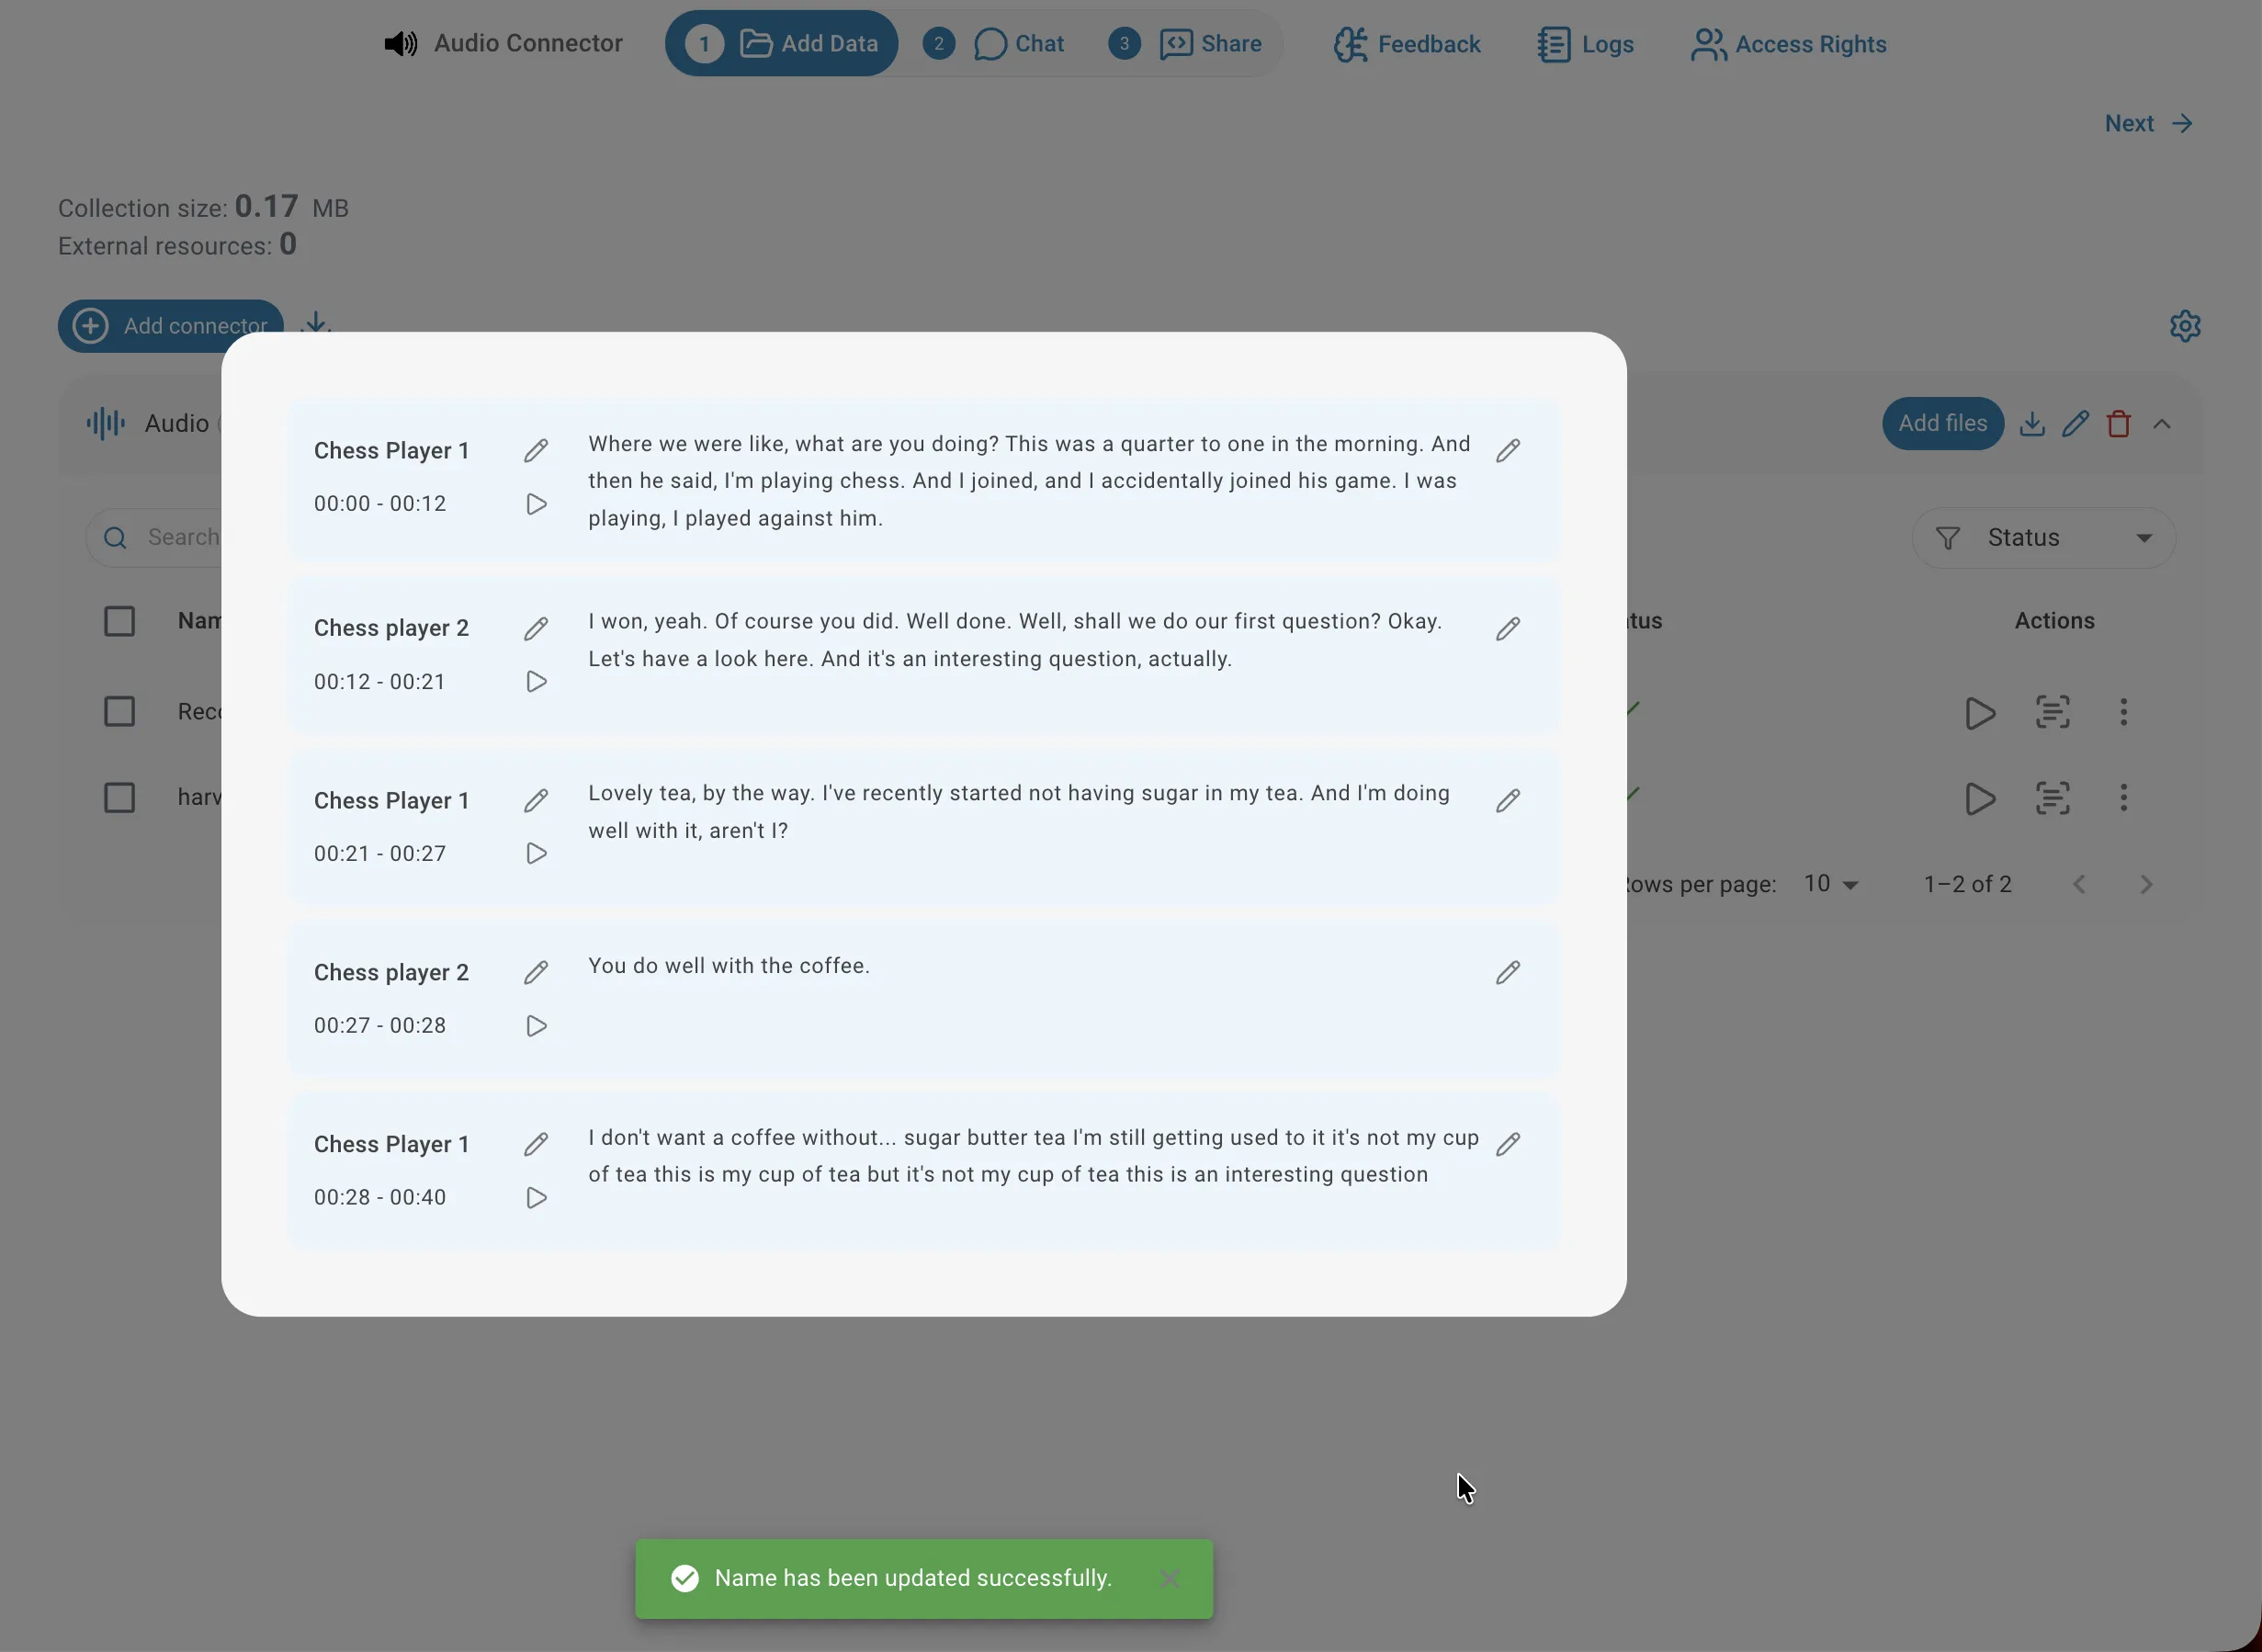
Correct segment text
Transcription is automatic and may occasionally misrecognise proper nouns, technical terms, or heavily accented speech. To fix an error, click the edit icon on the right side of the segment to open the Update Segment dialog, correct the text, and confirm. The updated text is re-indexed immediately and used in all future queries — correcting key terms can noticeably improve answer quality.

Ask questions about your audio
Once the audio is indexed, switch to the Chat tab to ask questions about the content in natural language. QAnswer searches the full transcript and generates an answer grounded in what was actually said. You can ask factual questions such as 'What was the main topic discussed?', request a summary of a recording, or query specific speakers such as 'What did John say about the project deadline?'. The assistant draws only from the indexed transcript, so answers remain accurate to the source material.
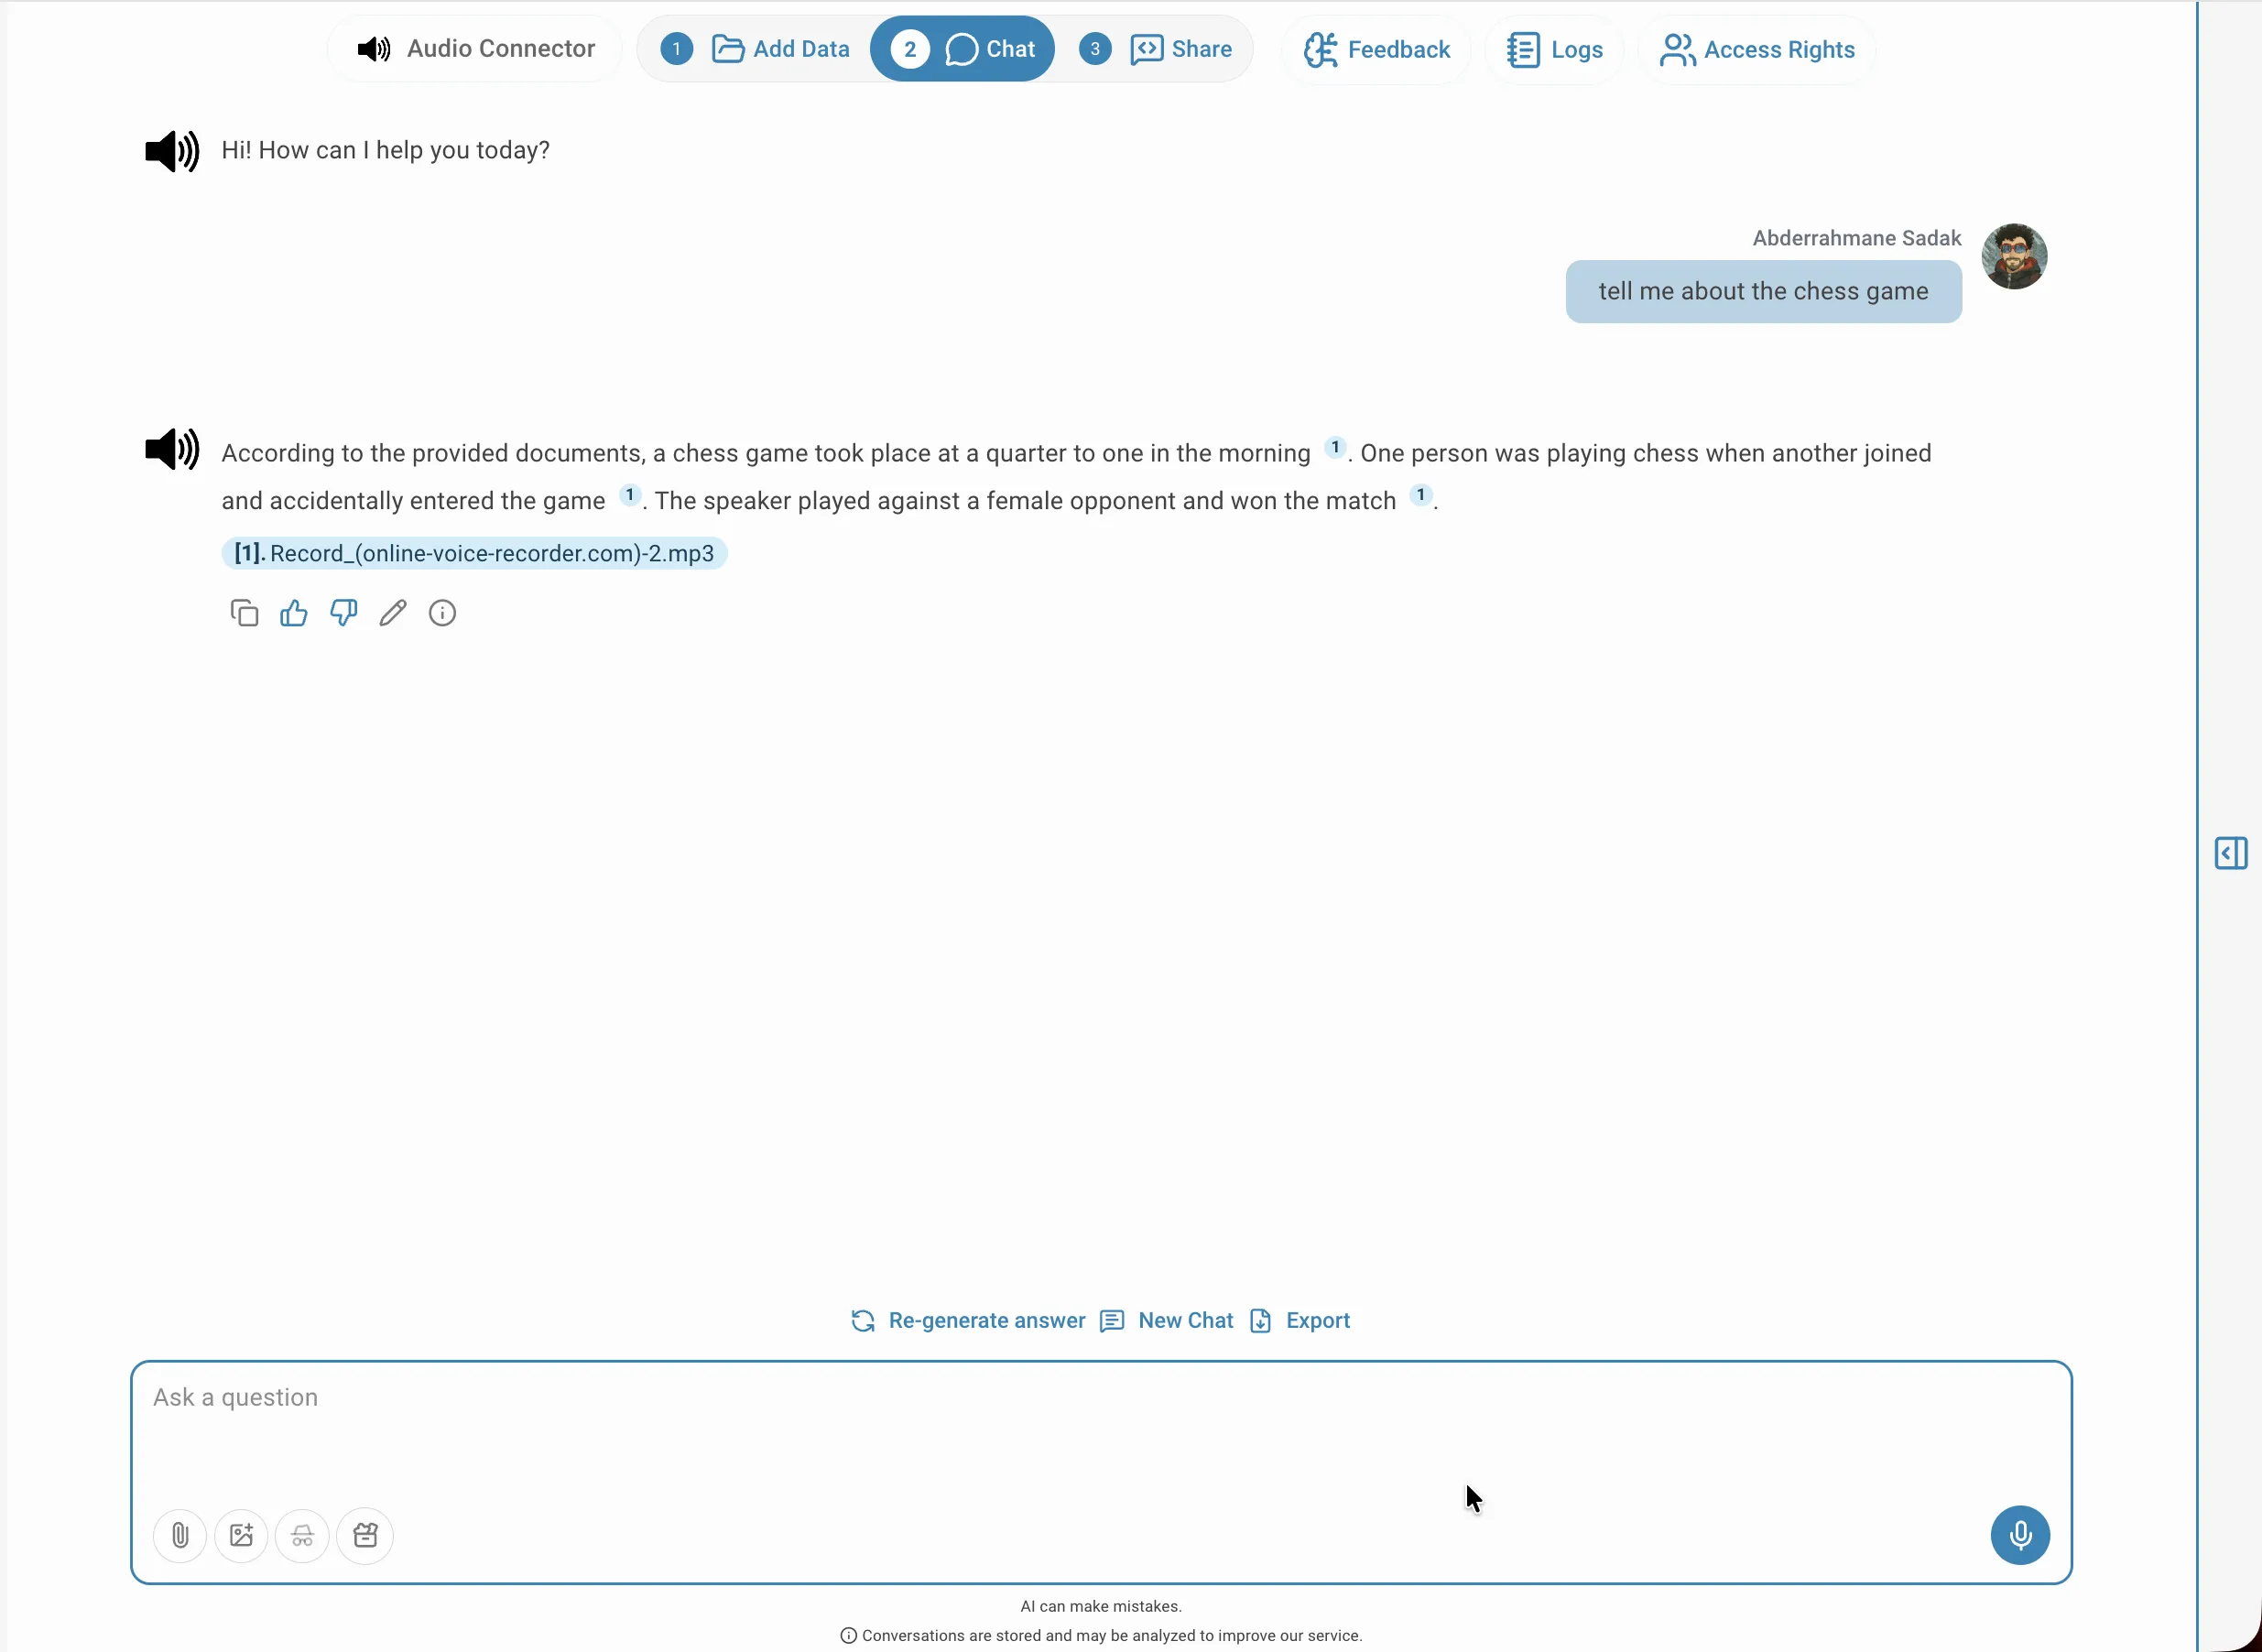
Highlighted source
Every answer includes numbered citations that link back to the exact segment in the transcript. Clicking a citation opens the transcription viewer with the relevant passage highlighted, showing the speaker label and timestamp so you can verify the context or listen to that exact moment in the audio. This makes it straightforward to audit where an answer came from and spot any transcription errors that could affect accuracy.