
API Access
API keys let your own code, scripts and integrations call QAnswer without a browser session. Every key you can manage from your personal space is listed on one page: the ones you create yourself, and the ones QAnswer minted for you when you shared an assistant or connected an integration.
Open API Access in the left navigation menu.
One row per key: its name, a badge saying what kind of key it is, the last characters of its value, its expiry date and its credit usage. The three icons on the right copy the key, open its usage guide, or delete it.
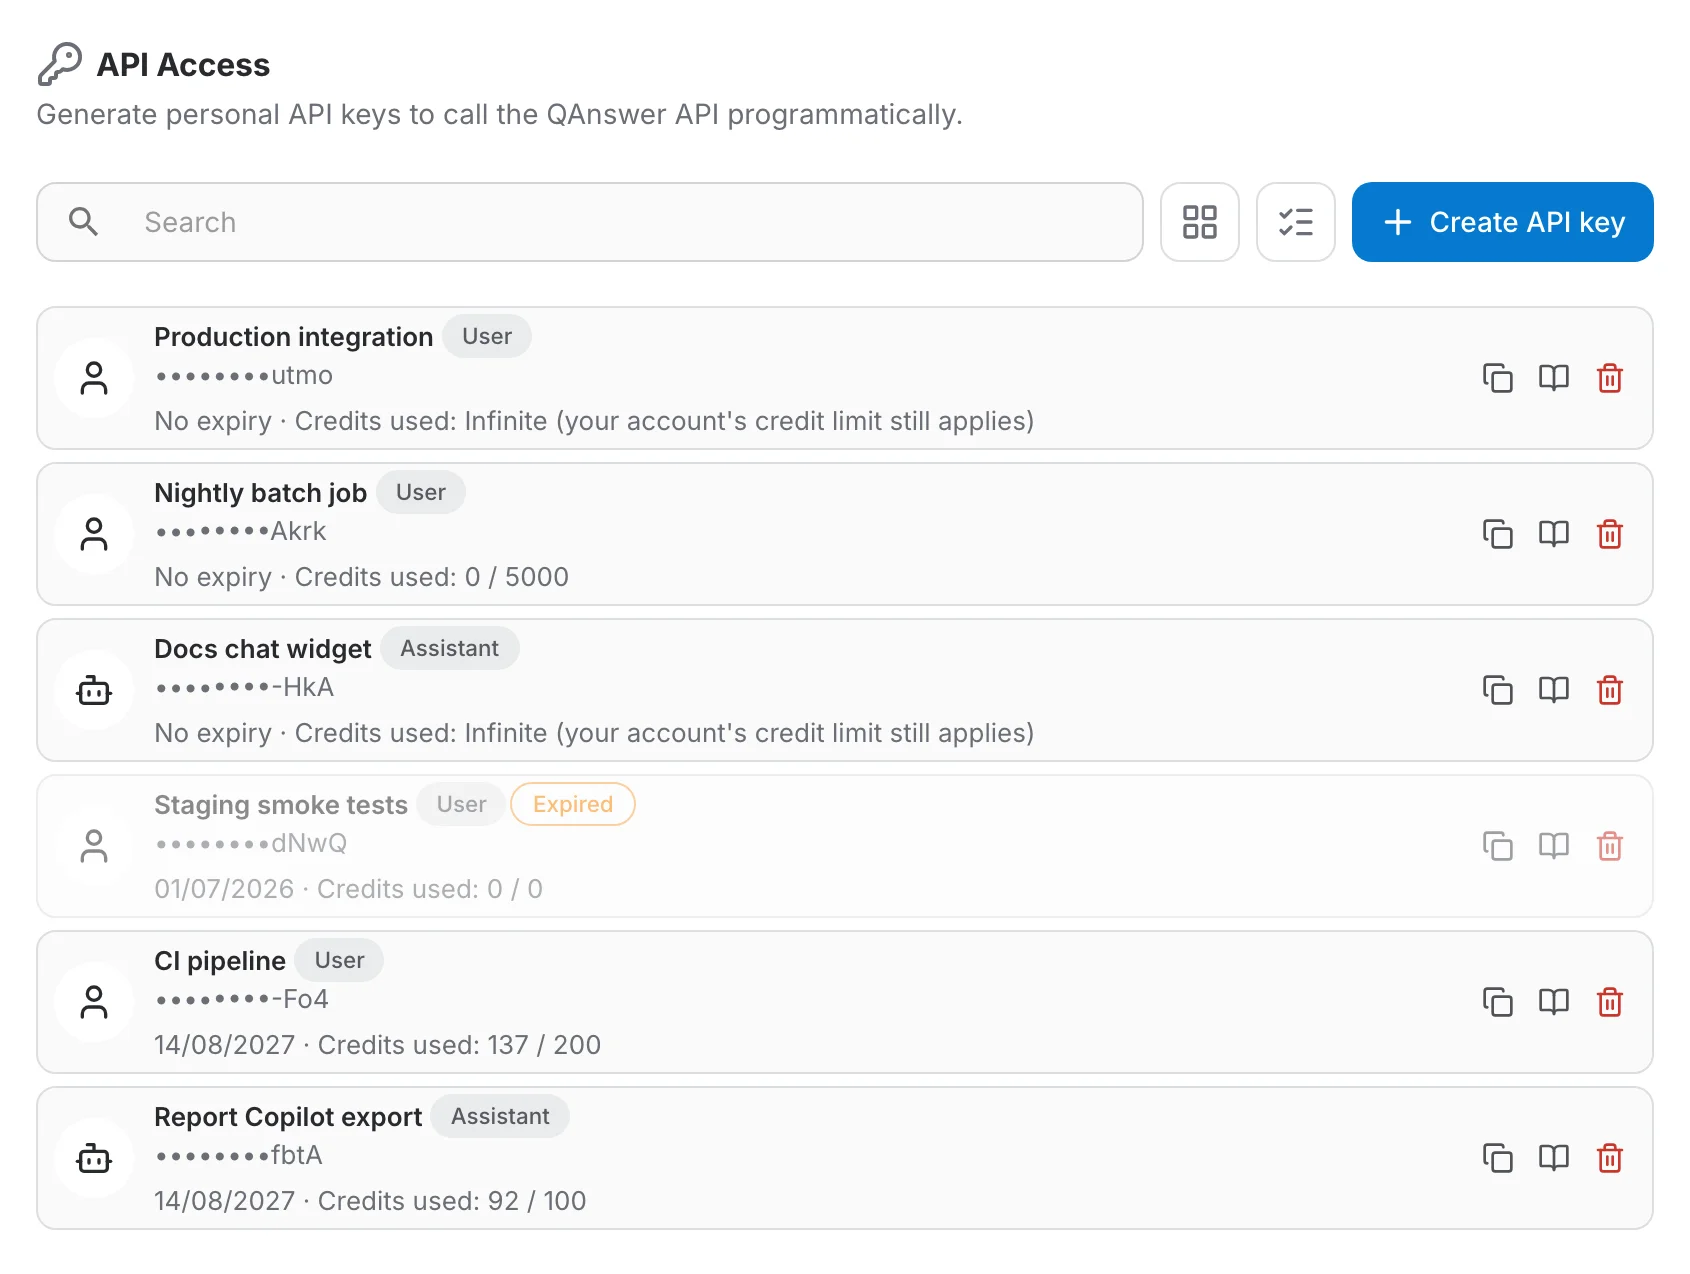
Clicking a key opens its own page, with everything in one place: Info at the top, its usage broken down by provider in the middle, and the usage guide at the bottom.
Create an API key
Click Create API key and fill in the options:
- Name (required) — a label to identify the key, e.g. the integration it's used for.
- Expiry date (optional) — the key stops working automatically after this date. Pick a day from the calendar, or type it as DD/MM/YYYY.
- Question credit quota (optional) — the maximum number of question credits this key can consume.
- Credit capacity (optional) — the maximum amount this key can spend on provider usage.
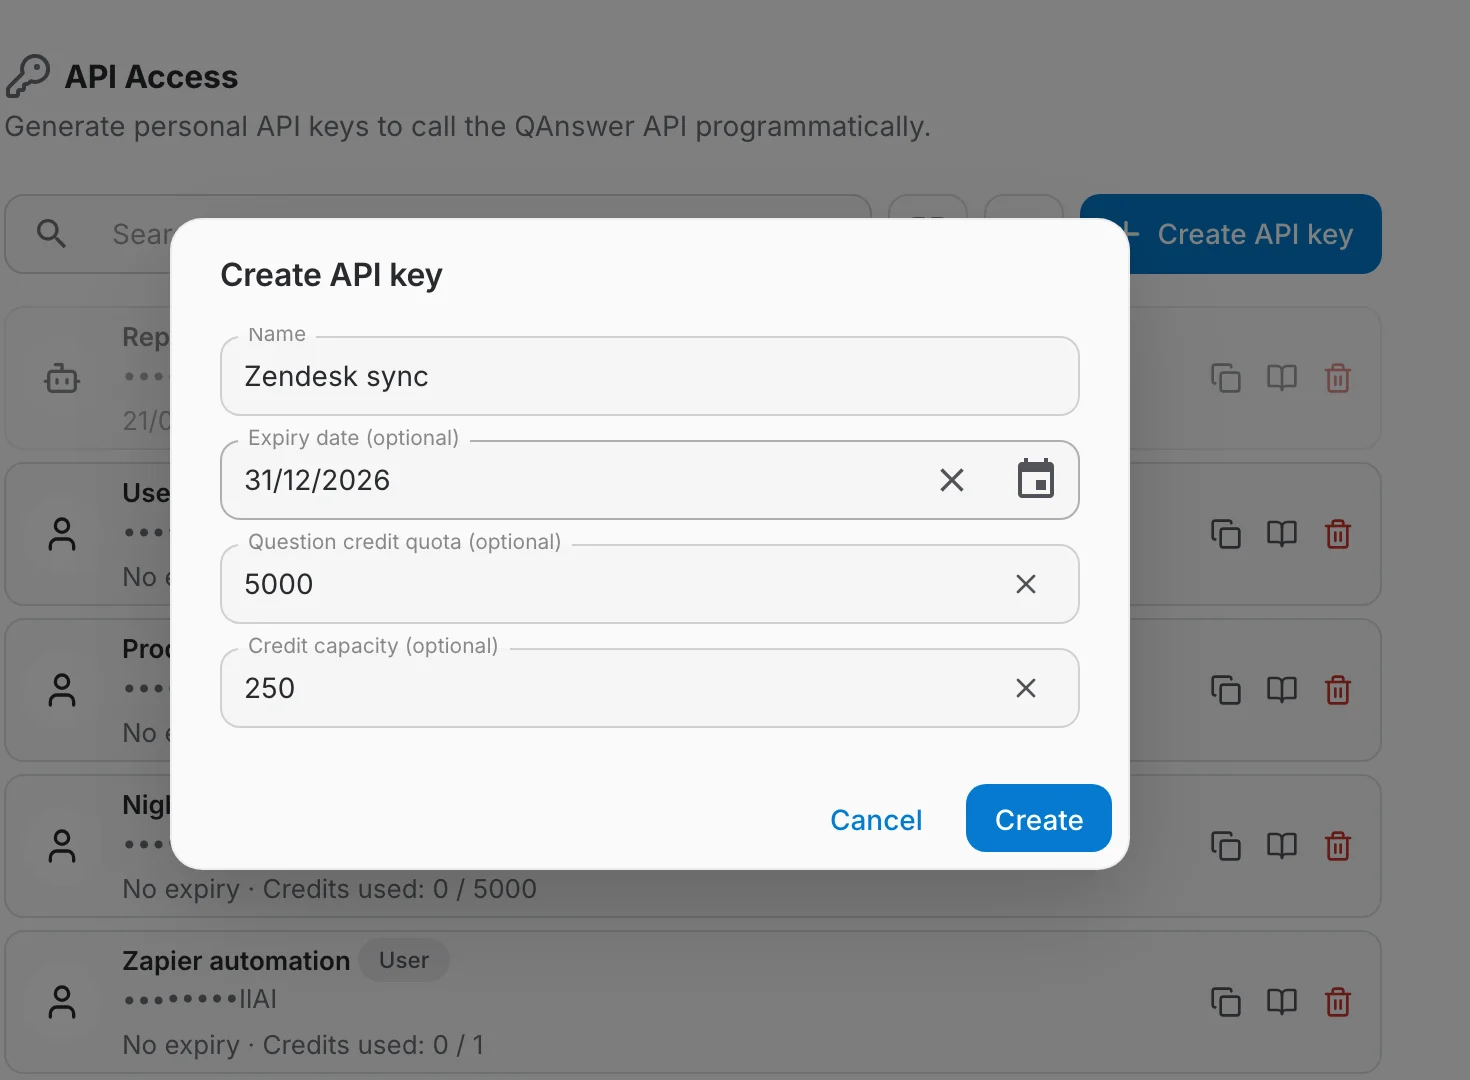
Every optional field can be emptied again from the clear button on its right, so an expiry, a quota or a capacity set by mistake goes back to unlimited in one click.
QAnswer creates the key and takes you straight to its details page. The value is shown there once, in clear, in a banner at the top — with a Copy button.

What a key can reach
Every key carries a badge that says what it is for. There are two kinds:
- User – a key that is not tied to any resource — the kind you create on this page. It acts on your behalf: whatever your account can do through the API, this key can do.
- Assistant – a key bound to exactly one AI assistant. It can only call the endpoints of that assistant — nothing else in QAnswer.
Assistant keys are not created from this page. They are minted on the assistant itself — when you share an AI assistant with an API key or connect it to Slack, Discord or Teams — and then appear here so you can track and revoke them in one place.
An assistant key can chat with and search that assistant, and reach its conversations, data sources and metadata. Everywhere else it is refused.
In particular, an assistant key can never:
- read or change your profile, your organizations, your teams, or who a resource is shared with;
- list, create or delete API keys — including itself;
- reach the administration, billing or branding endpoints;
- read or export the configuration of a language model, embedder or any other provider;
- delete or export the assistant it is bound to, or touch any other assistant.
Use a key
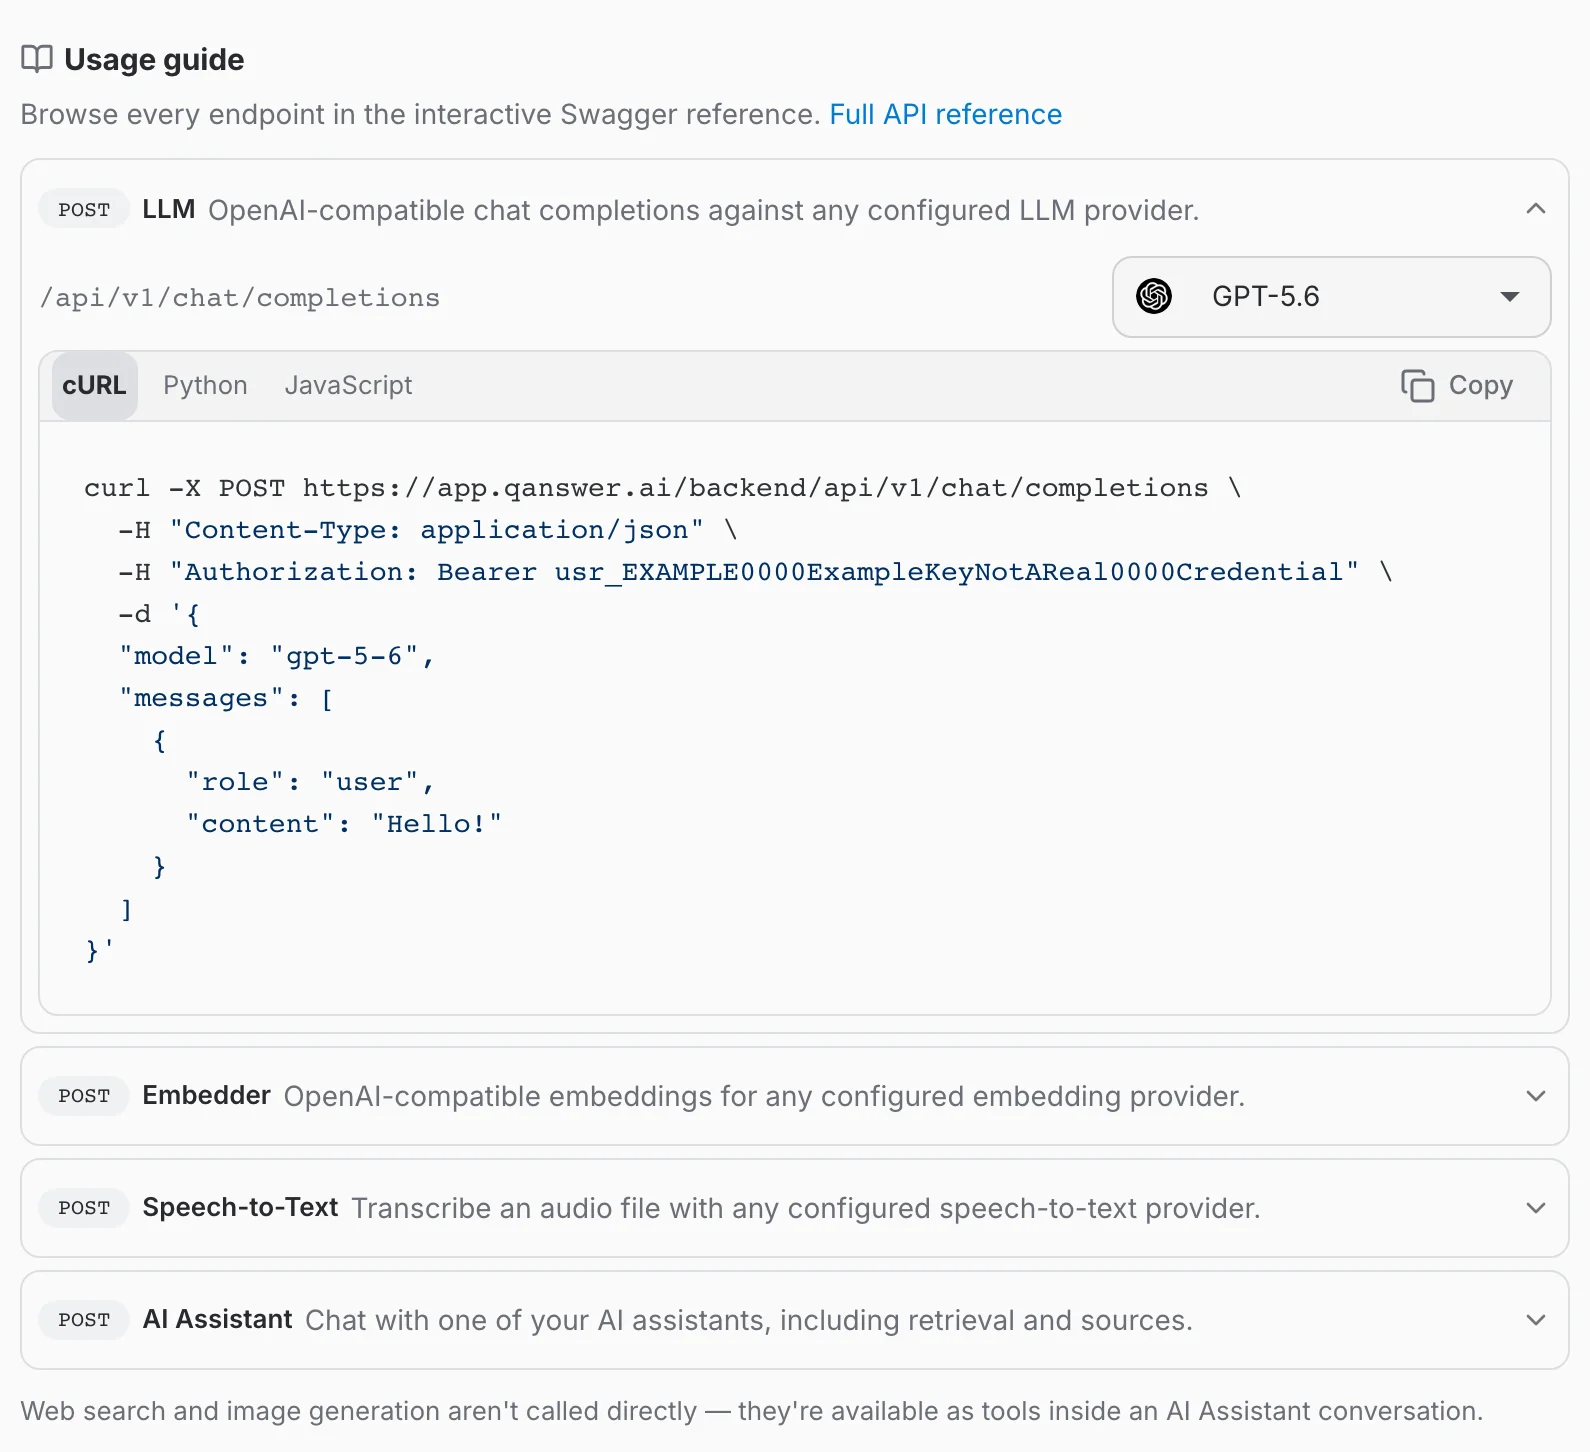
Open a key and scroll down to Usage guide, or click the book icon on its row to land on it directly. Every API your account can use gets its own card: chat completions, embeddings, speech-to-text and AI assistant chat. Web search and image generation have no snippet — they are used as tools inside an assistant conversation rather than called directly.
A card shows the HTTP method and the path, and expands to a ready-to-run snippet with the key already in the header. One card is open at a time: opening another closes it. The tabs above the snippet switch between cURL, Python and JavaScript, and the Copy button copies the language you are looking at. Where a call needs a model or an assistant, the selector next to the path chooses which one the example uses.
Every endpoint is documented in the API reference, also linked from the top of the section.
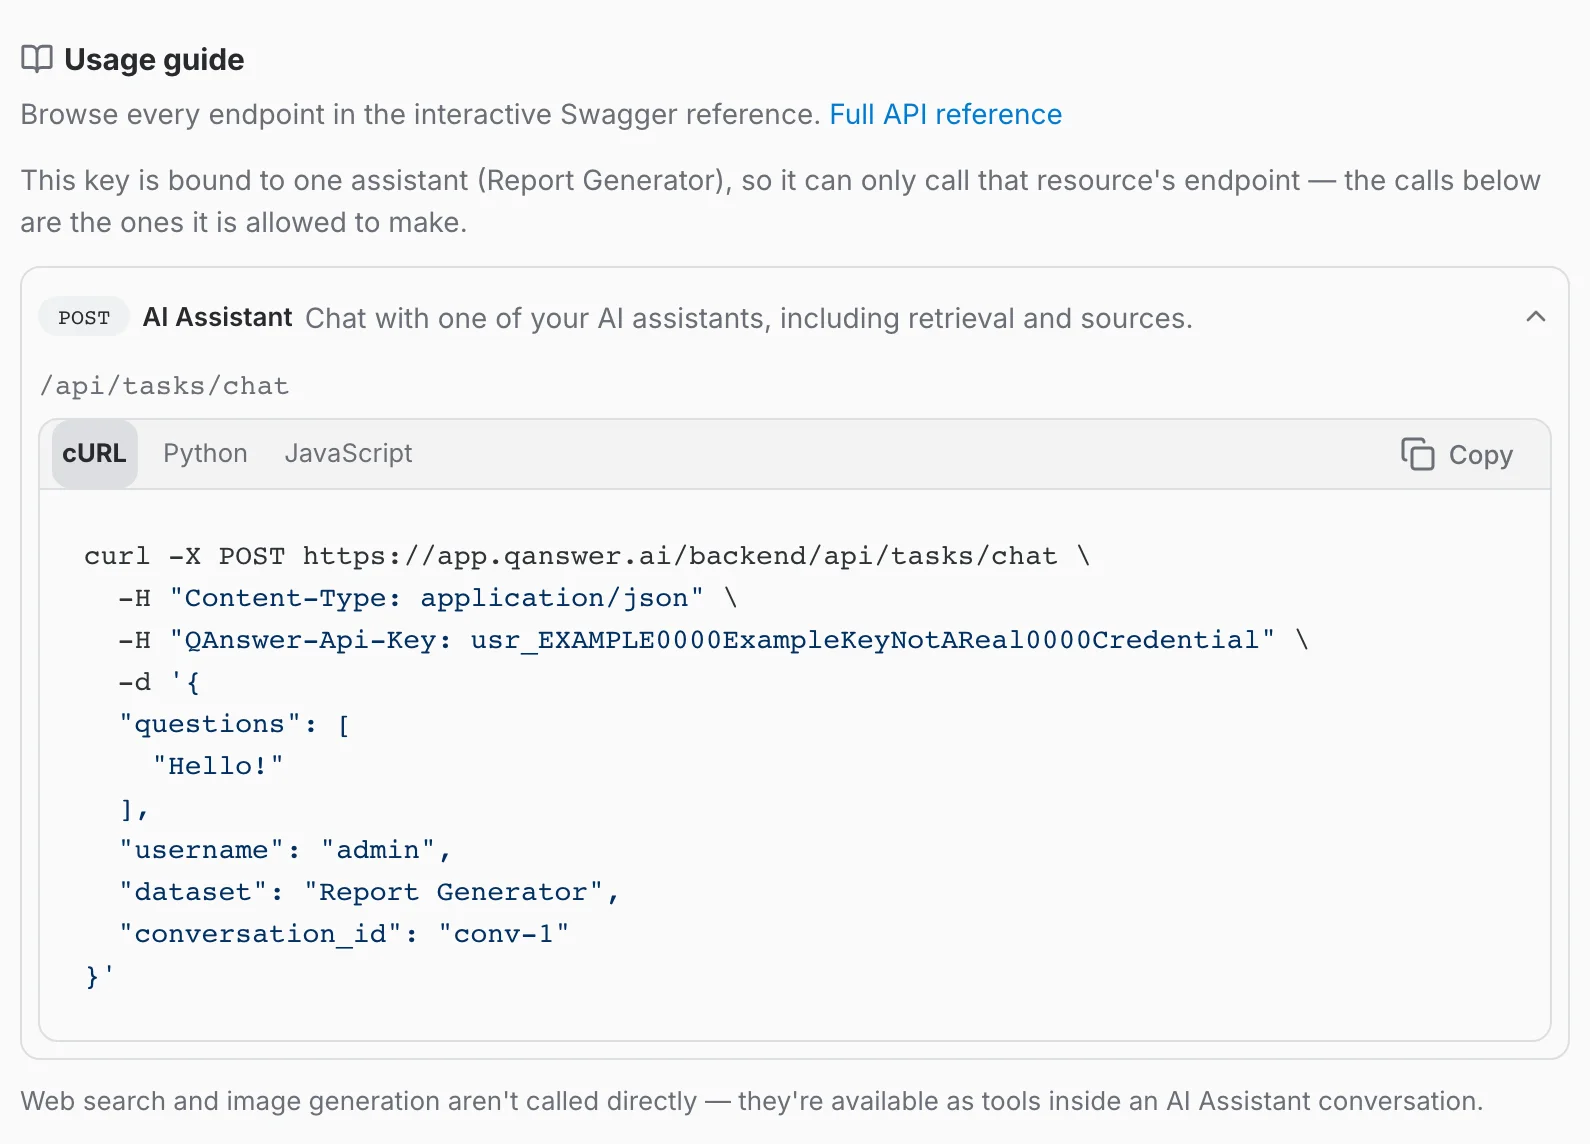
For an assistant key the guide is shorter and says so: it lists only the calls that key is allowed to make, against the assistant it names.
Track a key's usage
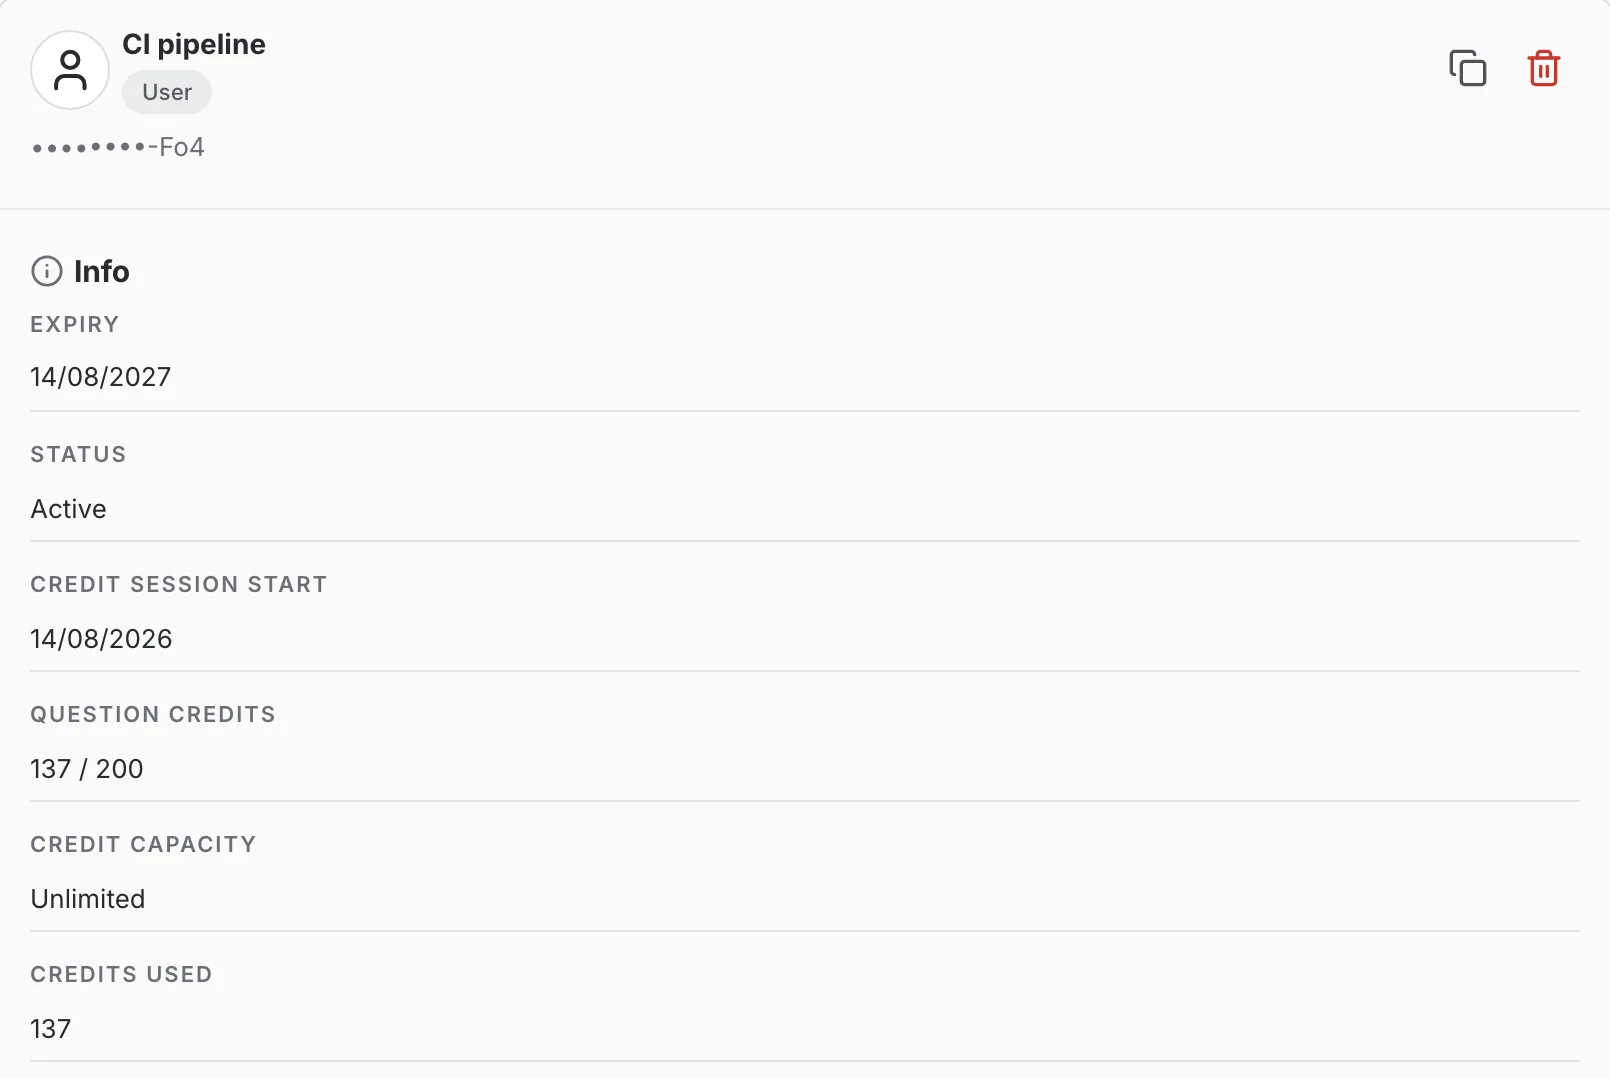
The Info section at the top of a key's page shows:
- Expiry — the date the key stops working, or No expiry.
- Status — Active, or Expired once that date has passed.
- Credit session start — the day the current quota period began.
- Question credits — question credits consumed against the key's quota, as used / total.
- Credit capacity — the spending limit set at creation, or Unlimited.
- Credits used — the running total for this key.
Once a key has been used, one extra section per provider family (LLM, embedder, web search, image generation, speech-to-text) sits between Info and the usage guide, breaking its consumption down by provider.
Manage your keys
- The search field filters the list by key name.
- The grid button next to it switches the list between rows and cards.
- The tick-list button after it turns on multi-selection: tick several keys, then delete them in one operation.
- The bin icon on a row deletes that single key, after a confirmation.
- An expired key stays in the list, greyed out and badged Expired, until you delete it. The API refuses it in the meantime.