MCP Servers
Overview
MCP (Model Context Protocol) servers give the language model access to third-party tools and applications, turning it into an agentic assistant that can call external APIs — project trackers, spreadsheets, calendars, messaging platforms and more — on the user's behalf.
Adding an MCP Server
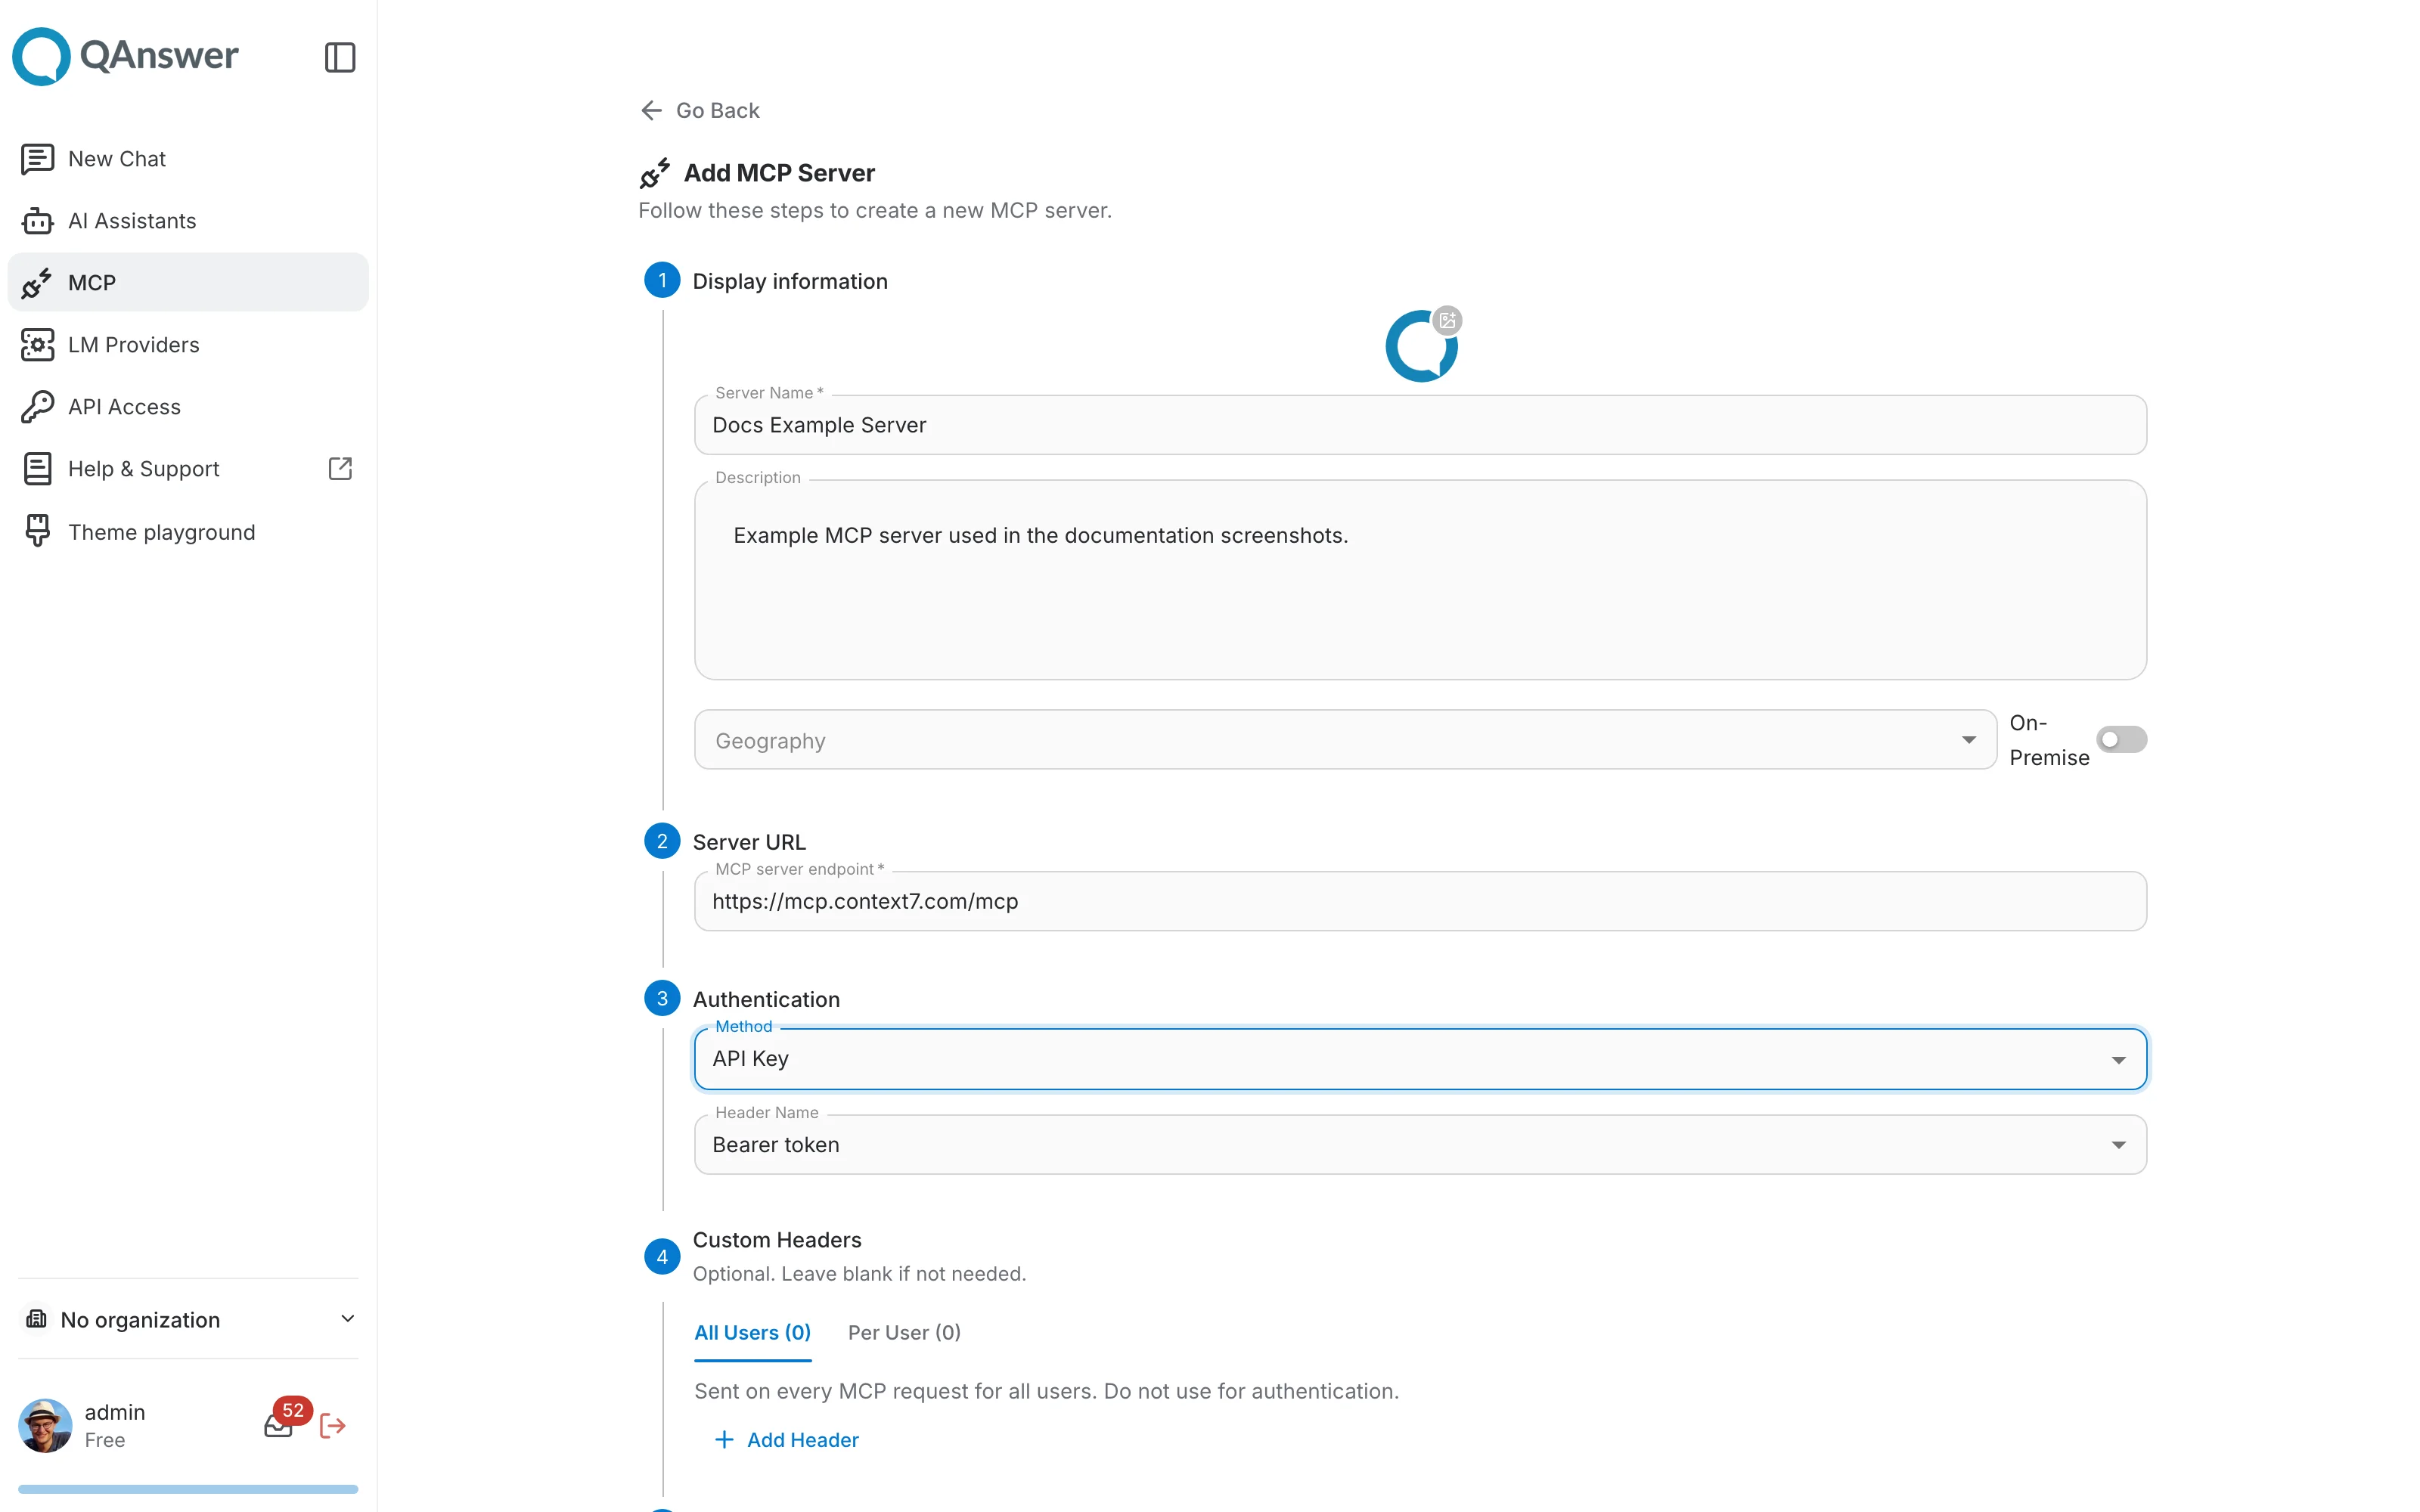
Click Add MCP Server to open the creation form.
Step 1 — Display information and server URL
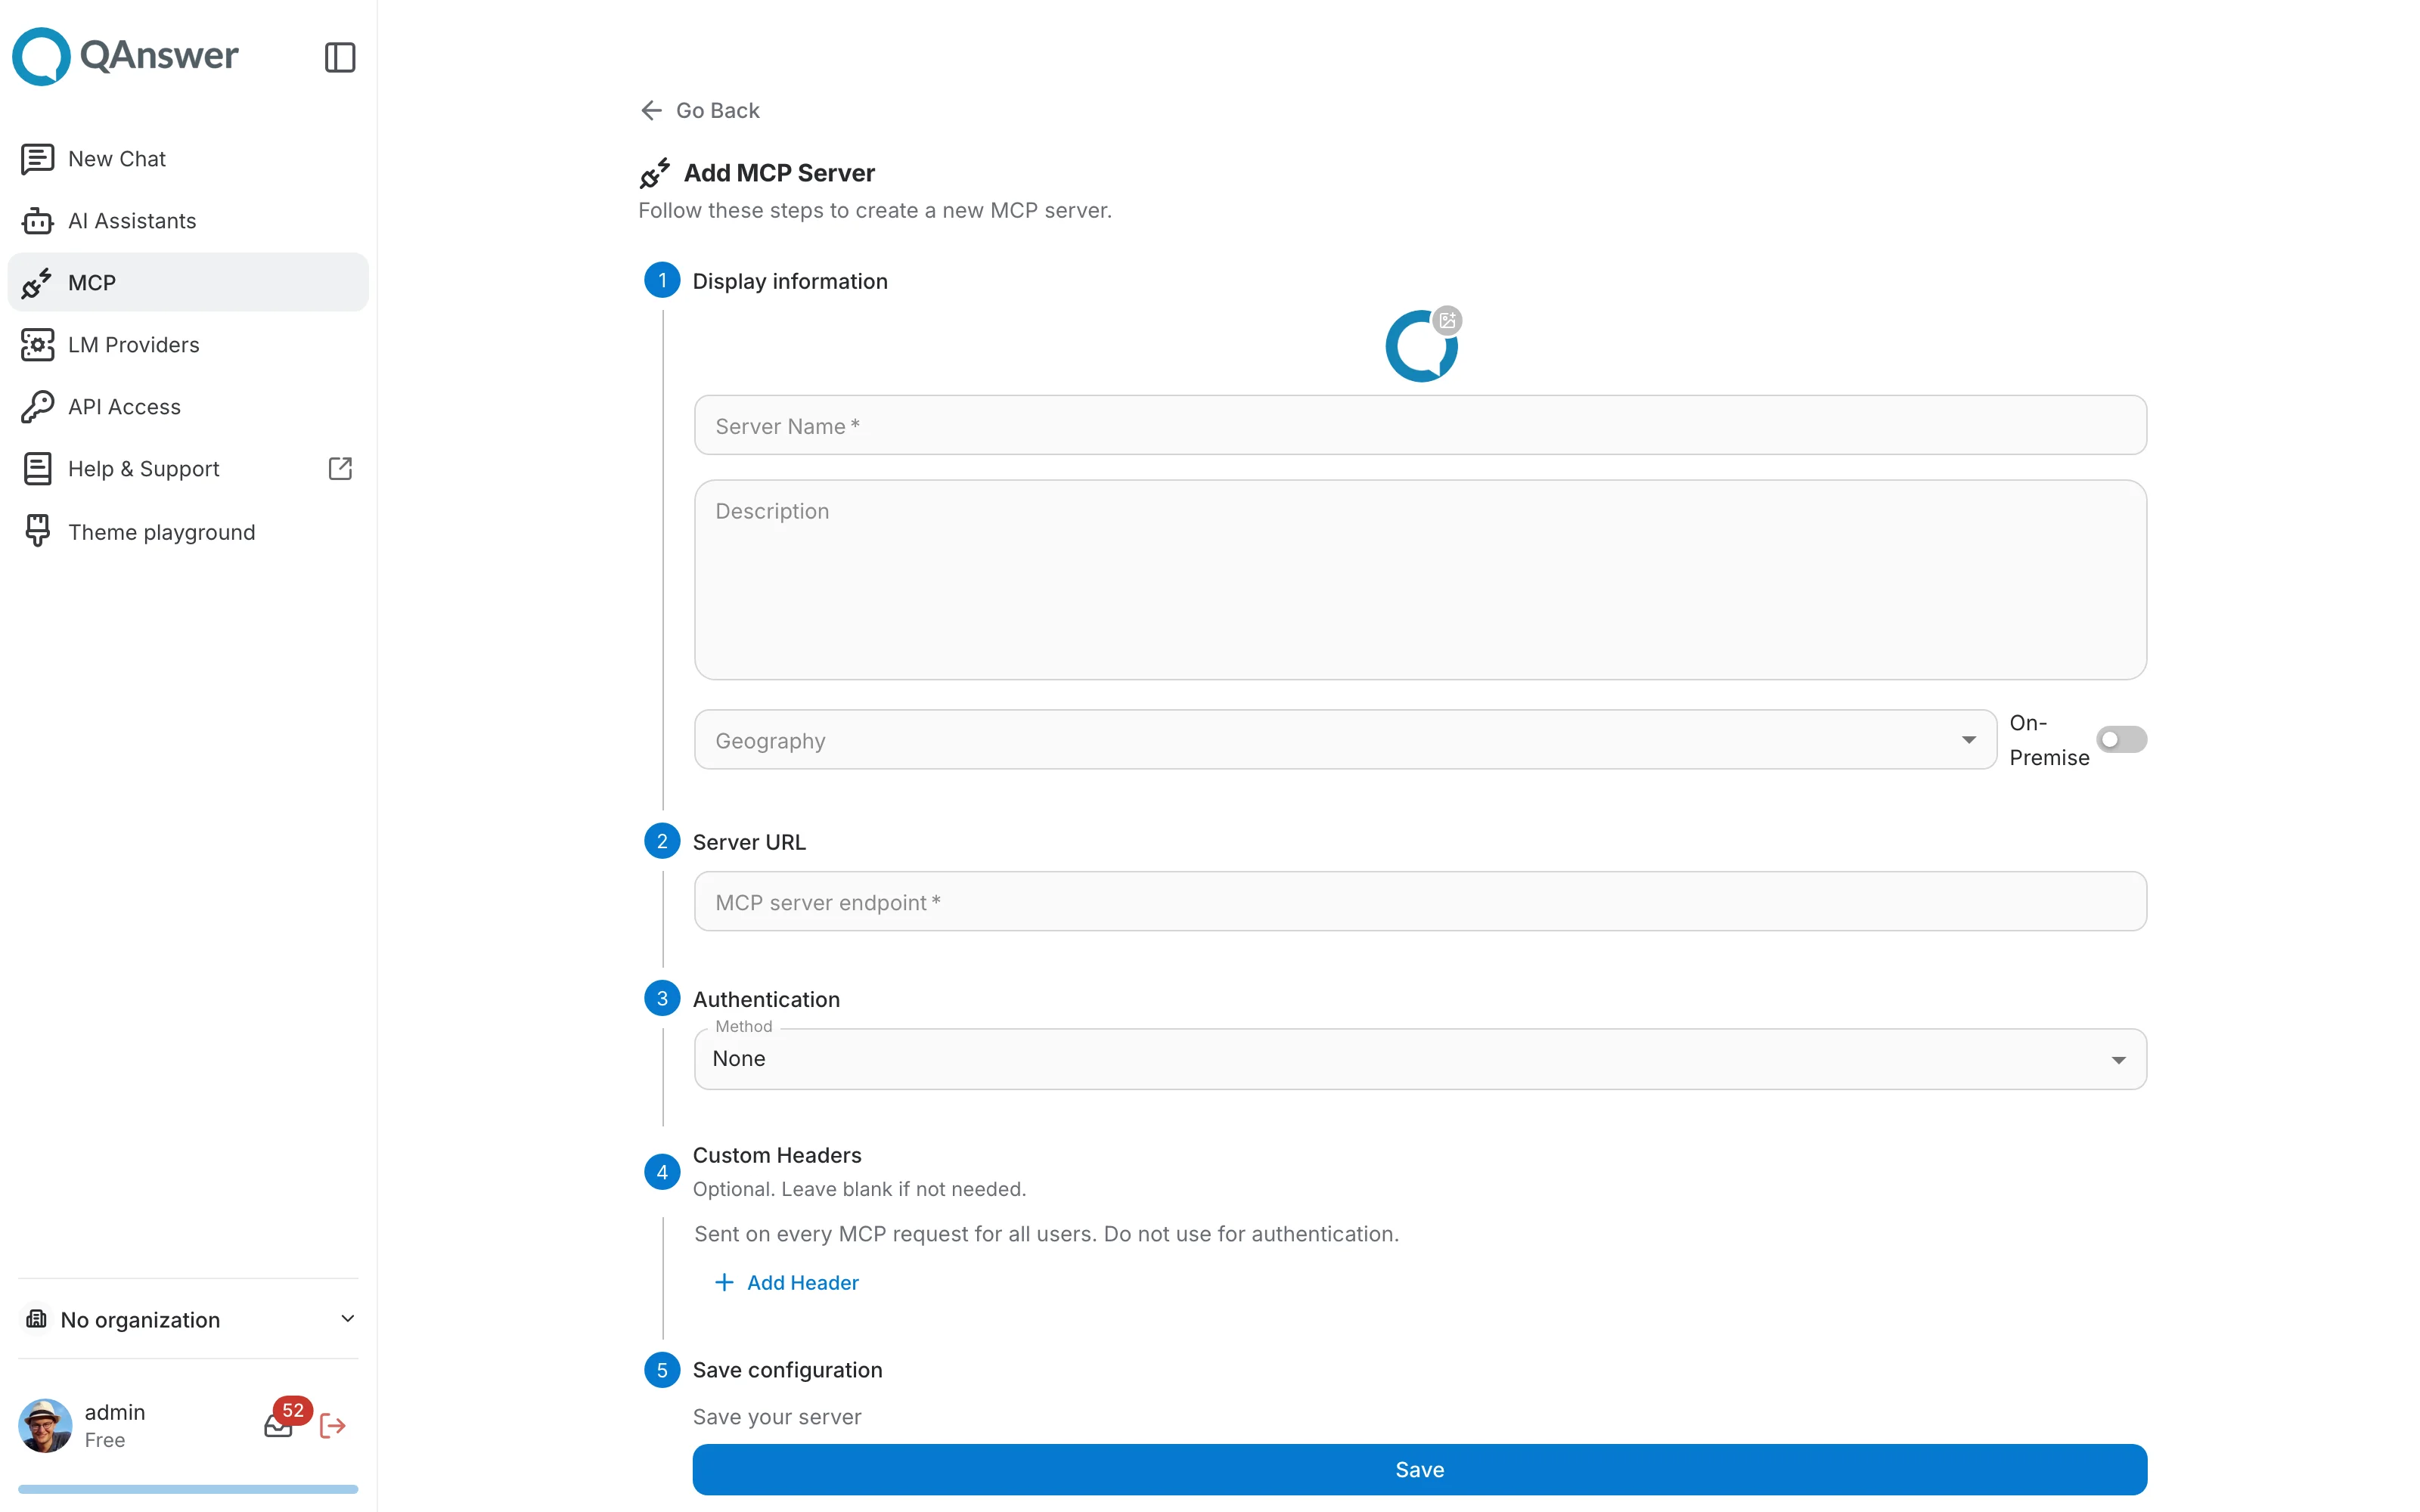
The form is organized into the following sections:
- Display information — server name, an optional description, and a logo (uploaded automatically or defaulted).
- Geography / On-Premise — an optional geography tag for the server, and an On-Premise switch for internally hosted servers.
- Server URL — the MCP server endpoint to connect to.
Step 2 — Authentication and custom headers
Configure how QAnswer authenticates against the remote server:
- Authentication Method — None, API Key, OAuth2, or Advanced OAuth2. API Key lets you pick where the key is sent (e.g. as a Bearer token) via the Header Name field.
- Per-user auth fields — some servers need credentials scoped to each individual user rather than one shared secret — these are configured separately from the server-wide authentication method.
- Custom Headers — optional headers sent on every MCP request for all users (not for authentication). The All Users / Per User tabs let you add headers shared by everyone or scoped to a specific user.
Step 3 — Validating the connection and selecting tools
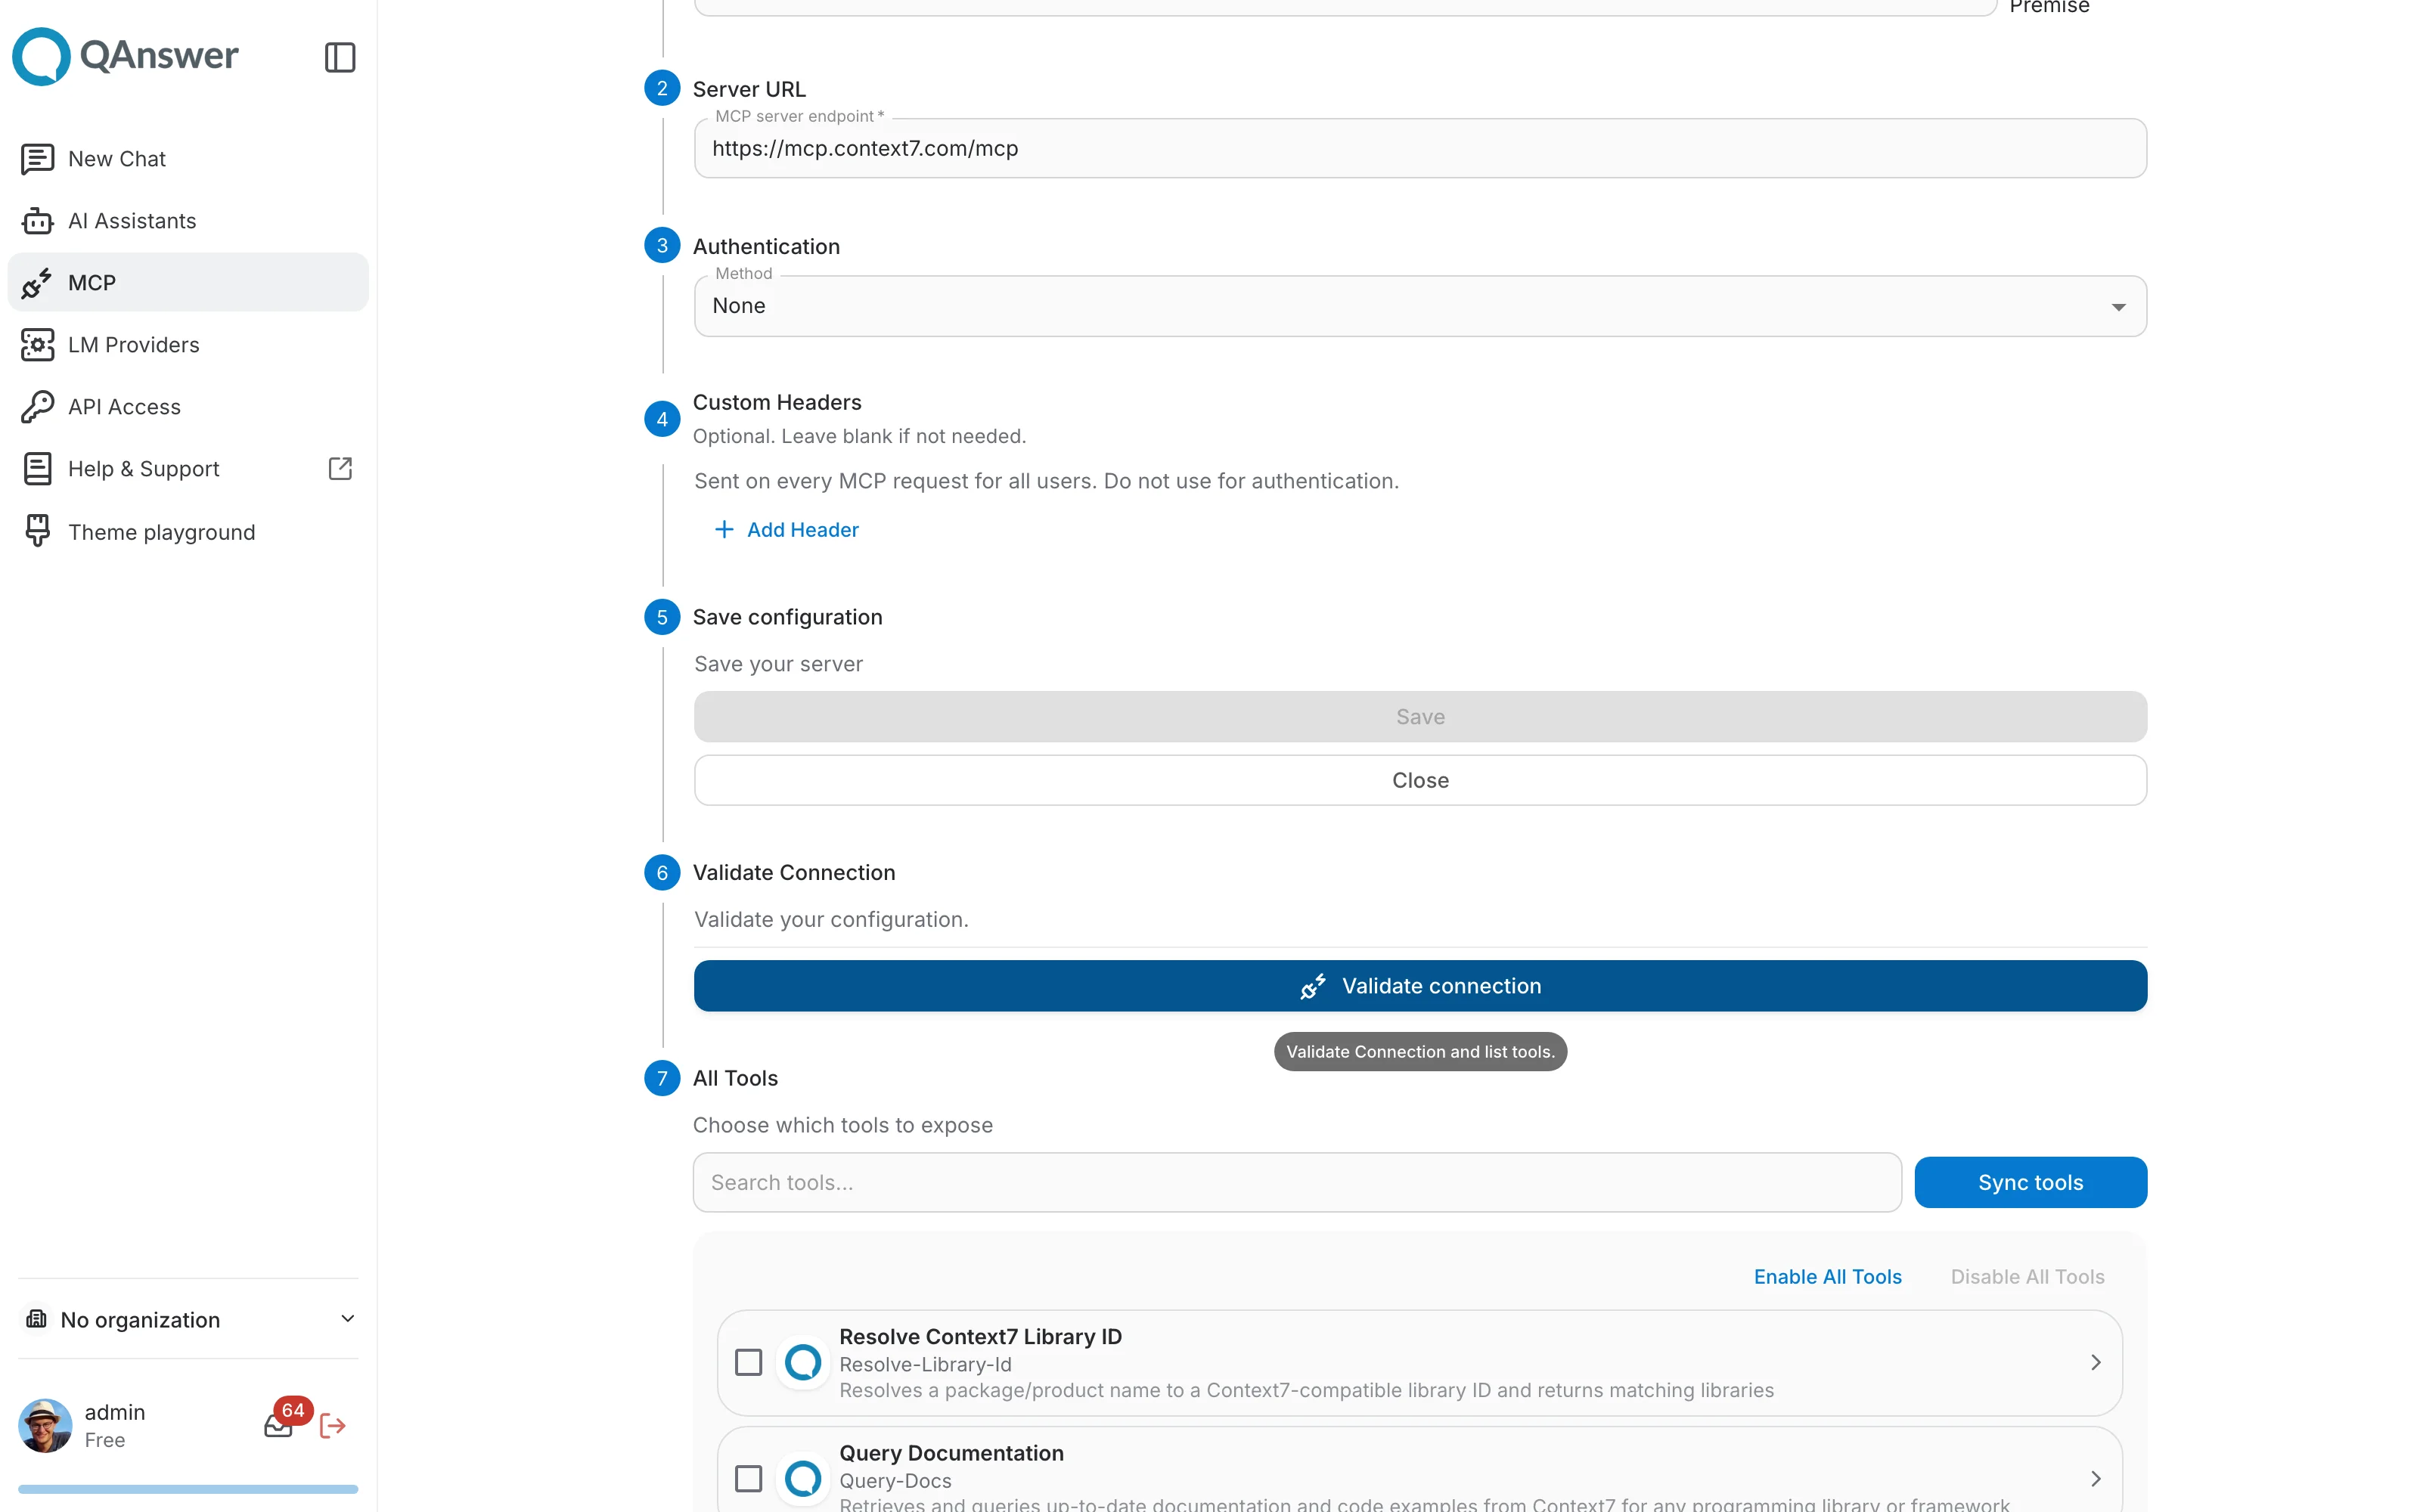
Once the server is saved, its tools become available to configure:
- Validate connection — connects to the live MCP server and lists every tool it exposes. Servers with authentication first need a connection (see Managing below) selected before this succeeds.
- Sync tools — after enabling or disabling tools, Sync tools shows a "Review tool changes" summary (new, updated, or removed tools) before applying it.
- Enable / disable — check individual tools, or use Enable All Tools / Disable All Tools, to control which of the server's tools are exposed to the language model.
Managing Existing Servers
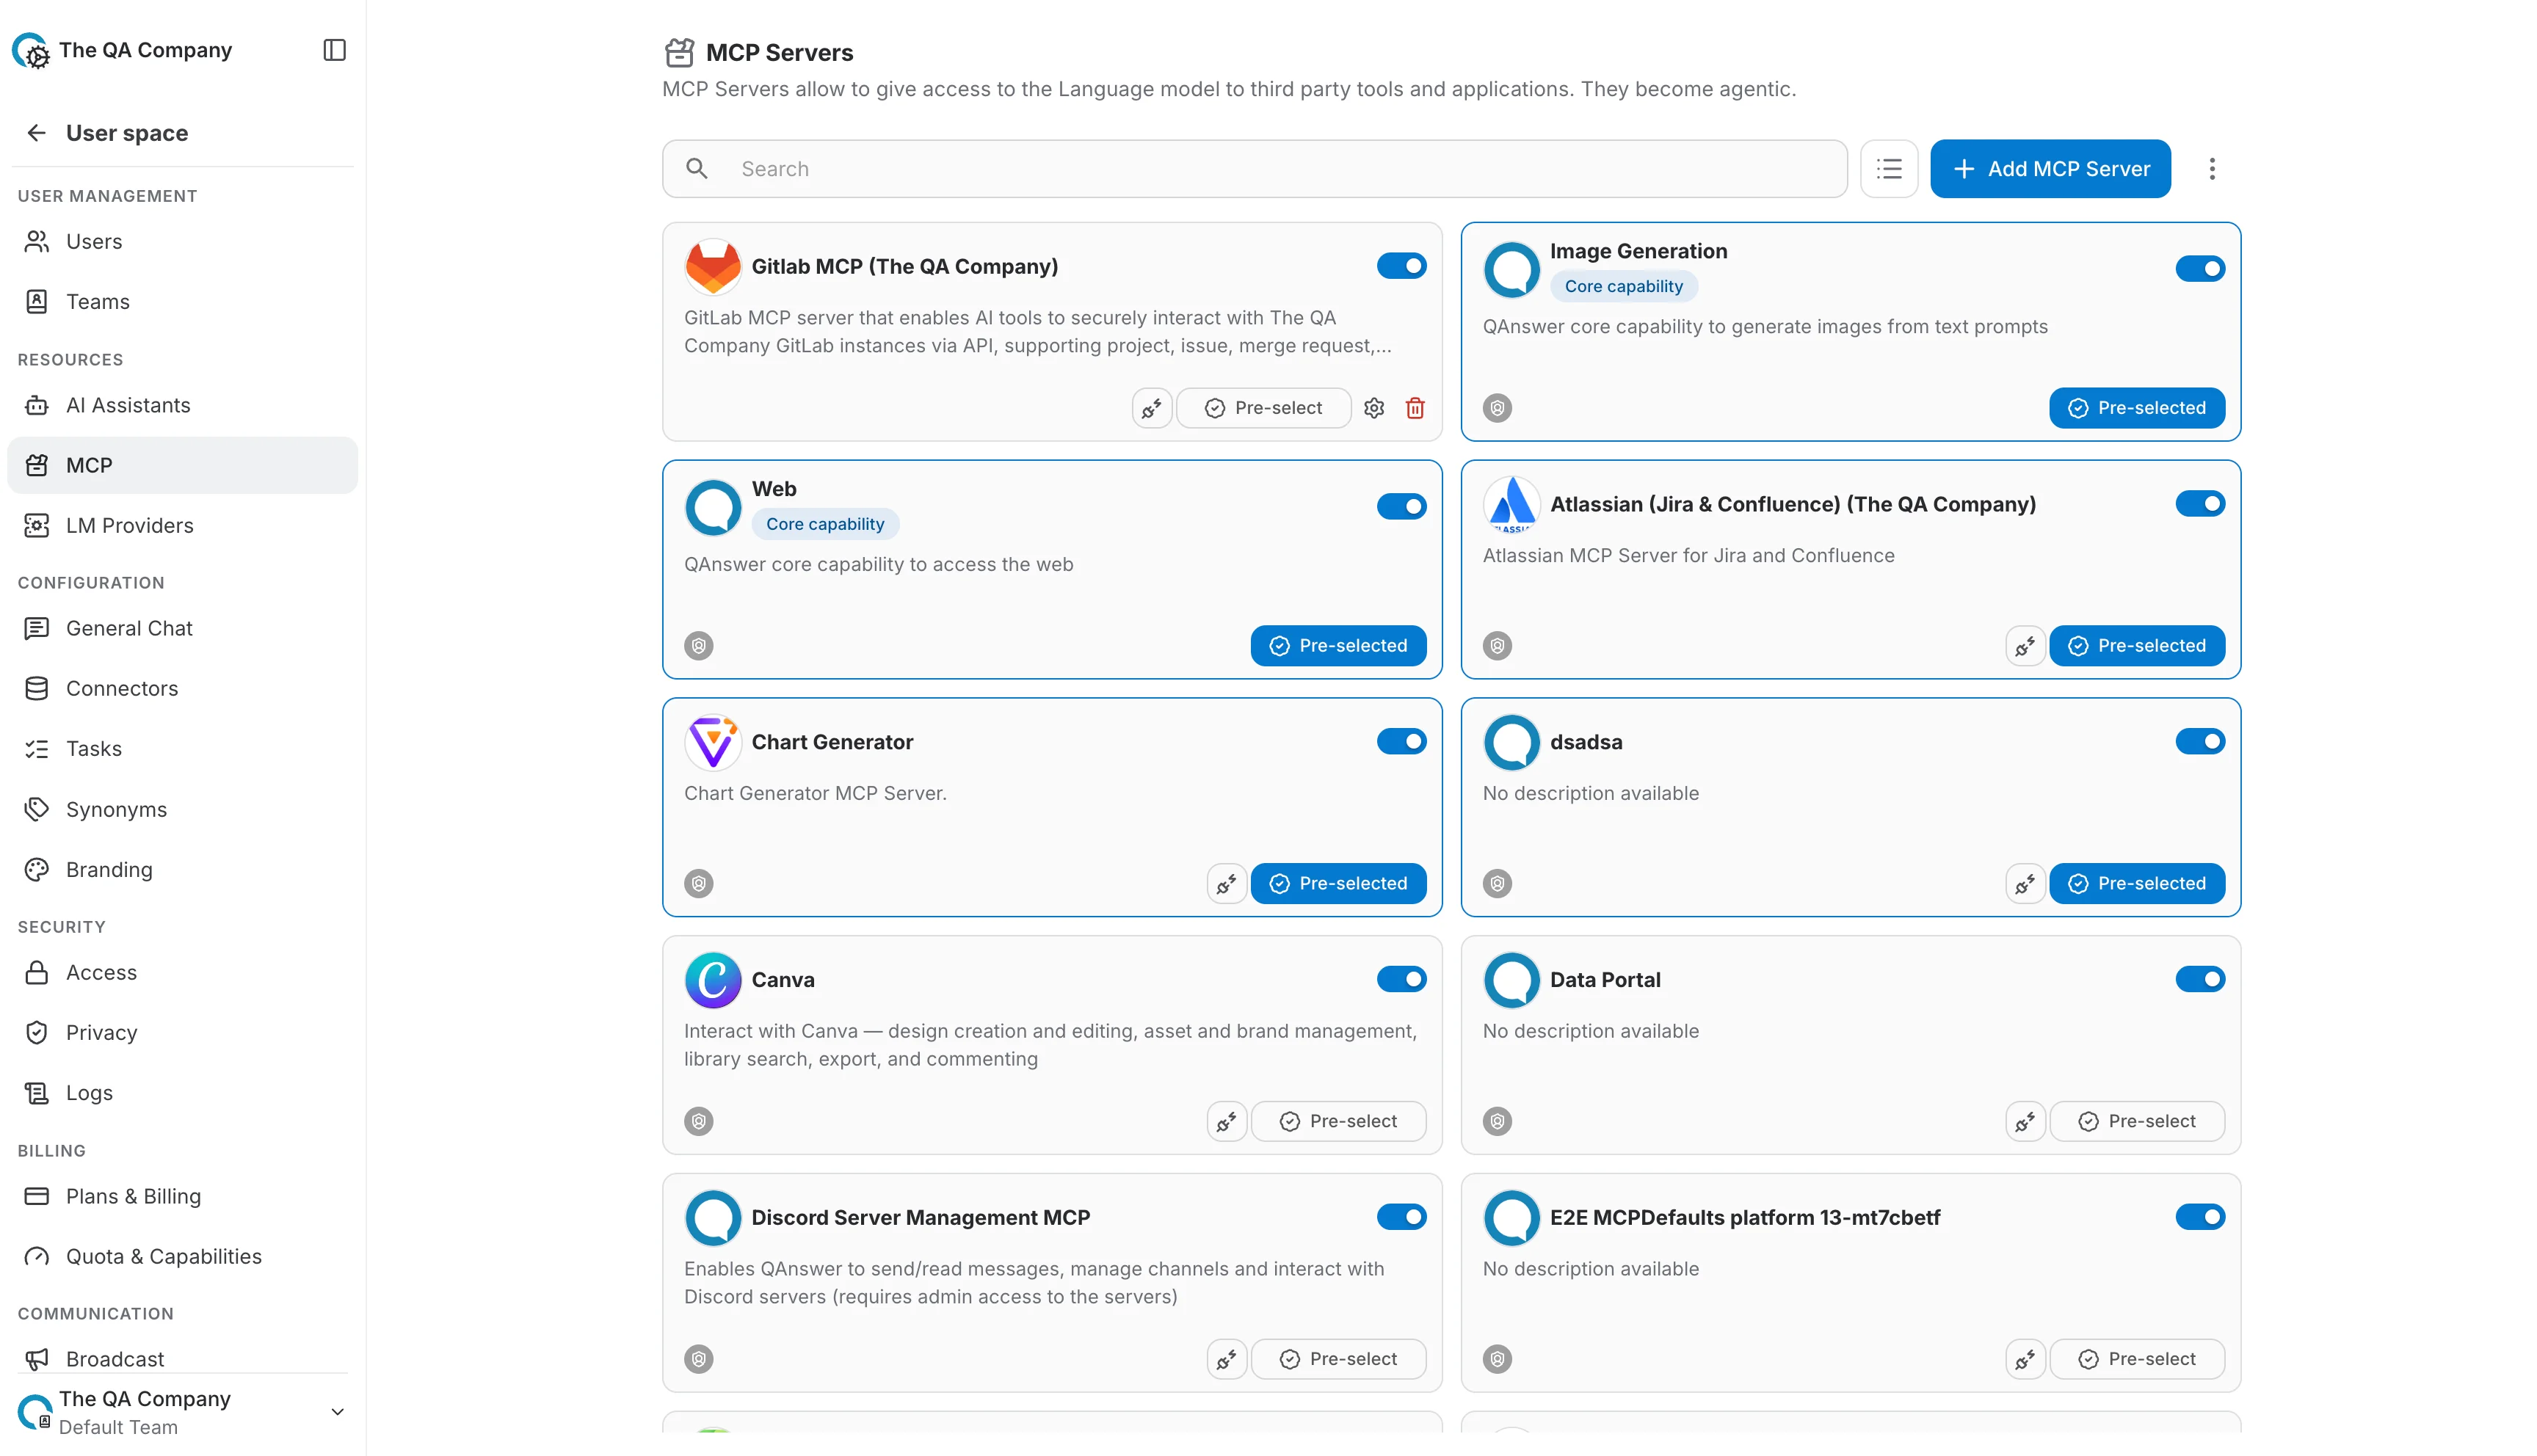
Each server card lists its Activate/deactivate switch, Set as default, Test connection, Edit, and Delete actions. Above the list, a search box filters servers by name as you type.
- Search — filters the list by name as you type.
- Active toggle — hides the server from regular members while keeping it visible to admins, without deleting its configuration.
- Set as default — automatically selects the server's tools for every new chat at the current scope (user, team, or organization).
- Test connection — runs a quick connectivity check from the card itself, without opening the server.
- Edit — opens the configuration stepper again to change the display information, URL, authentication, headers, or enabled tools.
Server Details
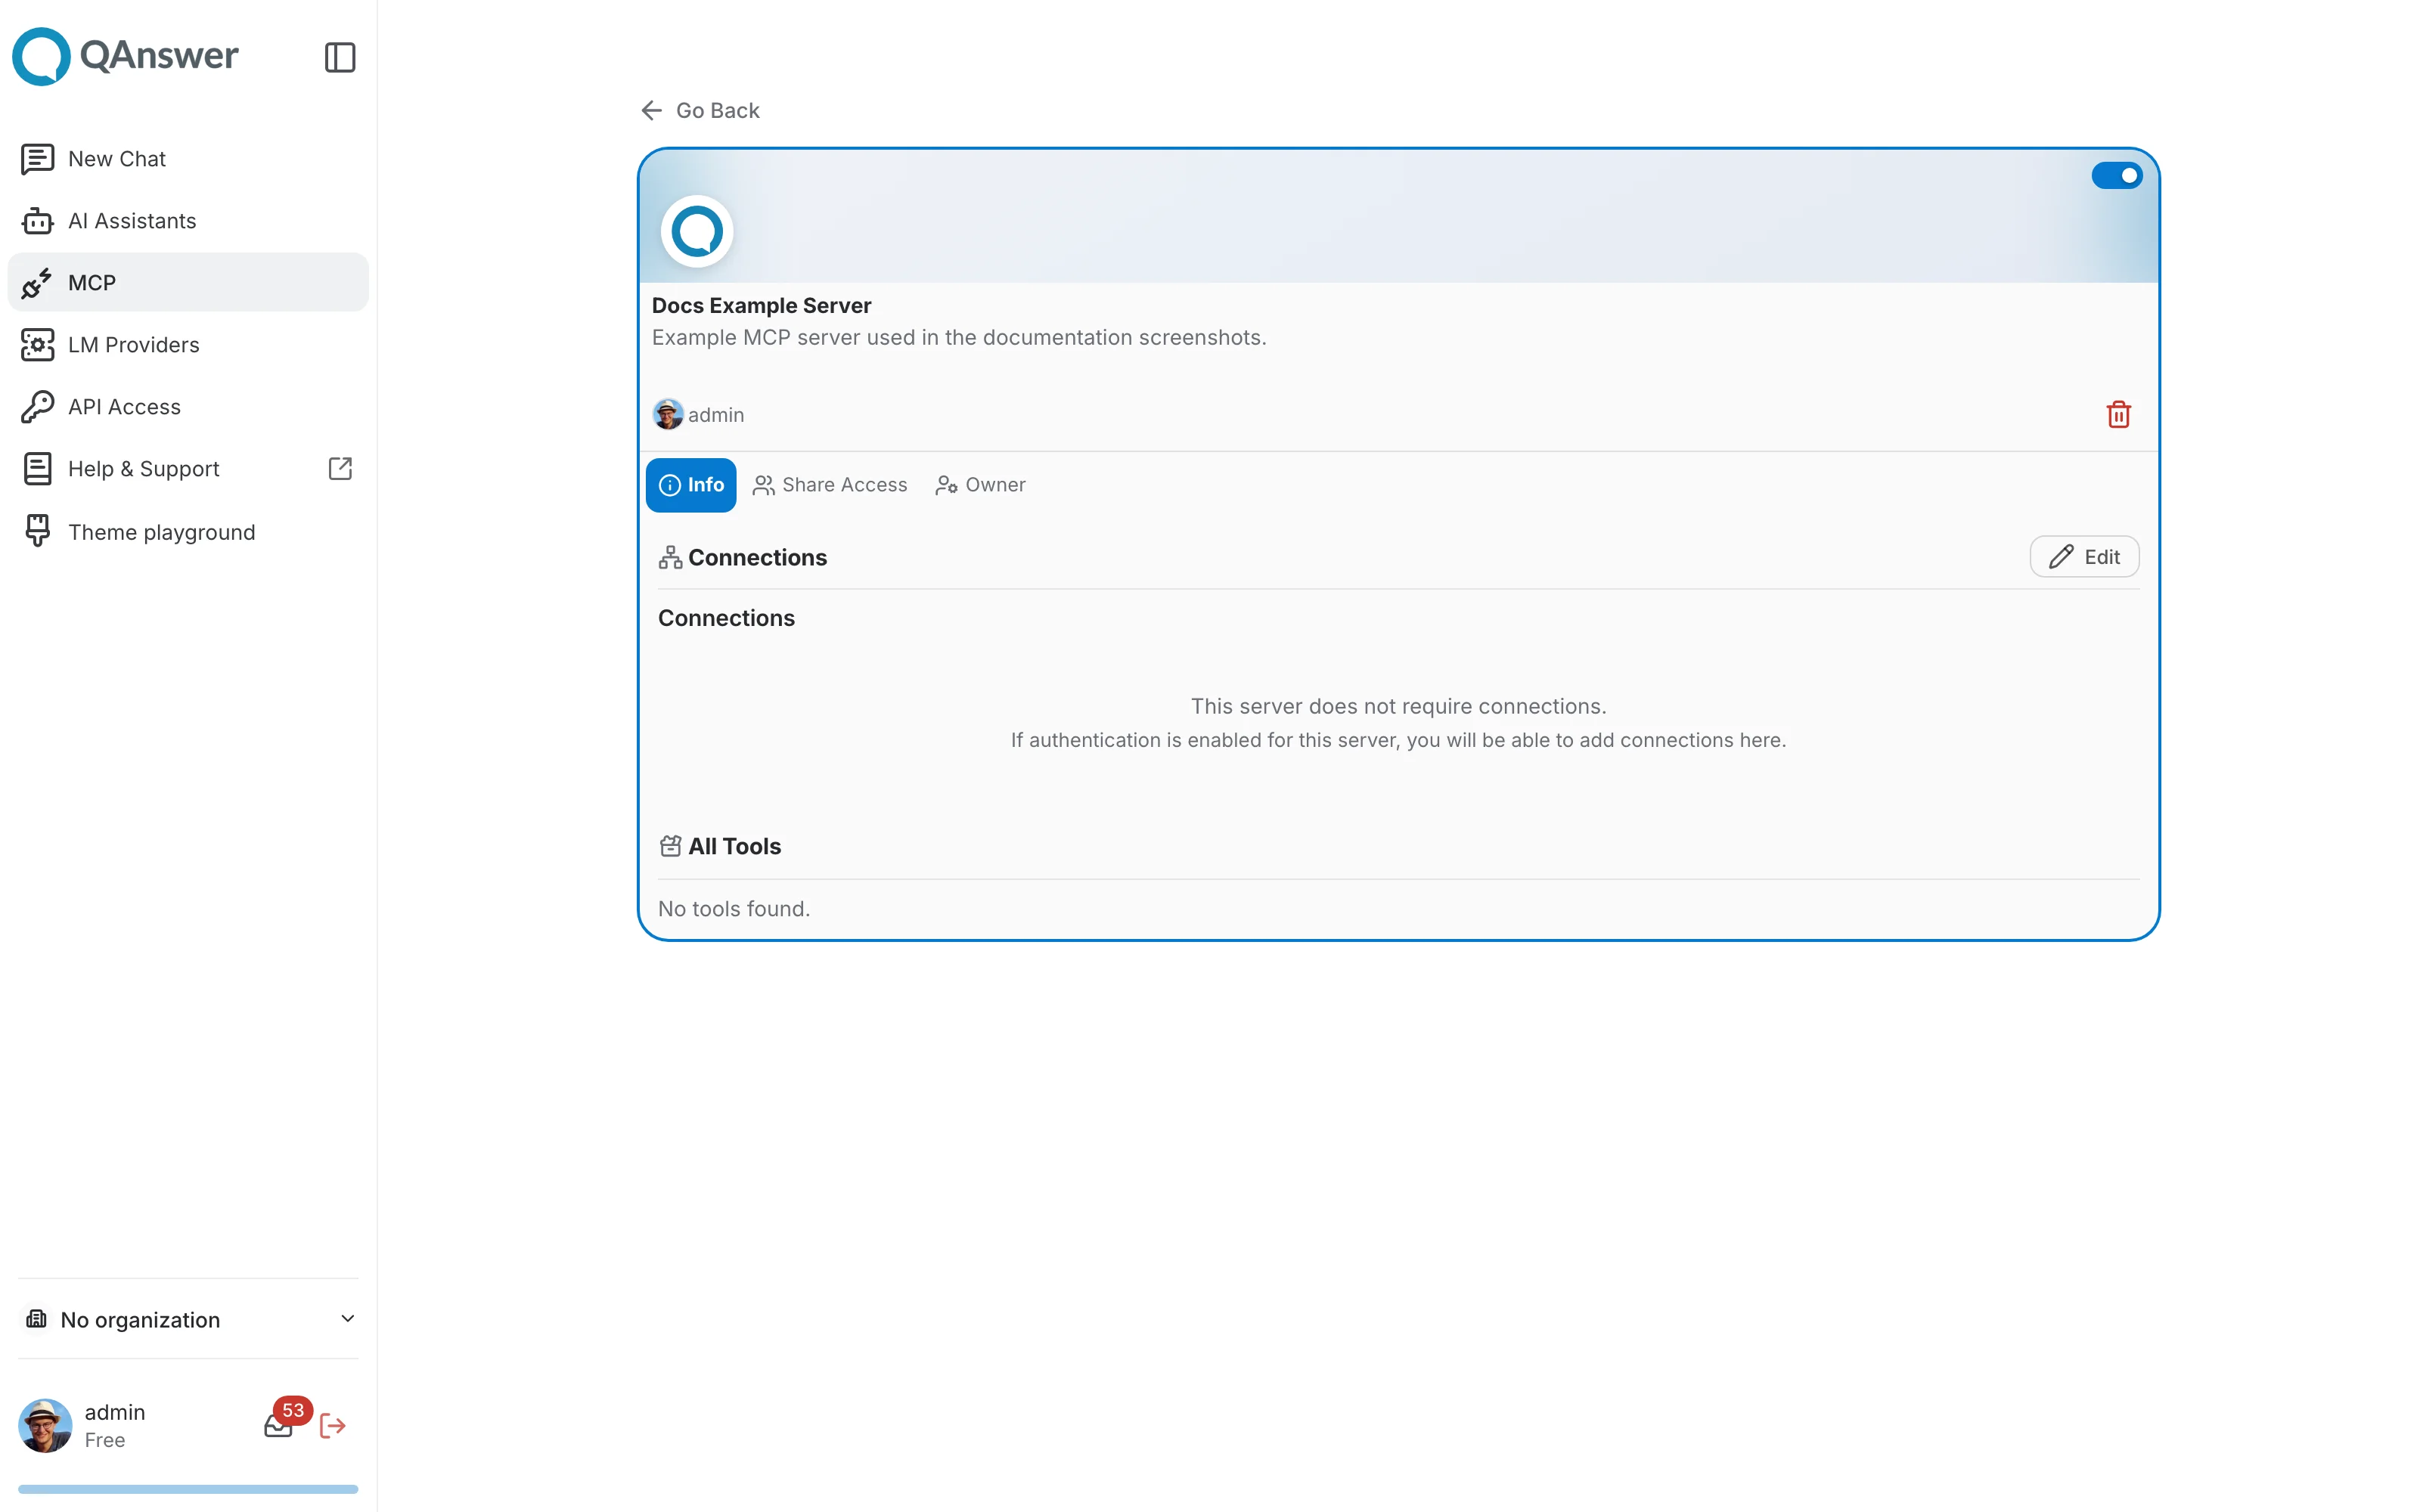
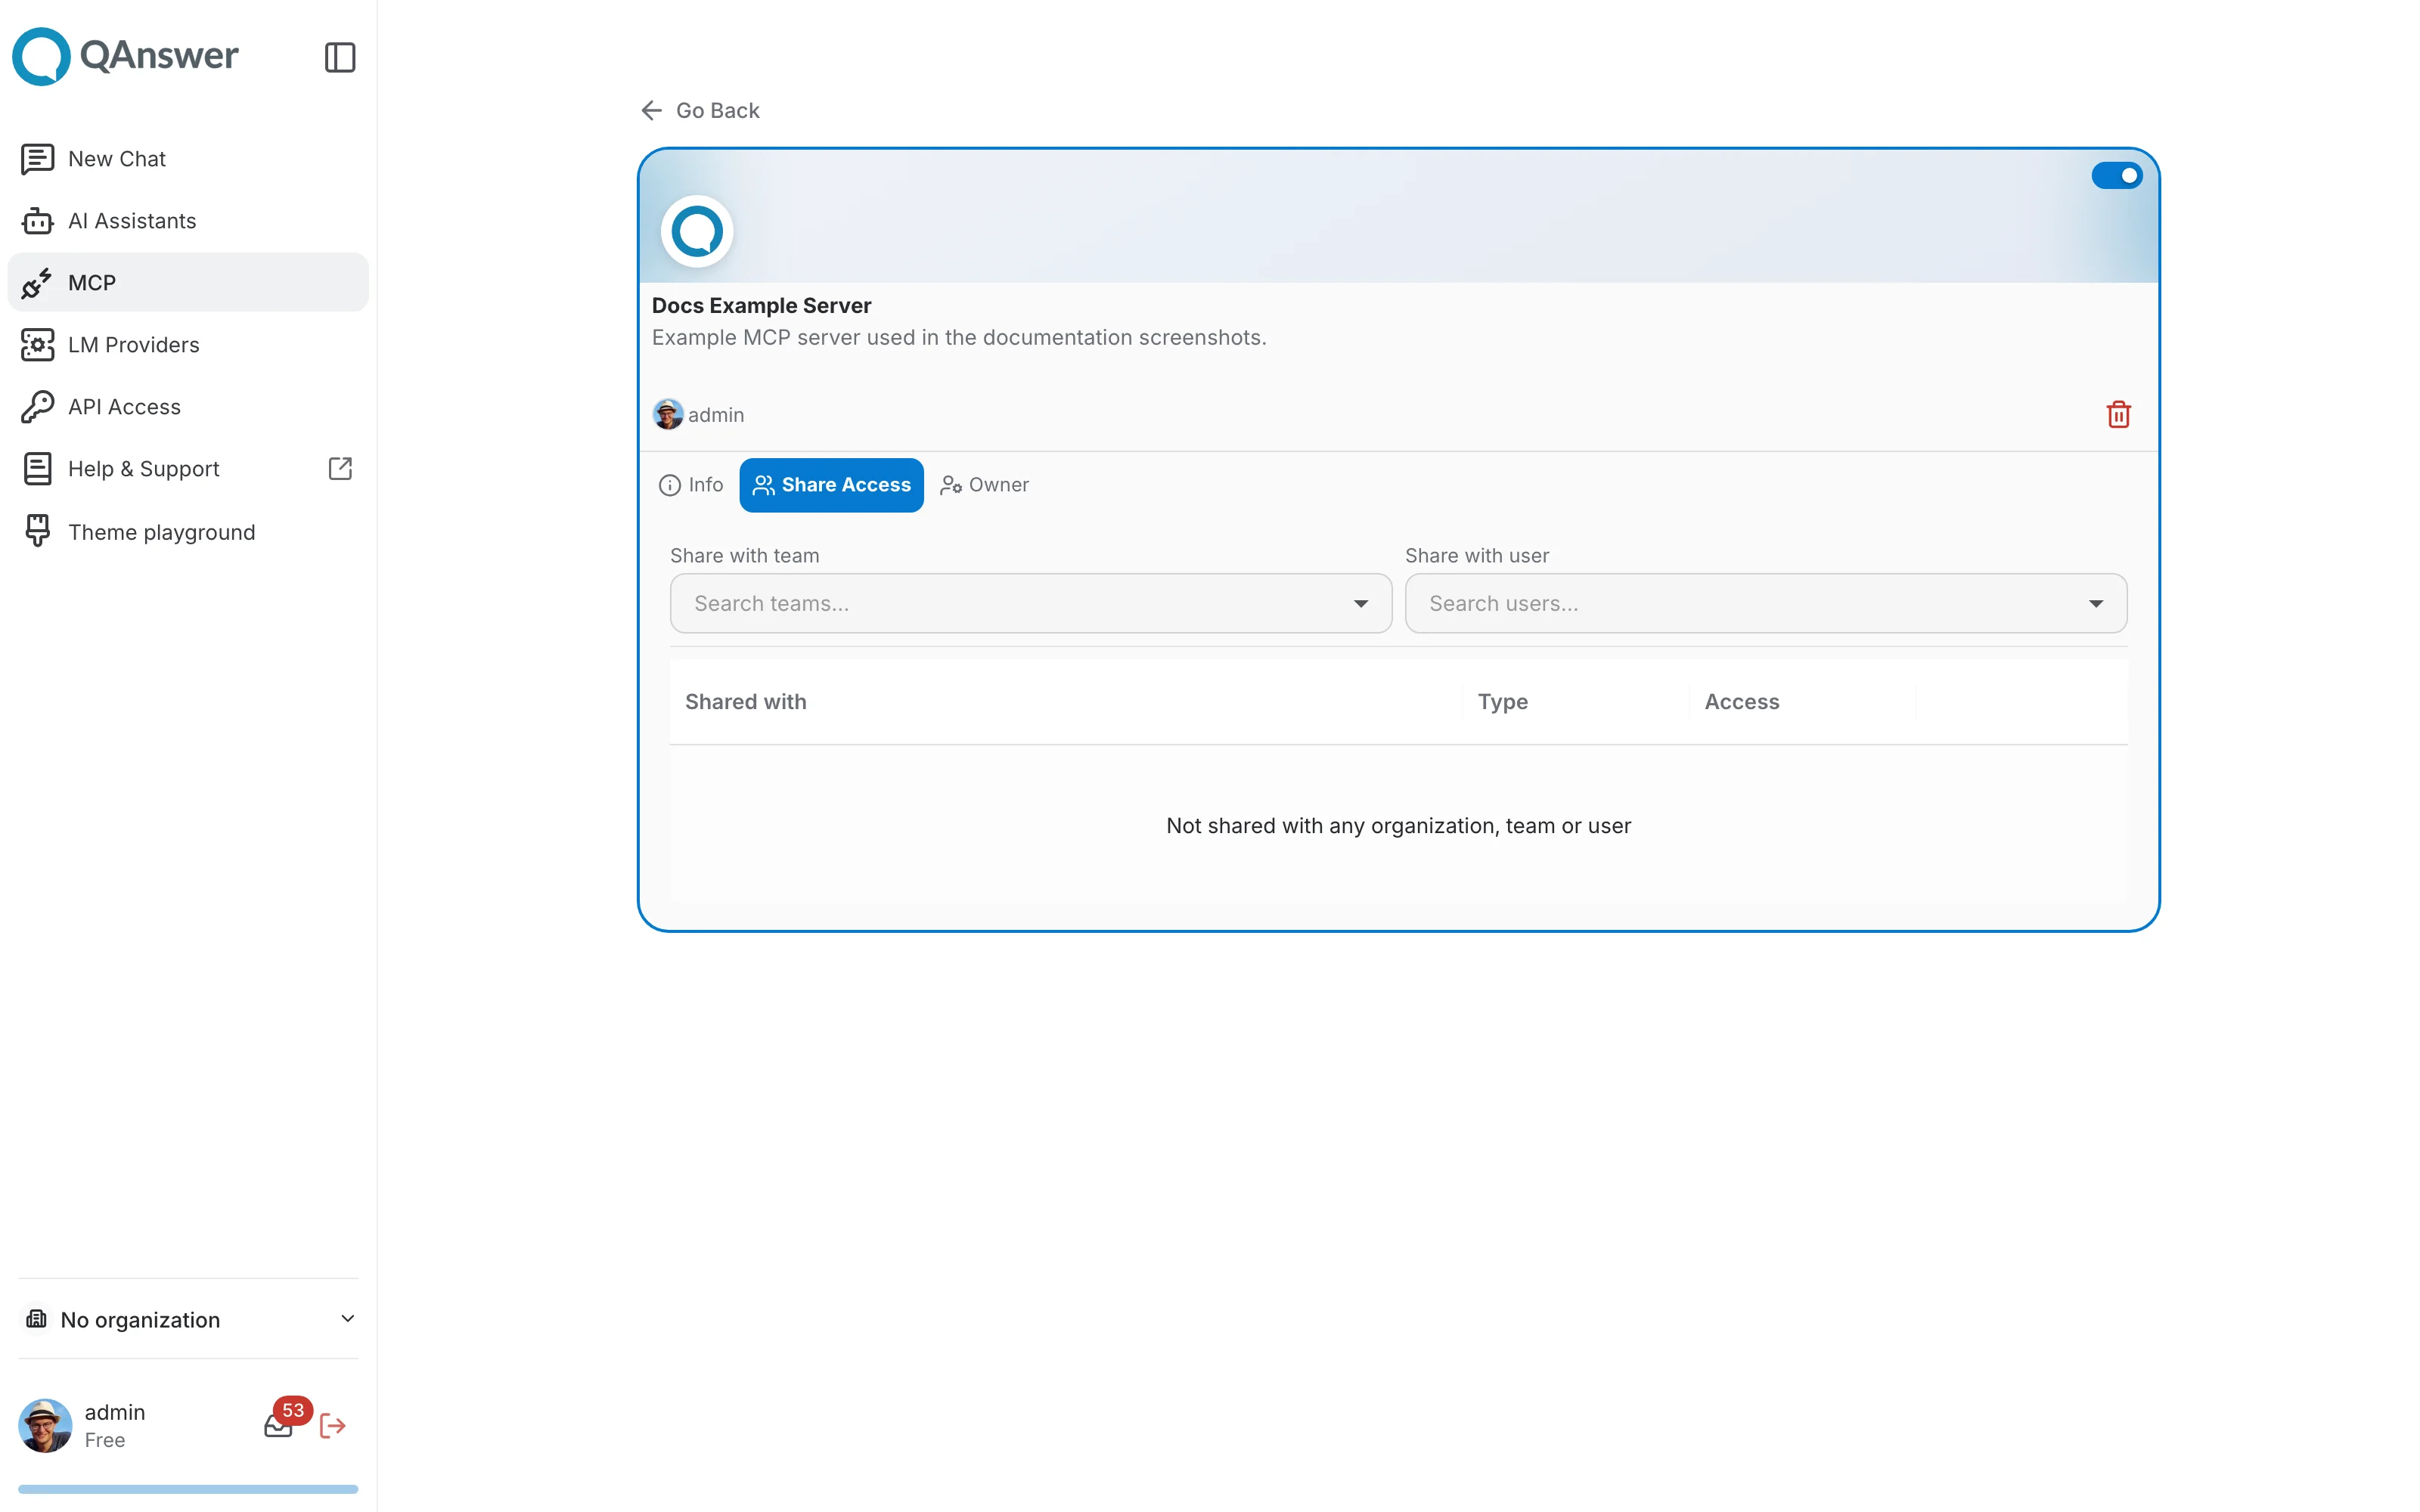
Clicking a server card (outside of its action buttons) opens a read-only detail page with three tabs:
- Info — the server's Connections (per-user or shared credentials, when authentication is enabled) and the full list of enabled tools, each with a per-tool "ask for confirmation by default" switch.
- Owner — who owns the server (a user, team, or organization) and, for admins, the option to transfer ownership.
- Share Access — share the server with additional teams or users beyond its owner, and review who it's already shared with.