
Managing LM Providers
Everything on this page works the same on all five tabs and at every level — the list, the switches, testing, adding and importing behave identically in your own workspace, on the LLM tab of an organization and on the Web Search tab of a team.
Each level is managed by its own admins — platform admins in the admin space, organization admins in the organization settings, team admins for their team. In your own workspace you are the admin: you can add providers with your own API key and pick your own defaults, and everything a level above you activated simply shows up in your list.
The list
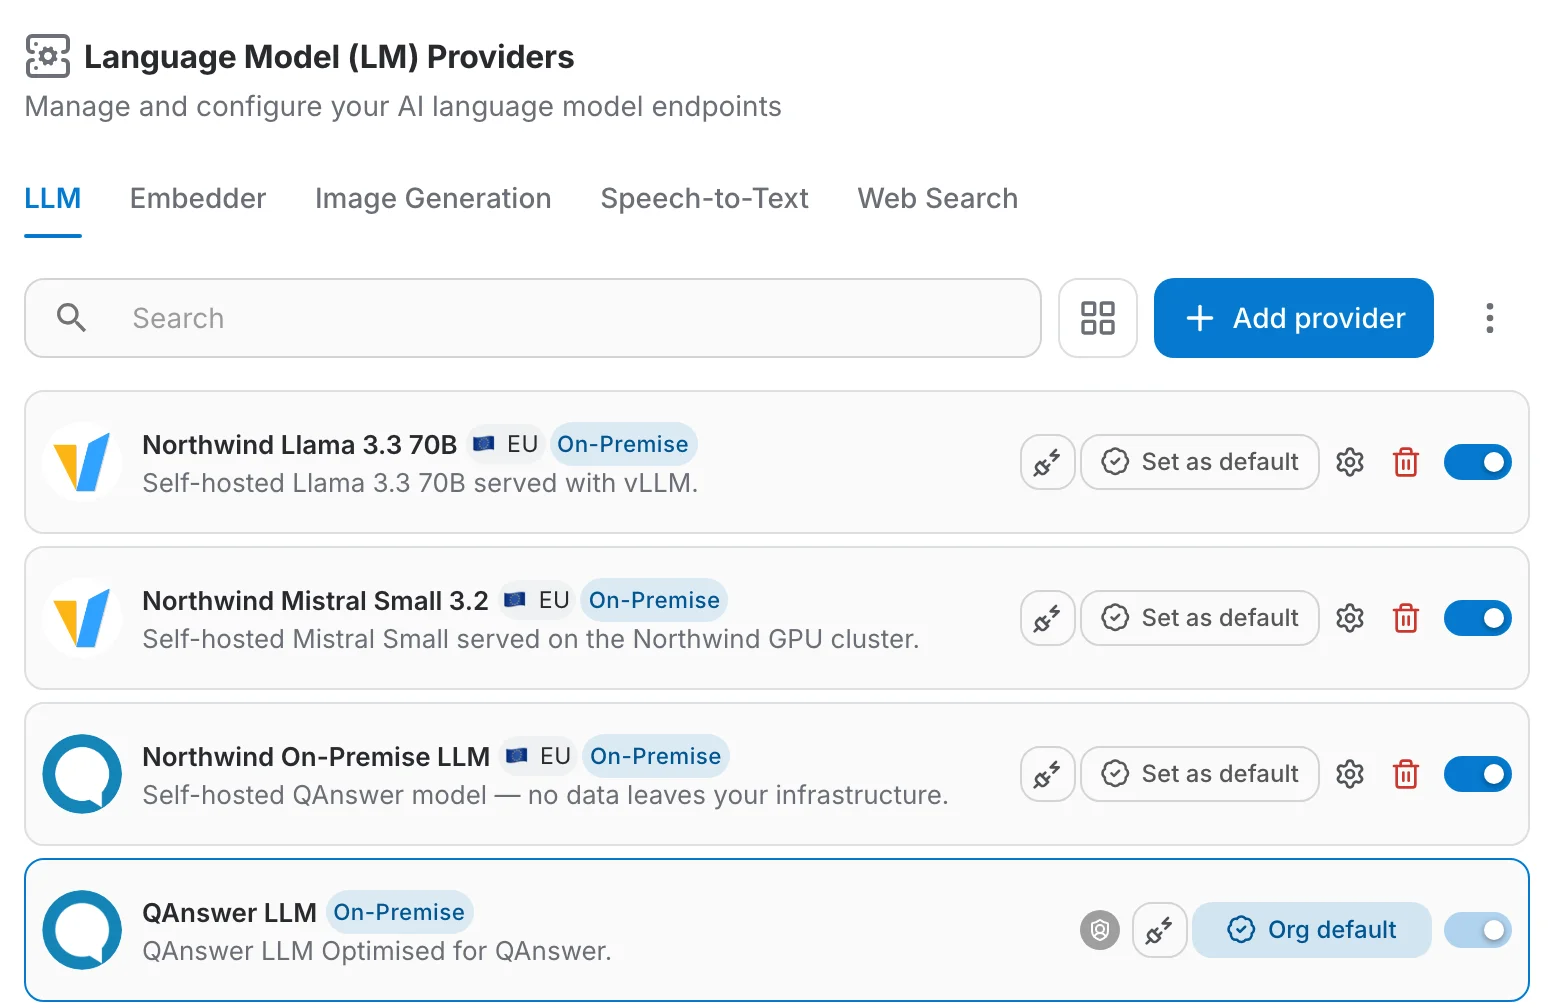
Each row is one provider. From left to right you see:
- the logo and the name users will see.
- where the service is hosted — 🇪🇺 EU, 🇺🇸 US or 🇨🇳 China. Useful when data residency matters.
- an On-Premise badge when the model runs on your own infrastructure and no data leaves it.
- a Default chip among the action buttons on the one provider used when nobody picks anything else — labelled Org default, Team default or Your default, depending on the level you are managing.
- the action buttons, and on the far right the on/off switch.
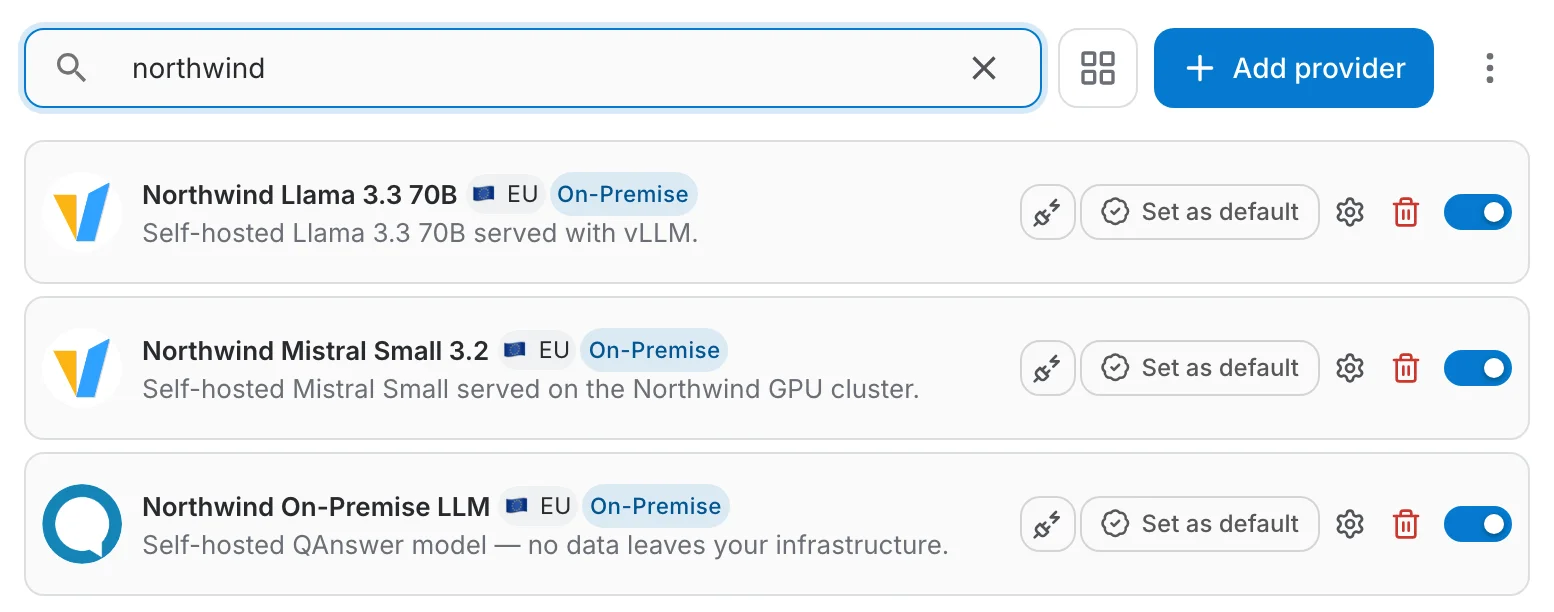
Search
Type a few letters in the search box to narrow the list. The search runs on the server, so it also finds providers further down a long list.
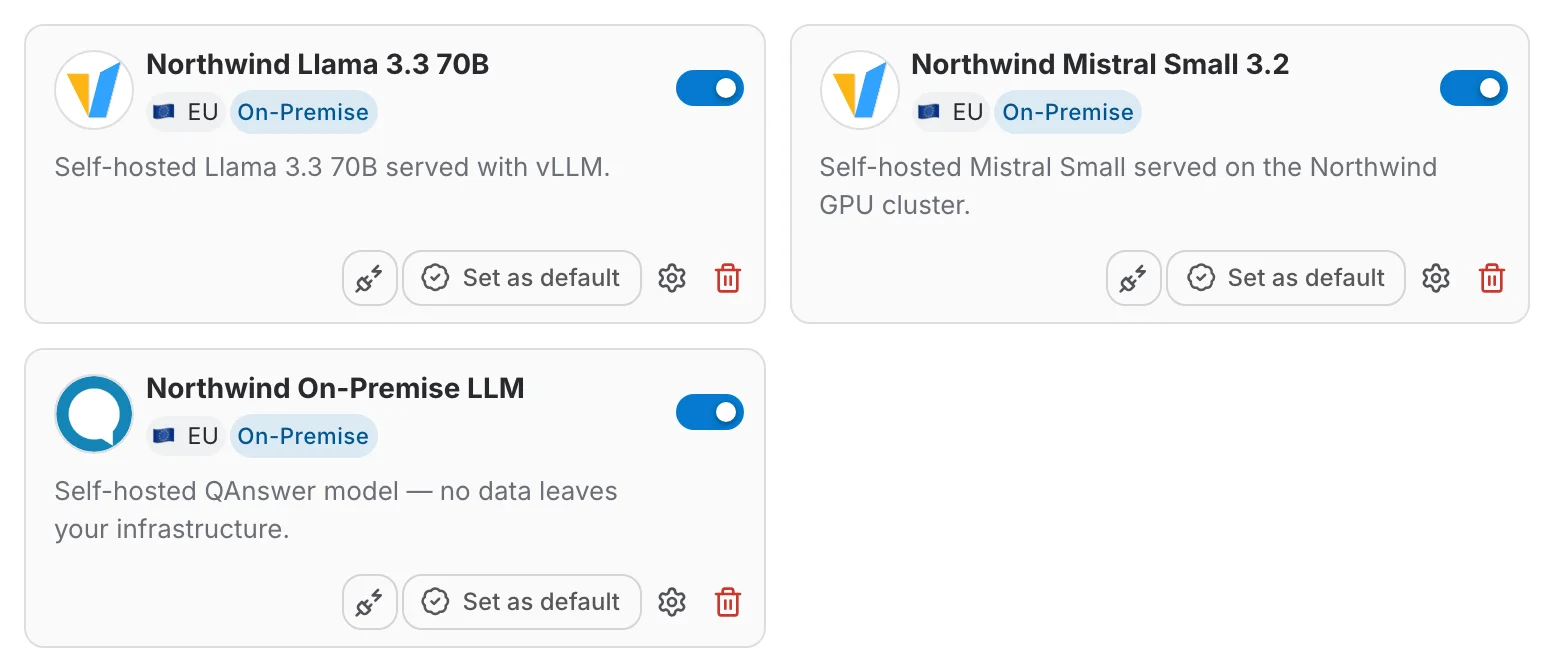
List or grid
The button next to the search box switches between the compact list and a two-column grid of cards. Your choice is remembered.
Which providers you can change
Providers created at your level come first in the list and carry a gear and a bin icon — those are yours to edit and delete. Providers inherited from a higher level have no gear: you can still activate them and make them the default, but their settings are managed where they were created.
Turning a provider on or off
The switch on the right of each row decides whether the provider exists for your organization. Switched off, it is greyed out and nobody in the organization can select it.
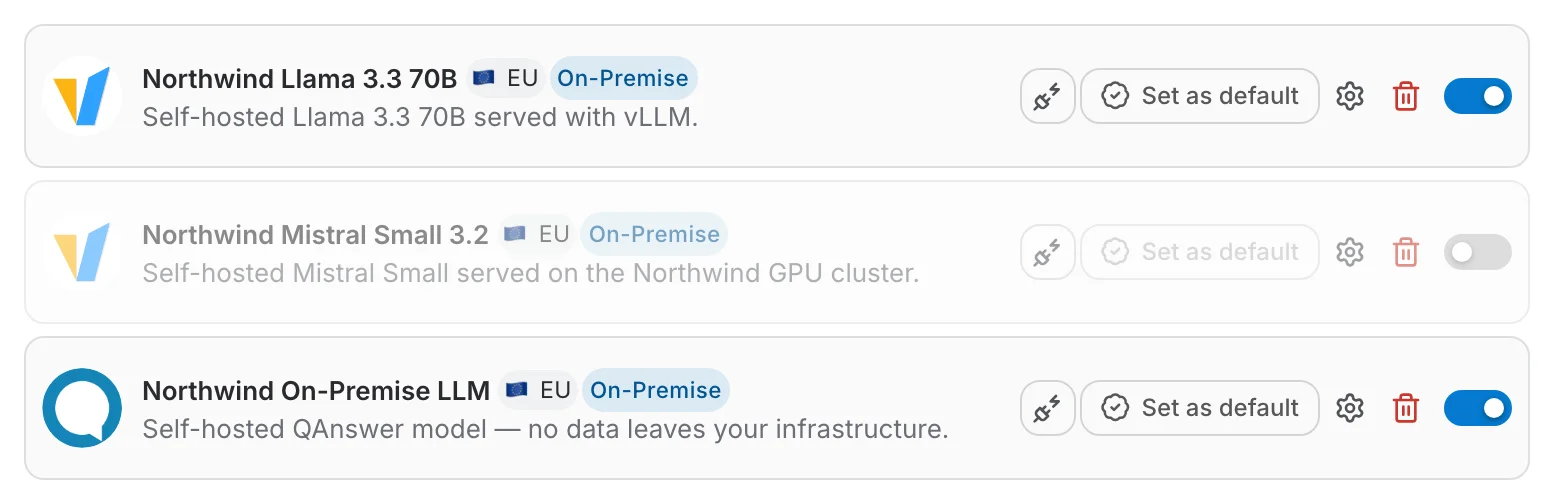
The switch of the default provider is disabled on purpose. Make another provider the default first, then you can switch the old one off.
Choosing the default
The default is what QAnswer uses when a user, an assistant or an API call does not name a provider explicitly. Click Set as default on any active provider to move the chip to it.
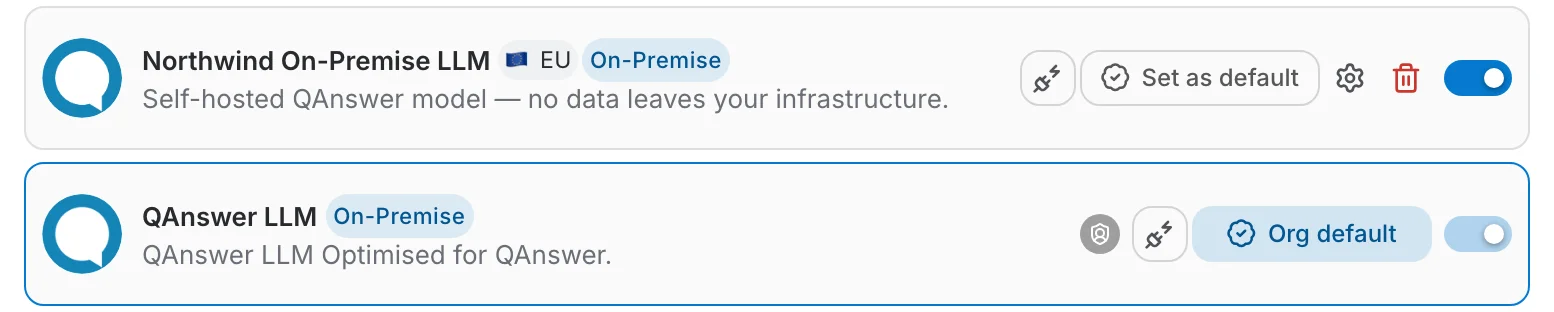
The default applies to the level you are managing — each level picks its own, and the most specific level wins: personal over team, team over organization, organization over platform.
Checking that a provider works
The plug button on a row runs a real call against the provider. If it succeeds, nothing happens — the button simply stops spinning. If it fails, a panel opens with the exact error from the provider and the payload that was sent, which is usually enough to spot a wrong key or a typo in the endpoint.
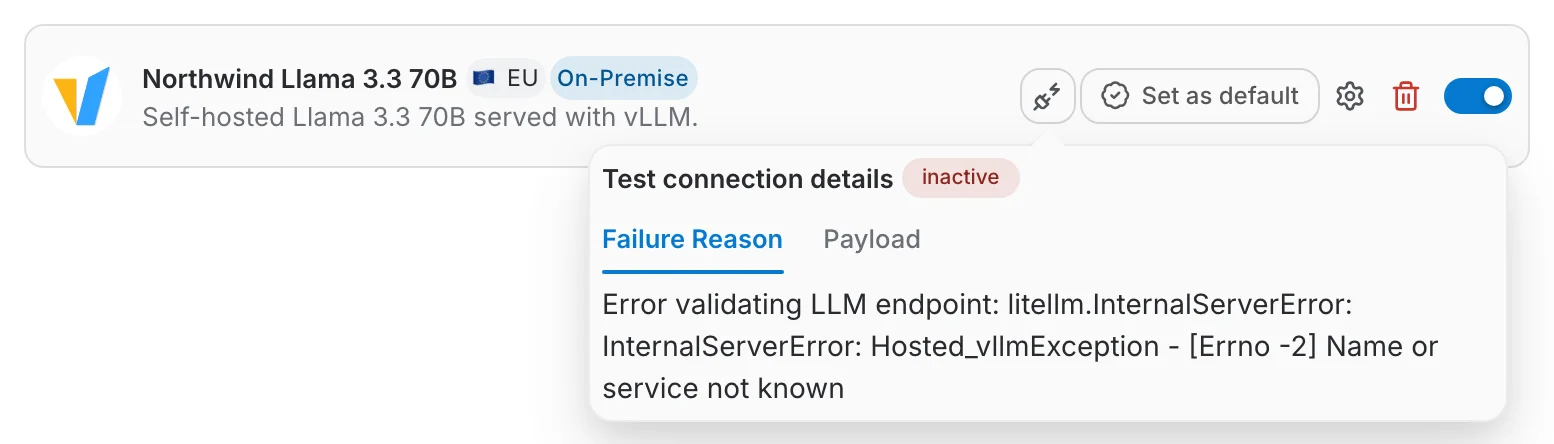
Run the test right after you add a provider. A key that was copied with a missing character looks perfectly fine in the form and only fails when a user asks a question.
Adding a provider
Click Add provider. Adding a provider is two steps, and the second step only asks for what that particular service needs.
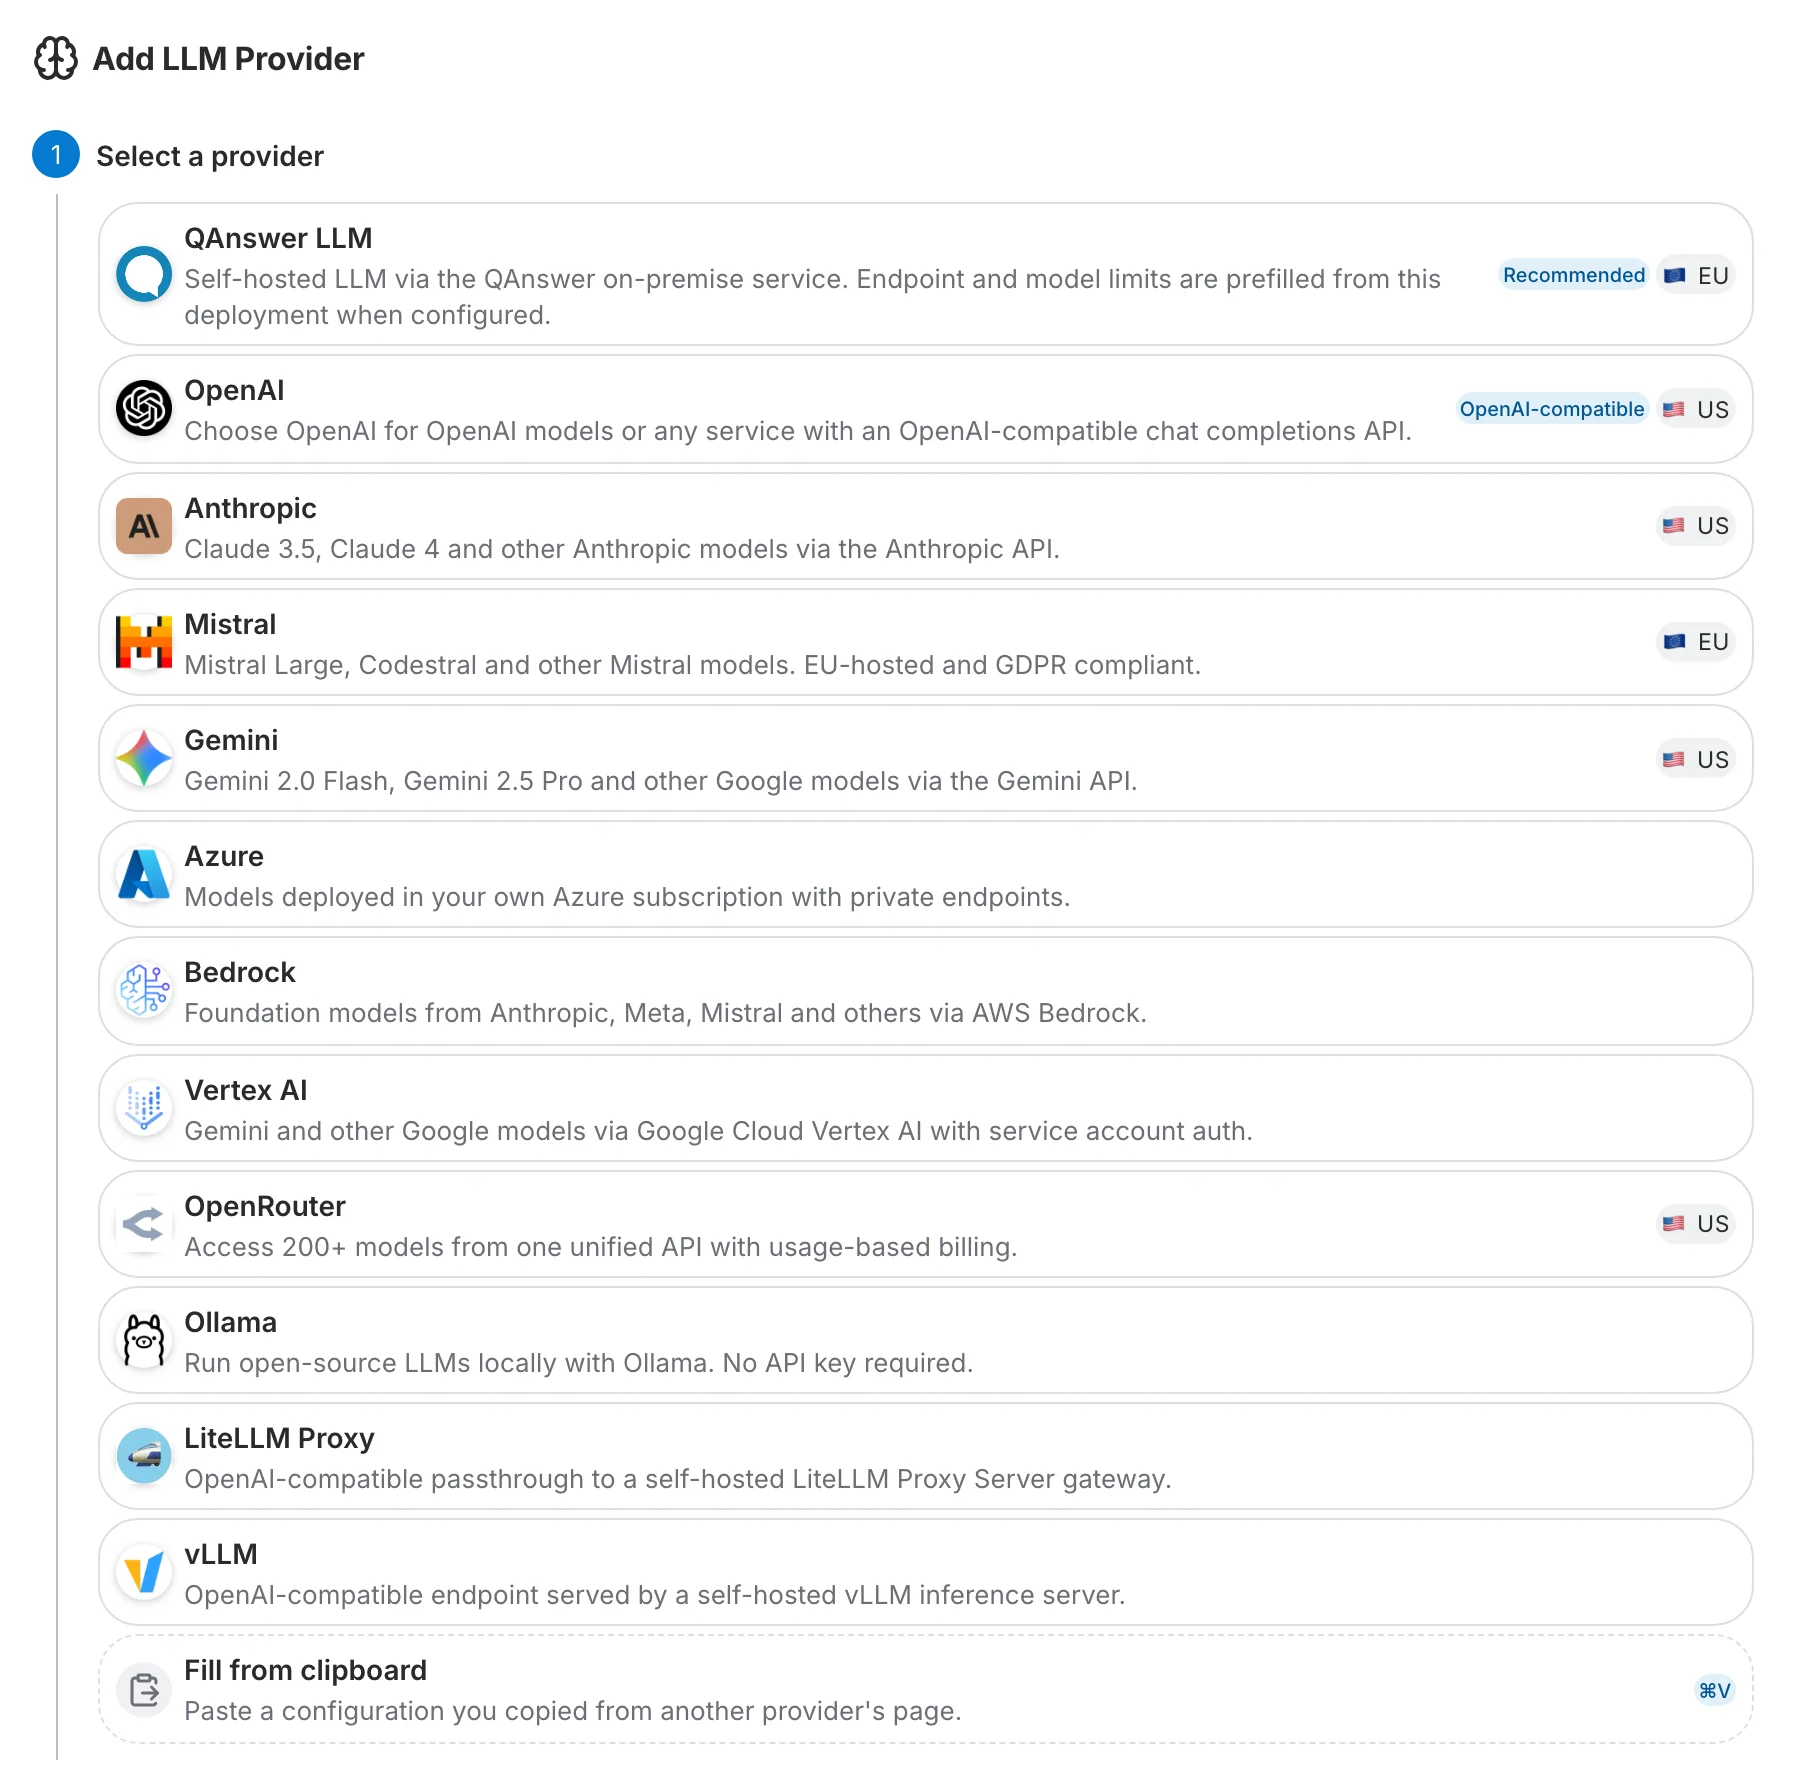
Step 1 — pick the service
Pick who hosts the model. The Recommended badge marks the option we suggest if you have no preference, the flag tells you where the service is hosted, and an OpenAI-compatible badge marks a tile that also accepts any service speaking the OpenAI API. The last tile is not a service at all — Fill from clipboard pastes a configuration you copied from another provider.
Step 2 — fill in the details
The form links straight to the page of the provider where you create an API key. Paste the key, choose the model, give it a name your users will recognise, and click Create.
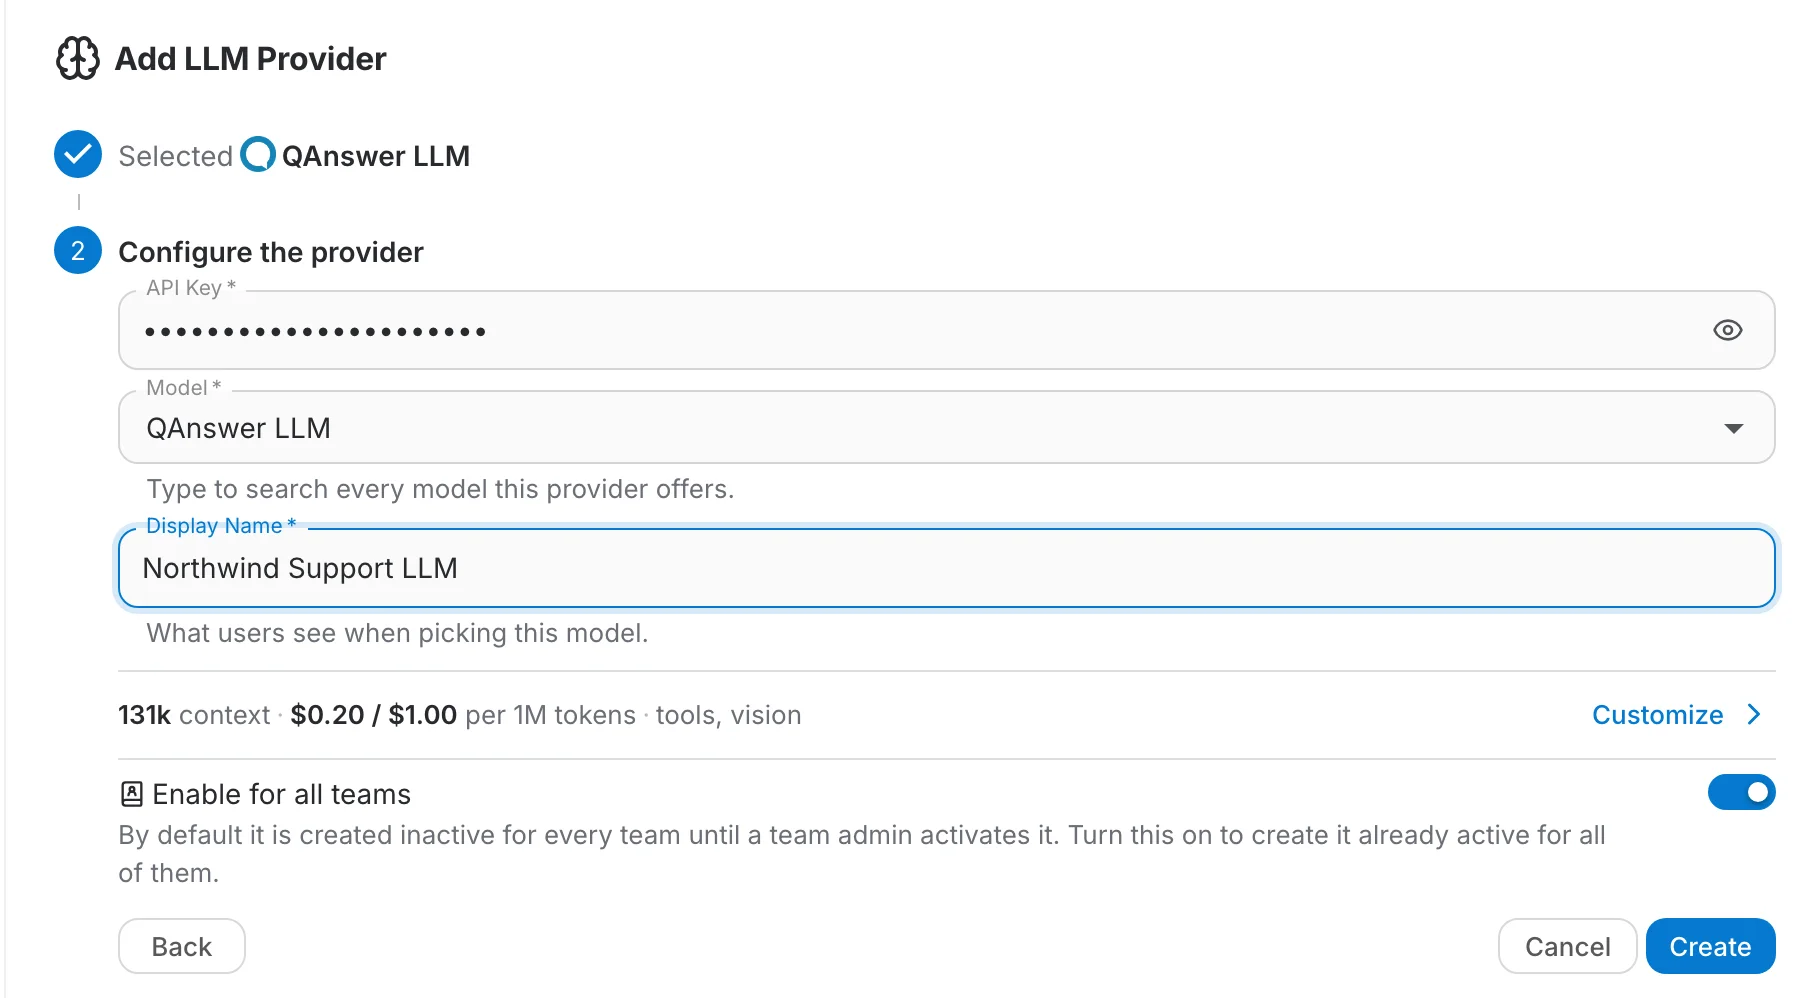
For LLM providers, the Model field searches the full catalogue of the service you picked — see the model catalogue.
Connecting an OpenAI-compatible service
Many services speak the OpenAI API without being OpenAI — a gateway in front of your own models, an inference server, a regional reseller. That is what the OpenAI-compatible badge on the OpenAI tile means, on the LLM and the Embedder tab: pick OpenAI, then click Configure custom endpoint in step 2.
Step 2 turns into the full form, where you type the service's own base URL, model name, credentials and capabilities yourself instead of picking a model from the OpenAI catalogue. Endpoint URL becomes required — it is what sends the requests to your service rather than to OpenAI.
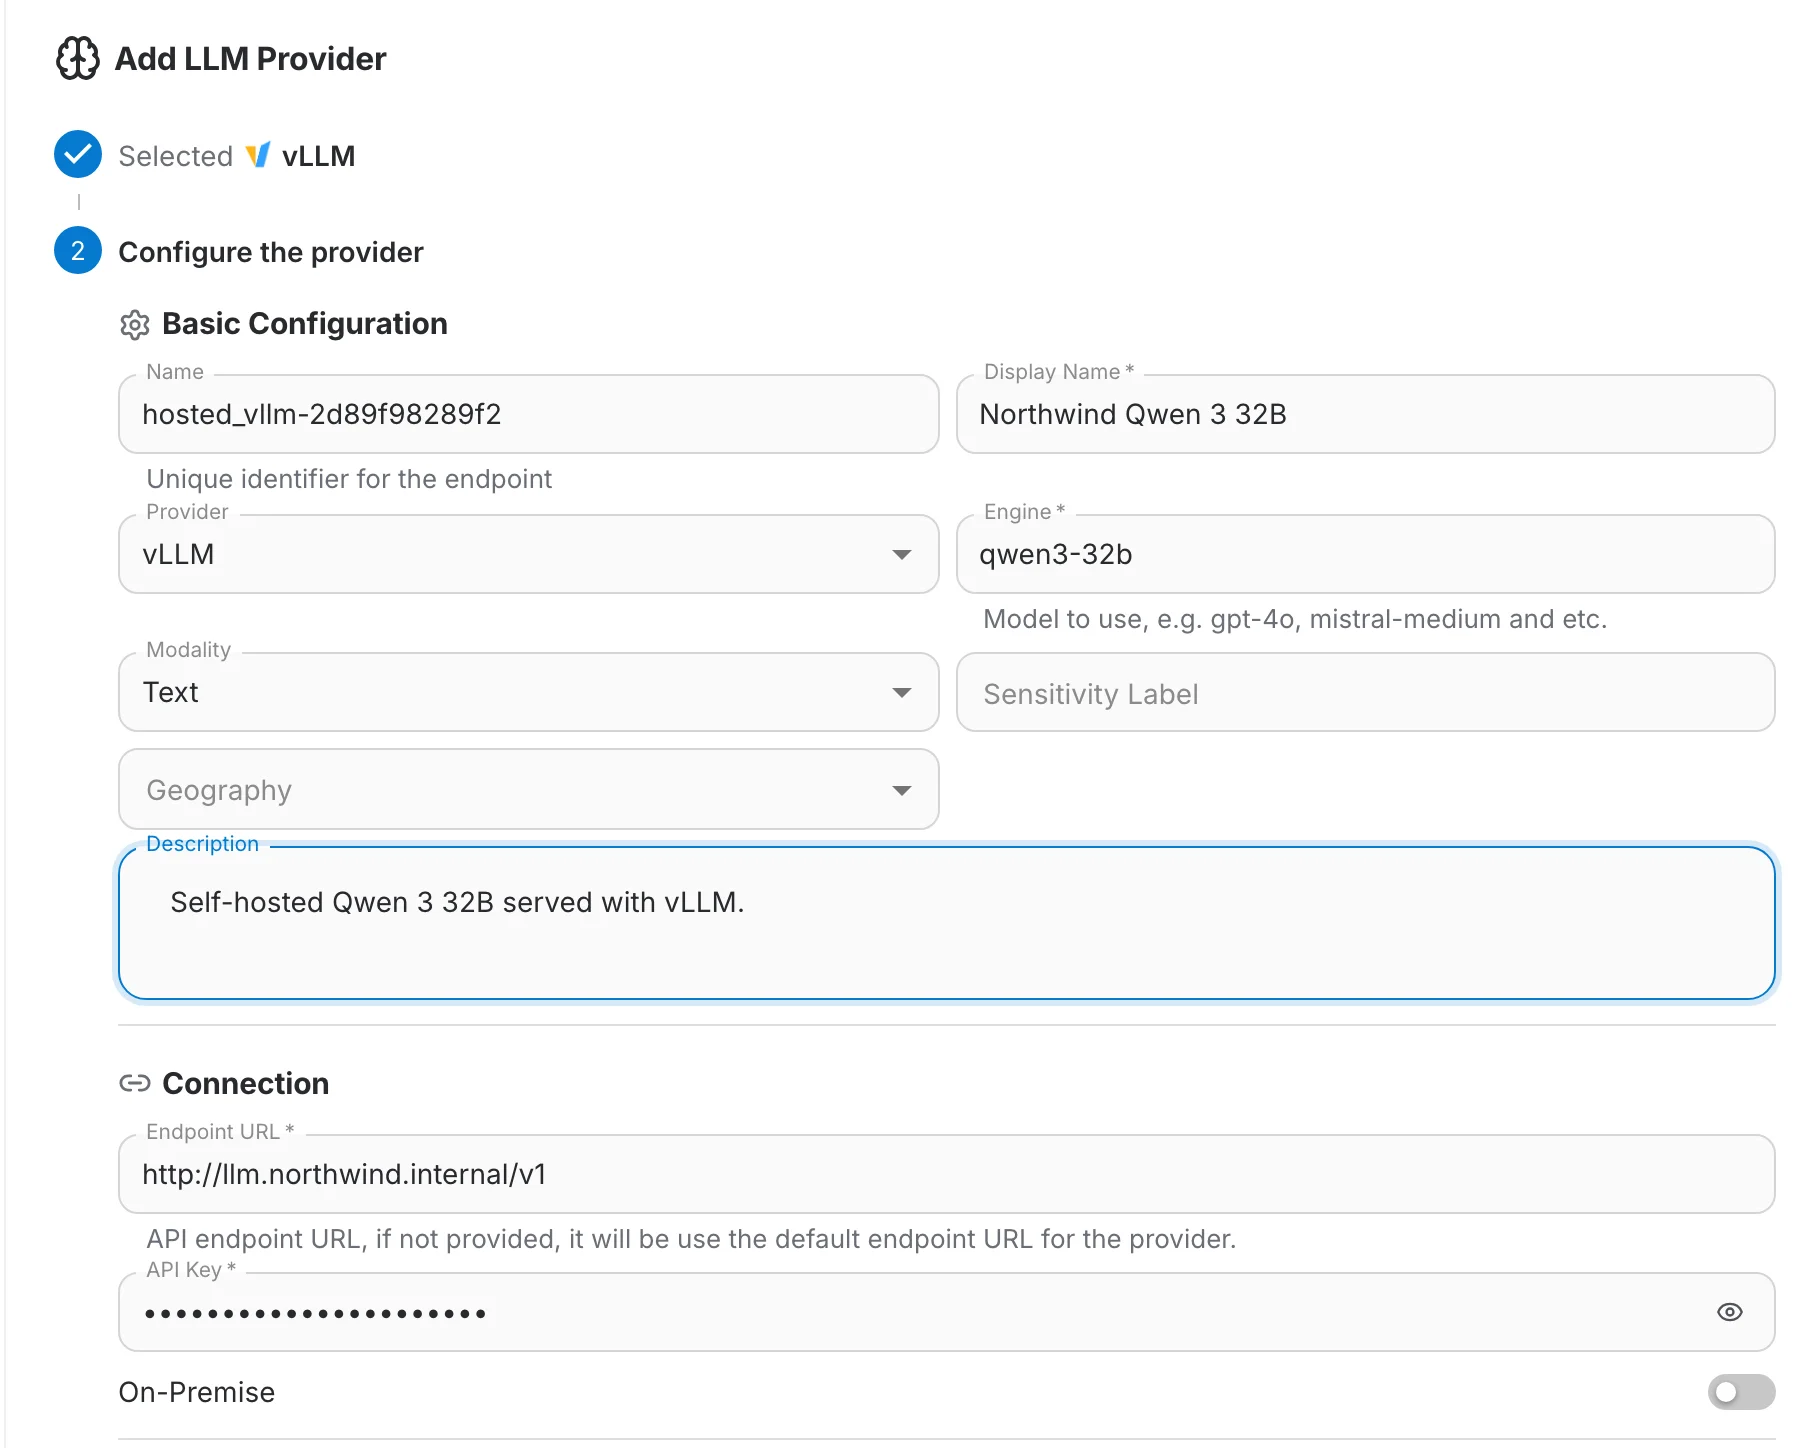
vLLM, LiteLLM Proxy, Ollama and Azure have their own tiles and fill in more for you. Take the OpenAI route only for a service that has none.
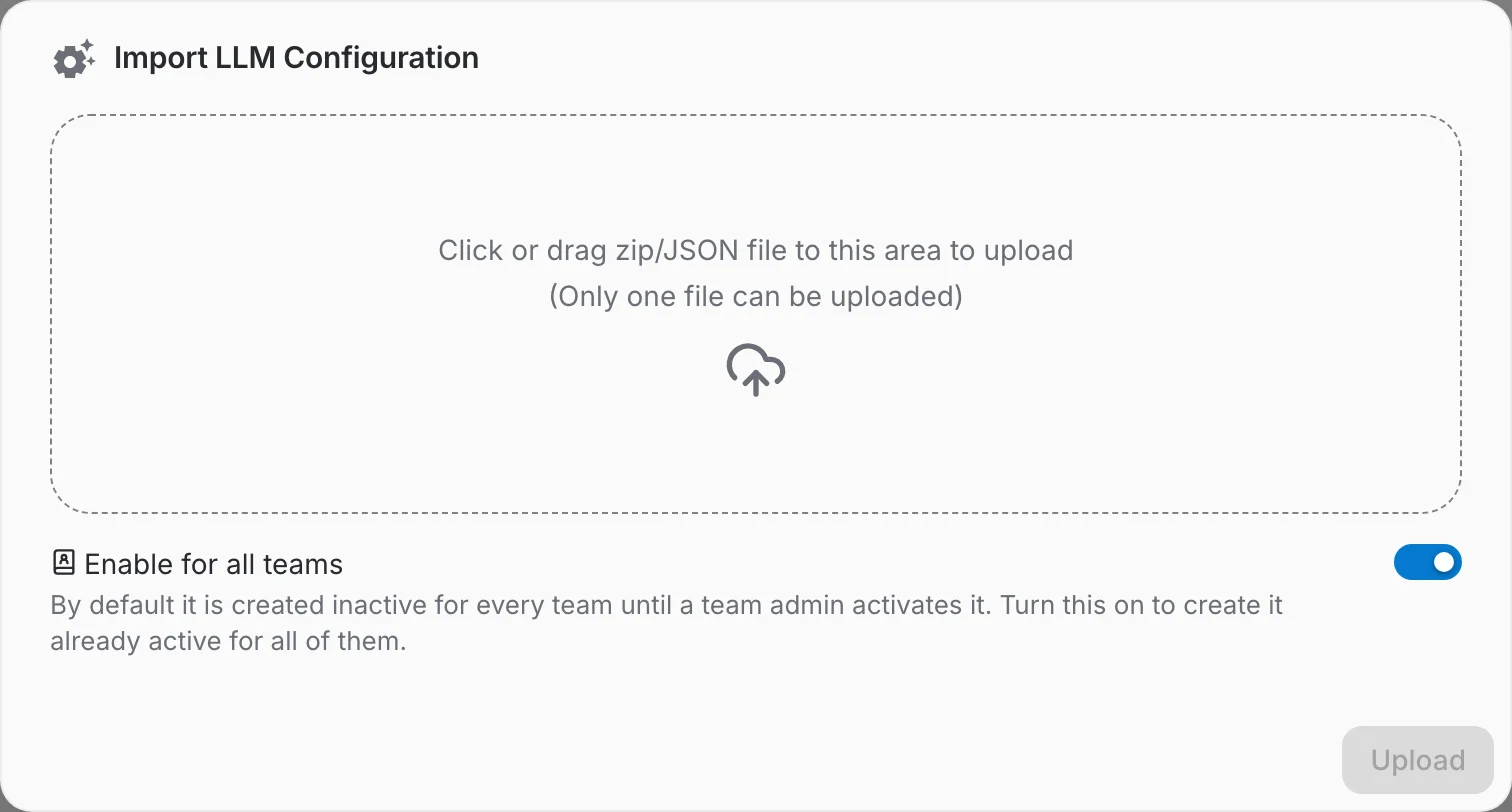
Enable for all teams
By default a new provider is created switched off for every team, so a team admin has to activate it deliberately. Turn Enable for all teams on if you would rather have it available everywhere straight away.
In the admin space the same switch is called Enable for all organizations and plays the same role one level up: it decides whether organizations get the new provider switched on out of the box.
Looking at one provider in detail
Click a row to open the provider. The header keeps the actions you know from the list, and the tabs below hold everything else.
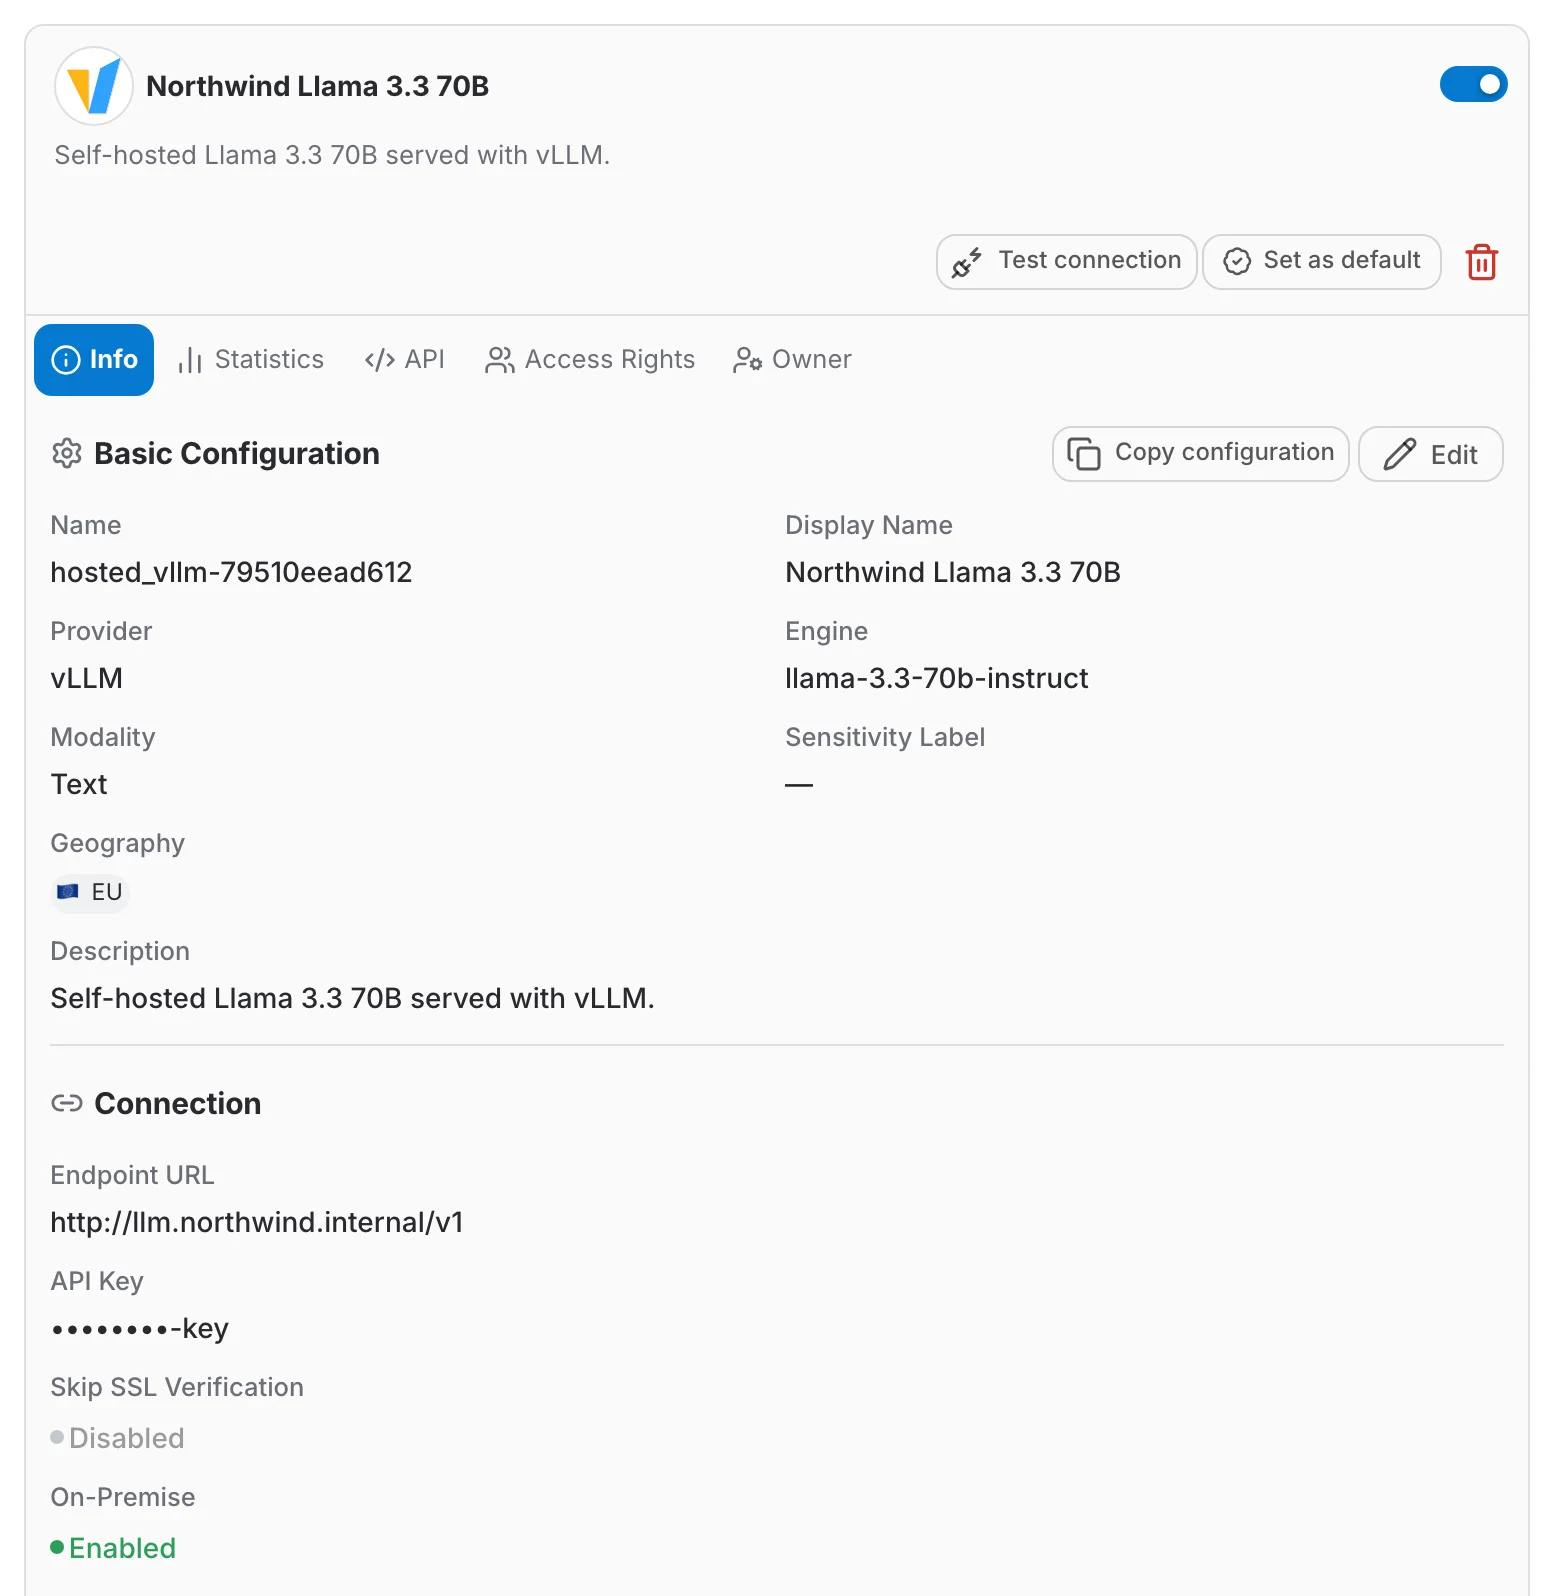
- Info — every setting of the provider, grouped into Basic Configuration, Connection, Generation Parameters, Capabilities, Cost and Advanced. Click Edit to change them.
- Statistics — how much this single provider has been used and what it cost.
- API — ready-made code snippets for calling this model through the QAnswer API.
- Access Rights — share the provider with another team or another user.
- Owner — see who owns the provider and hand ownership over to someone else.
Copying a provider configuration
A provider that already works is the best starting point for the next one. Open it and click Copy configuration, next to Edit on the Info tab: the whole configuration goes to your clipboard.
Then go where the new provider belongs — another organization, another team, another deployment — click Add provider and choose Fill from clipboard, the dashed tile at the end of the list. Pressing ⌘V (Ctrl+V on Windows) while that list is open does the same. The form opens already filled in; give it a display name and click Create.


The internal name and the Default badge are left out, because a new provider always gets its own. A copy also stays in its category: an embedder configuration cannot be pasted into the LLM tab. And Copy configuration only shows up on providers you are allowed to edit — the ones created at your level.
API keys and secrets travel with the configuration, as plain text on your clipboard. Paste it into QAnswer and nowhere else, and copy something harmless afterwards if you share your screen.
Working on several providers at once
Select mode
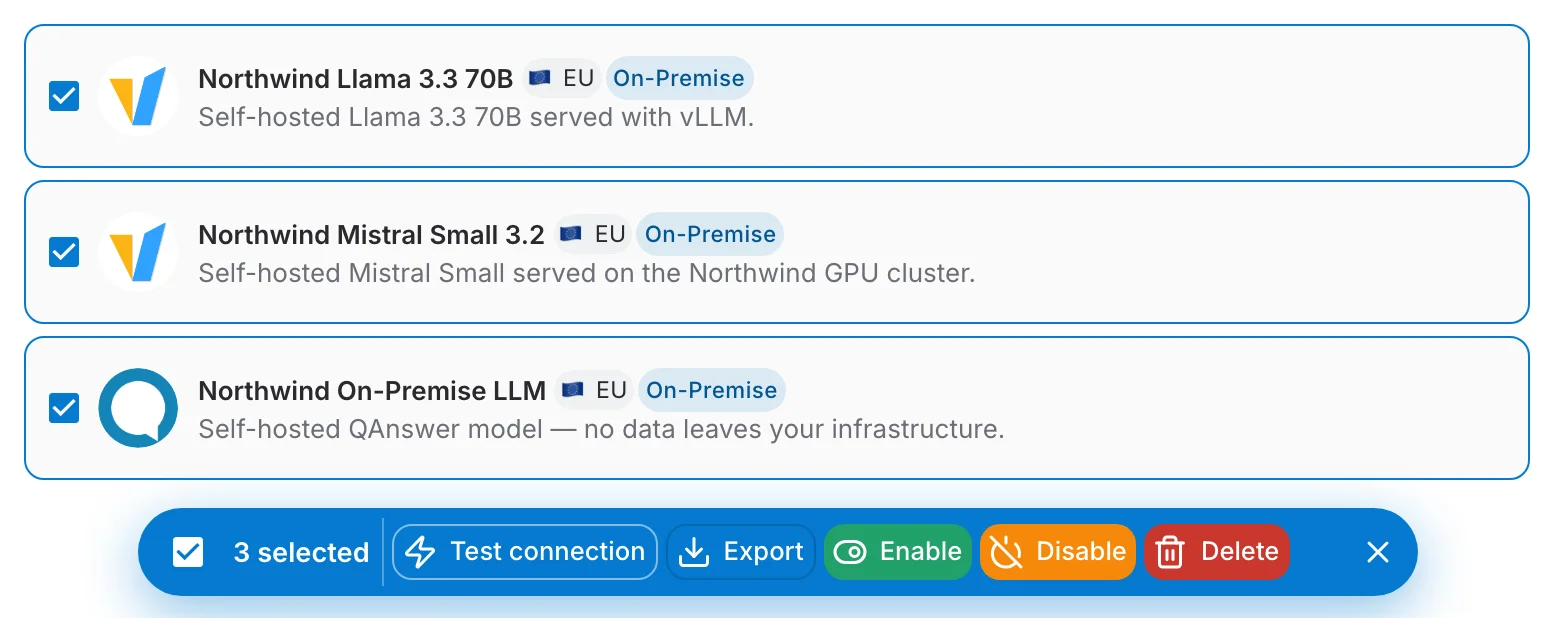
Open the ⋮ menu and click Select to get a checkbox on every row. A bar then appears at the bottom of the page with the actions that can run on your selection — test the connection of all of them, enable or disable them, or delete them. The result is reported per provider, so you can see exactly which one failed.
Import and export
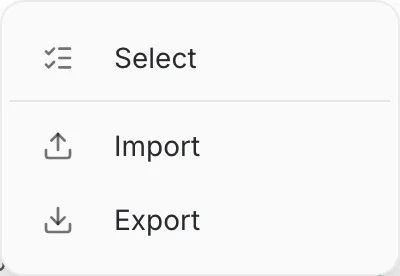
The same ⋮ menu holds Import and Export. Export writes the providers of the current tab to a zip that also contains their logos and cost metadata; Import reads that zip back, and its Enable for all teams switch decides whether what you import arrives switched on everywhere. It is the quickest way to copy a working setup from one environment to another.
Both live behind the ⋮ button at the top right of the list, next to Add provider. Export is reserved for the platform admin space: in an organization and in a team the entry is greyed out, so a team admin can import a setup but not export one.
Providers live on the platform and can be used by other organizations, which is why they cannot be deleted again once other organizations rely on them. Import into a production environment only when you mean it.