
Team members
A team admin manages the members of the team from the Users page of the team settings: who belongs to the team, the role each of them holds in it, and whether their account is active.
The members table
Each row is one member of the team. The table has six columns:
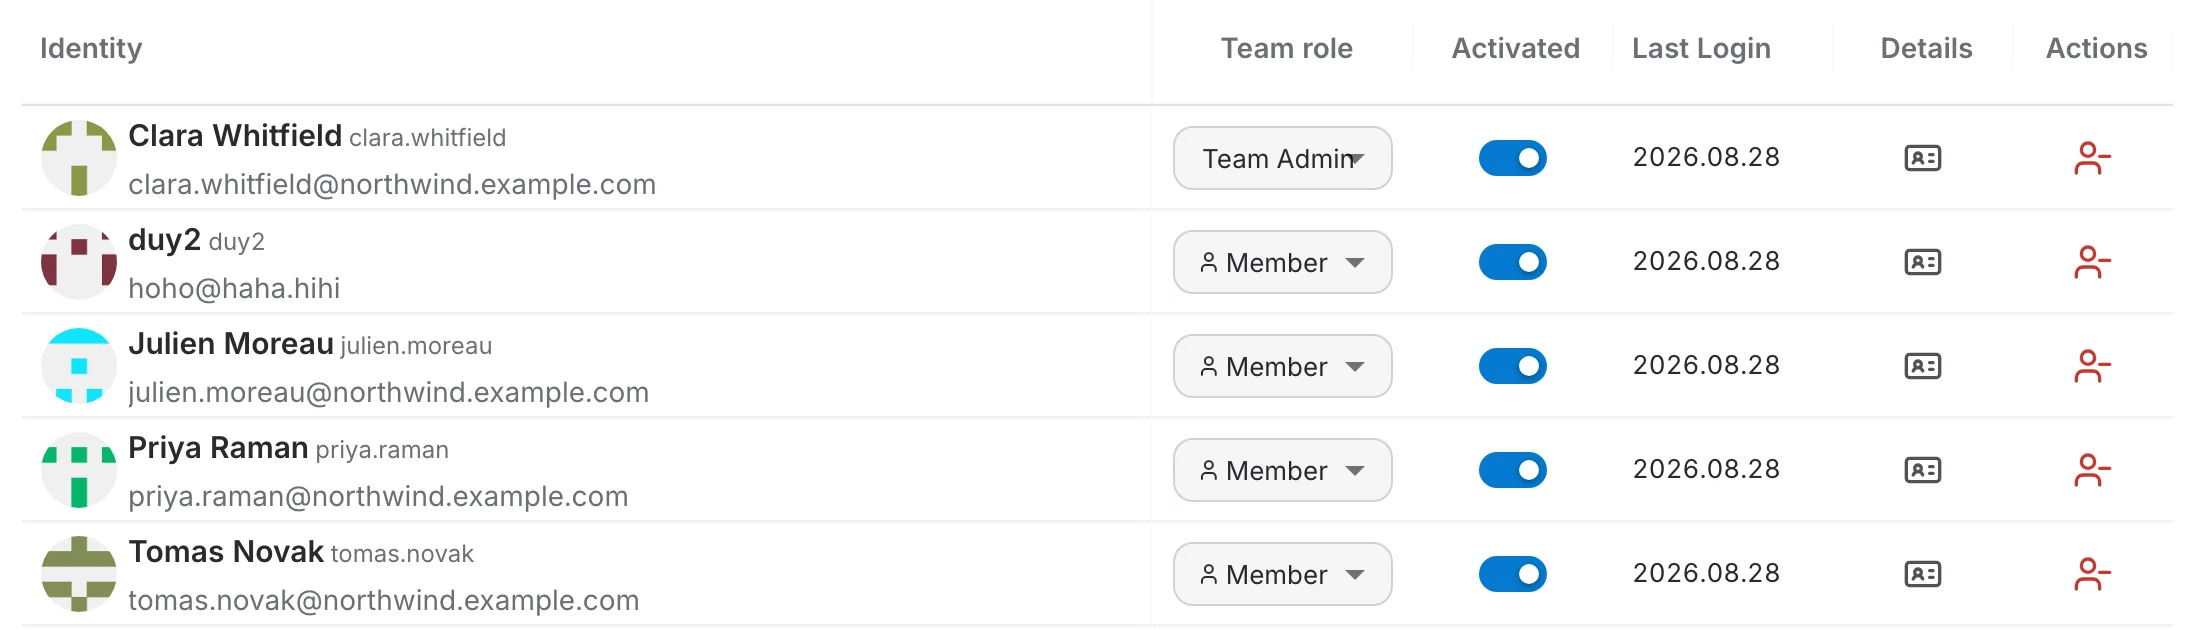
- Identity — avatar, display name, username and e-mail address.
- Team role — the member's role in this team, changed inline from the dropdown.
- Activated — whether the account is active. A deactivated account cannot sign in.
- Last Login — the date the member last signed in.
- Details — opens the member's details card over the table.
- Actions — removes the member from the team.
Team roles
A member holds one of two roles in the team. The dropdown in the Team role column switches between them:
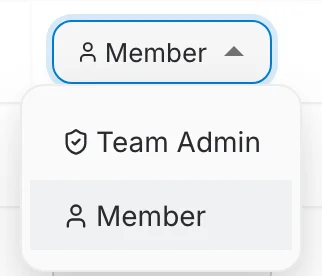
- Team Admin — manages the team: its members, their roles, and the resources shared with the team.
- Member — a regular member, who can use the resources shared with the team.
Search, views and export
The toolbar sits above the table:

- Search — filters the members by name, username or e-mail.
- View toggle — switches between the detailed table and a grid of member cards.
- Add user — adds a member to the team.
- The ⋮ menu — Select, to act on several members at once, and Export, to download the current member list.
Adding a member
There are two ways to add someone to a team, depending on your role:
- Option 1 — Invite by e-mail. Send an invitation to an address. It does not need a QAnswer account yet, and accepting puts them in the team and in its organization. Available to every team admin.
- Option 2 — Add an existing user. Pick someone who is already in the organization and put them in the team at once, as a Member or a Team Admin, with nothing for them to accept.
Option 1: Inviting people into a team
A team invitation works exactly like an organization one, with one difference worth knowing:
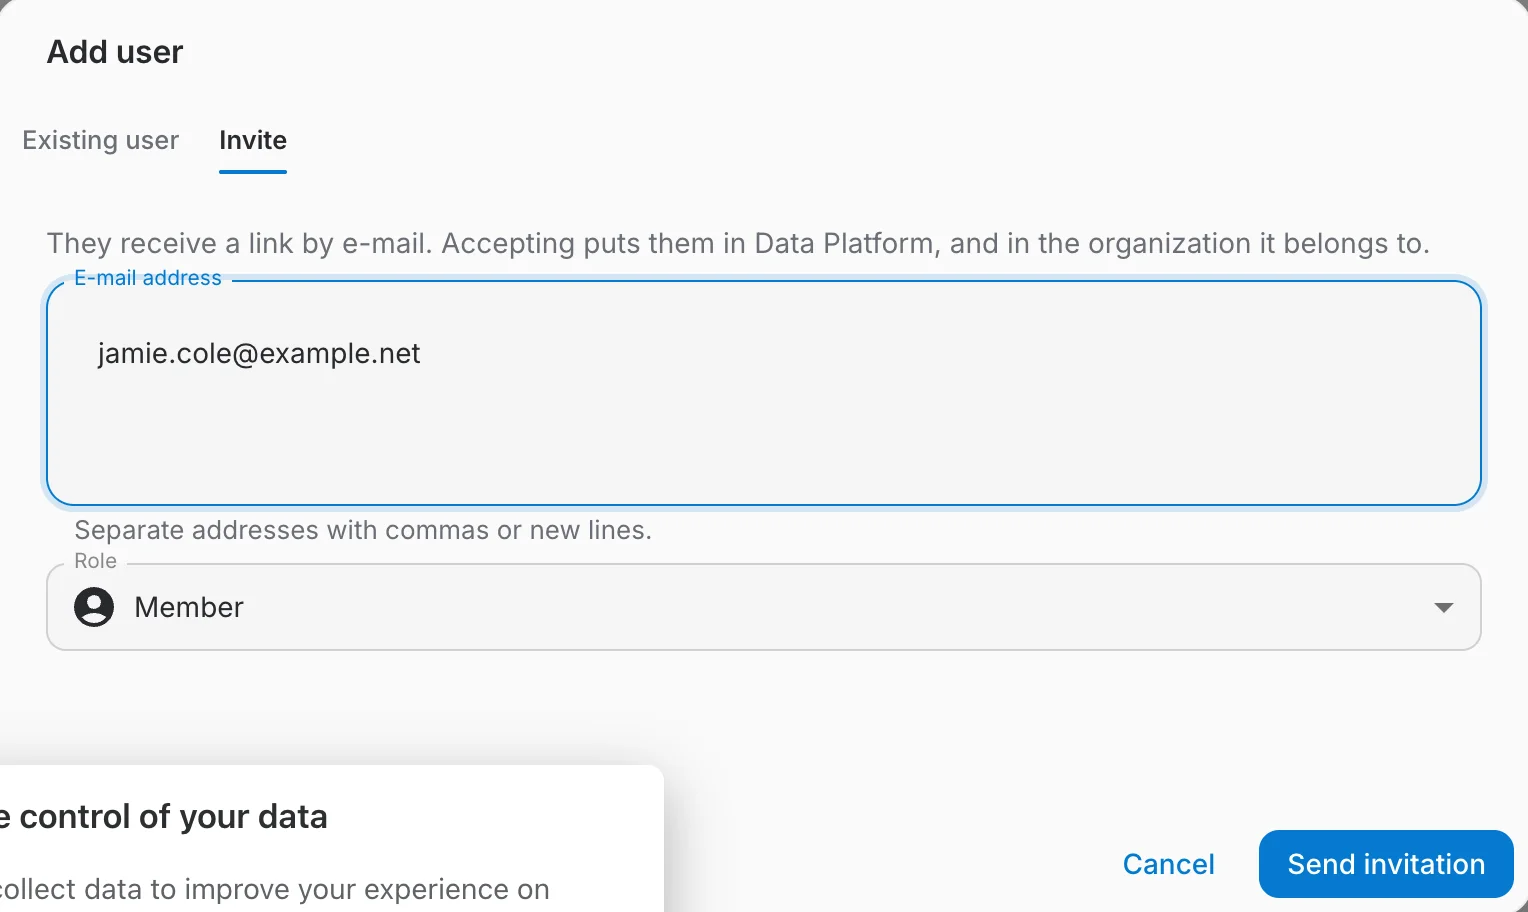
- Accepting puts the person in the team AND in the organization the team belongs to. They do not have to be a member of the organization first.
- The Role dropdown sets what they become when they accept: Member or Team Admin — the team role, not an organization one.
- A team's invitations are its own. They appear on the team's Invited tab, not on the organization's, and a team admin manages them without needing organization rights.
The Invited tab
Outstanding invitations live on their own tab beside Members, with the number still waiting for an answer in the tab label. Accepted invitations leave the list — the person has joined by then, and shows up under Members.
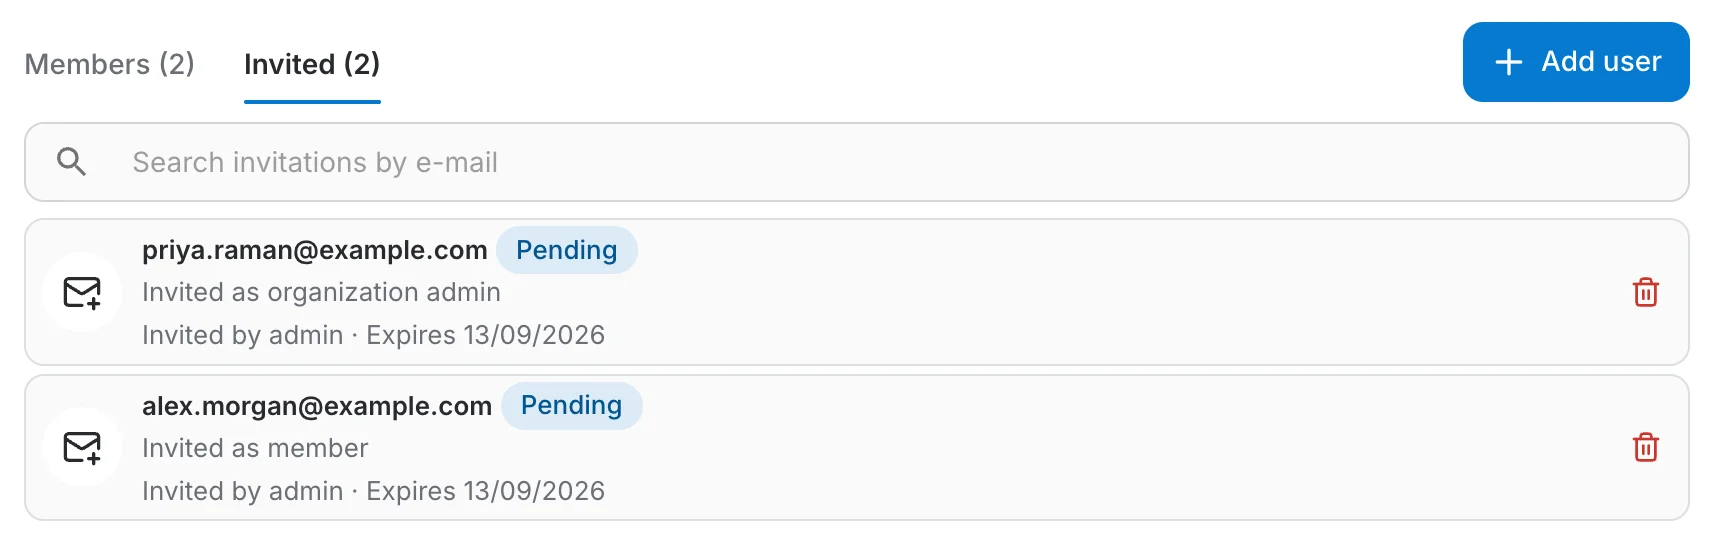
- Pending — sent, not yet answered. The row shows who invited them and when the invitation expires.
- Expired — an invitation lapses after 14 days. Withdraw it and send a new one.
- The bin icon withdraws an invitation. The link stops working immediately, and the address is free to be invited again.
What the invitee sees
The invitation arrives as an e-mail naming who invited them and what they are being invited to, with one button to accept and a quieter link to decline.
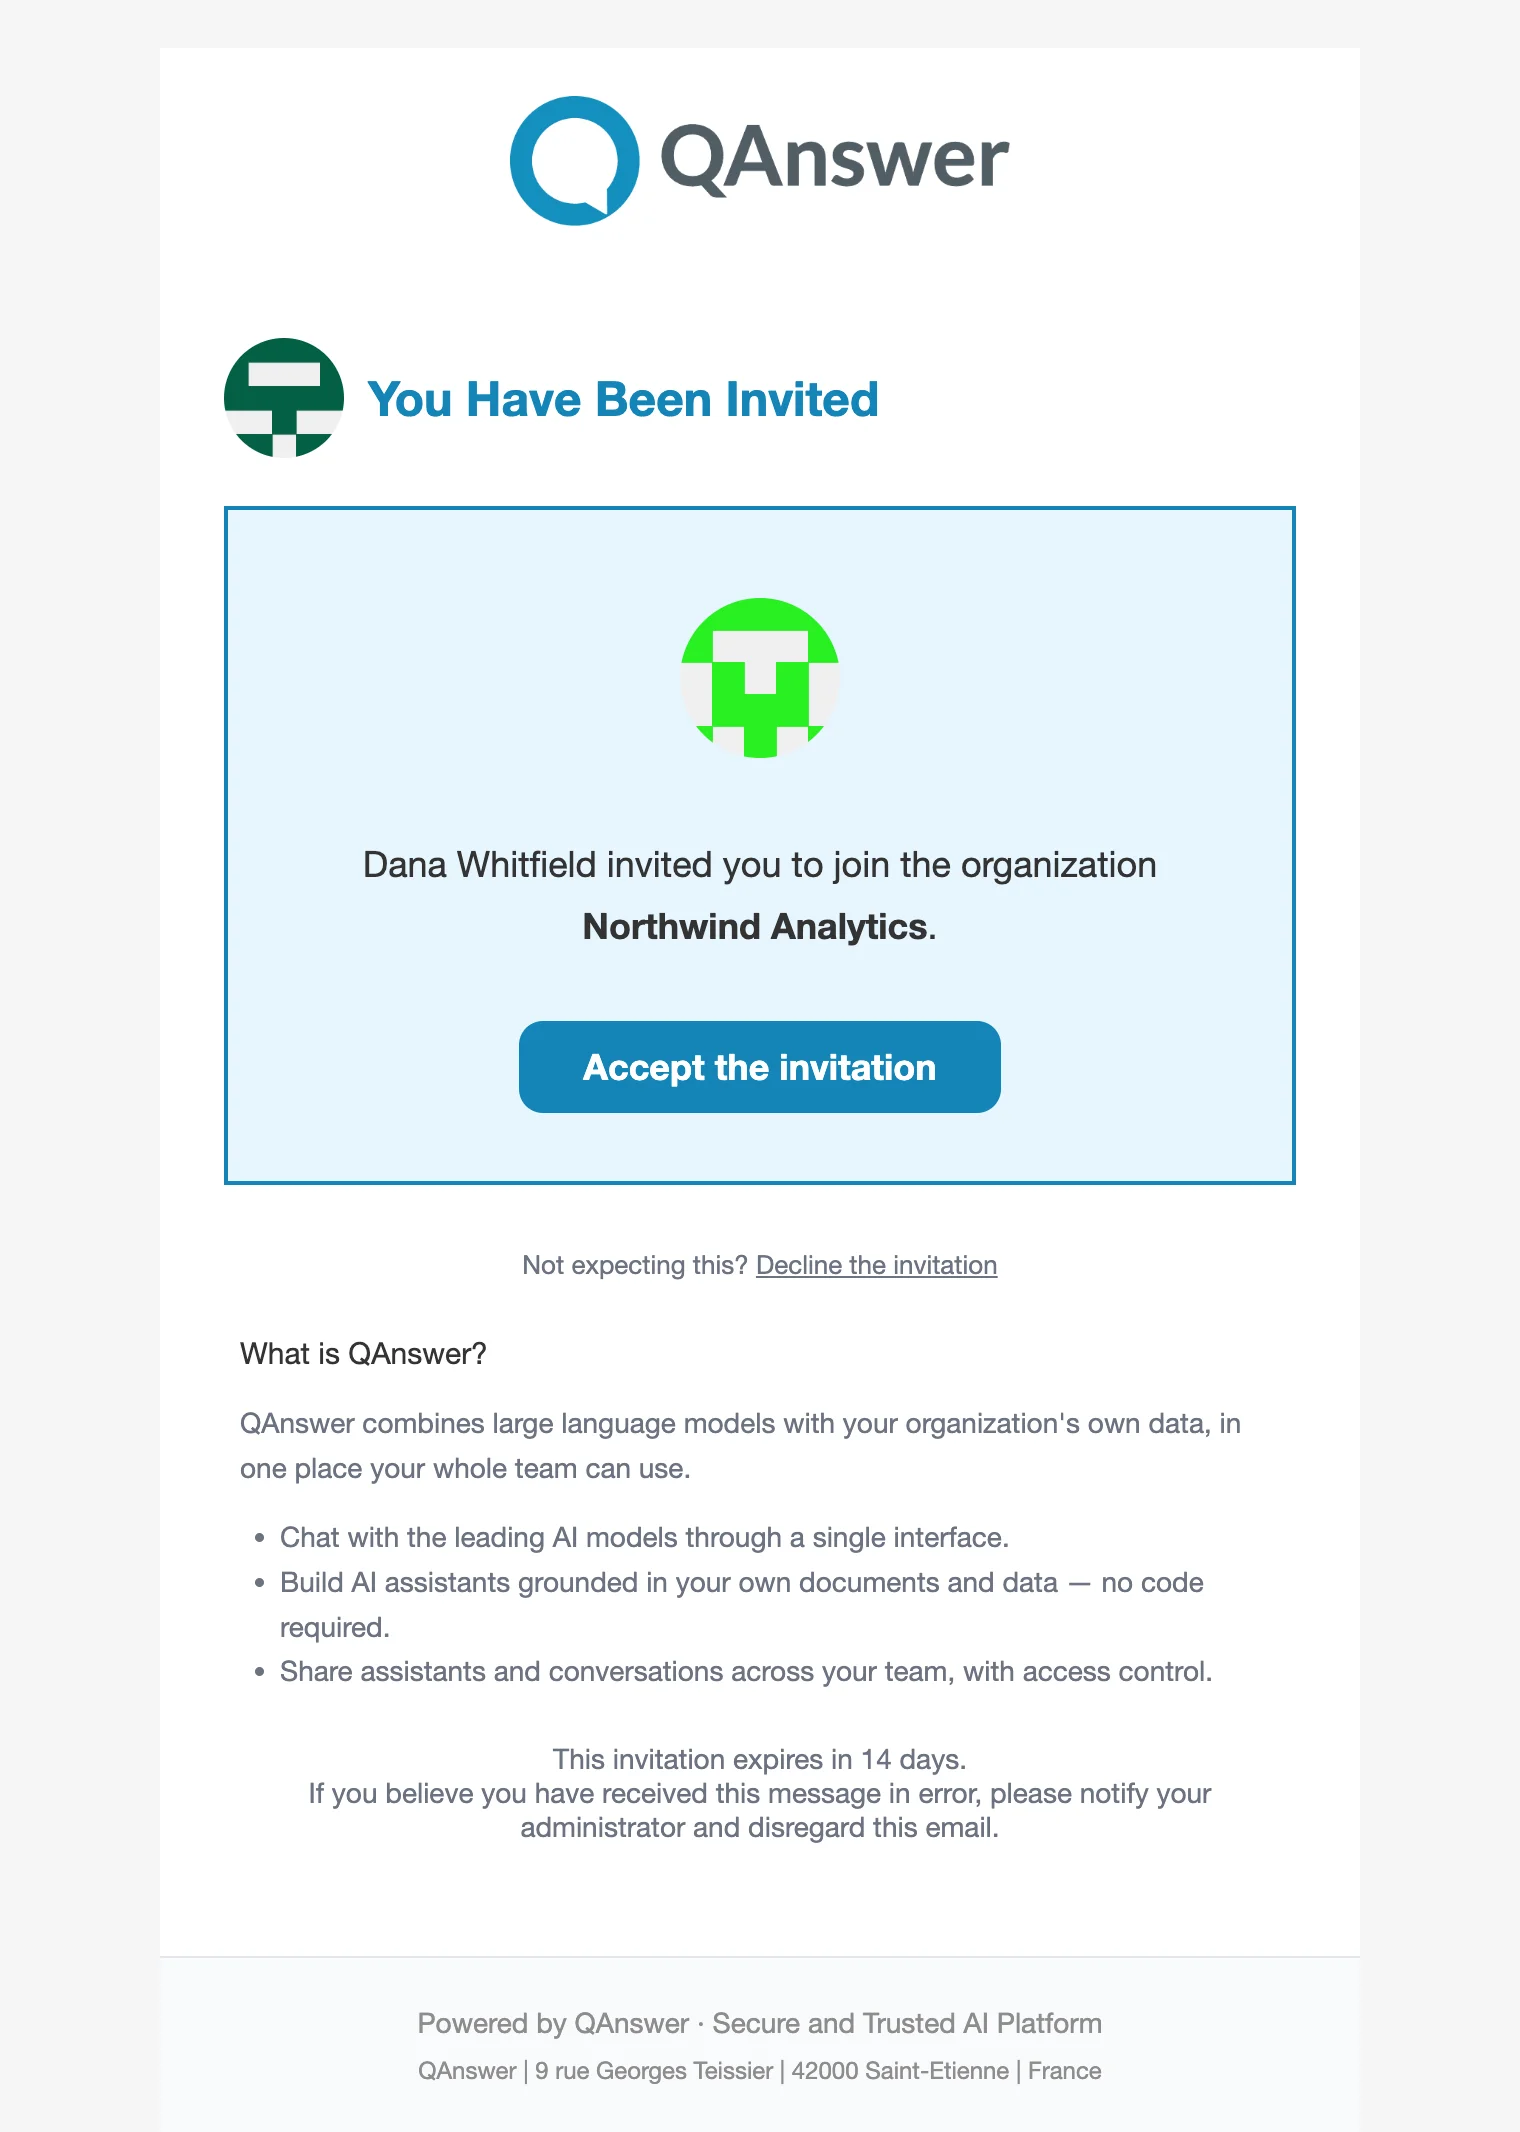
The e-mail carries one link. Following it is itself the act of accepting, so there is no second confirmation step:
- If the address already has an account, they sign in (if they are not already) and join immediately.
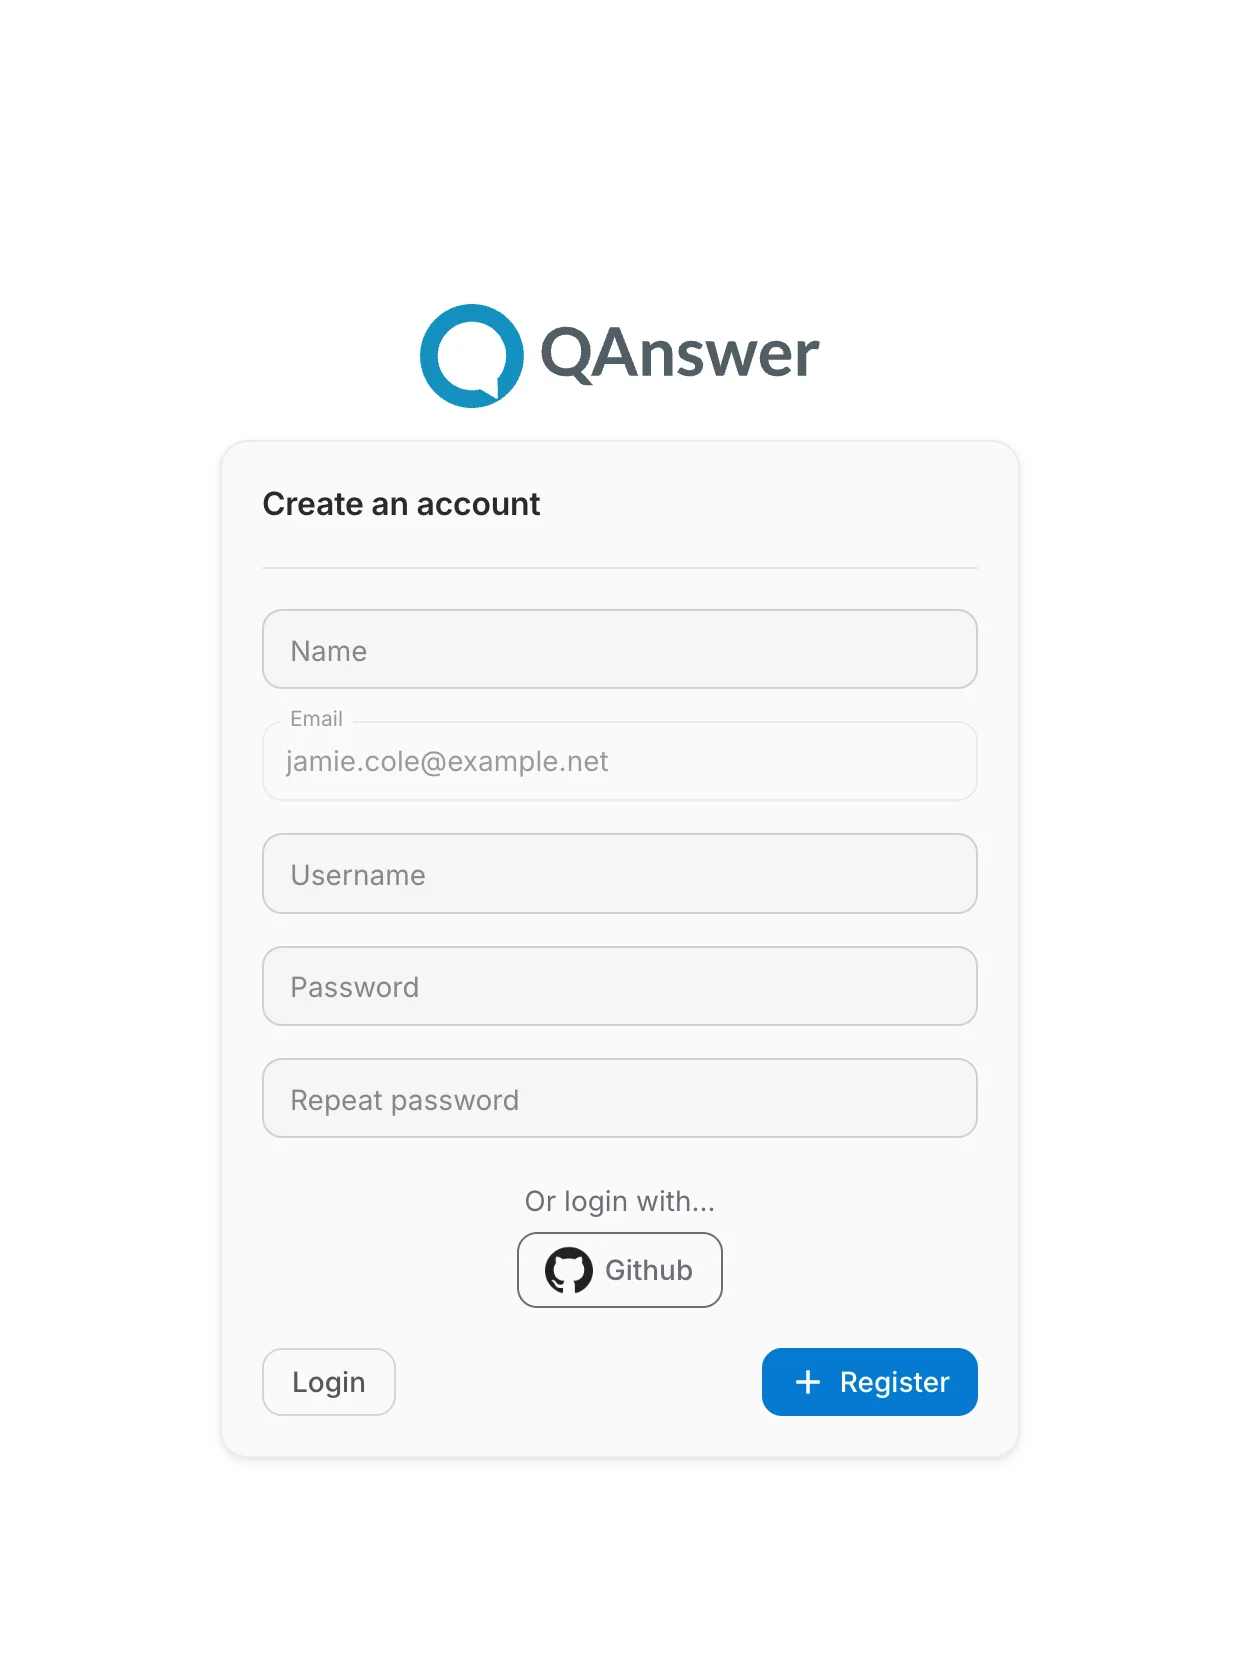
- If it does not, the link opens signup with the address filled in and locked — the invitation is only valid for the address it was sent to. The account is created ready to use, with no separate confirmation e-mail, and joins at once. They can also sign up through an identity provider (Google, GitHub, Microsoft…) and still join.
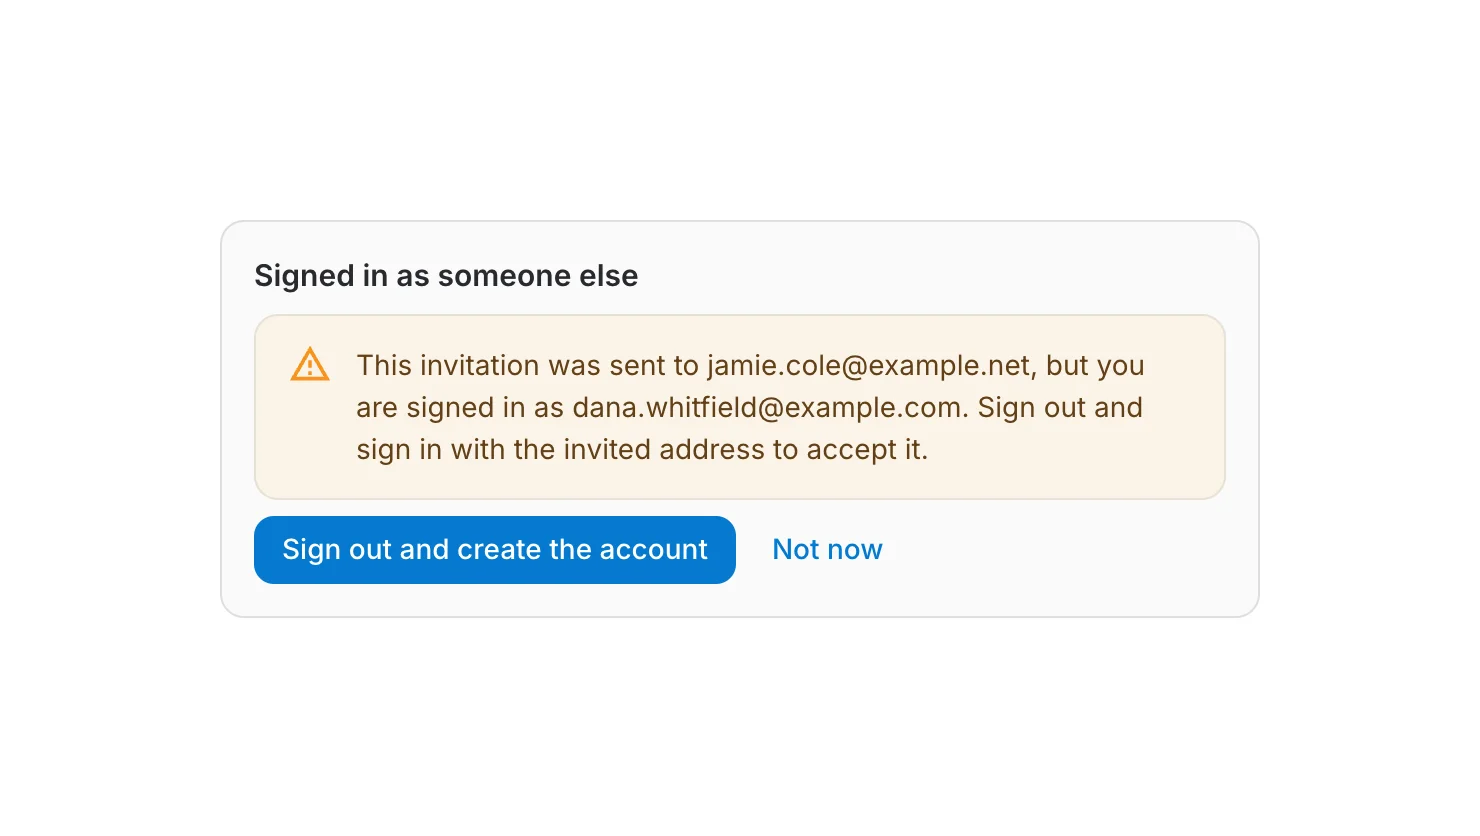
- If they are signed in as a different account, the page says so and offers to switch — holding the link is not enough, the invitation names an address.
The link opens signup with the invited address already filled in. The field cannot be edited: the invitation is only valid for the address it was sent to. Signing up here — with a password or through a provider — creates the account and joins the organization in one step.
Option 2: Adding an existing user
The second option skips the invitation. It is the right one when the person is already in the organization and simply needs to be in this team as well.
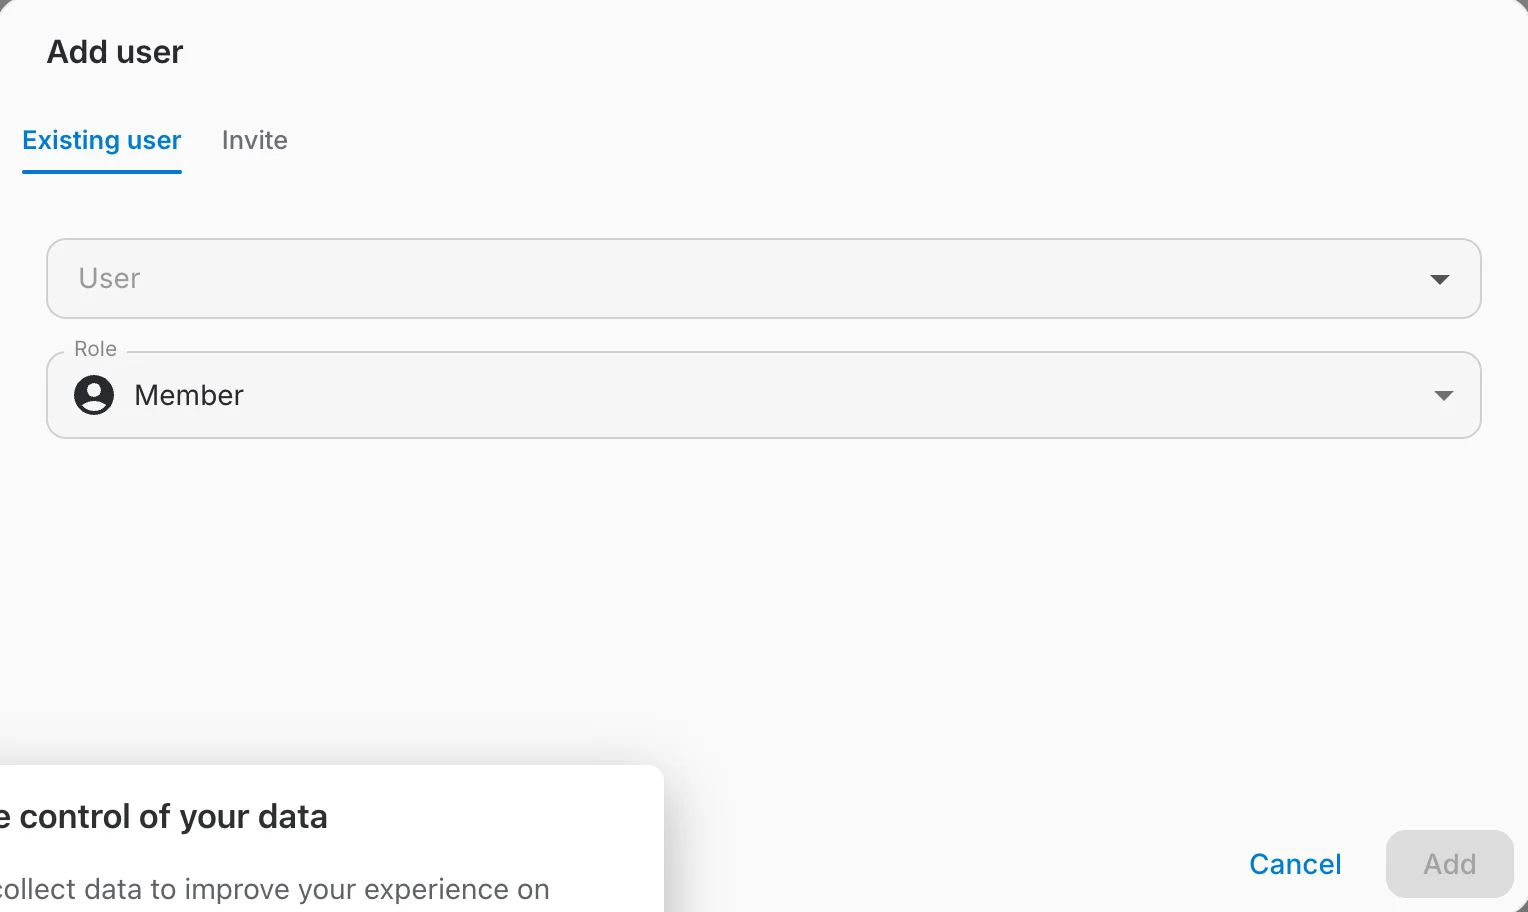
The Role select decides which role the member joins with, Member or Team Admin; it defaults to Member. Add stays disabled until a user is selected.
- The User field searches the team's own organization, so every result is someone who can be put in the team straight away. Team admins may use it — no platform rights are needed.
- Clicking Add puts them in the team immediately; they are notified rather than asked.
The member details card
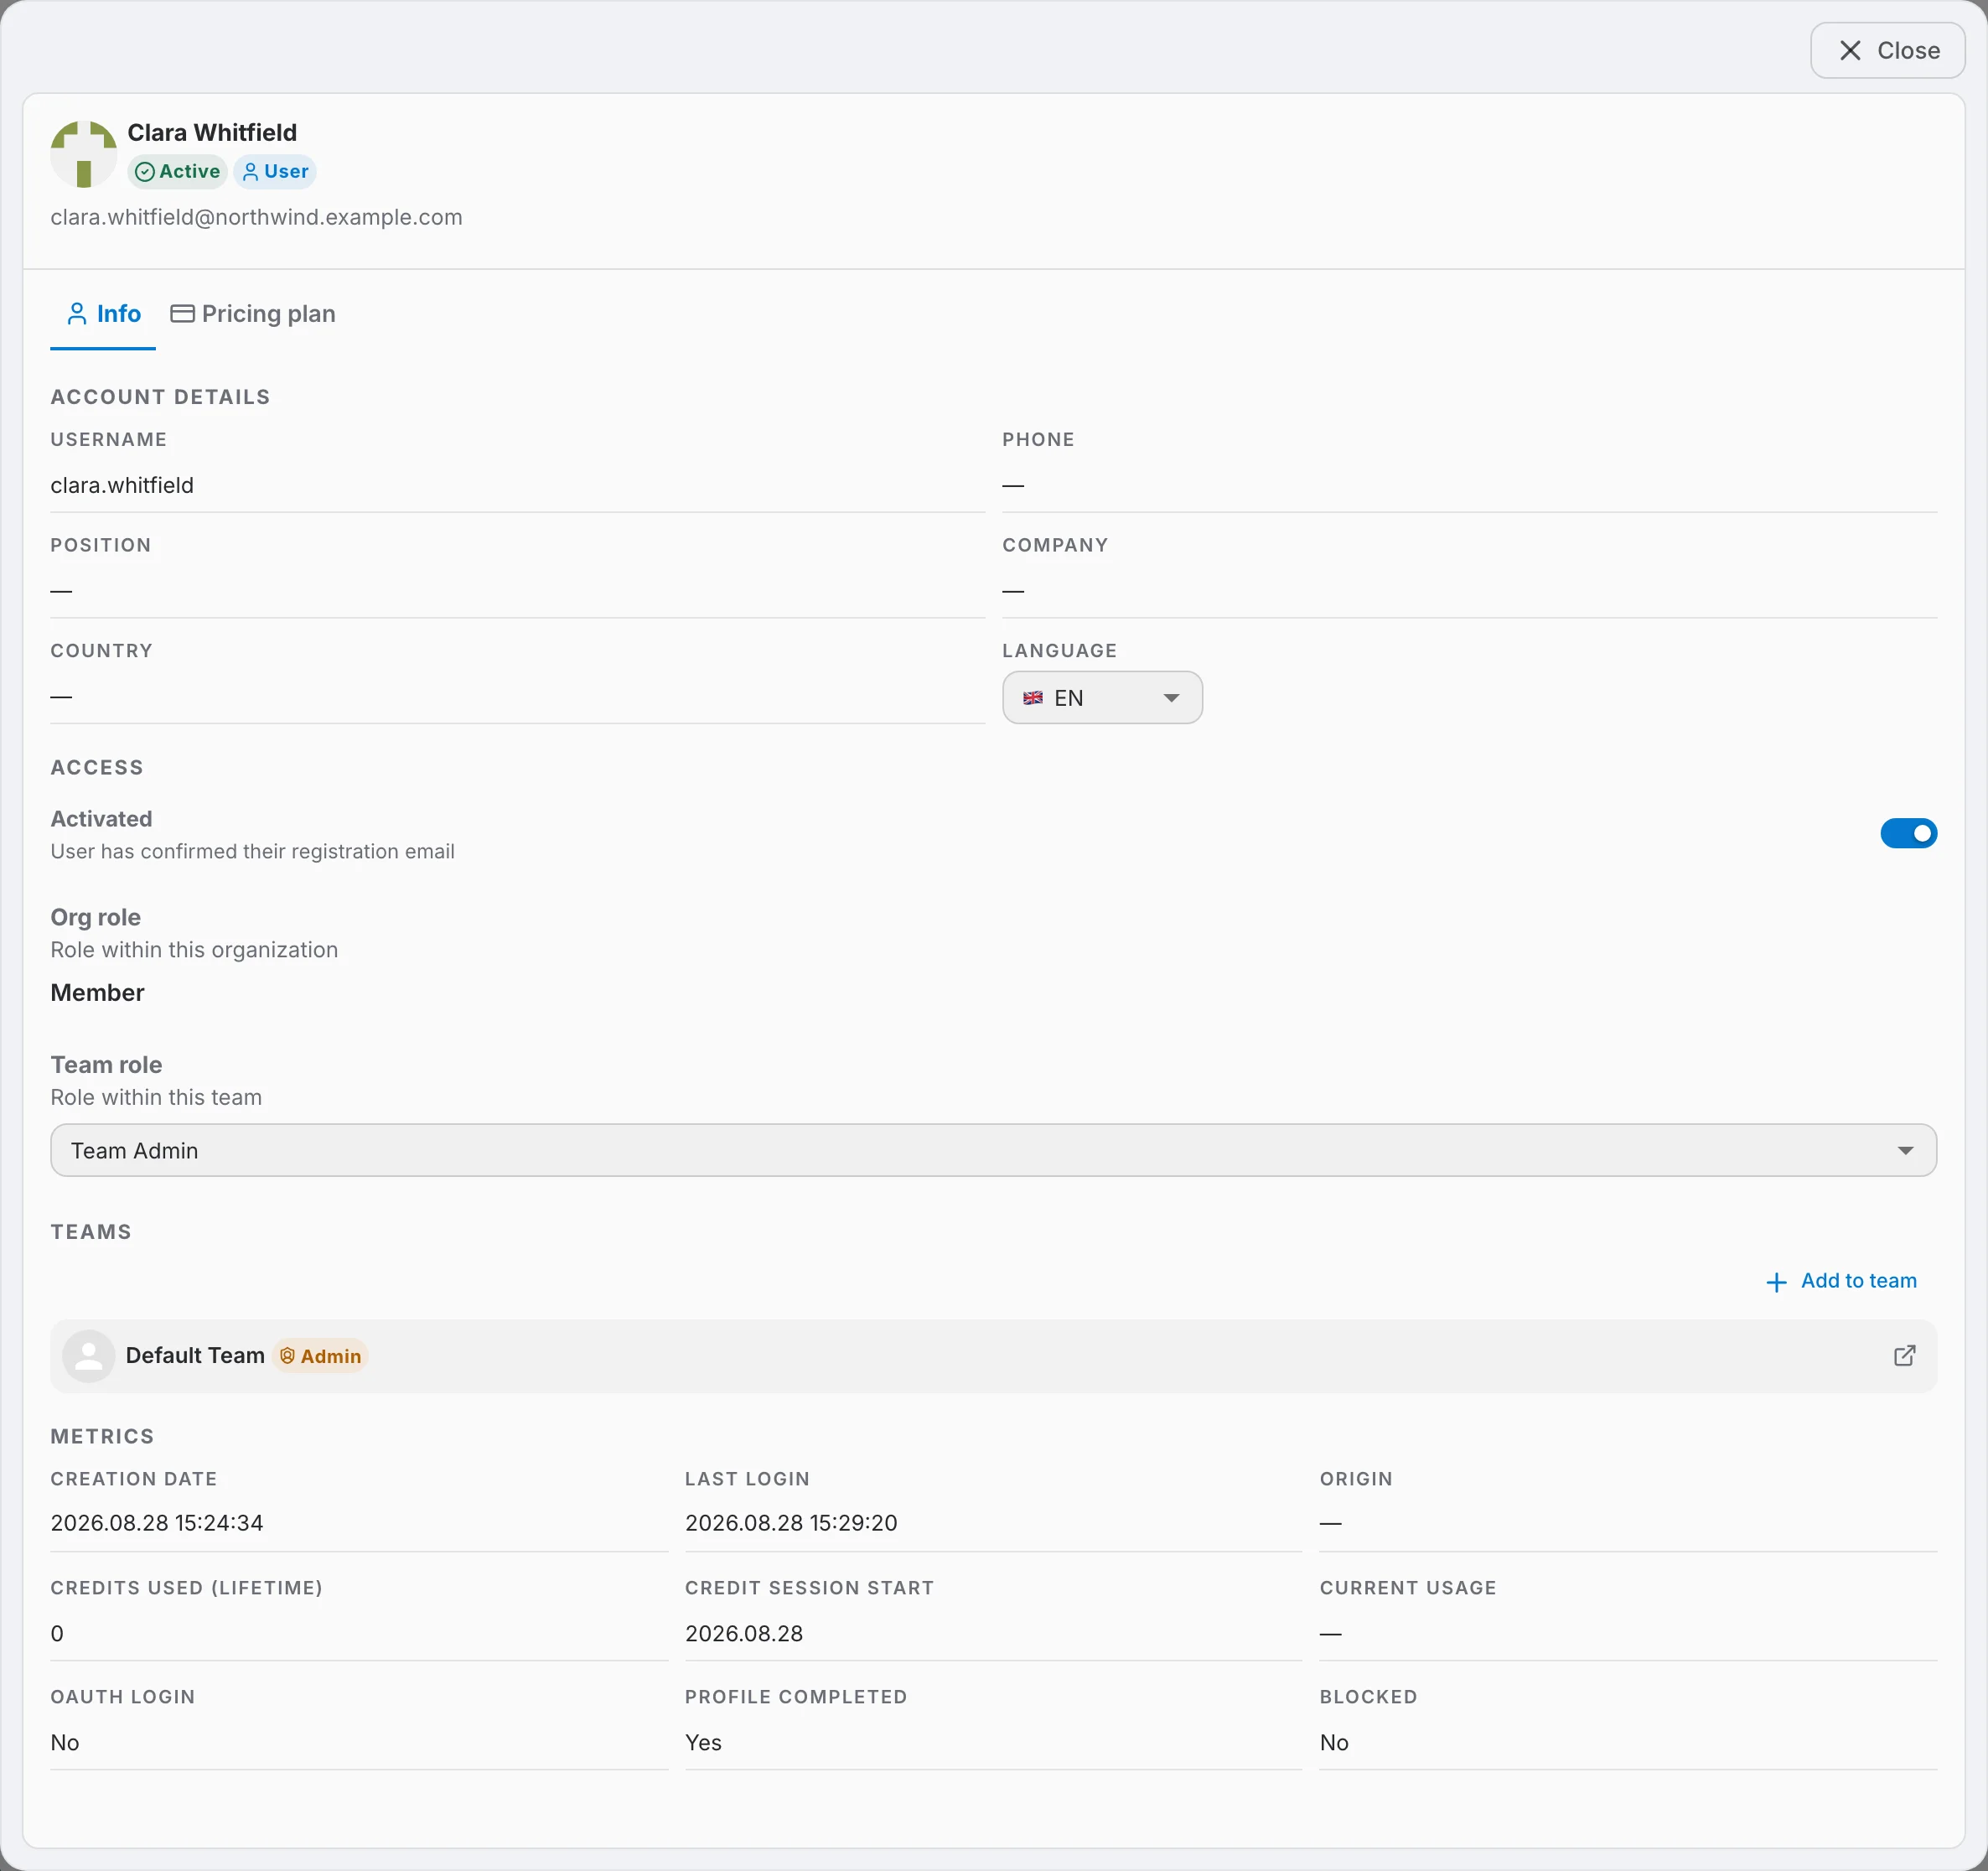
The Details column opens a card over the table. It has two tabs.
Info
Four sections, in this order:
- Account details — username, phone, position, company, country and interface language.
- Access — the Activated toggle, the member's organization role, and the Team role select.
- Teams — the teams the member belongs to in this organization, with an Add to team button.
- Metrics — creation date, last login, credits used, whether the account signs in via OAuth, and whether it is blocked.
Pricing plan
The plan the member's account is on.
Removing a member
The red icon in the Actions column removes the member from the team. They remain a member of the organization and of any other team they belong to, and their account itself is untouched.
Hovering that icon currently shows "Kick from organization", which is wrong inside a team's settings. The confirmation dialog and the action itself only remove the member from the team.